Review of the Old Louisville Ghost Tour as Recommended by The New York Times with Viator | Top Things to Do in Louisville, Kentucky

(By using the affiliate links and/or codes in this blog post, you help support Myles Katherine Photography. I may earn a small commission at no additional cost to you if you make a purchase through these links. Thank you for your support!)

When you’re thinking “vacation”, you’re probably not thinking of Louisville, Kentucky. Well, I’m here to change your mind. I’ve been there twice now and I absolutely love it. I’ve traveled all over the US and Europe, from sipping port wine in the Douro Valley of Portugal to touring the Harry Potter Warner Bros. Studio in London to taking a sightseeing tour in New York City and Louisville is still at the top of my list. Maybe not first place, but there’s definitely more than meets the eye when it comes to Louisville. We had so much fun the first time around that we dragged my family along for our next visit because we knew they’d love it. They didn’t believe us either, but now my family constantly talks about wanting to go back! And if you’re in a historic town like Louisville, you absolutely have to take the Old Louisville Ghost Tour. Louisville was founded in the 1770s so there is definitely a lot of spooky history! We had the best time exploring the neighborhoods, taking photos of the gorgeous mansions, keeping an eye out for ghosts and getting to know some of the other visitors in our tour group.
Obviously, one of the main things to do in Louisville is tour all of the bourbon distilleries. Louisville and the surrounding towns, like Bardstown, are home to the most bourbon distilleries in the world. I highly recommend taking an all day distillery tour and stopping by a handful of them. Buffalo Trace, Jim Beam, Maker’s Mark, Wild Turkey, Old Forester and Evan Williams are all close to Louisville and are incredibly stunning places to visit. I like to call Buffalo Trace a Disneyland for adults. The grounds of these distilleries are immaculate and are beautiful places to sit and drink bourbon, particularly in the fall. The first time I visited Louisville was in July, and I promised myself that if I ever came back, it would be in the fall. There is so much gorgeous farmland around the city, which makes sense because the Kentucky Derby also takes place there. I just knew it would be colorful and stunning in the fall. All that to say, the second time we visited we went in September and it was everything I hoped it would be. There’s something so magical about sipping bourbon in the fall. I promise you, you’ll walk away from Louisville feeling like you’ve uncovered a secret to American history, and that secret is bourbon.

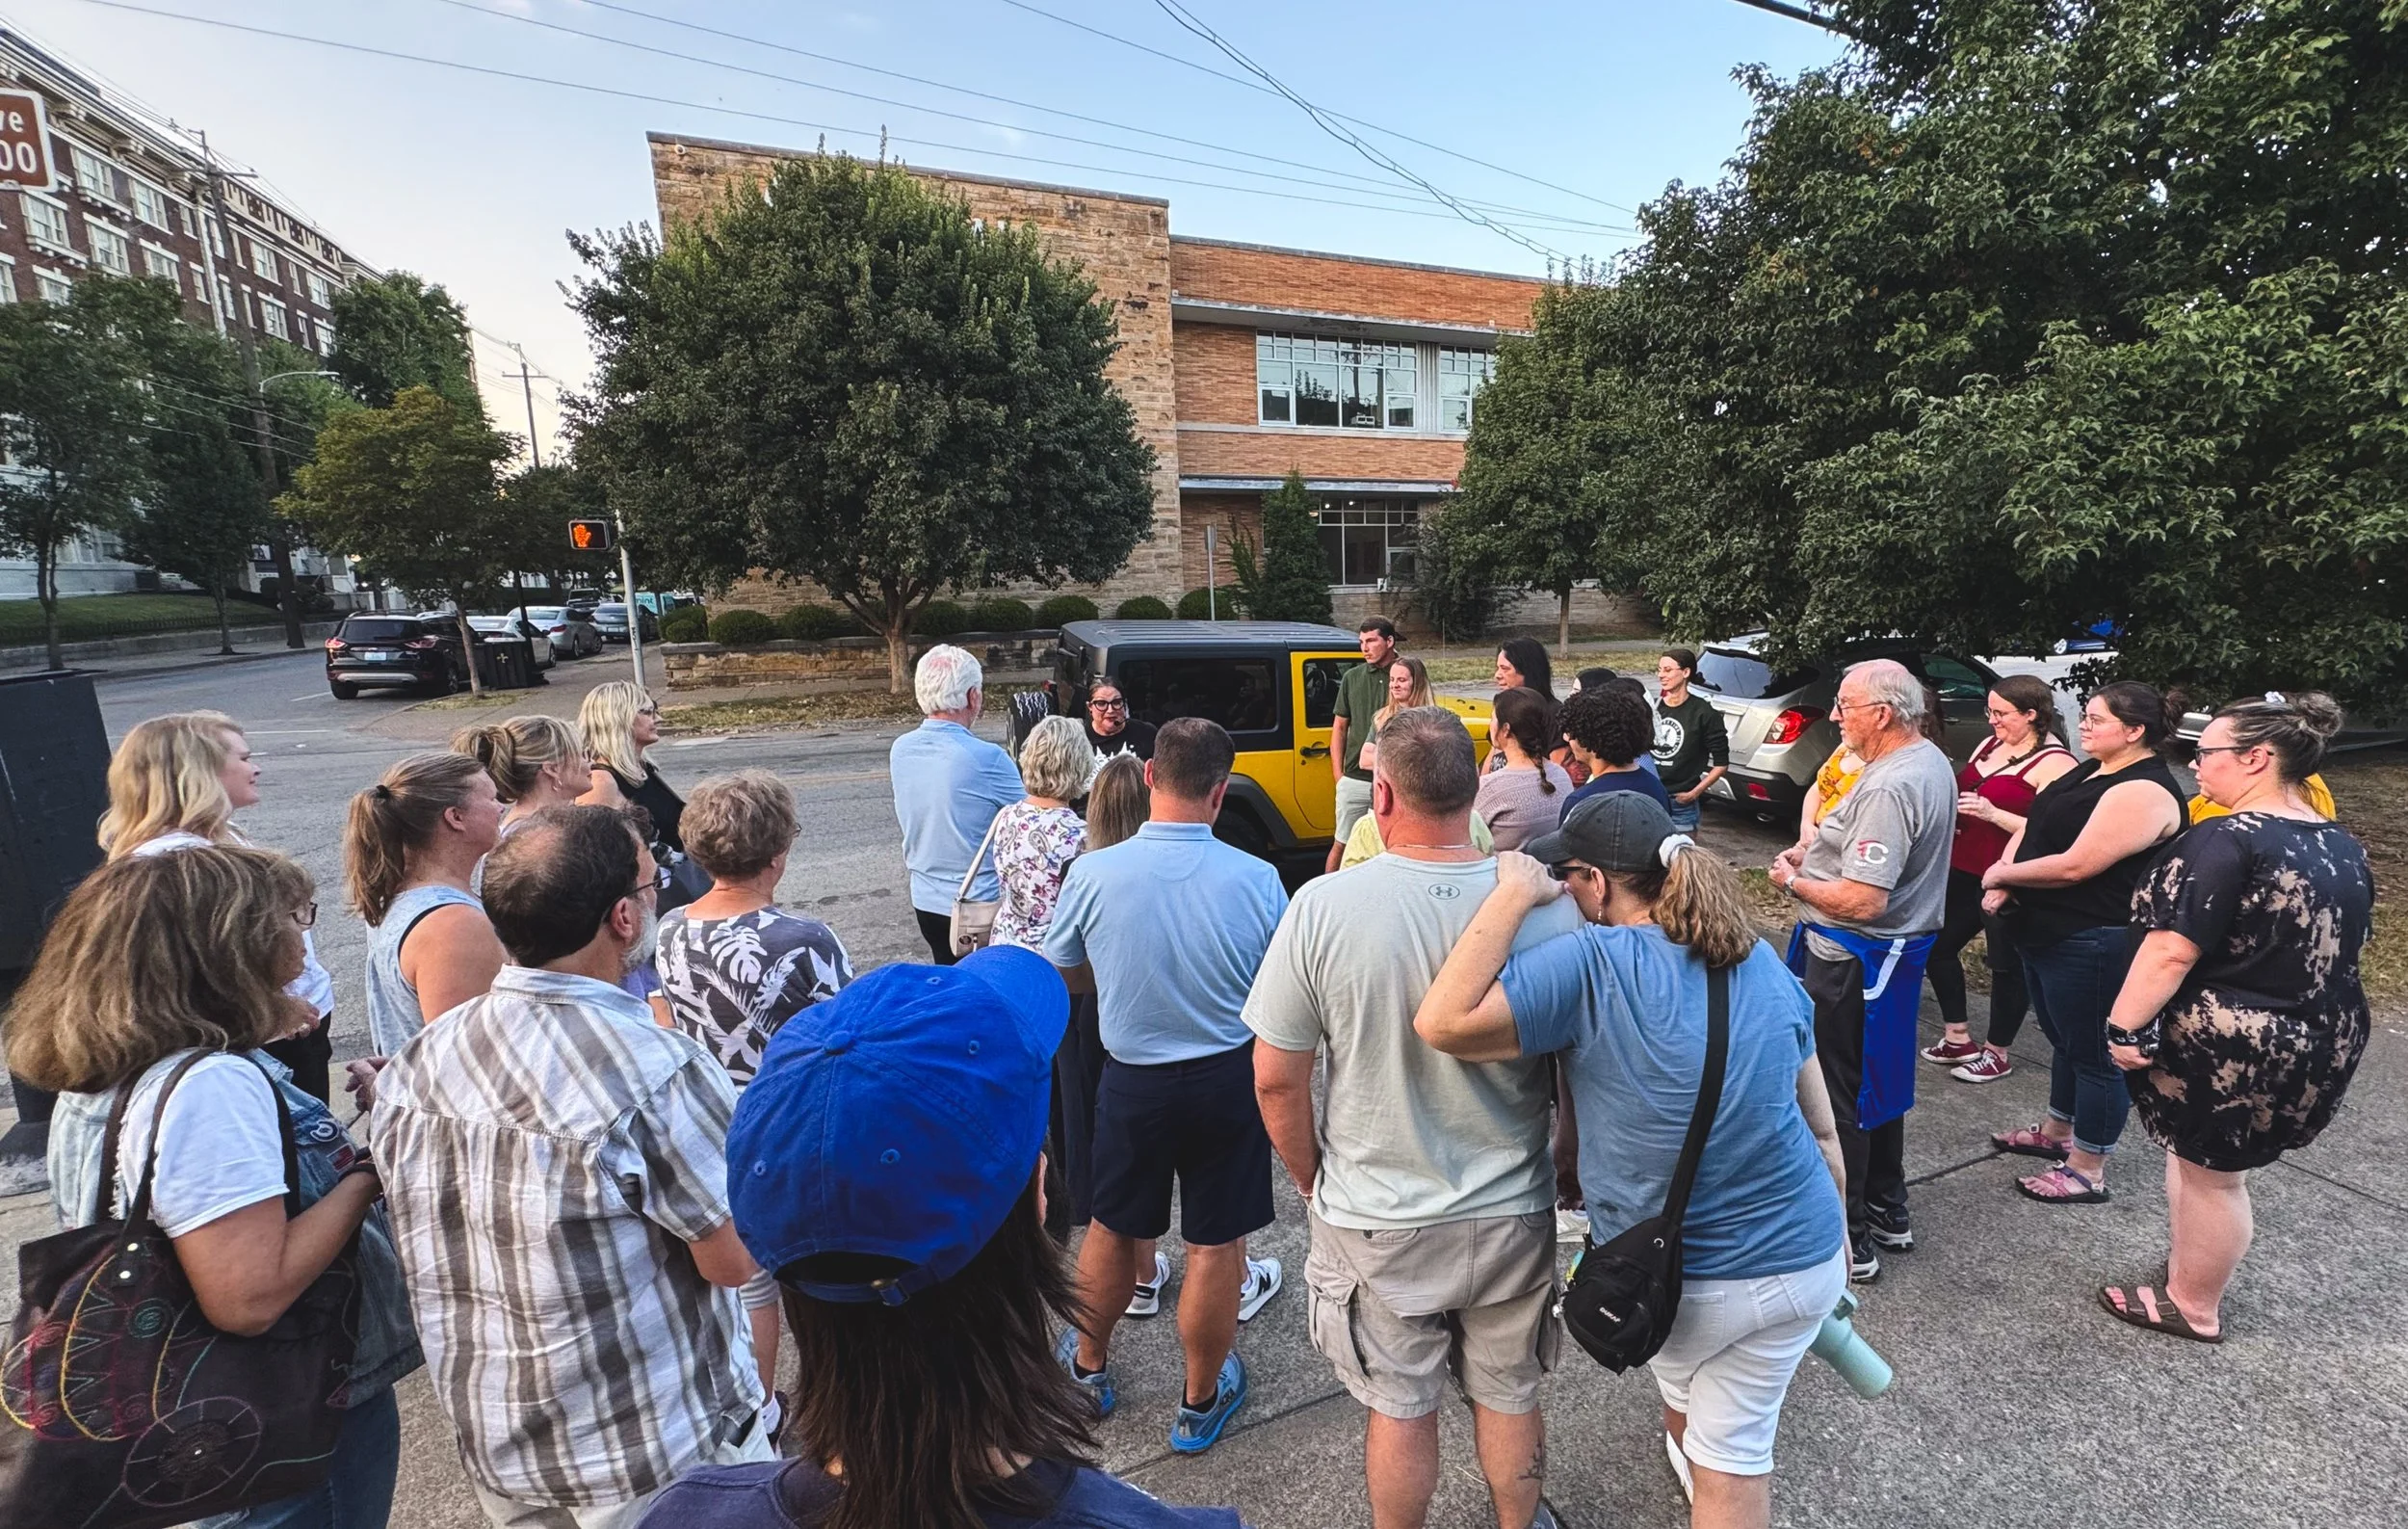
But just because Louisville is known for bourbon doesn’t mean there aren’t a million other things to do there with your family. The Louisville Mega Cavern is a must along with the Louisville Zoo and the Cave Hill cemetery (Muhammad Ali is buried here)! But one of my favorite things we did on our second visit was the Old Louisville Ghost Tour with Viator. I’ve been on so many ghost tours, in London, England, Savannah, GA, Williamsburg, VA and so many more. It’s always such a great way to learn more about a city. Usually the tour takes place in a well-known area so it’s also the perfect way to get your bearings when you first arrive in a new place. The Louisville ghost tour was even better than I thought it would be though. Our tour guide was incredible and the stories were some of the spookiest ones we’ve heard. We walked past some incredibly gorgeous homes and learned so many things about Louisville and the spirits that haunt the city.

I definitely recommend doing a ghost tour towards the beginning of your trip because it provides a foundation of knowledge regarding the city, the buildings and the neighborhoods. Not to mention, the tour guides are locals so they typically provide a ton of recommendations, from restaurants to hotels to bars to events. Make sure to book a tour that is either at sunset or at night to get the full spooky effect. I’ve taken a few daytime ghost tours and it’s just not the same!

Our tour guide had even lived in one of the houses that was mentioned in one of the ghost stories and had seen a ghost herself! She even contributed to one of the books that was written about the ghosts of Louisville. It even inspired me to take a ghost tour in my hometown of Richmond, Virginia. It’s funny how you never really explore your own city sometimes just because you get caught up in the ups and downs of life!

It was just a fun way to spend the evening before heading off to the bourbon bars downtown. You absolutely have to visit Hell or High Water (a speakeasy-style bar) or Neat Bar if you’re interested in bourbon and cocktails. Or you can just meander around Whiskey Row and pop into a few places, though keep in mind that most of the distilleries close around 5 or 6pm.

I highly recommend the Old Louisville Ghost Tour if you’re visiting Louisville. It was just a great way to feel engaged in the city and to fully understand everything that Louisville had to offer. And if you’re visiting in the fall, you absolutely have to take this tour. There’s nothing that screams fall like a ghost tour. It was a flat walk so nothing too treacherous, and even though we covered quite a bit of ground, it was never too much at once. My parents are in their 60s and they were totally fine. You’ll get to see the Witches’ Tree, Conrad’s Castle and stunning mansions throughout the walk. It was worth every penny and I’d even take the same tour again next time I’m in Louisville.

If you’re interested in taking the same tour, you can find it here! And I’ve included a handful of other recommendations for Louisville below. :)

LOUISVILLE RECOMMENDATIONS

Old Louisville Ghost Tour

Whiskey Row Ghost Tour

Kentucky Derby Museum

Cave Hill Cemetery

Bourbon Tour (Buffalo Trace, Woodford, Wild Turkey, etc.)

Full Day Private Bourbon Tour

3 Hour Food and Walking Tour

I hope this helps you with planning your trip to Louisville! You won’t regret it. You should also consider going to Bourbon and Beyond - a 4 day music festival with huge names like Foo Fighters, Dave Matthews Band, Kacey Musgraves and so many others. We went to the festival in 2024 and it was an absolute blast. I’ll never forget it!

Thanks so much for stopping by! Feel free to leave any questions or comments below. Happy travels!

<3 Myles Katherine


RECOMMENDED POSTS

GHOSTS GHOULS AND GALLOWS TOUR IN LONDON REVIEW

AMALFI COAST AND POMPEII TOUR FROM ROME

NEW YORK IN ONE DAY GUIDED SIGHTSEEING TOUR REVIEW

REVIEW OF THE COMPLETE DOURO VALLEY WINE TOUR FROM PORTO, PORTUGAL

THE COTSWOLD WAY IN 10 DAYS HIKING AND HOTEL GUIDE

REVIEW OF THE WILLIAMSBURG HAUNTS BOOS & BOOZE PUB CRAWL

Lomography Berlin Kino 400 35 mm B&W Film Review with Sample Photos!

(By using the affiliate links and/or codes in this blog post, you help support Myles Katherine Photography. I may earn a small commission at no additional cost to you if you make a purchase through these links. Thank you for your support!)

I always love trying out Lomography’s film stocks. There aren’t many companies out there that produce film, let alone experiment with color, grain and contrast. Lomography has created some of my favorite film over the years, like Lomochrome purple, Lomochrome turquoise and Color Negative 100 and 400. I use the Color Negative 400 all the time. It’s pretty much my go-to film stock because it’s affordable, consistent and perfectly saturated. I have a full blog post about it here if you want to see some sample photos!

These days I stick with color film for the most part, but every once in a while I’ll throw a roll of black and white film in my camera bag and see how it goes. There is truly something special about black and white film. I swear my brain captures images differently when I know that my camera is loaded with it. I see the world in shapes and light, rather than being distracted by color. I always think that I’m going to regret shooting in black and white because it’s not capturing exactly what I see in front of me, but that’s never the case. Oftentimes, my black and white photos are my favorite photos from my travels! I think it’s because black and white film is automatically nostalgic. Maybe it tricks your brain into believing that each photo is special and memorable? It’s more simple than color film, and you really see the moment for what it is. Nothing flashy or over the top. Just a moment in time that might have slipped by if you hadn’t frozen it on film.


THOUGHTS ON BERLIN KINO 400 FILM

Berlin Kino 400 is an interesting black and white film, in my opinion. It’s definitely super grainy for a 400 film, so it comes across more like an 800 ISO film. I typically don’t like too much grain in my photos, but in this case, it didn’t bother me so much. It’s not an incredibly contrasty film either. It has a fairly minimal tonal range, but still captures a lot of detail in your subjects. It’s not as dynamic as a film like Neopan Across 100 for example (one of my favorite black and white films - check out my blog post about it here!) and it’s not as classic-looking as Ilford HP 5 Plus 400 or Kodak Tri-X 400. By that I mean, the blacks and whites aren’t as intense or prominent. The tones blend together in a soft, natural way that is incredibly moody and gentle. It was a perfect film for capturing my sister’s new baby and the beautiful, quiet waves on the Oregon coast. It definitely makes the images feel a lot more aged than they are, almost as if you are using an expired film roll. It can be a bit difficult to get your hands on this film, but I usually have decent luck finding it for a good price on eBay.

I used the Nikon FE2 for all of the photos in this post. It’s one of my favorite 35 mm film cameras (read more about it here!) and I think it was a perfect match for this film. I wouldn’t use a super cheap film camera with Berlin 400 because you really need a sharp, nice lens to override the grain. The Nikon FE2 is similar to a Canon AE-1 or Pentax K1000, so any of those cameras would be great to use as well if you’re shooting 35 mm. I also shot a roll of Berlin 400 with my Contax 645 which is a super fancy medium format 120 film camera, and I really loved the way those turned out. 120 film is physically larger than 35 mm so it captures more detail and the grain isn’t quite as noticeable. I will say I prefer the way those images turned out than the 35 mm.


WOULD I BUY IT AGAIN?


This is a hard one. While I enjoyed shooting with this film, I’m not sure it is 100% my vibe. Overall, I prefer film that is a bit cleaner with less grain, but I do like the overall mood and nostalgia of the film. It does capture a surprising amount of detail for how minimal the contrast is. I would probably prefer Lomography Earl Grey 100 because it has a bit more intensity, or even Lady Grey 400 which falls more in the middle. Berlin Kino 400 does remind me of Potsdam Kino 100 but with a little more grain, which makes sense because it does come from Lomography’s Kino black and white film family. If you’d like just a little less grain and smoother overall quality, I’d try the Potsdam 100 out. With an ISO 100 film though, I’d recommend shooting outdoors in bright sunlight for best results.

I definitely don’t regret shooting with it, as I do find the photos to be beautiful in a vintage, black and white tv kind of way. I think it would be a really cool roll to make a short film out of using a video camera like the Lomography LomoKino. I’ve actually had one of these cameras for a few years now but haven’t even opened it! It’s on my list to review soon though!

Overall, I recommend giving this film a try at the very least and seeing what you think! You can’t go wrong with any of Lomography’s film stocks. It’s always worth it to experiment and push yourself a little creatively. That’s why I like trying out different film stocks. I get bored shooting with the same old films time and time again. :)

If you’re looking for more black and white 35 mm film recommendations check out my blog post, The 5 Best and Most Affordable Black and White Film Stocks. If you’re looking for 35 mm camera recommendations, make sure to read my post The Top 10 Best 35 mm Film Cameras for Beginners.

WHERE TO BUY BERLIN KINO 400 FILM

35 MM

B&H Photo

Shop on eBay


120 FILM

Shop on eBay

Amazon


WHERE TO BUY POTSDAM KINO 100 FILM

35 MM

B&H Photo

eBay


120 FILM

B&H Photo

eBay


If you found this post helpful in any way, I’d love it if you considered signing up for my Patreon! For as little as $1 a month, you’ll get early access to all of my YouTube videos, plus tons of photos that I don’t post anywhere else. Depending on which tier you choose, you could also receive seasonal prints and/or discounts! I always use all of the proceeds towards cameras, film & processing.

If you have any questions, I’m always happy to help! You can contact me here, or leave a comment below! Thanks so much for stopping by! You can also check out my B&H Photo storefront & Amazon Storefront for more camera/film recommendations. :) Have a magical day!

<3 Myles Katherine

RELATED POSTS

Genaray GXS-200BI 230W Bi-Color Monolight and Angler Beauty Dish Review | The Perfect Continuous Lighting for In-Studio Photography & Videography

(By using the affiliate links and/or codes in this blog post it supports Myles Katherine Photography. We may get a small kick back by you doing so.)

Lately I’ve been trying to find ways to make my studio lighting set-up easier and more natural-looking. Over the last decade I’ve been using strobe lights, and I love them for dramatic, intense lighting for fashion or for product photography. But sometimes, especially for portraits, I’m looking for something more natural and diffused. My husband and I have been in the process of building a photography studio over the last few years (yes… it’s taken us FOREVER to finish), and it’s finally starting to come together. Overall, I prefer to shoot outdoors but that’s not always an option depending on weather or your client’s expectations. I’ve also been filming a lot of YouTube videos for my channel, Cameras & Cats, so I’ve been on the hunt for the perfect studio lighting. I knew that I wanted something continuous with lots of gorgeous diffusion, but there are a LOT of options out there and I wasn’t quite sure where to start. To be completely honest, I find studio lighting to be intimidating and I’m just not the most technical person. I like to keep my photo shoots simple without too much set-up. As I got deeper into my research, the Genaray GXS-200BI 230W Bi-Color Monolight started to make more and more sense for me. It was super important to be to have full control over the color temperature and maybe even some fun effects I could use for photo shoots or video shoots. I also just wanted a single light that was incredibly bright, so that if I had to travel it wouldn’t be a hassle to drag around with me. The Genaray Monolight has 2700 to 6500K Bi-Color Control and an output of 47,701 lux. It’s definitely much brighter than I anticipated and I’m even able to get away with it being the only light in the room when I’m doing video shoots. I actually used it as the sole light in this YouTube video if you want to get an idea of how bright it is. Because I have glasses I put the light off to the side a little bit to avoid too much reflection, but I’d probably recommend moving it more towards the center if you can to help fill in both sides of your subject. Overall though, it’s pretty amazing! I have a new video coming out soon too that I filmed in our main studio which has white walls. I’ll be sure to share that video so you can see how the light functions in that scenario as well!


For diffusion, I decided to go with the 33” Angler Quick-Open Folding Beauty Dish which comes with attachable diffusers. This is necessary if you really want soft lighting without harsh shadows. I’m surprised by how large the light is with this beauty dish, so you do need quite a bit of space if you want to be able to move it around your subject. The Angler beauty dish actually has an inner and outer diffusion option so you get ultimate diffusion. Also, the fact that it’s 33” means it really helps to create natural, full coverage of your subject. I was a bit nervous about how complicated it was going to be to set up the monolight and beauty dish but it really couldn’t be easier! You literally just plug the light into the wall and then flip the on switch on the back. There’s an LED screen on the back of the monolight that tells you the color temperature and you can adjust by just turning the knob on the back. It’s truly SO simple. And the beauty dish just snaps right into place! It’s a dream to use. It’s also incredibly easy to tear down and transport so it’s perfect for on-location photo/video shoots.

The Genaray Monolight is also a great choice for video because it’s flicker-free and has an ultra-quiet motor so that it’s not picked up in microphones. In a lot of ways, I feel like this light was made exactly for me! I used to consider myself to be 100% photographer but lately my job has become more of a blend of photo & video, so this light really does cover all of my bases. My goal is always for my set-up to be simple. I don’t feel like you need a lot of gear to create amazing photos and video, and this light is definitely a testament to that. If you have a large studio and have multiple people to cover, you could get two or three of these for ultra-bright, but still natural-looking lighting. I’m typically only working with one subject at a time, so one light is enough in my situation. I truly think I found exactly the perfect light for me and my style of creating photos and video. It also has bluetooth connectivity so you can utilize all of those fun effects like disco, candle, fireworks, storm, and a bunch more. I haven’t tried them out yet but I plan to do a full youtube video sharing more about this light so make sure to check back if you want to find out more!

Overall, I couldn’t be happier with this lighting set-up. It’s exactly what I was looking for, and I hope this saved you the overwhelming research of trying to sort through the sea of lighting out there. If you want a super simple studio set-up that’s great for flicker-free video, natural-looking portraits and product photography, this is the perfect option. For me, when I’m doing fashion shoots, I prefer lighting that’s more intense and dramatic so in those scenarios, I would still use my stobe lights. However, if you’re looking for soft, even fashion lighting or beauty/makeup lighting, the Generay Bi-Monolight and Angler Beauty Dish may be a better option. You could definitely film some beautiful makeup tutorials or product reviews with this set-up. It really all depends on your style and needs in the studio. I hope this post helped you in your search for the perfect studio lighting!

I always recommend B&H Photo for photography/video gear purchases because they have super competitive pricing, crazy fast shipping and excellent customer services and return policies. I’ve included the links below in case you’re interested!

WHERE TO BUY THE GENARAY GXS-200BI 230W BI-COLOR MONOLIGHT

B&H Photo

WHERE TO BUY THE 33” ANGLER QUICK-OPEN FOLDING BEAUTY DISH FOR BOWENS

B&H Photo

#affiliate

If you found this post helpful in any way, I’d love it if you considered signing up for my Patreon! For as little as $1 a month, you’ll get early access to all of my YouTube videos, plus tons of photos that I don’t post anywhere else. Depending on which tier you choose, you could also receive seasonal prints and/or discounts! I always use all of the proceeds towards cameras, film & processing.

If you have any questions, I’m always happy to help! You can contact me here, or leave a comment below! Thanks so much for stopping by! You can also check out my B&H Photo storefront & Amazon Storefront for more camera/film recommendations. :) Have a magical day!

<3 Myles Katherine