Kodak GC/UltraMax 400 Color Negative Film Review with Sample Photos in Japan with a Nikon FE2 35 mm Film Camera

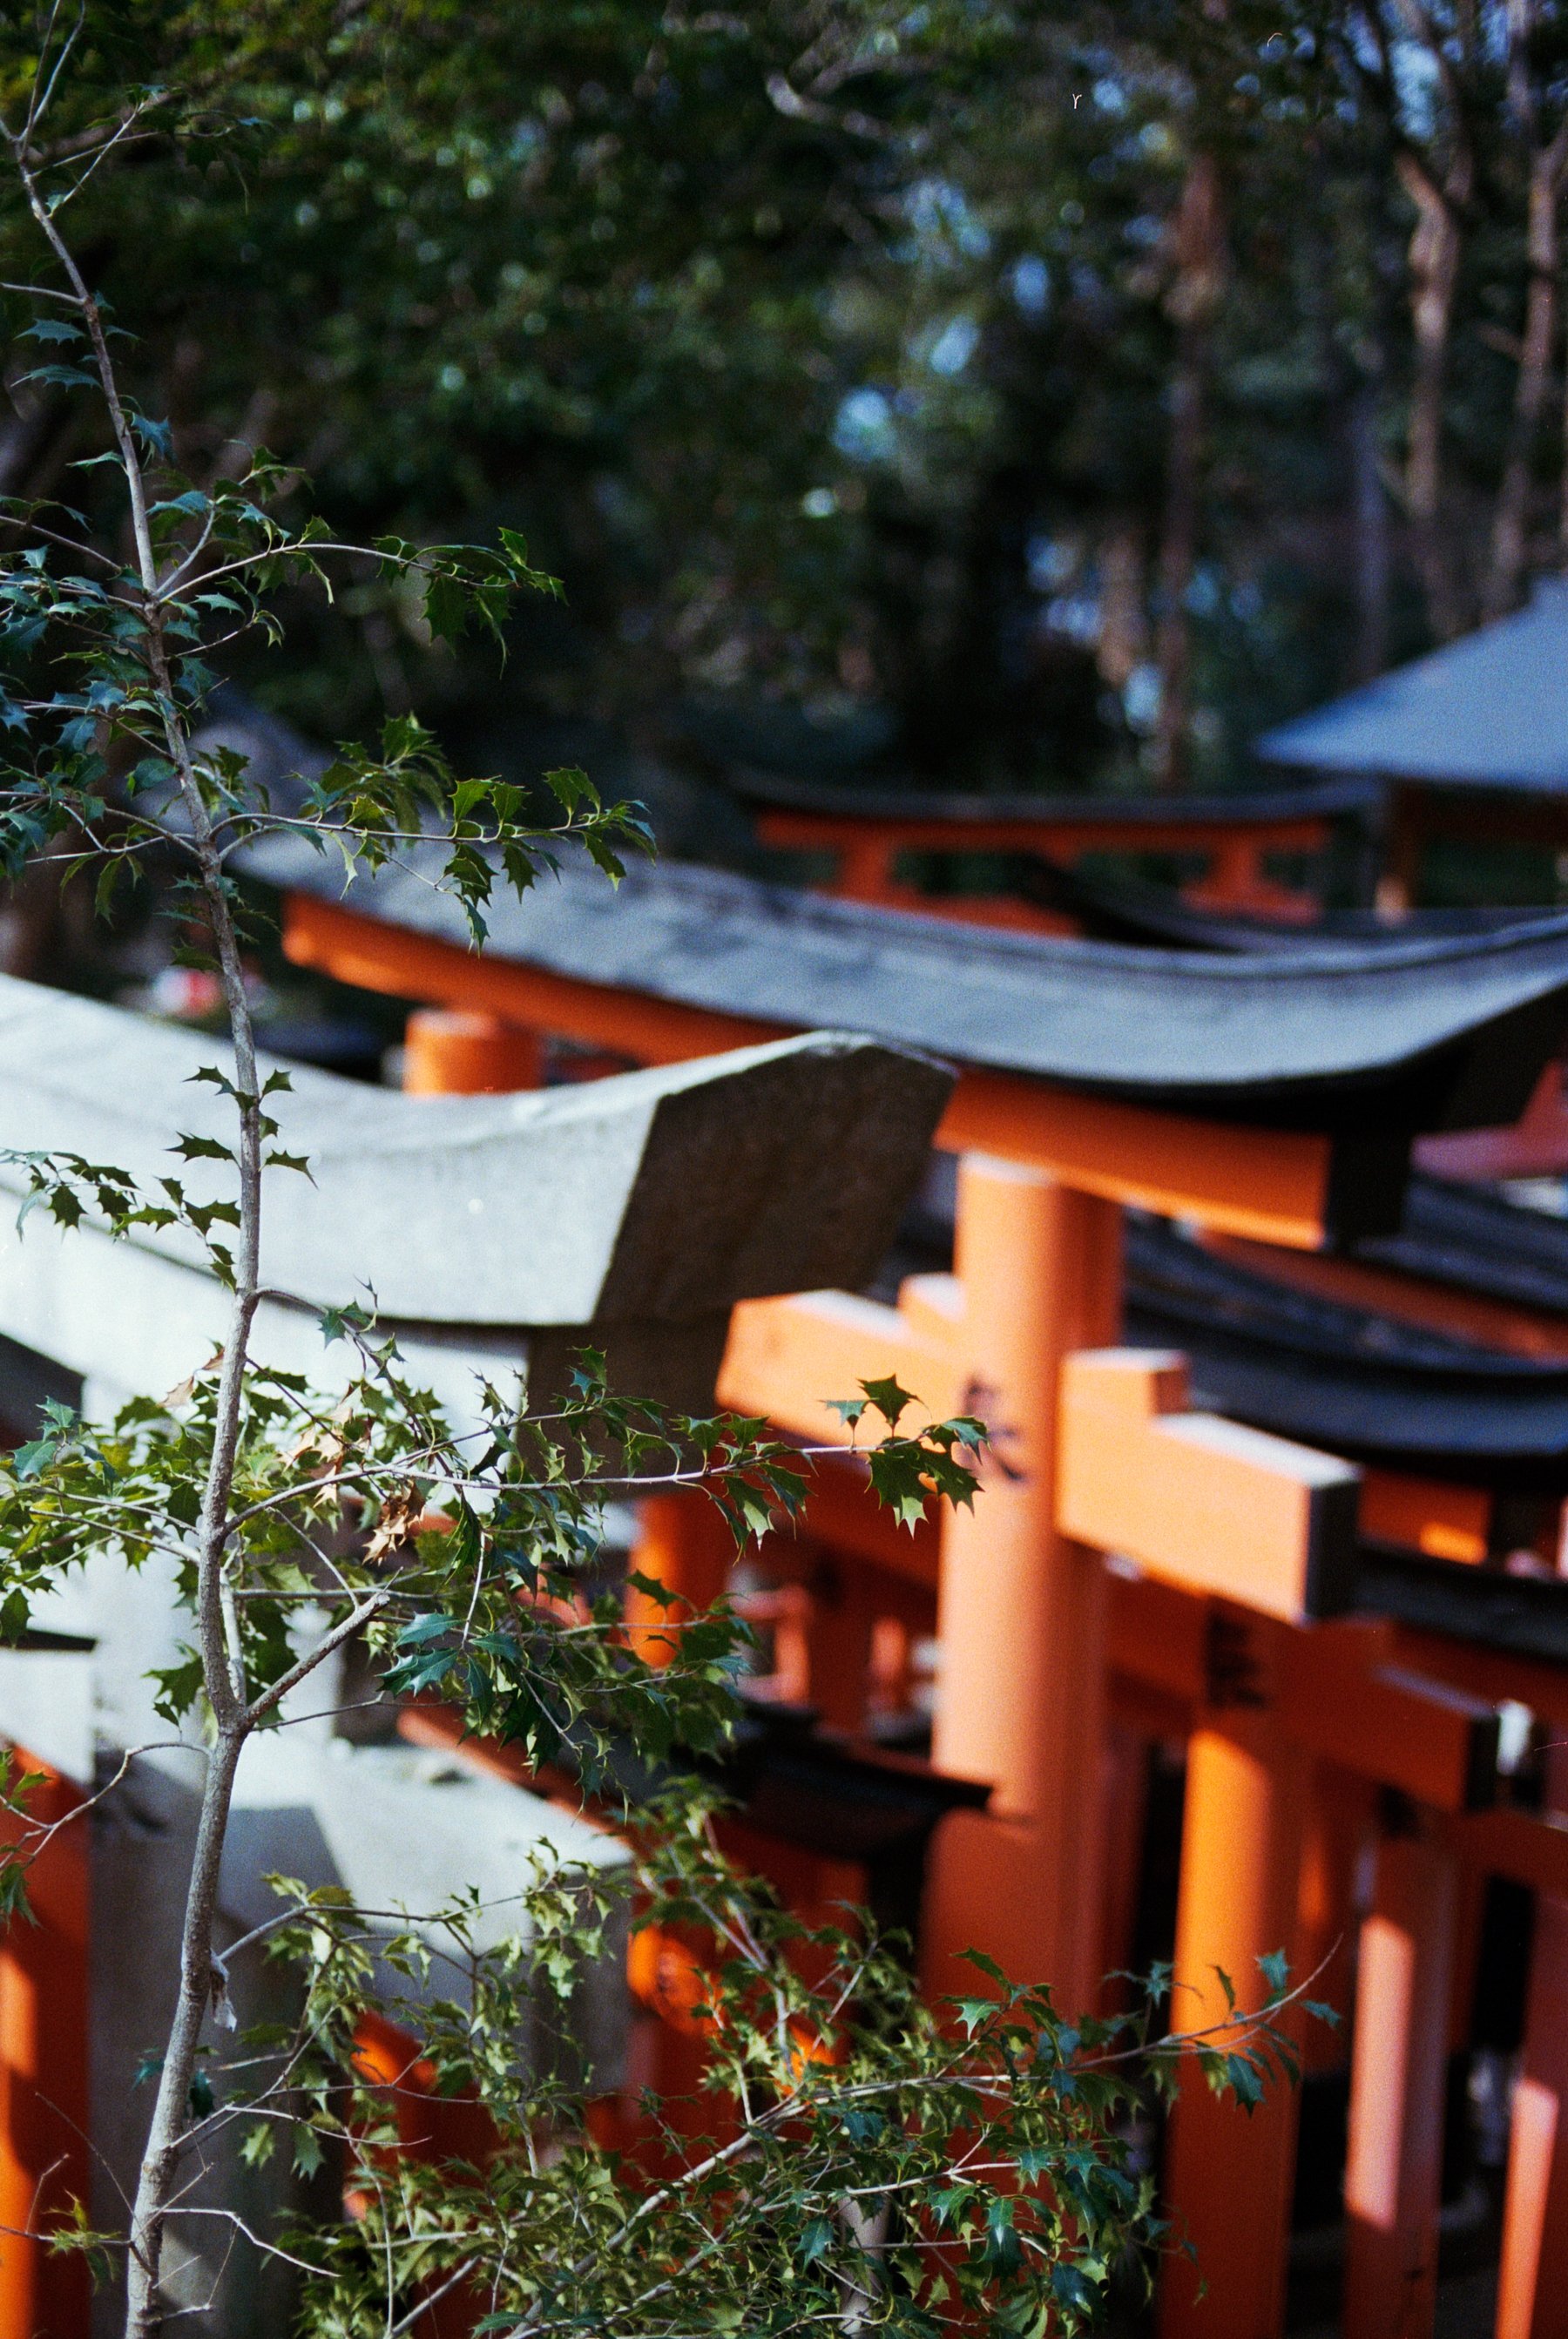
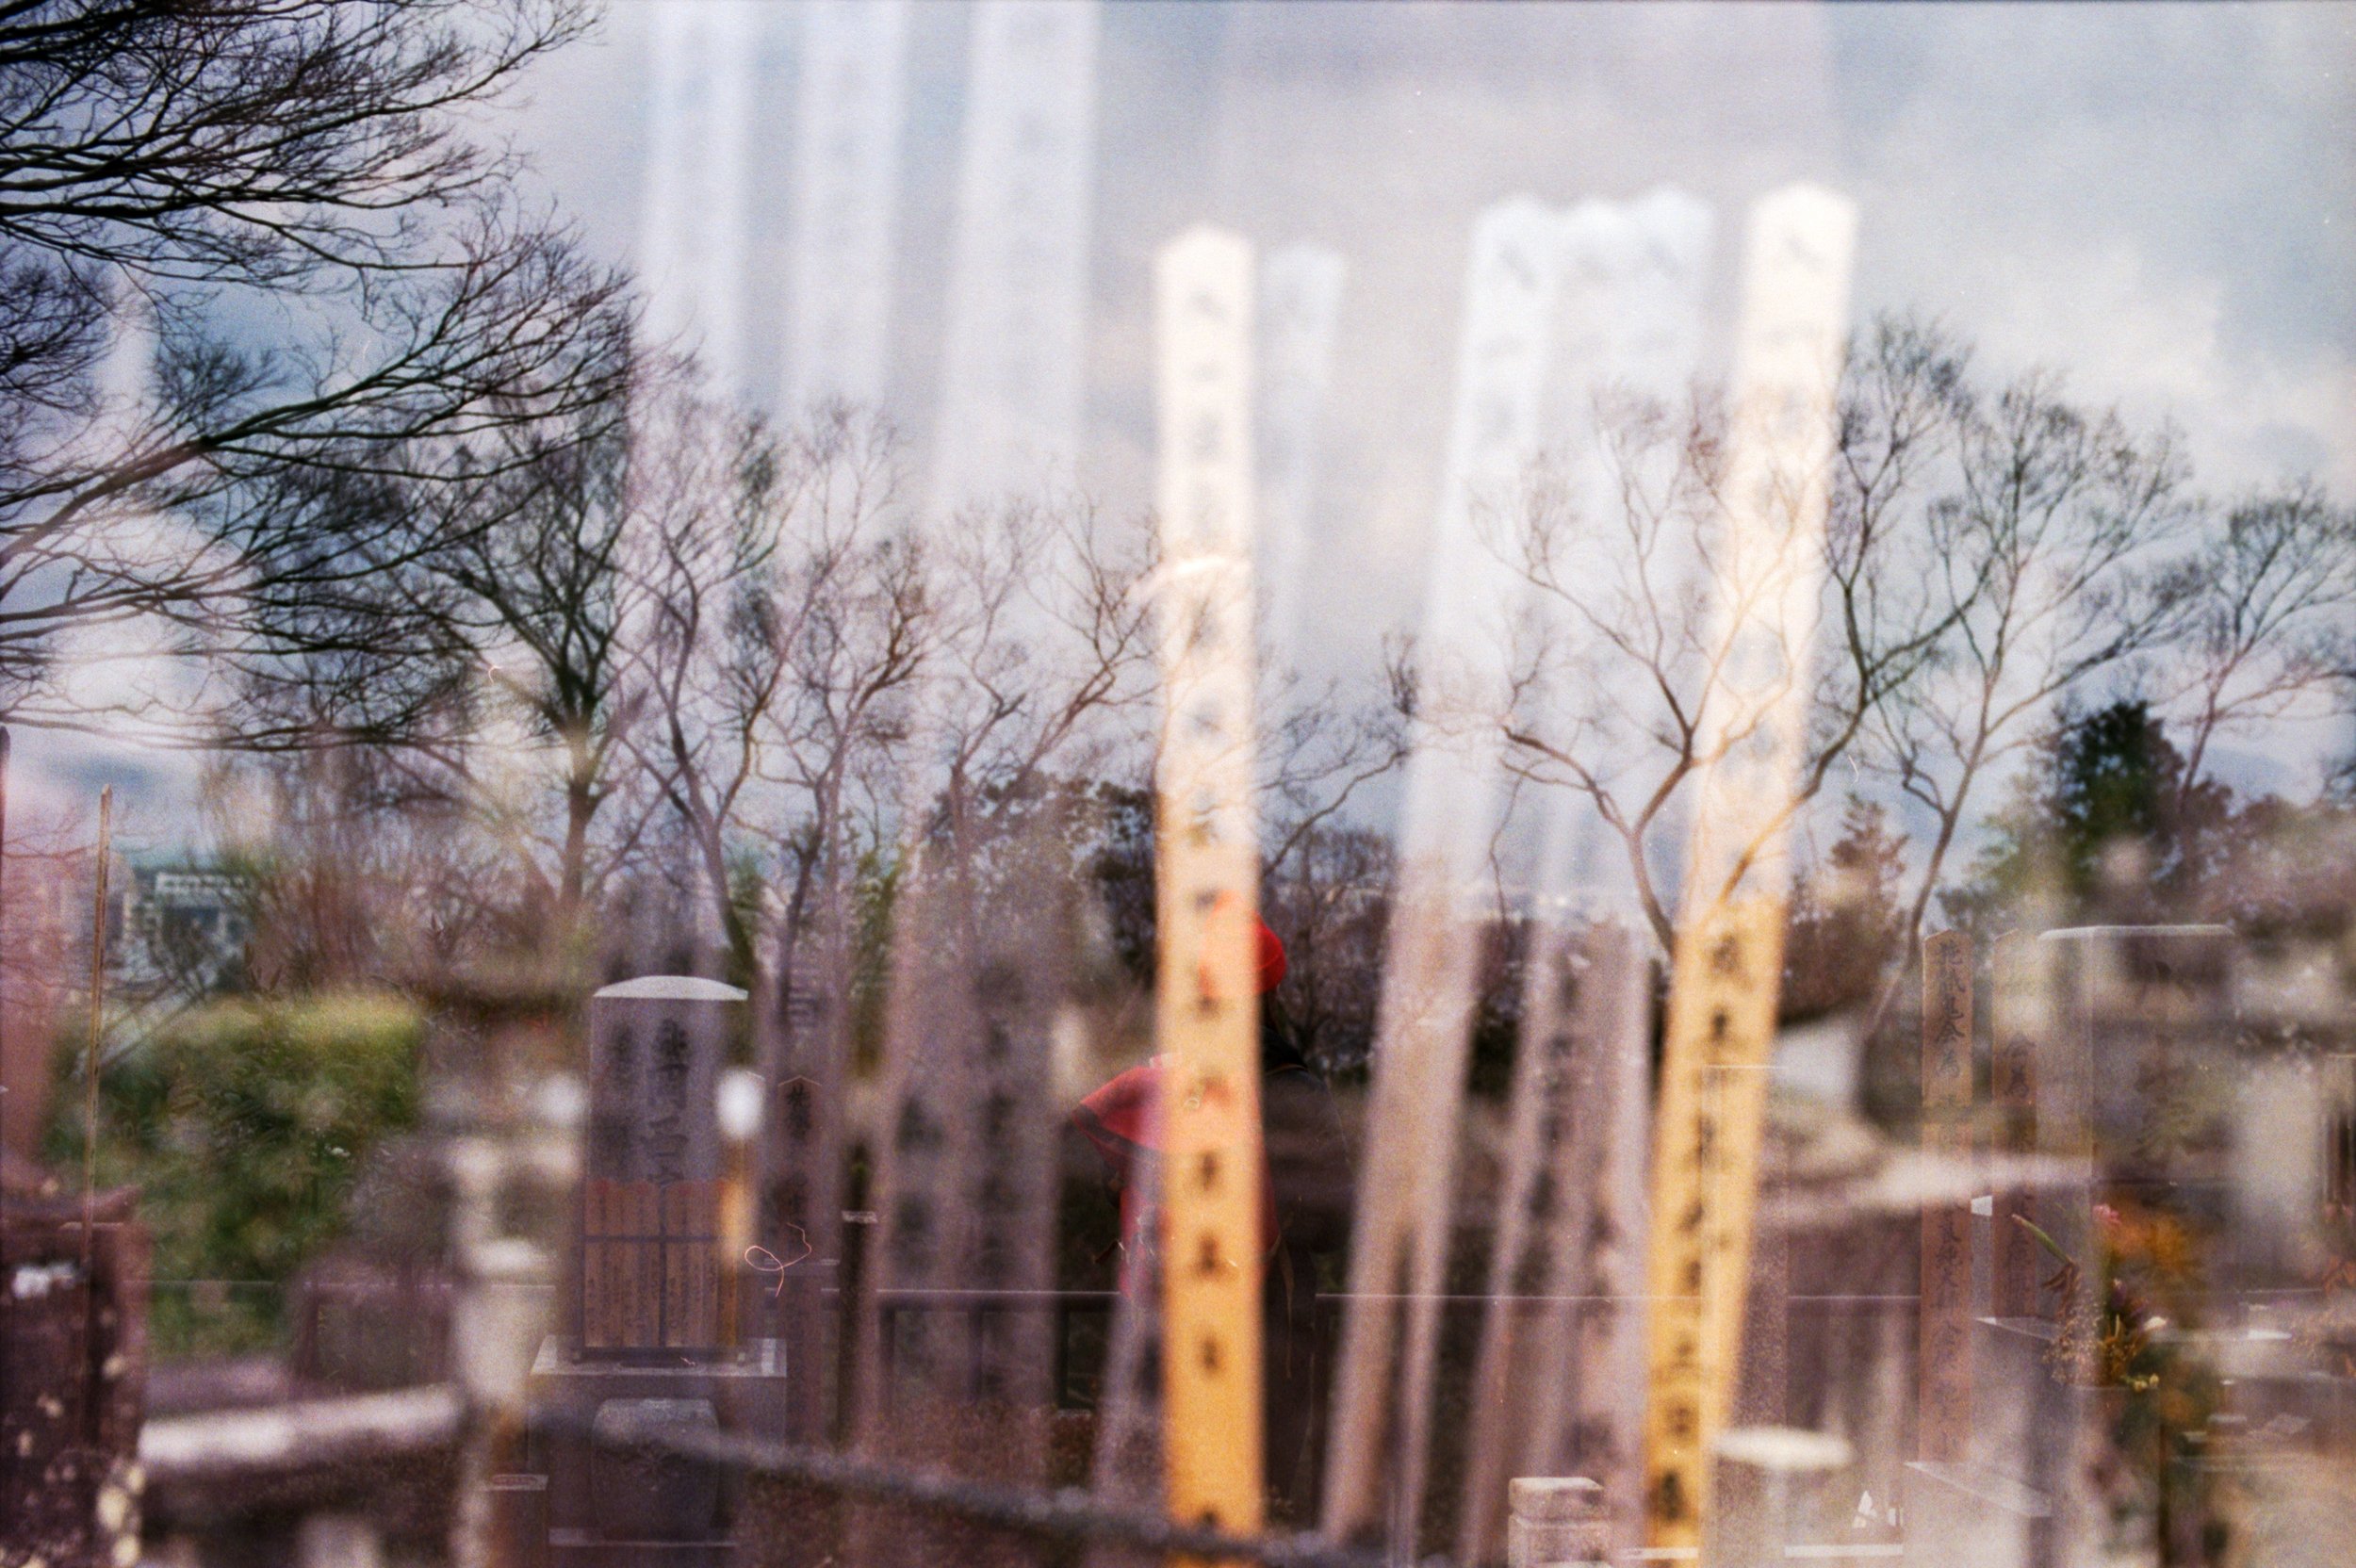
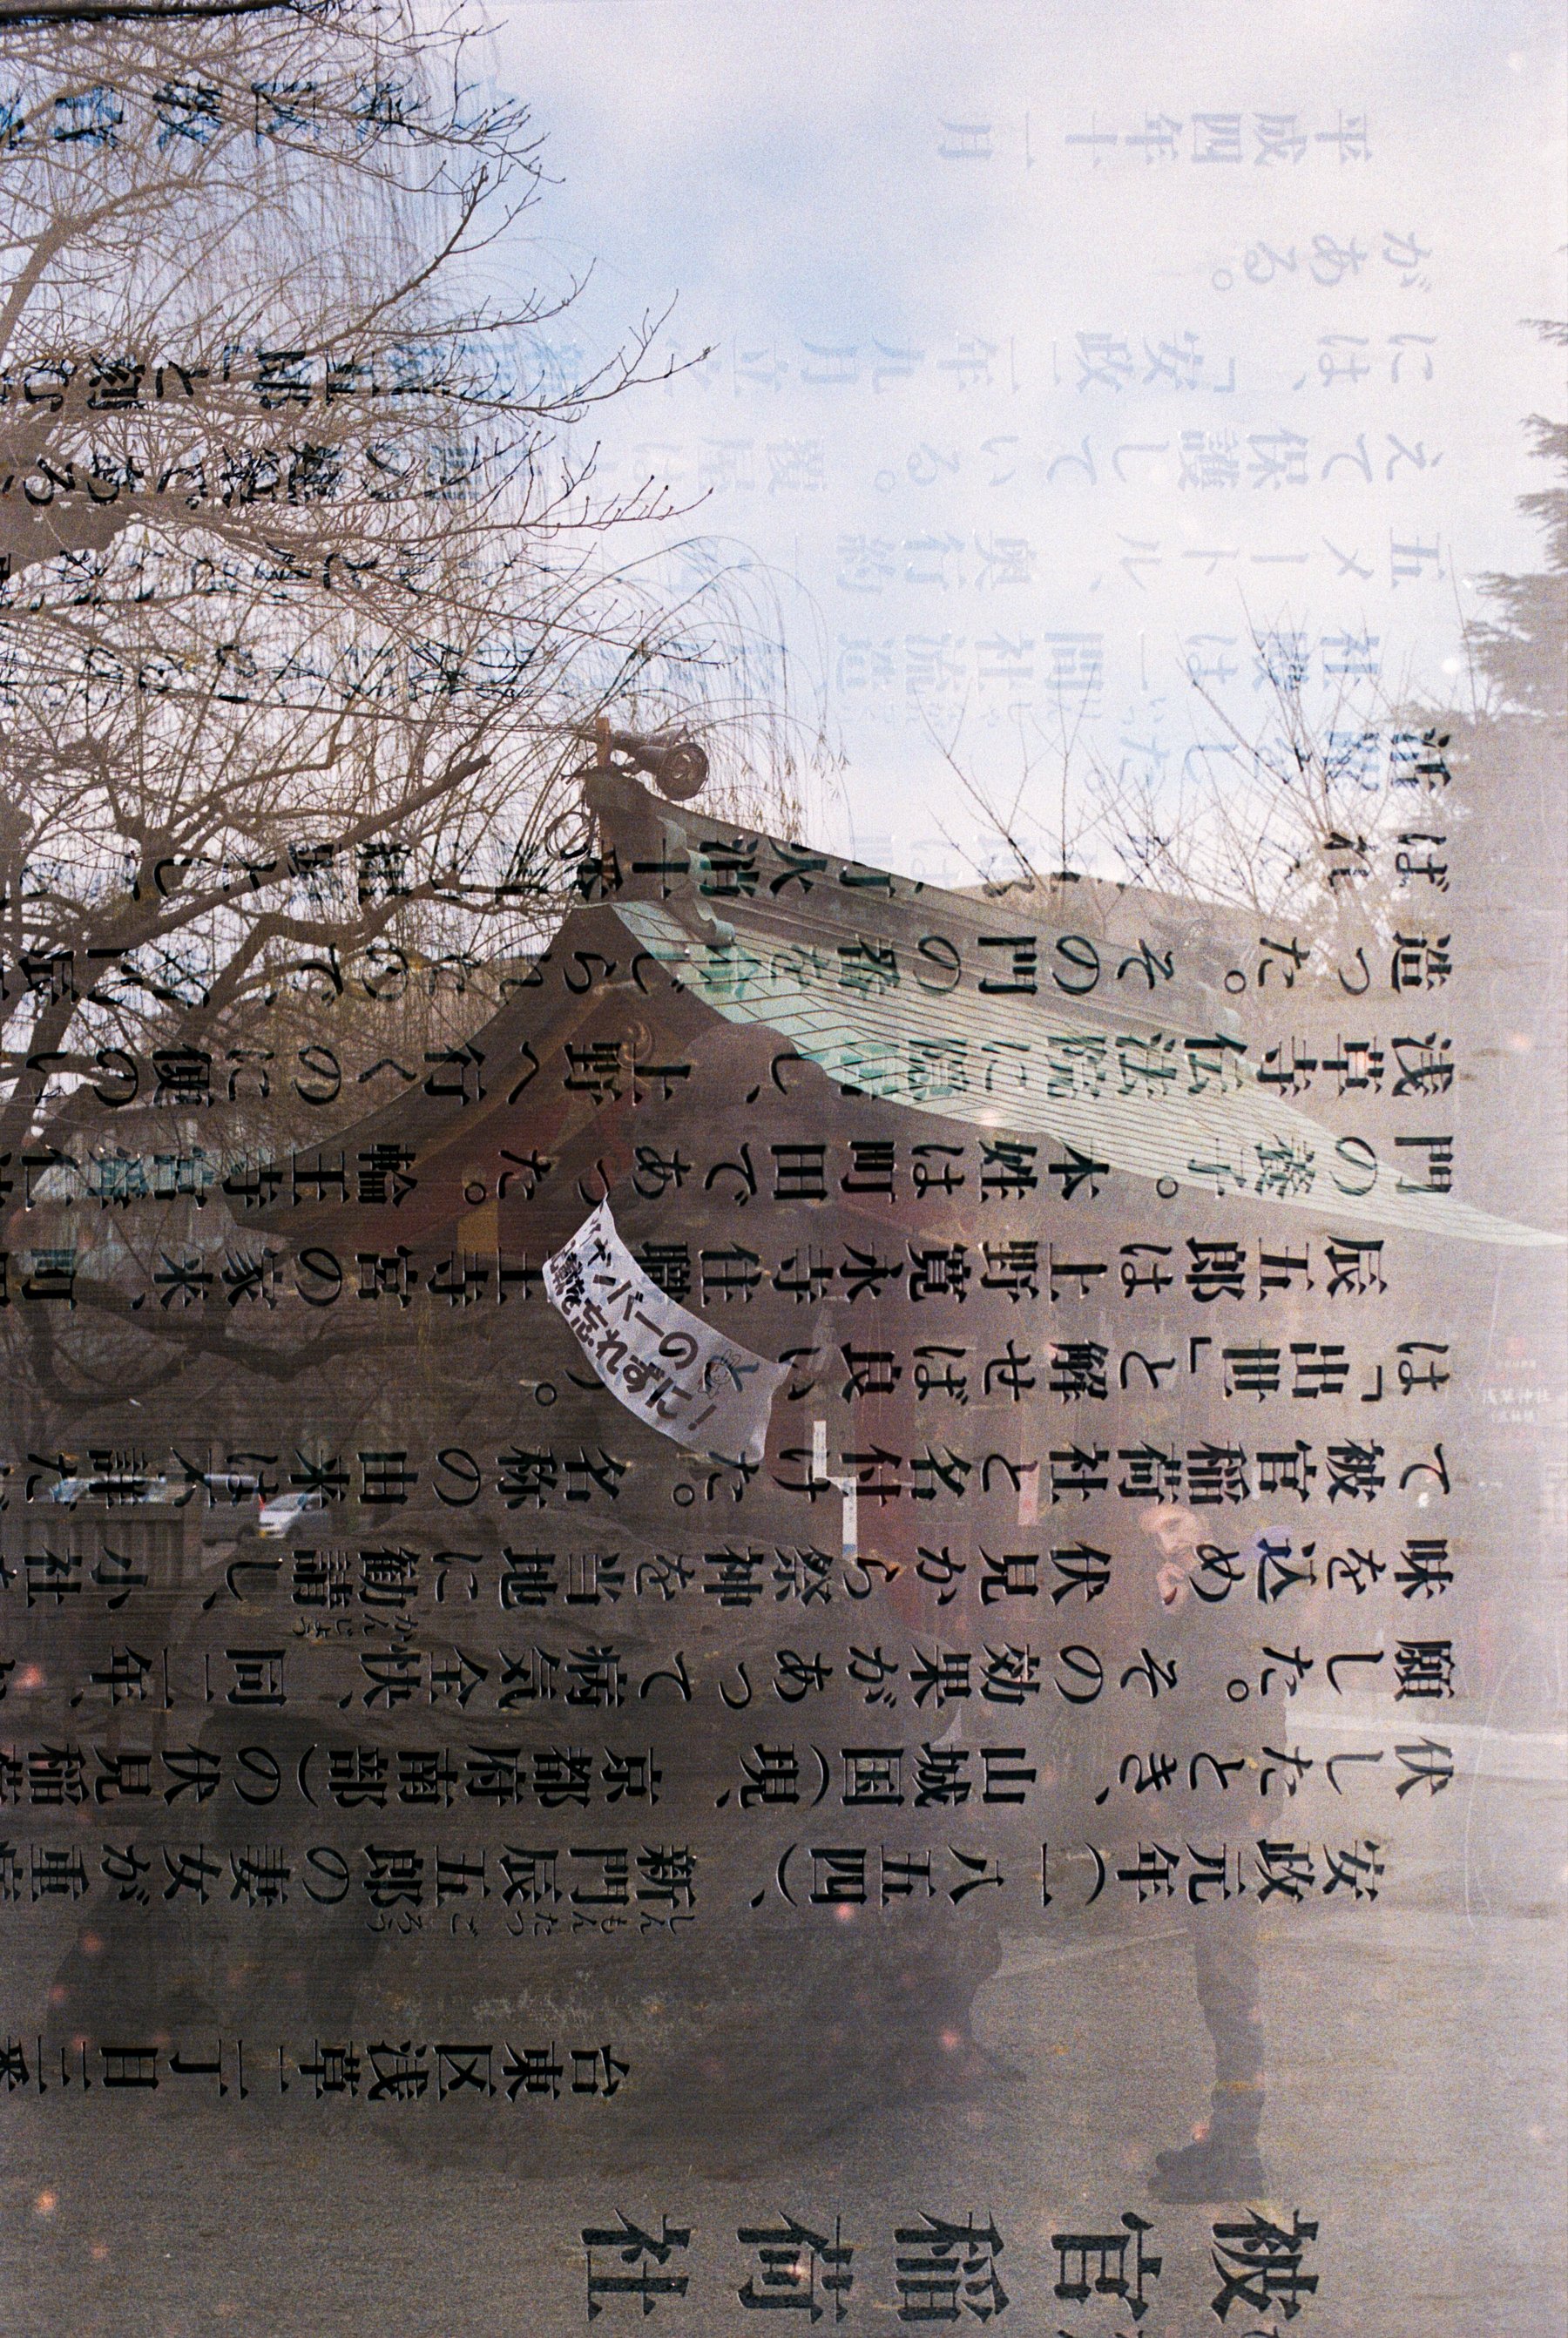
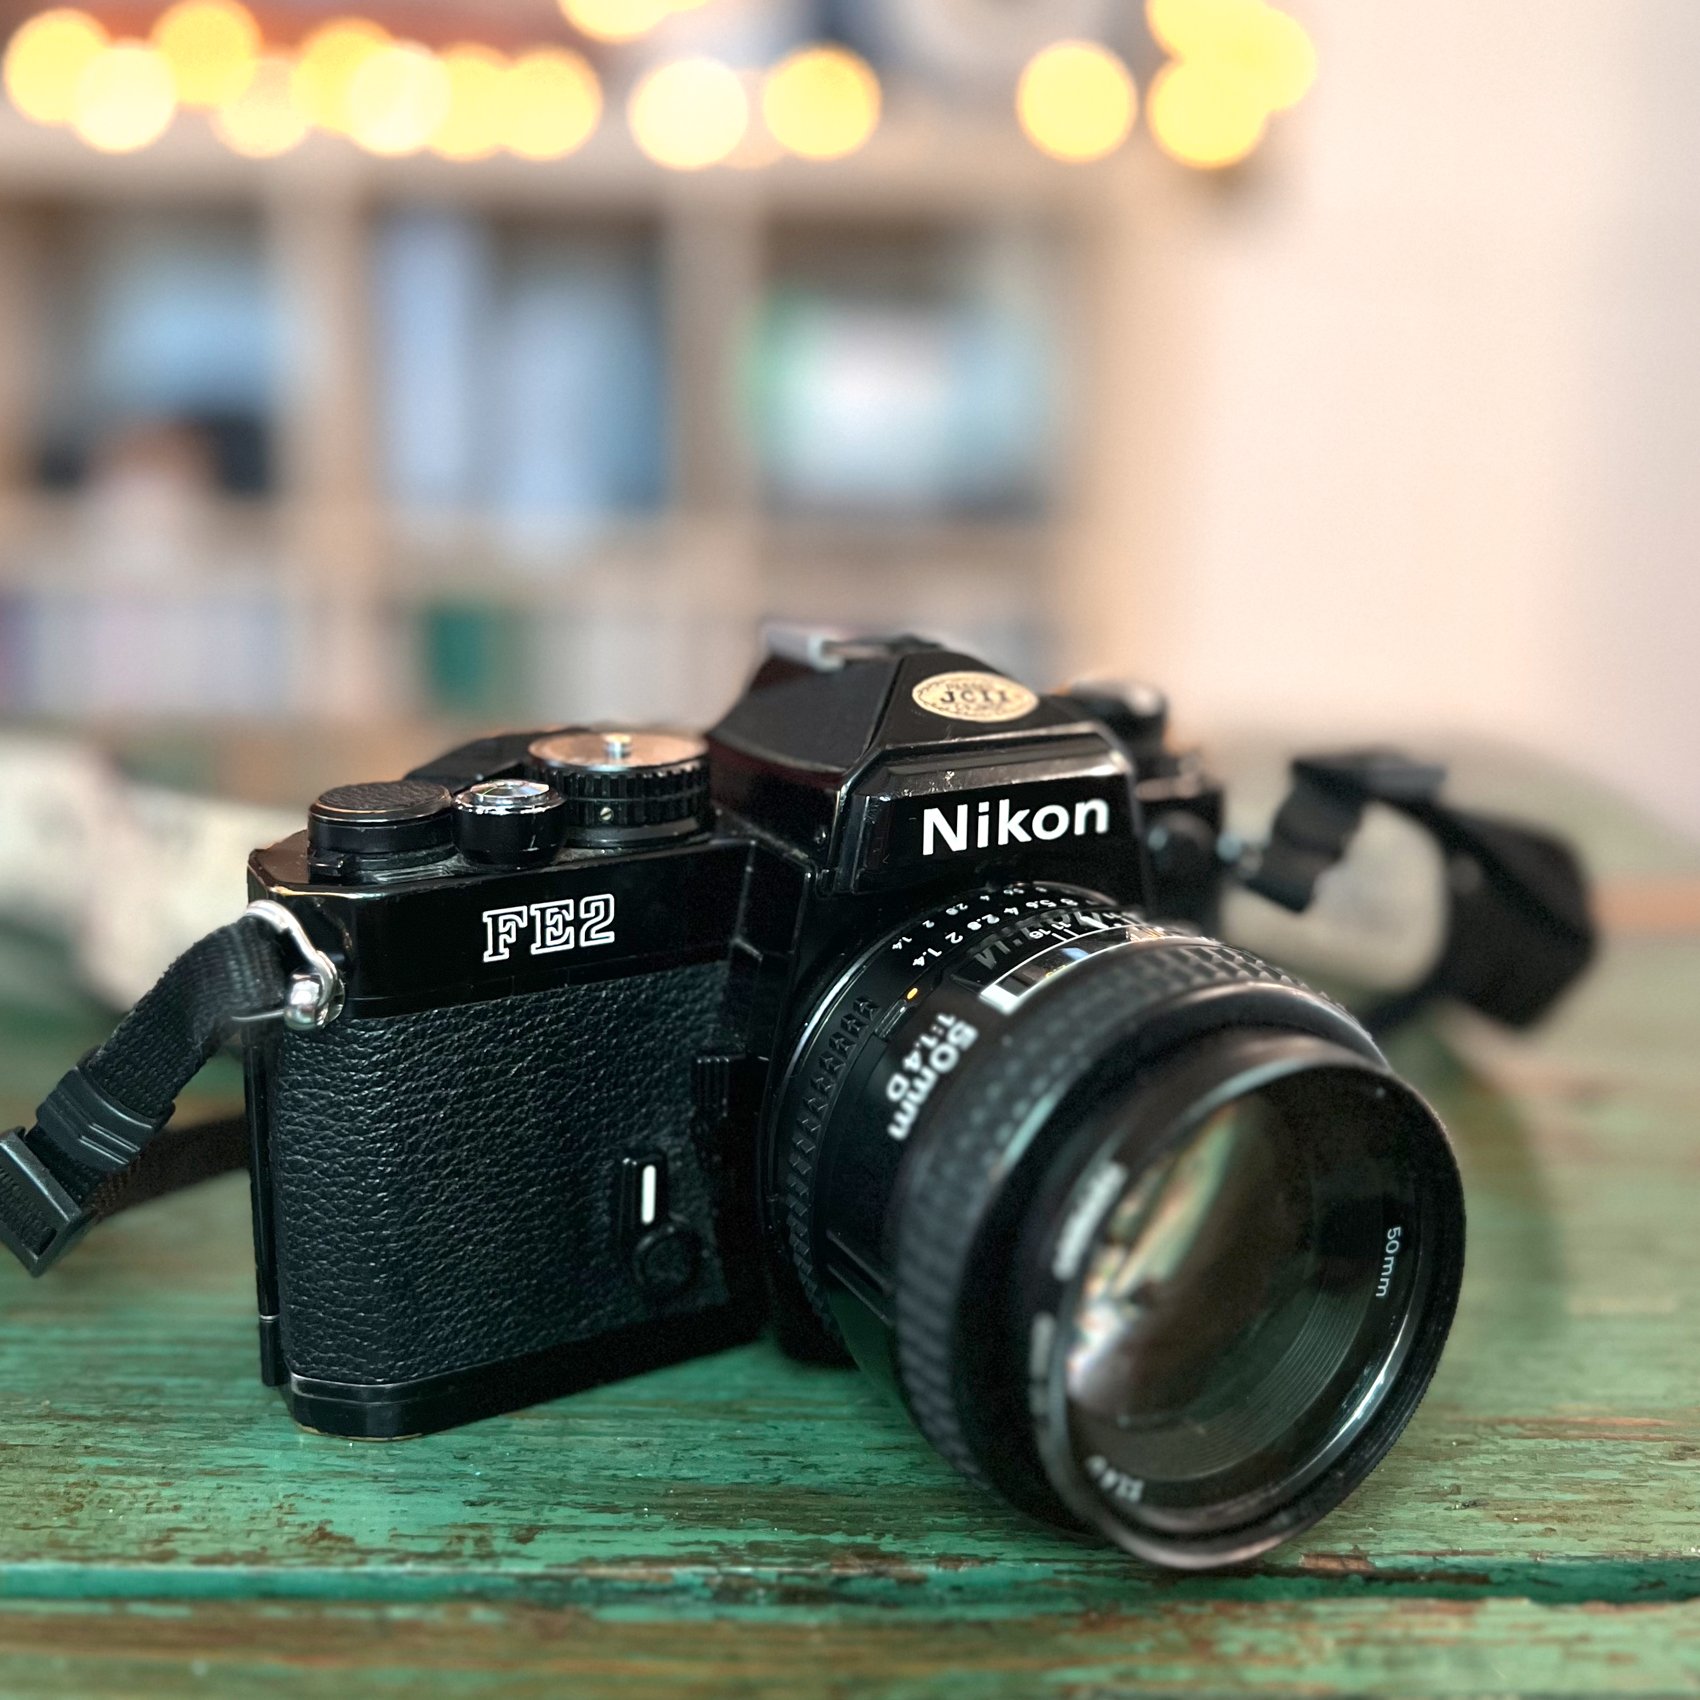
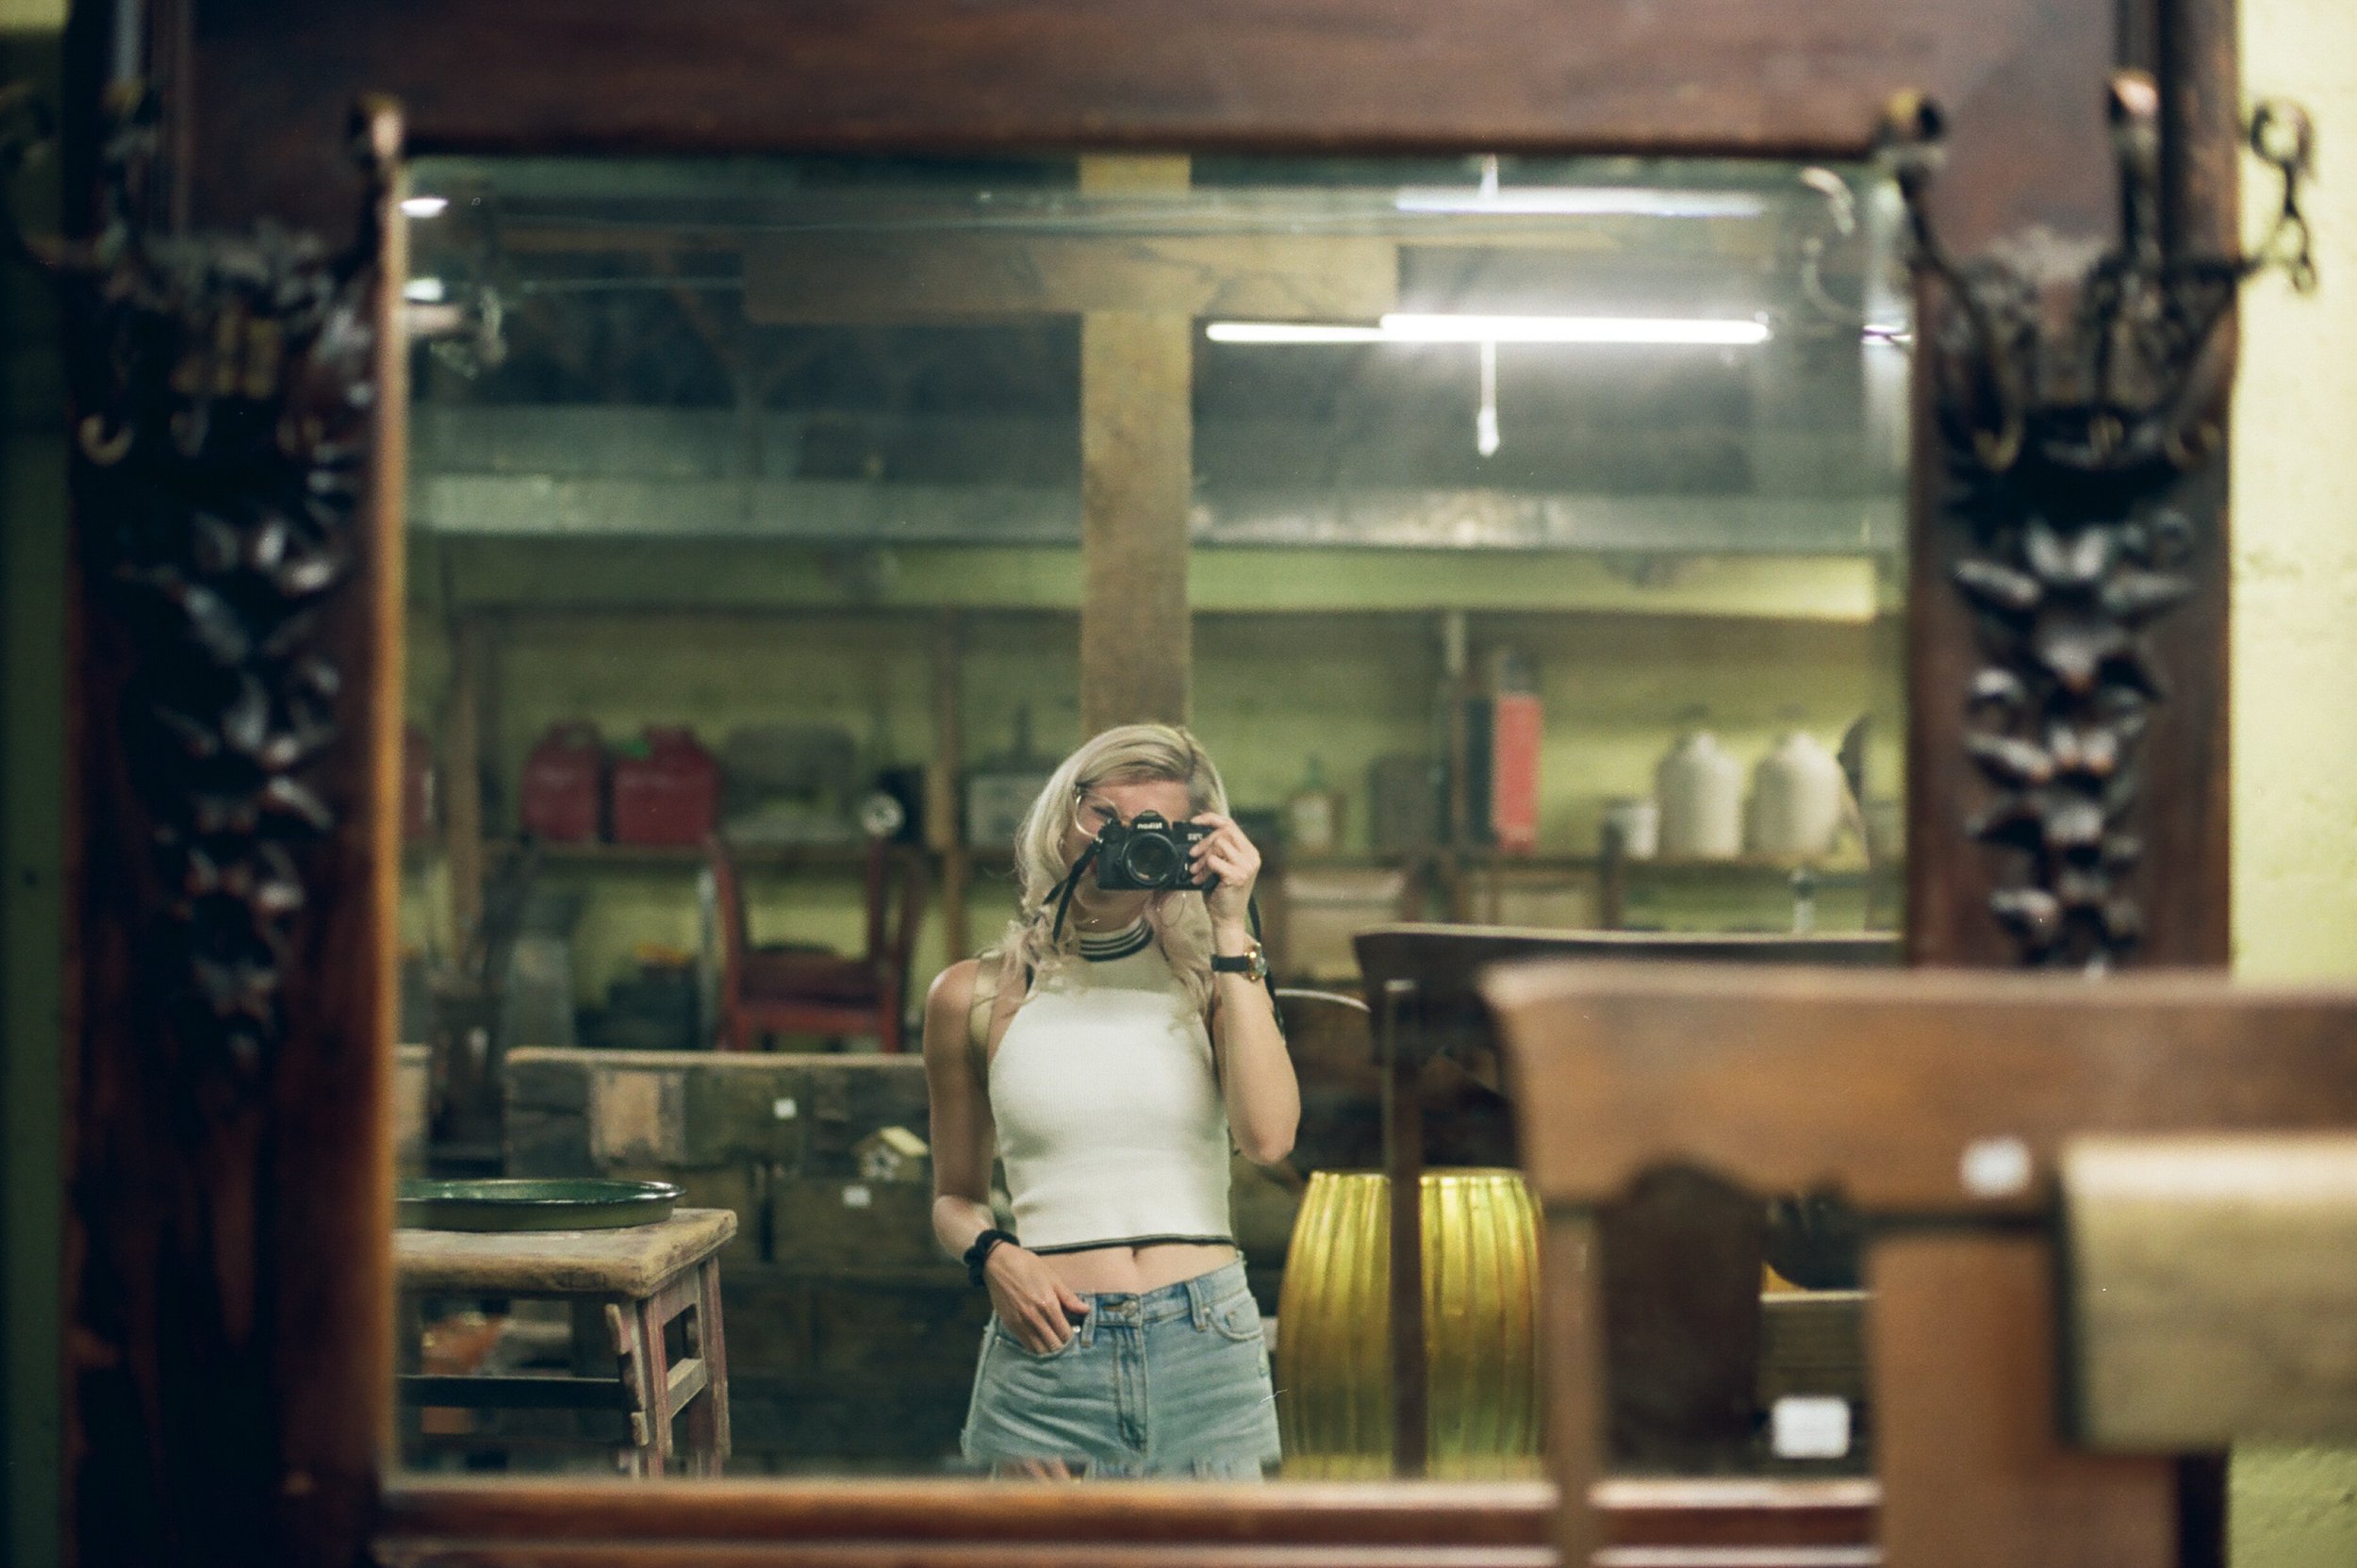
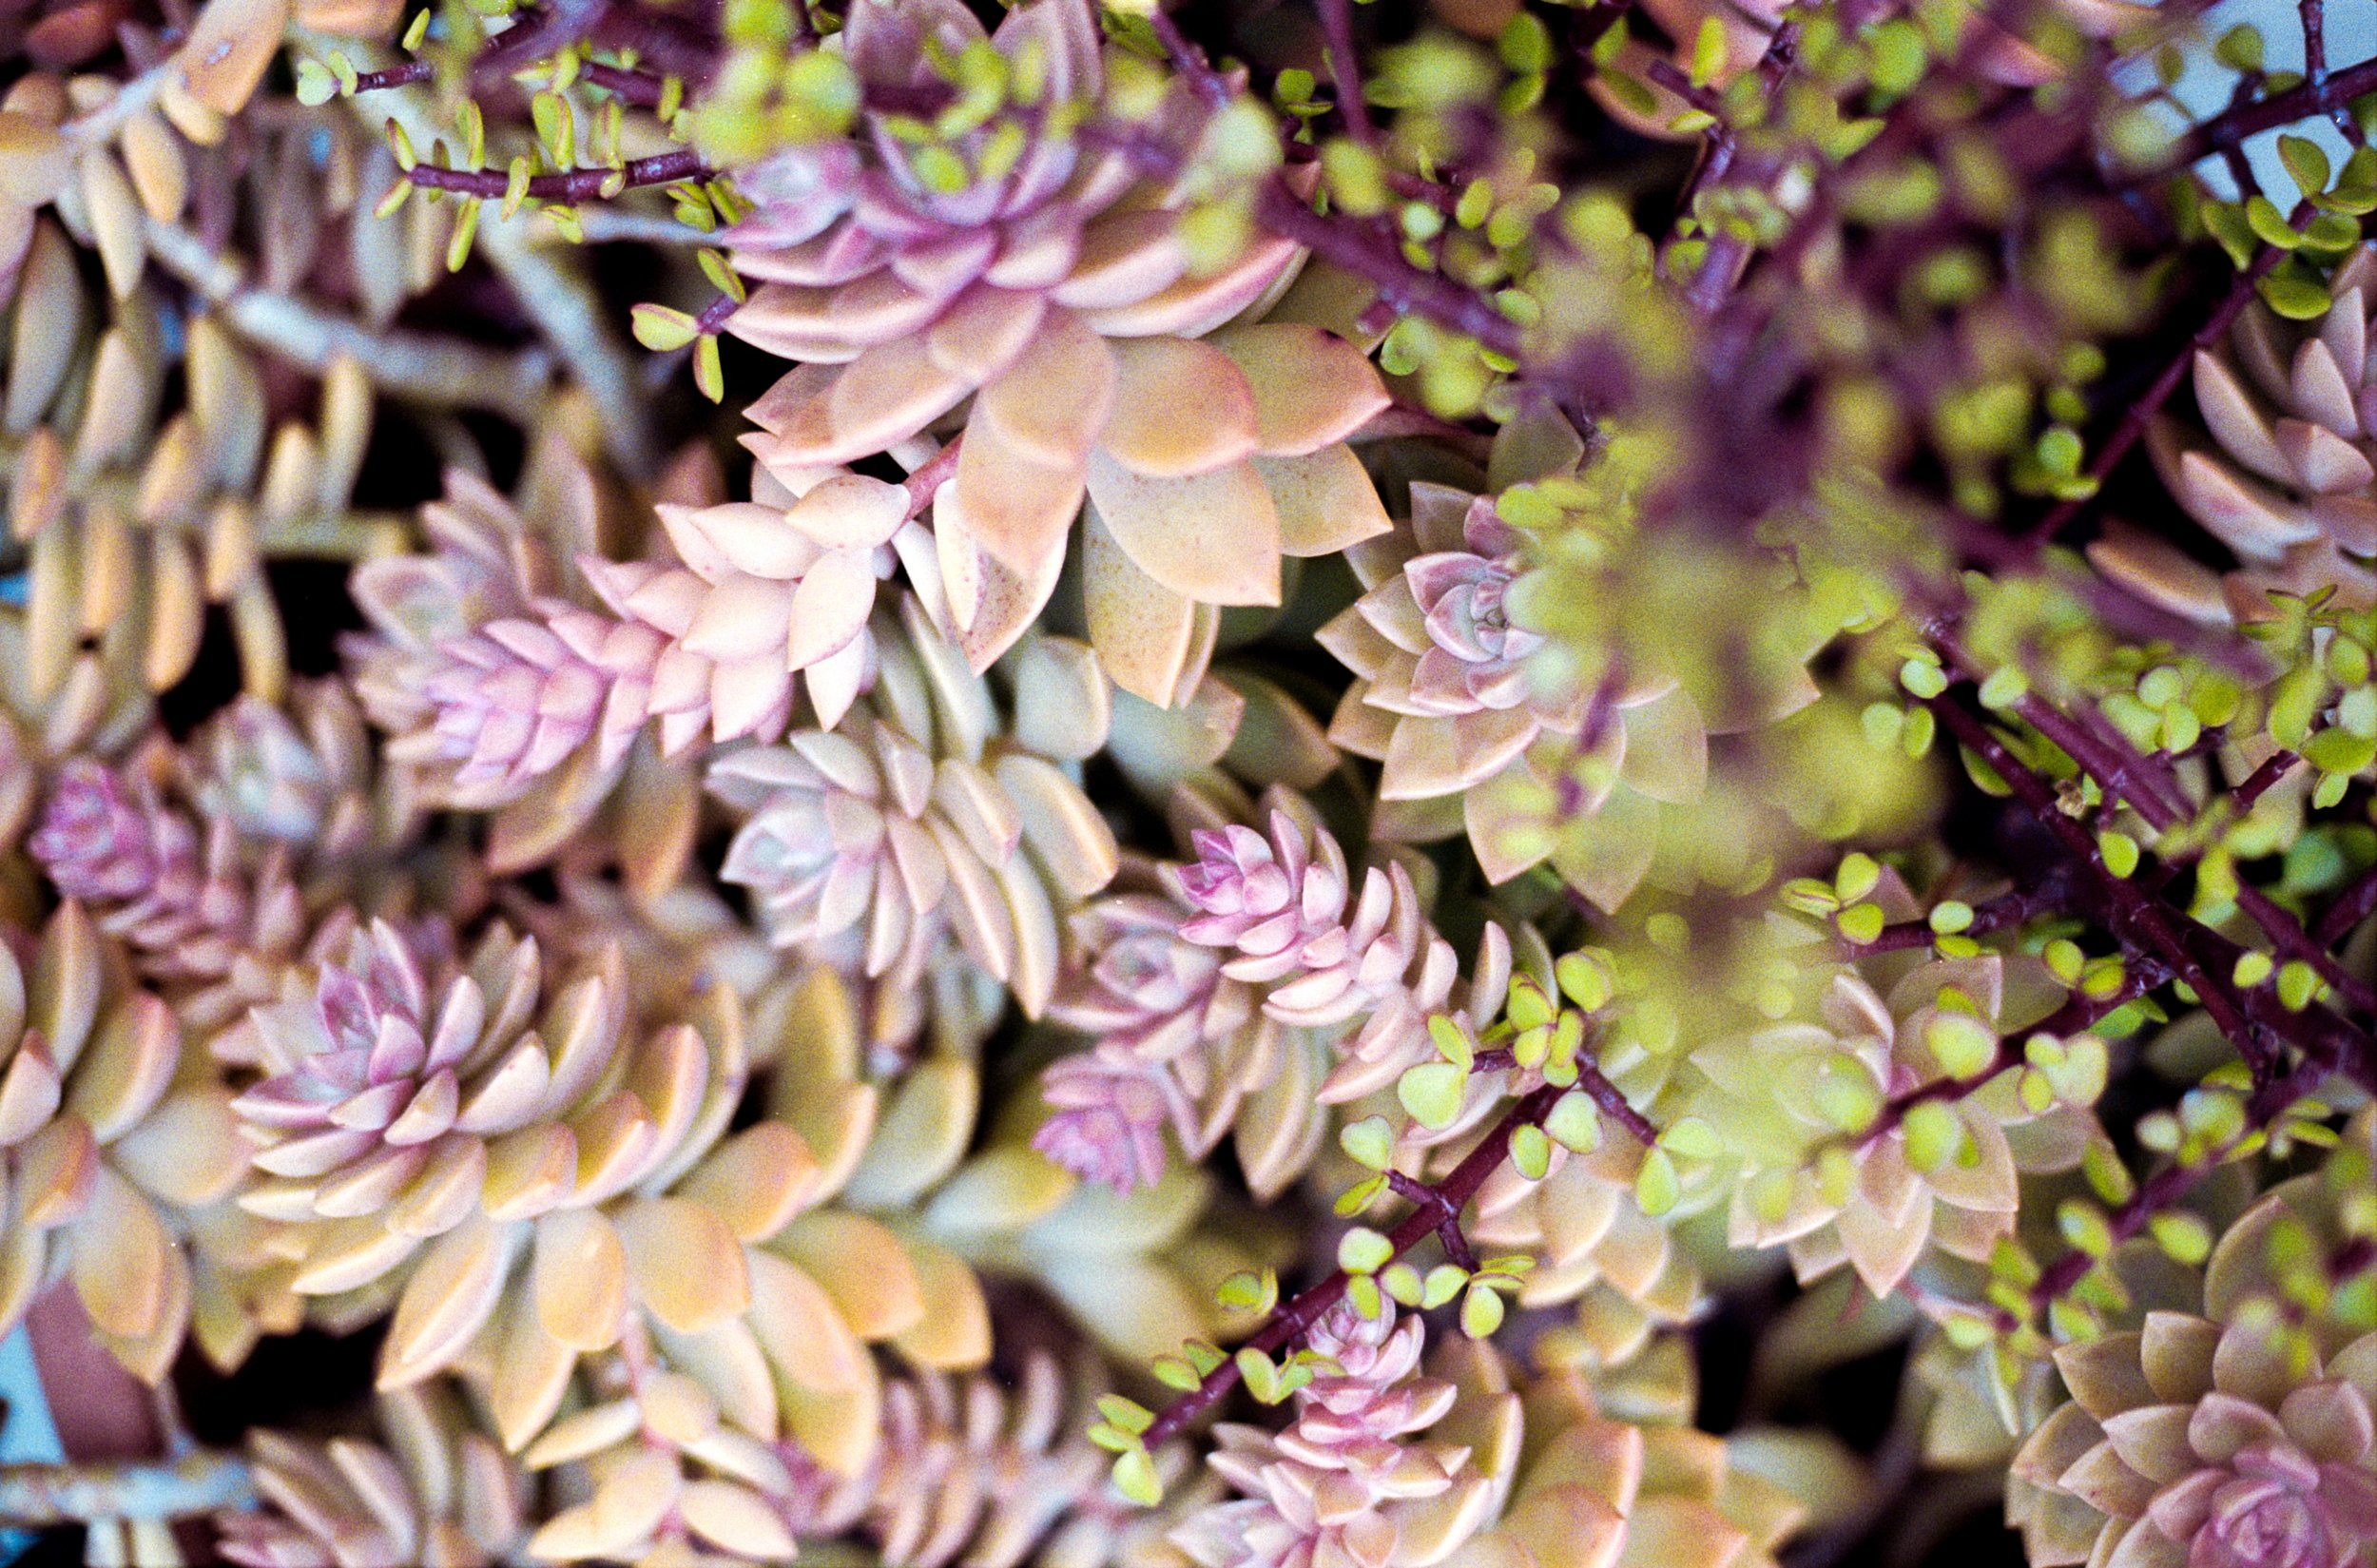
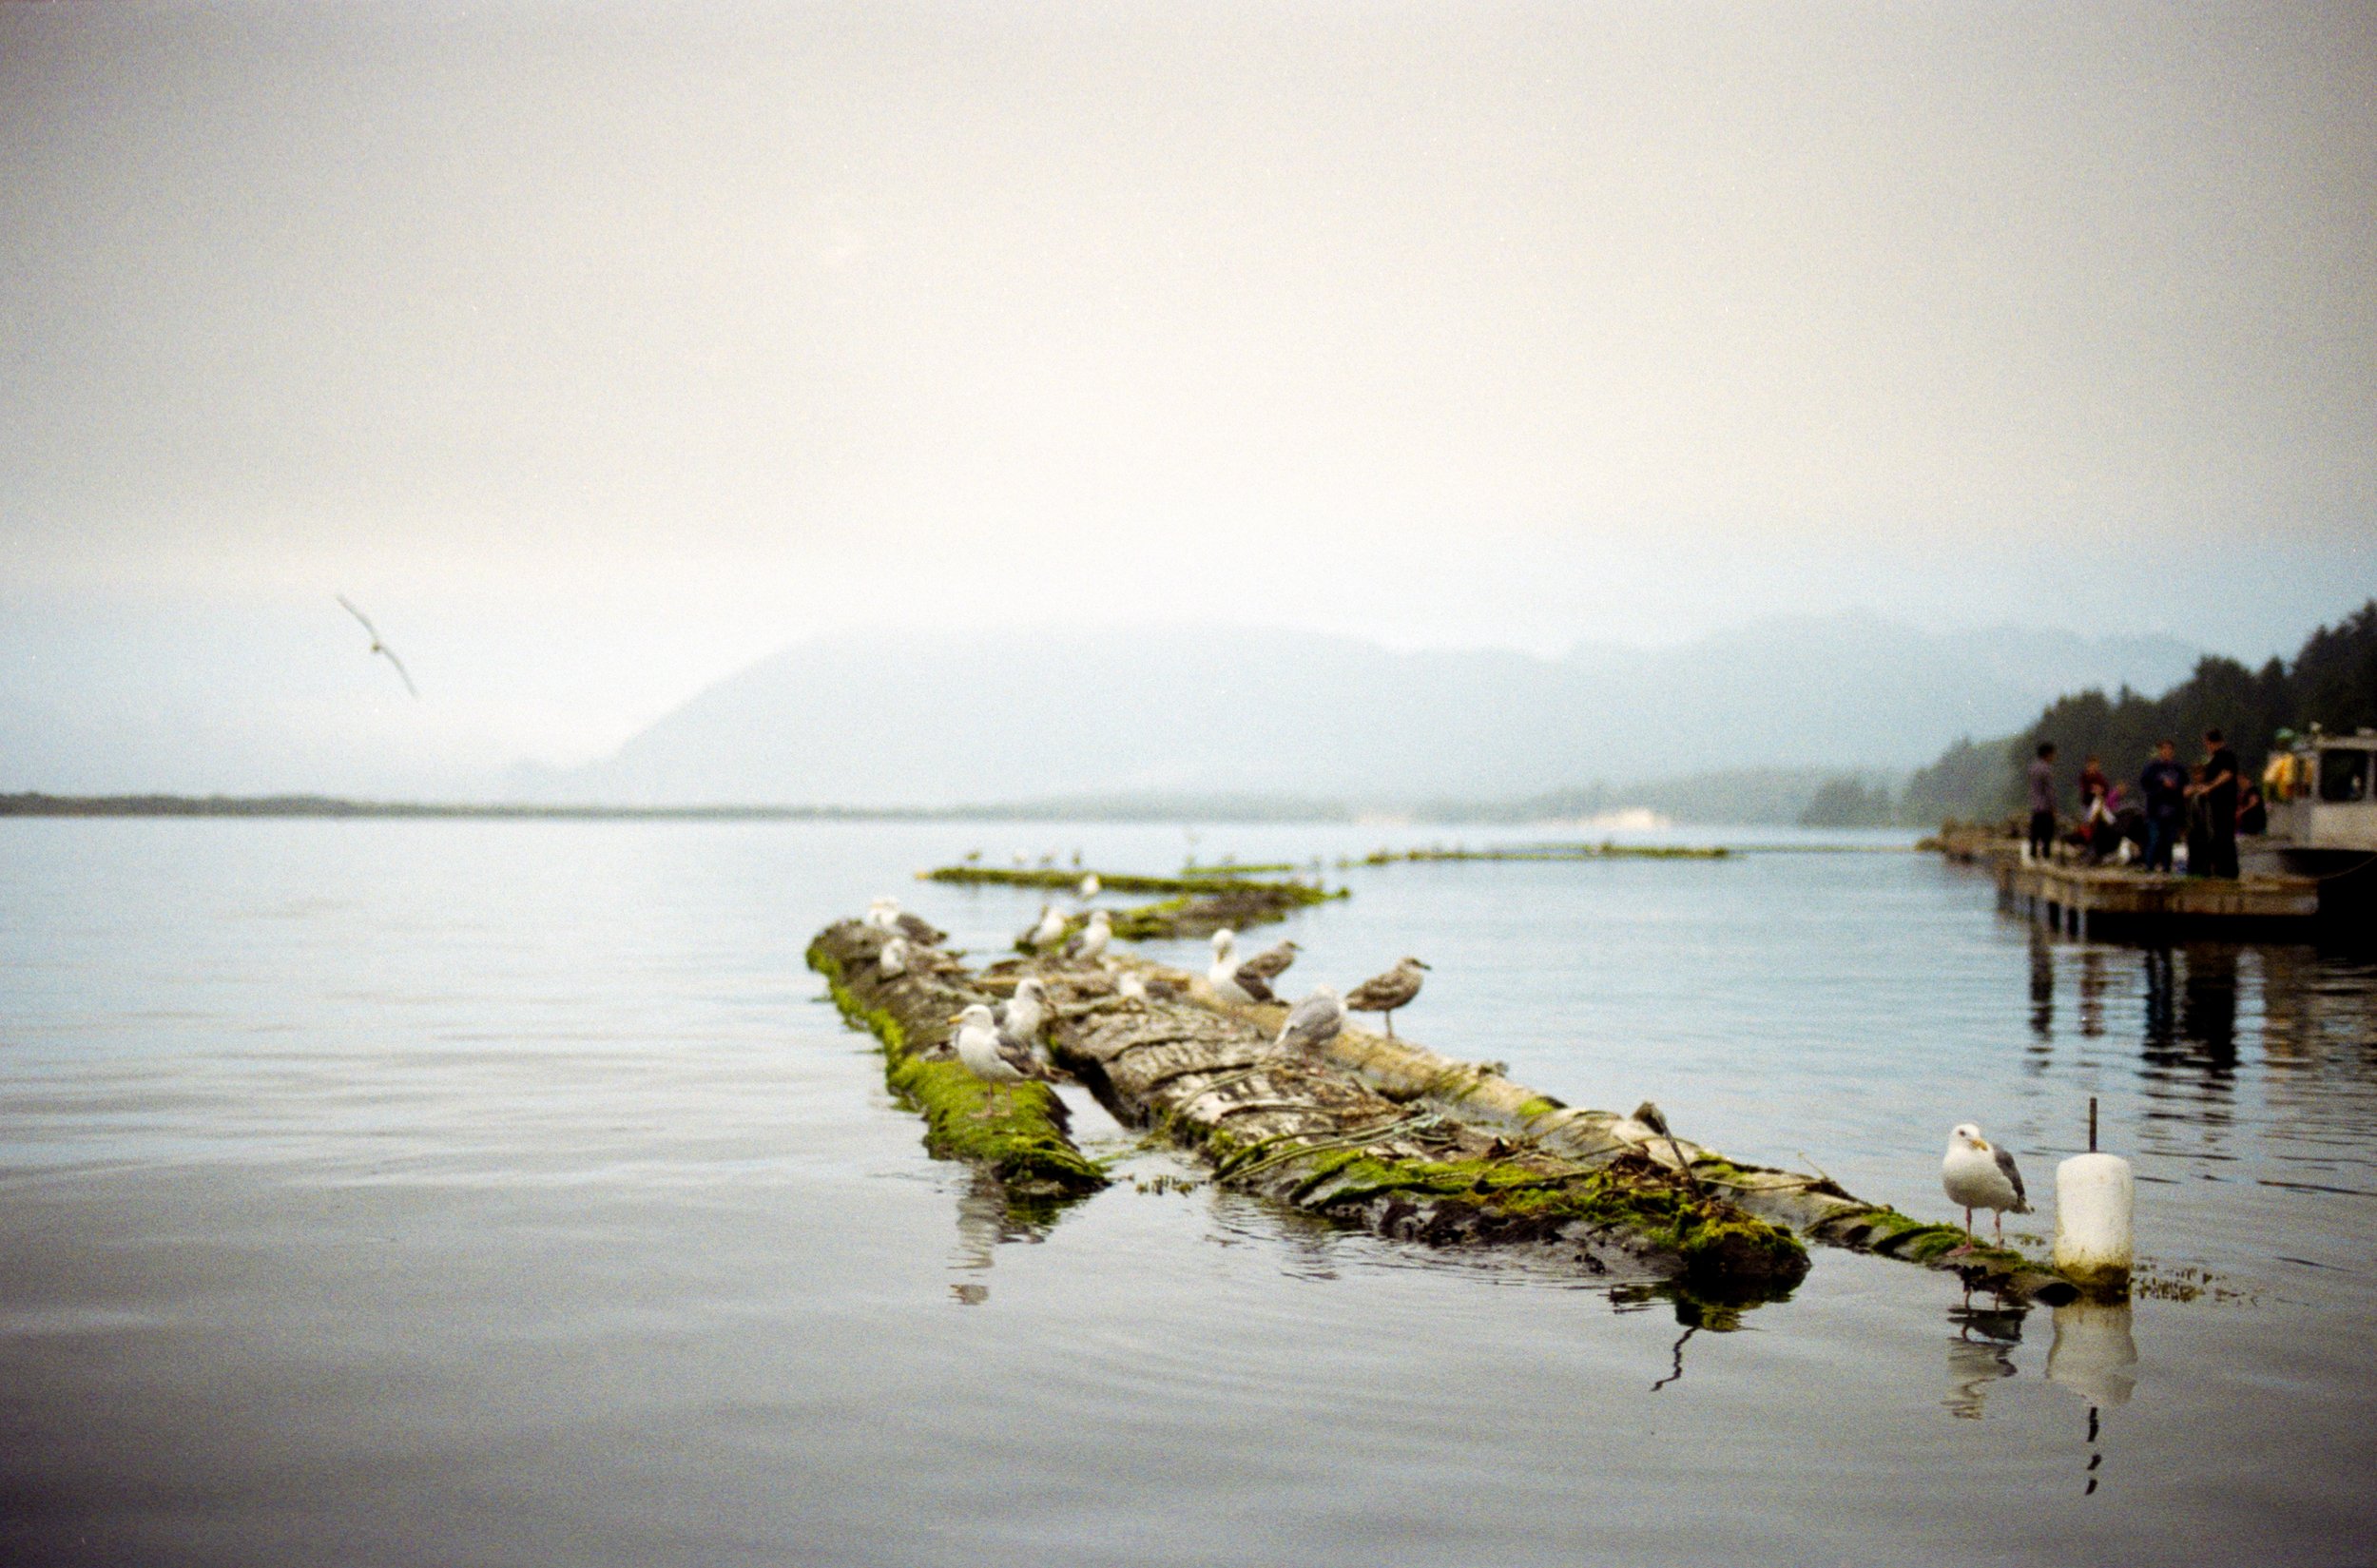
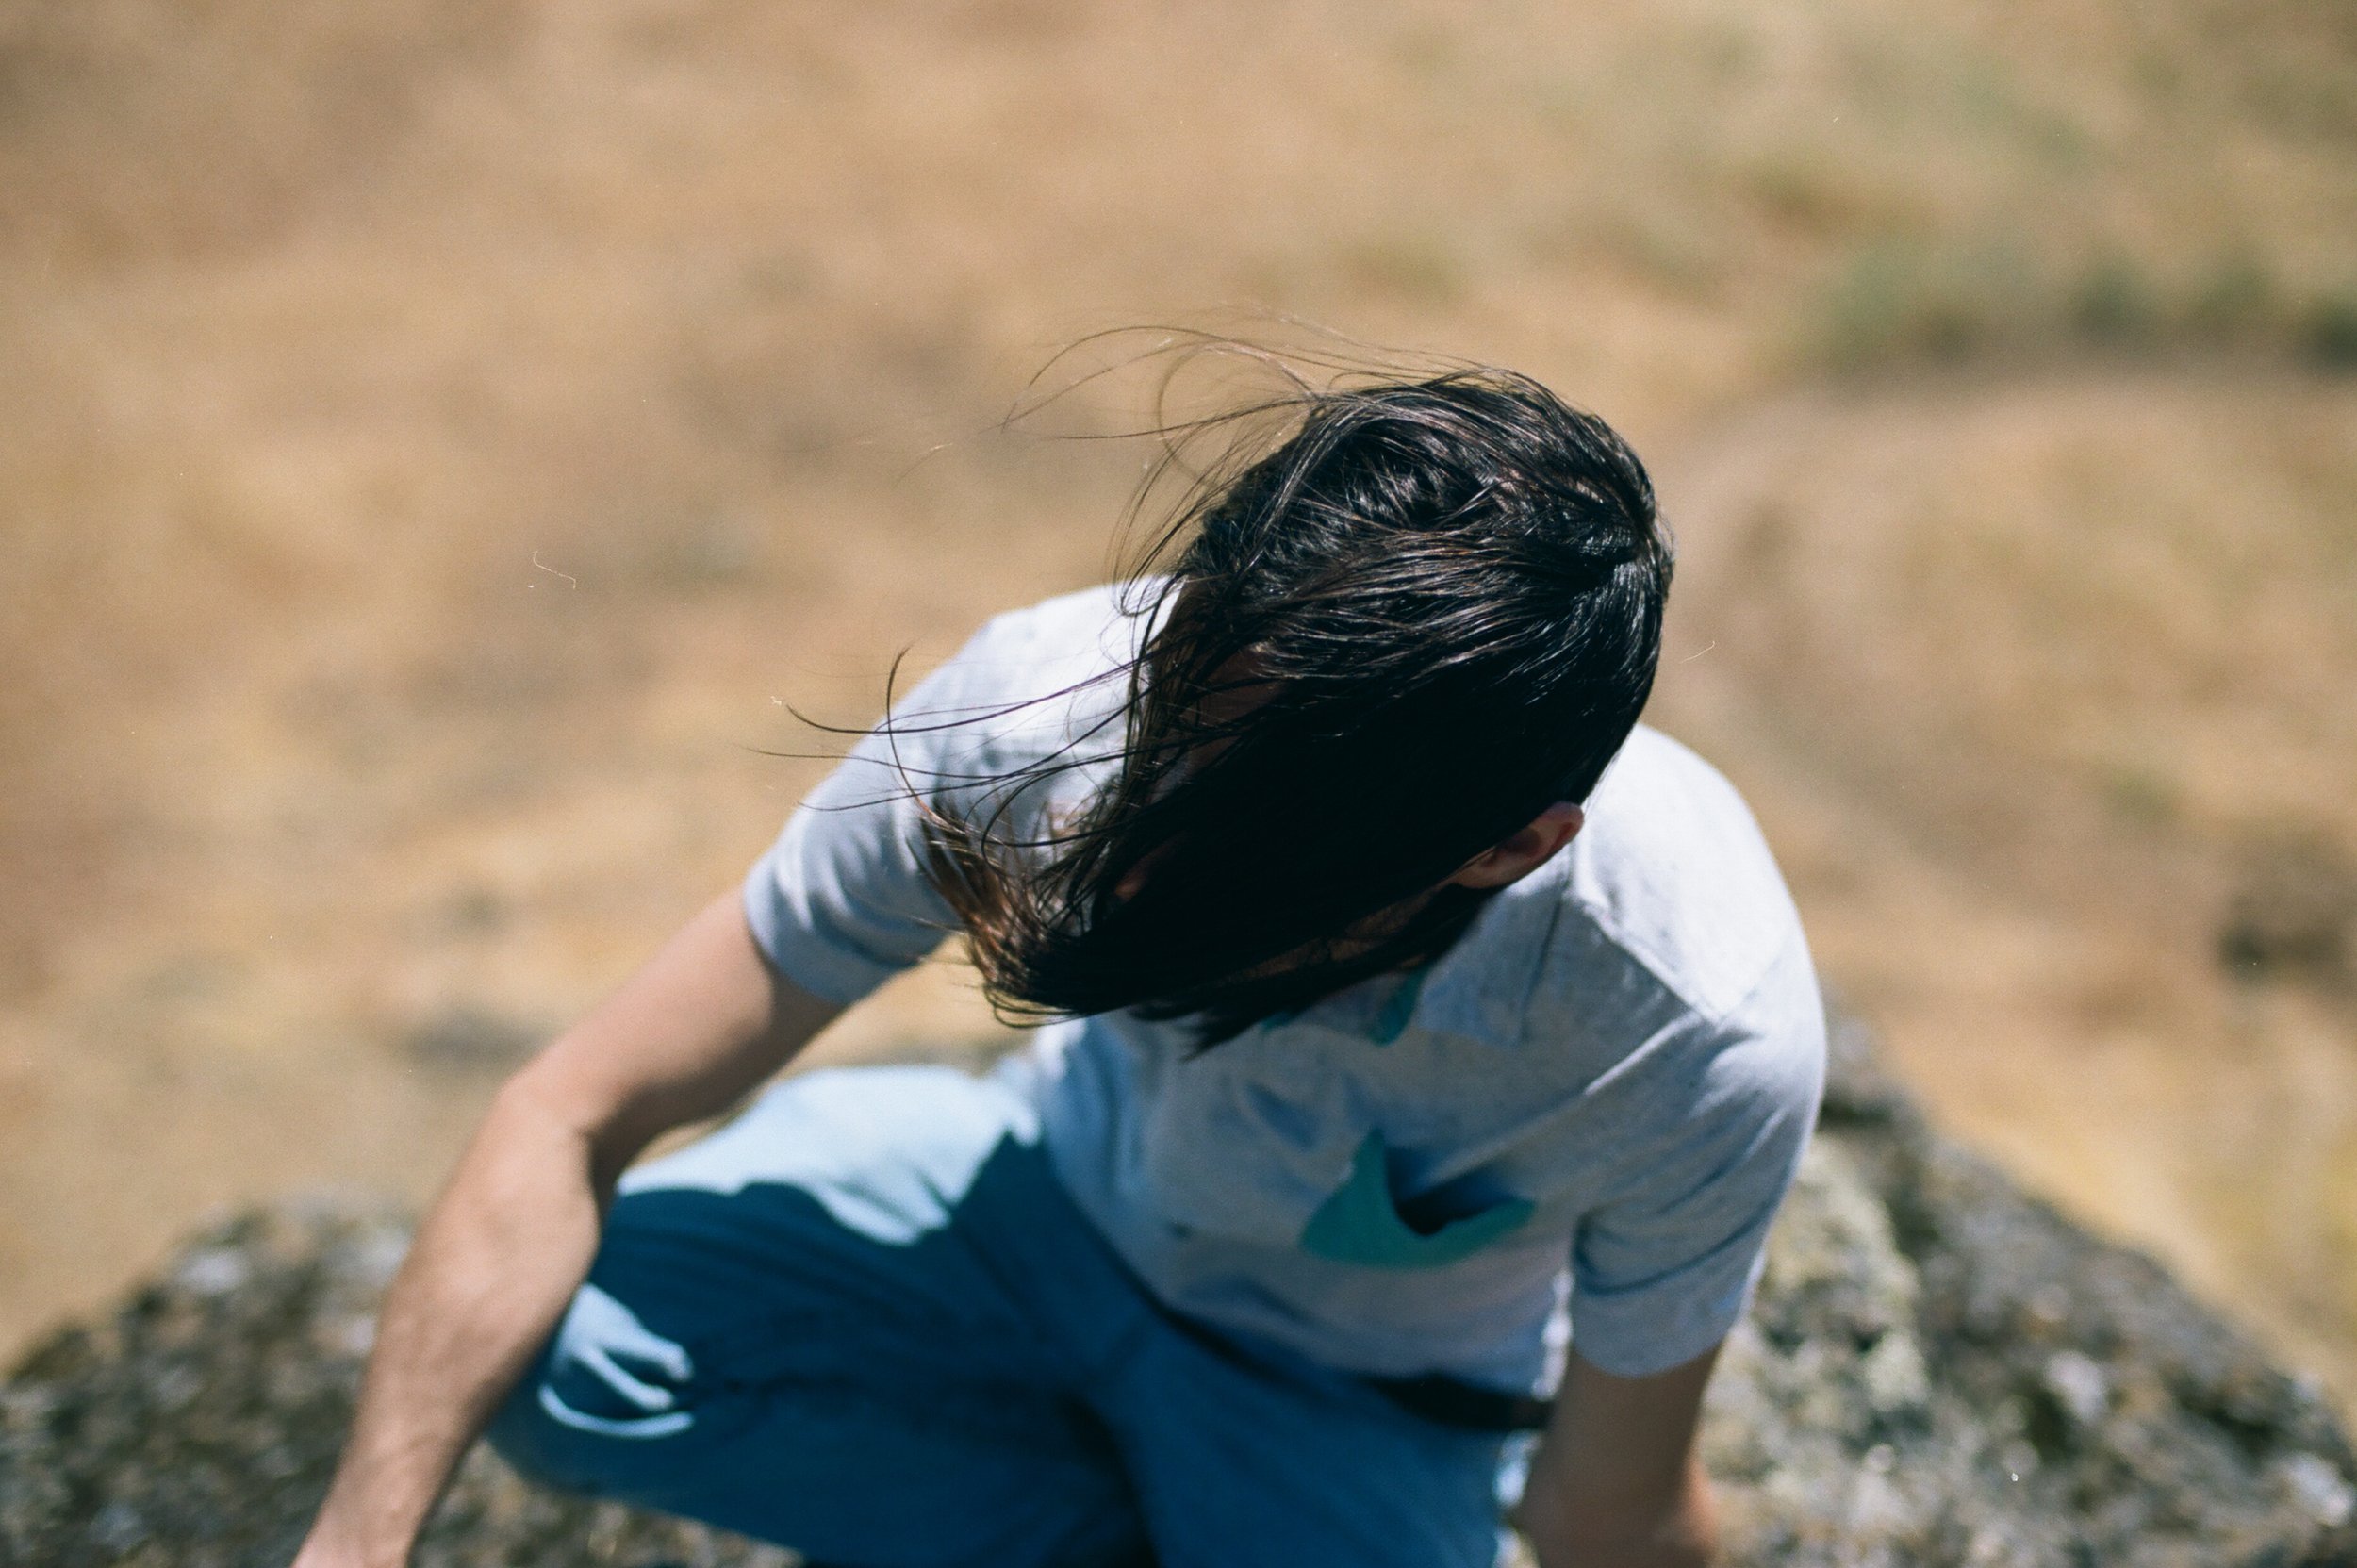
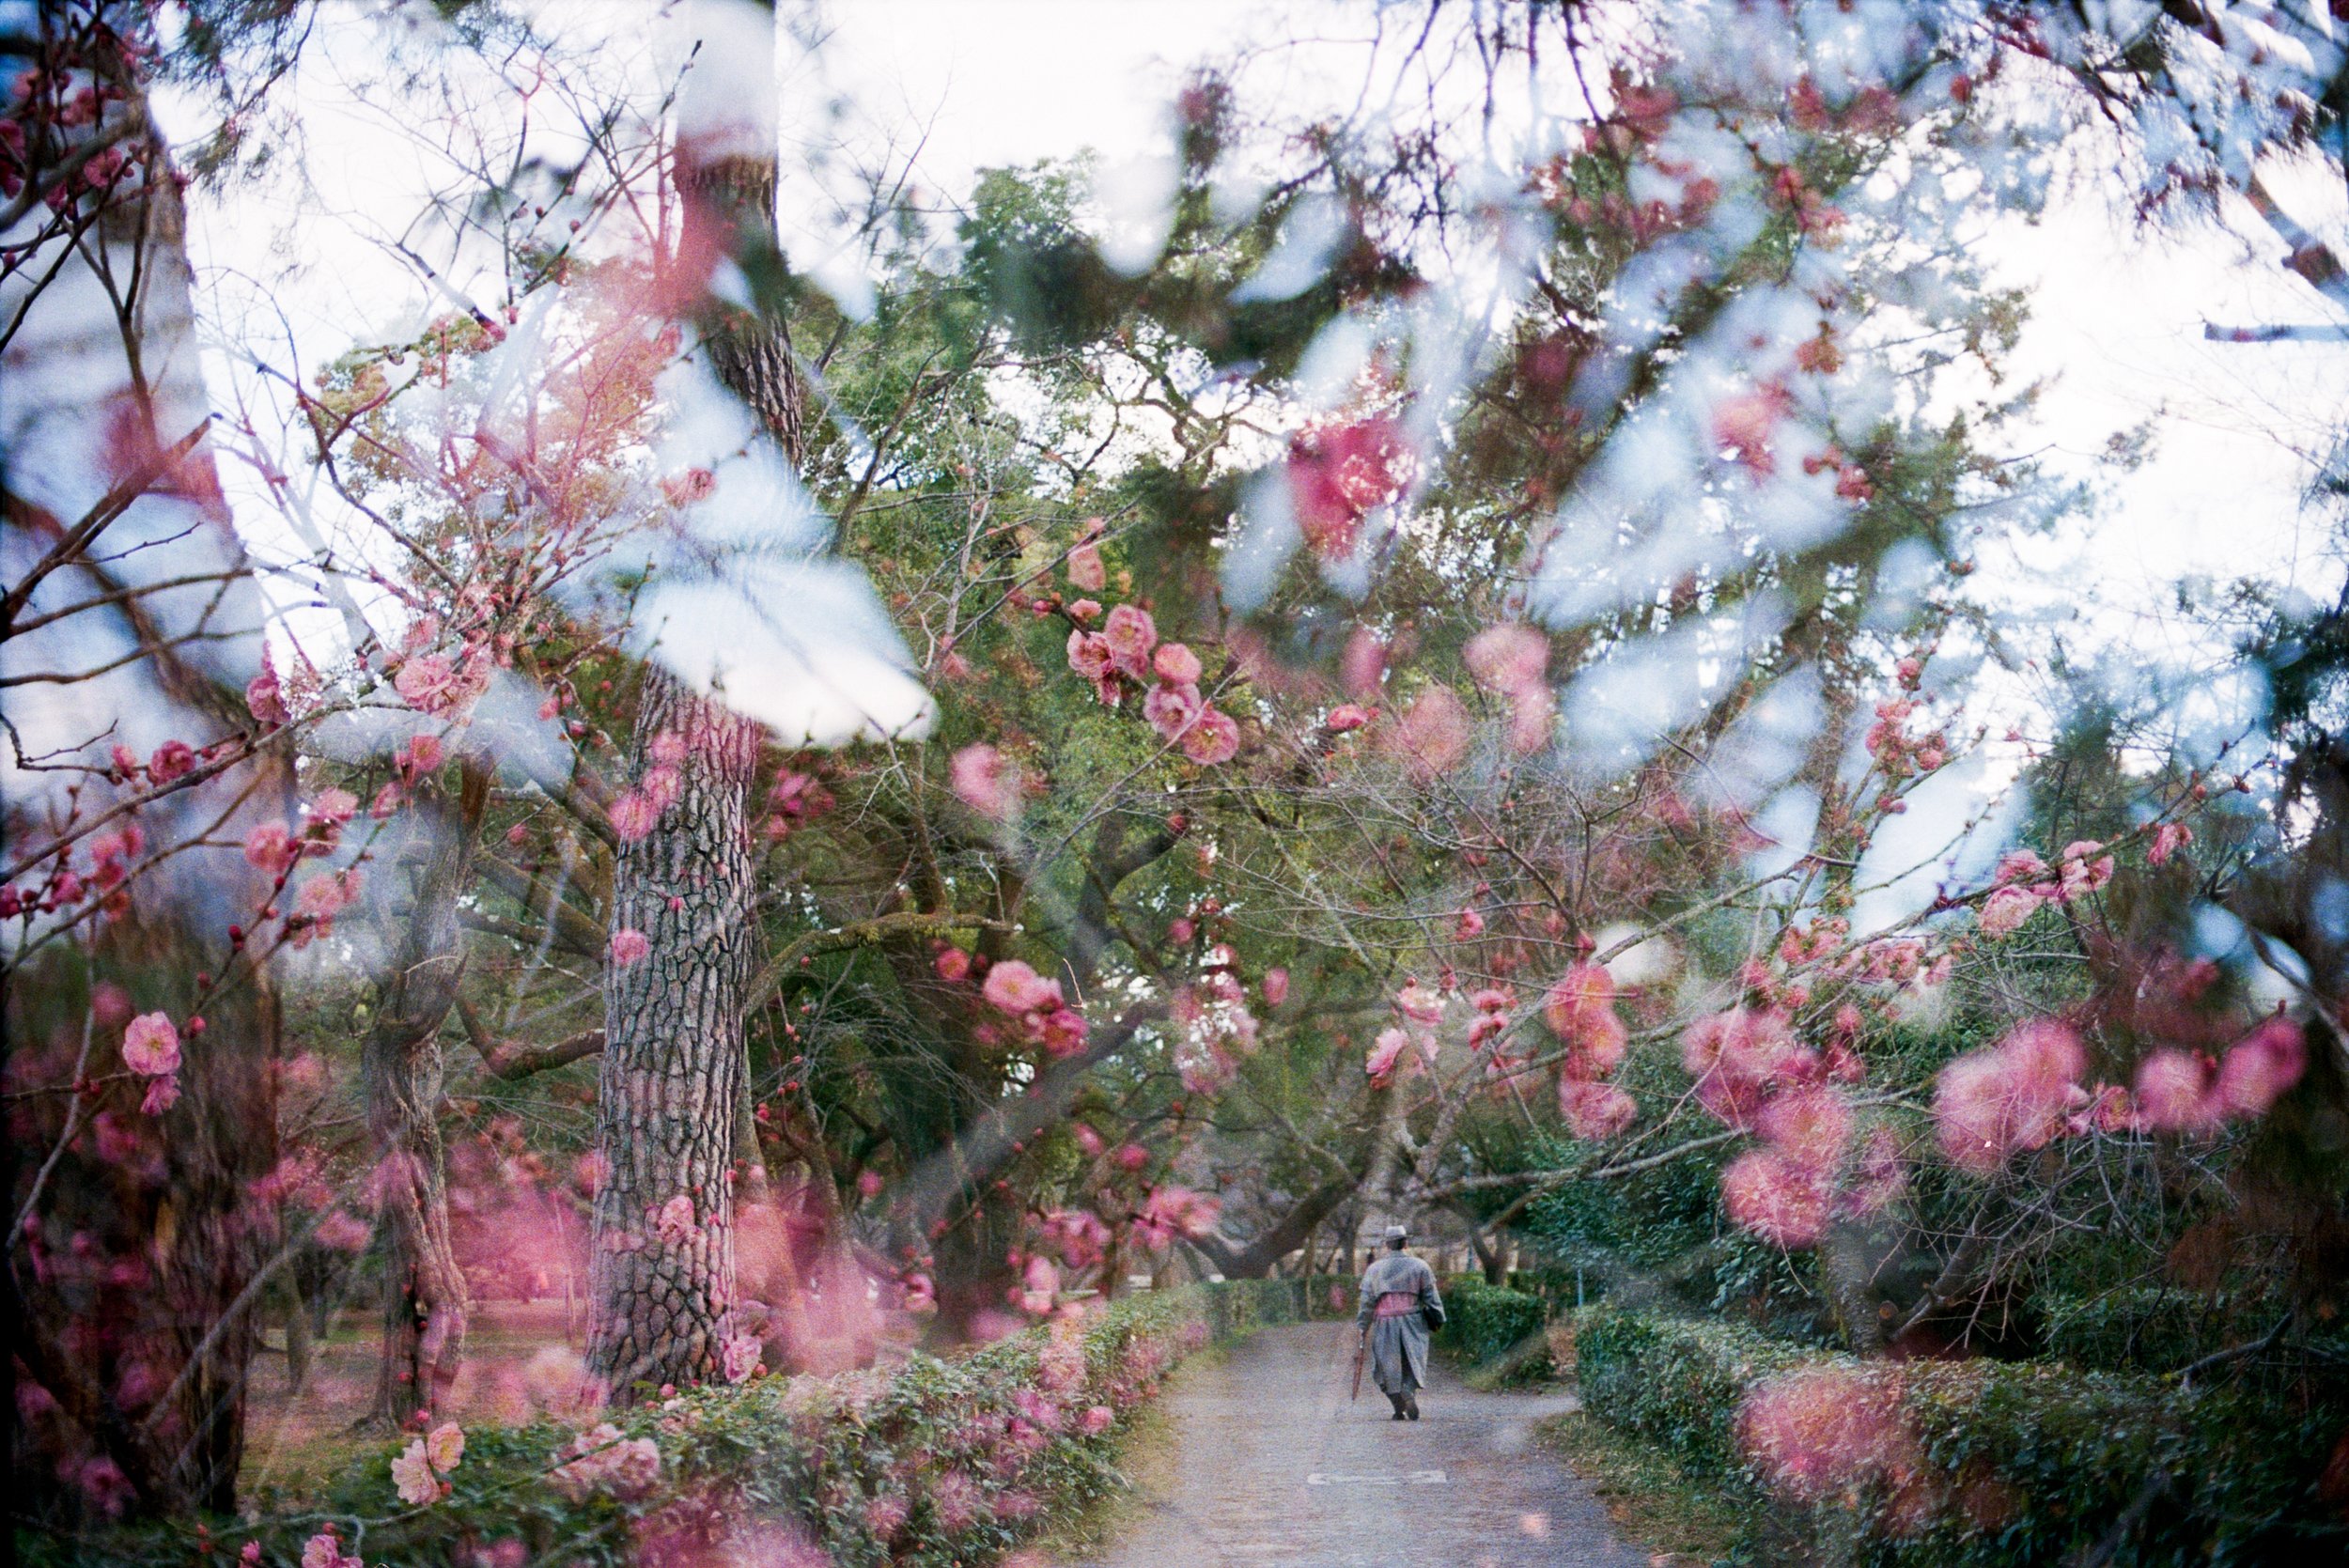
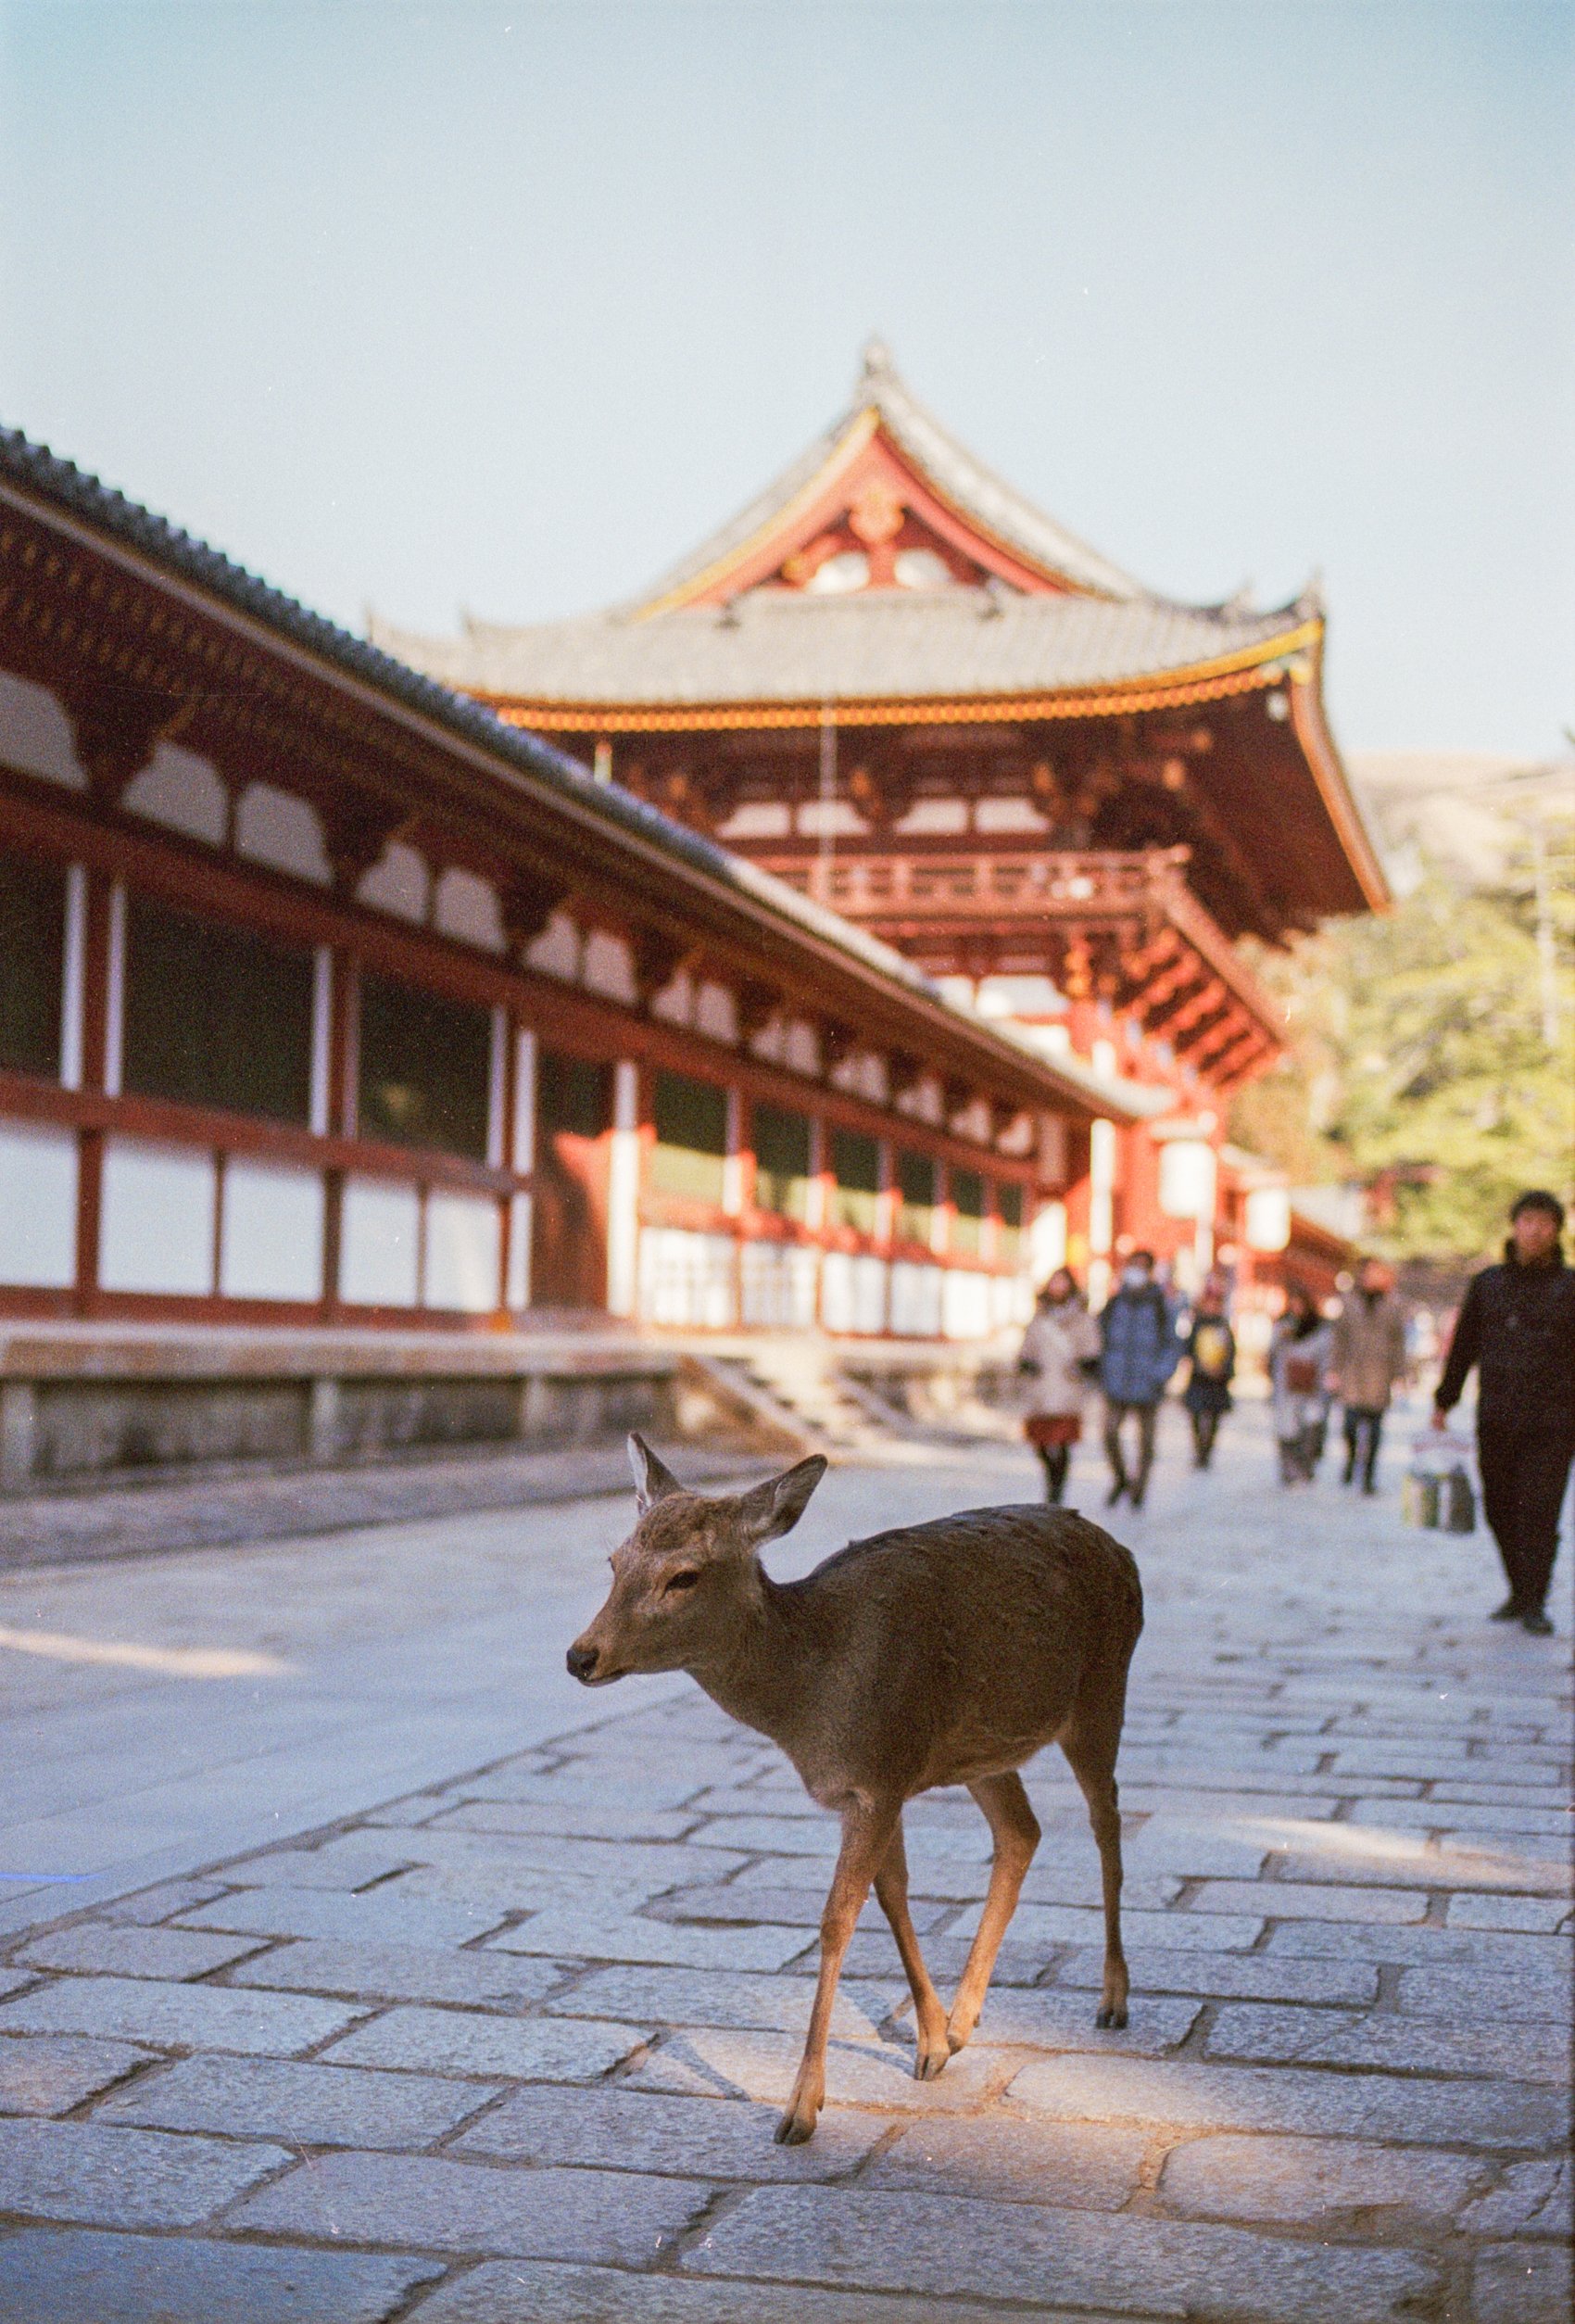
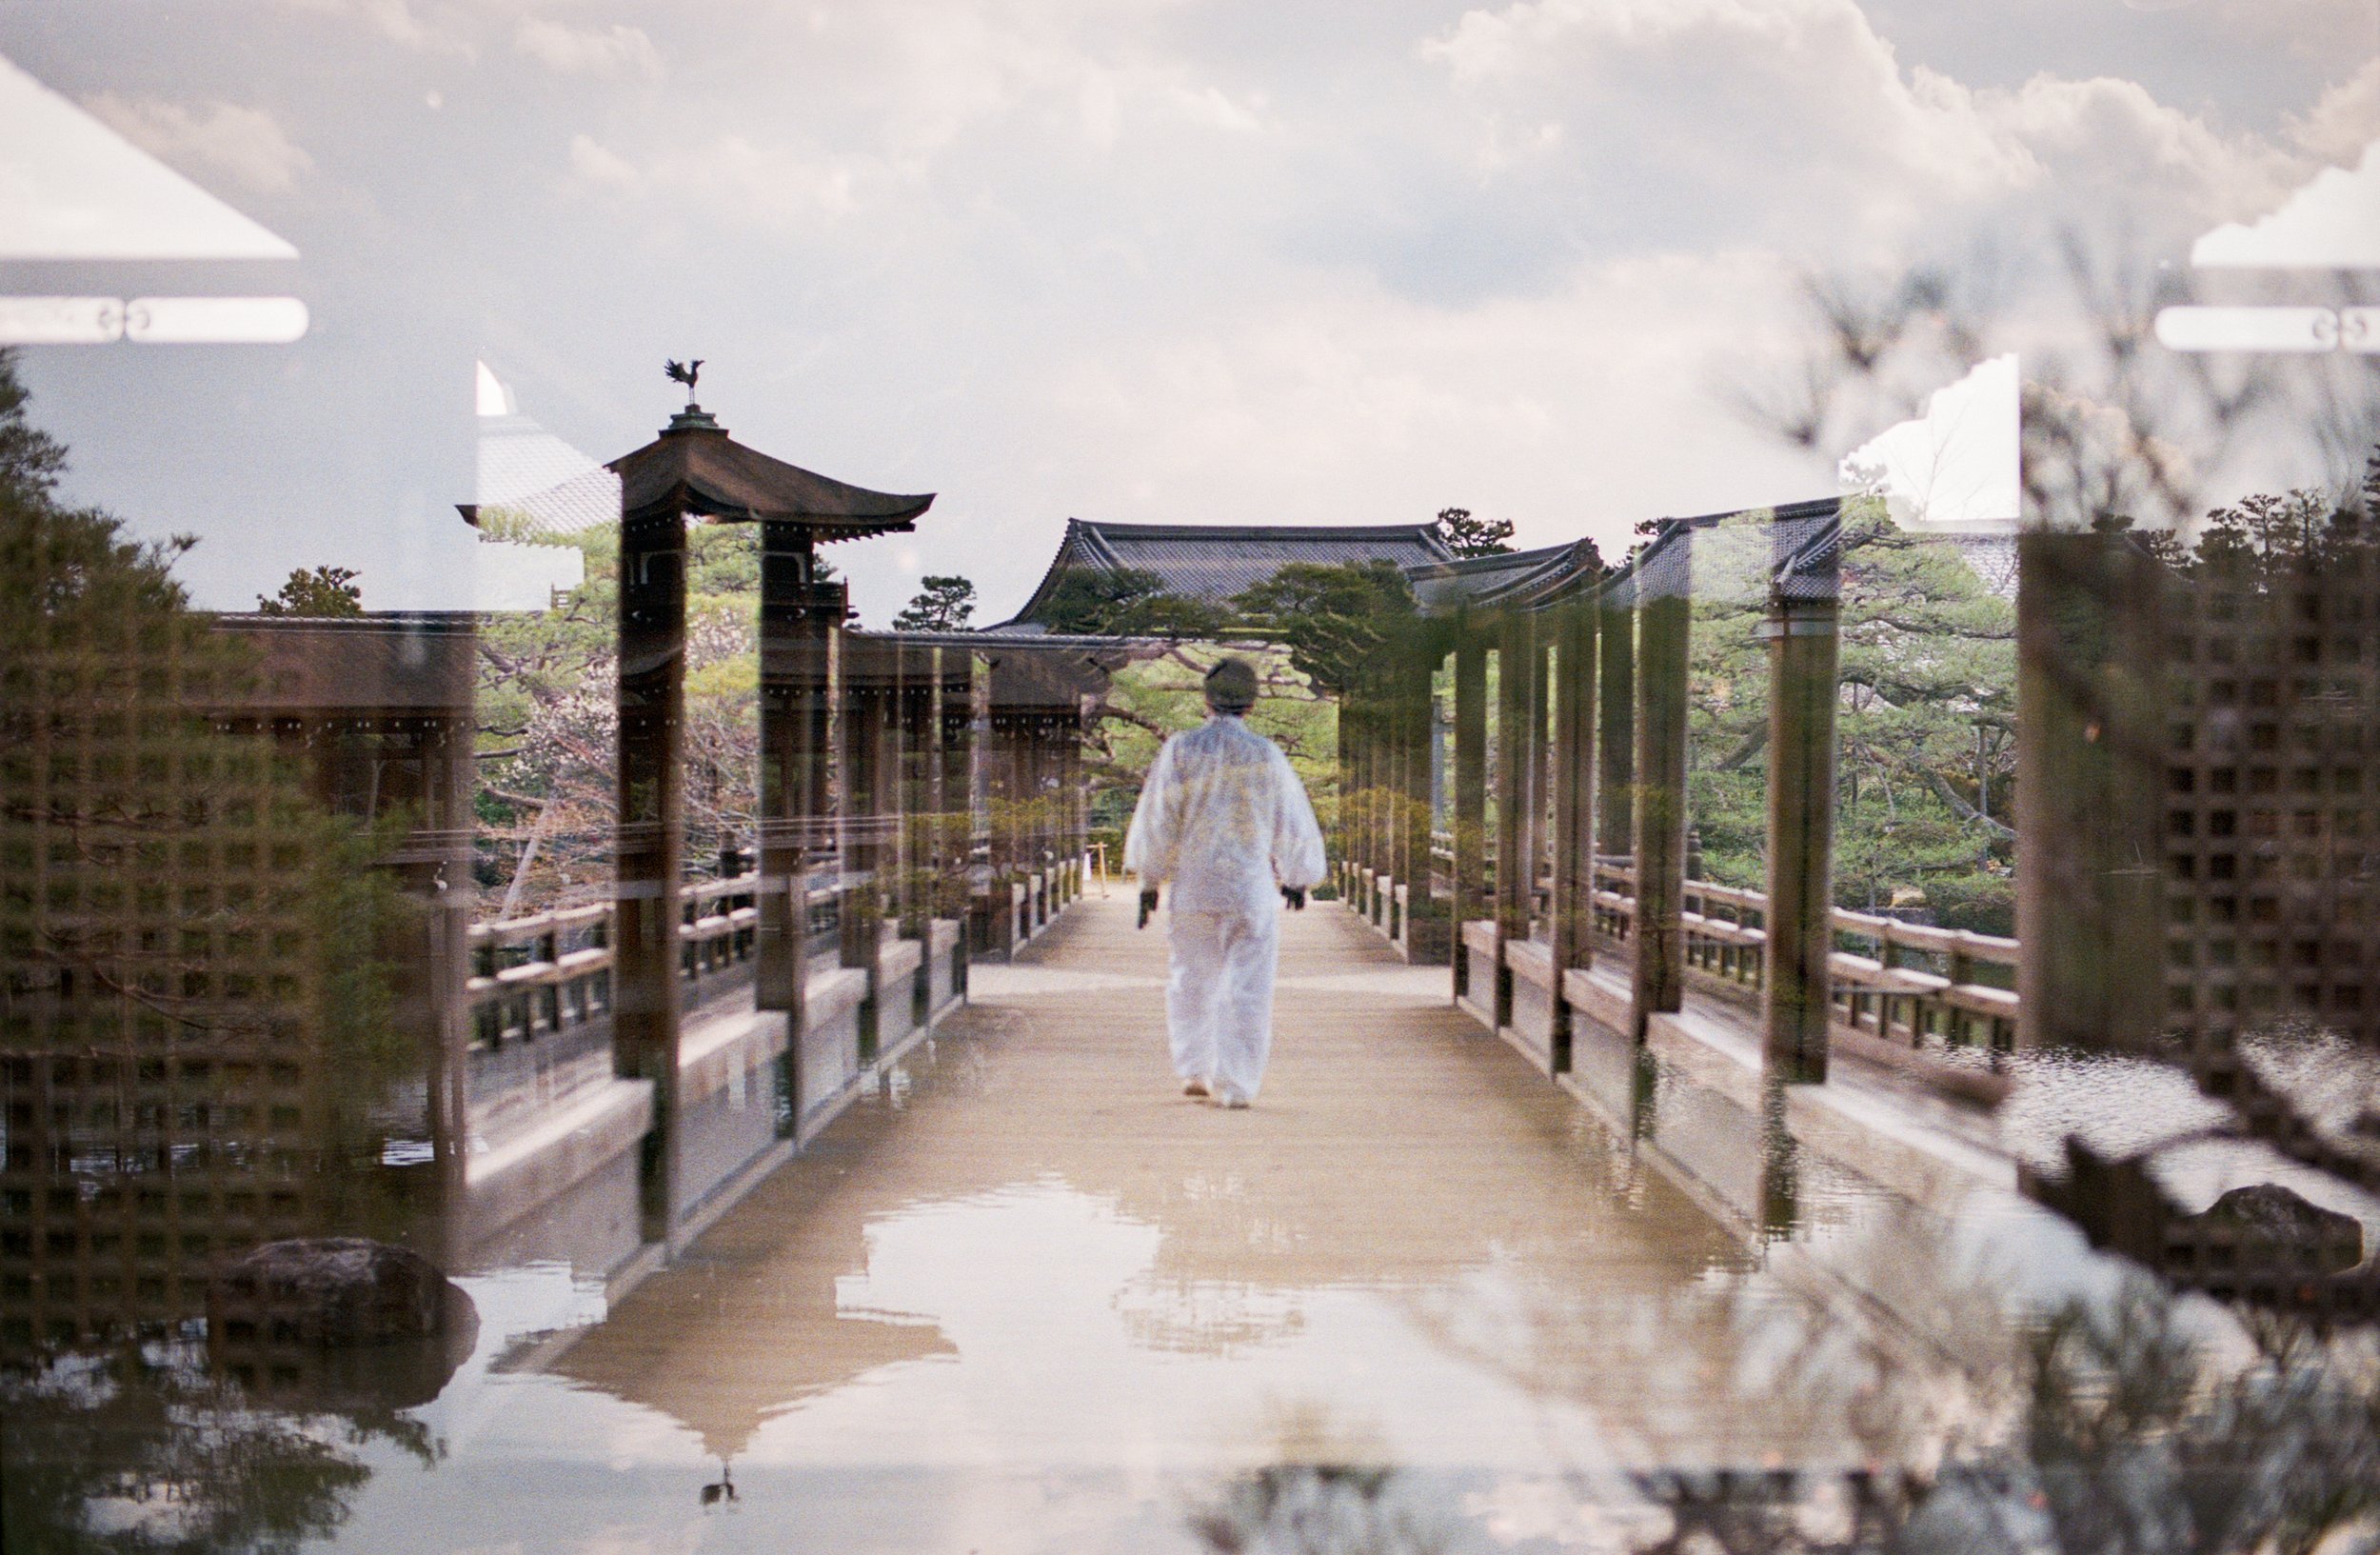
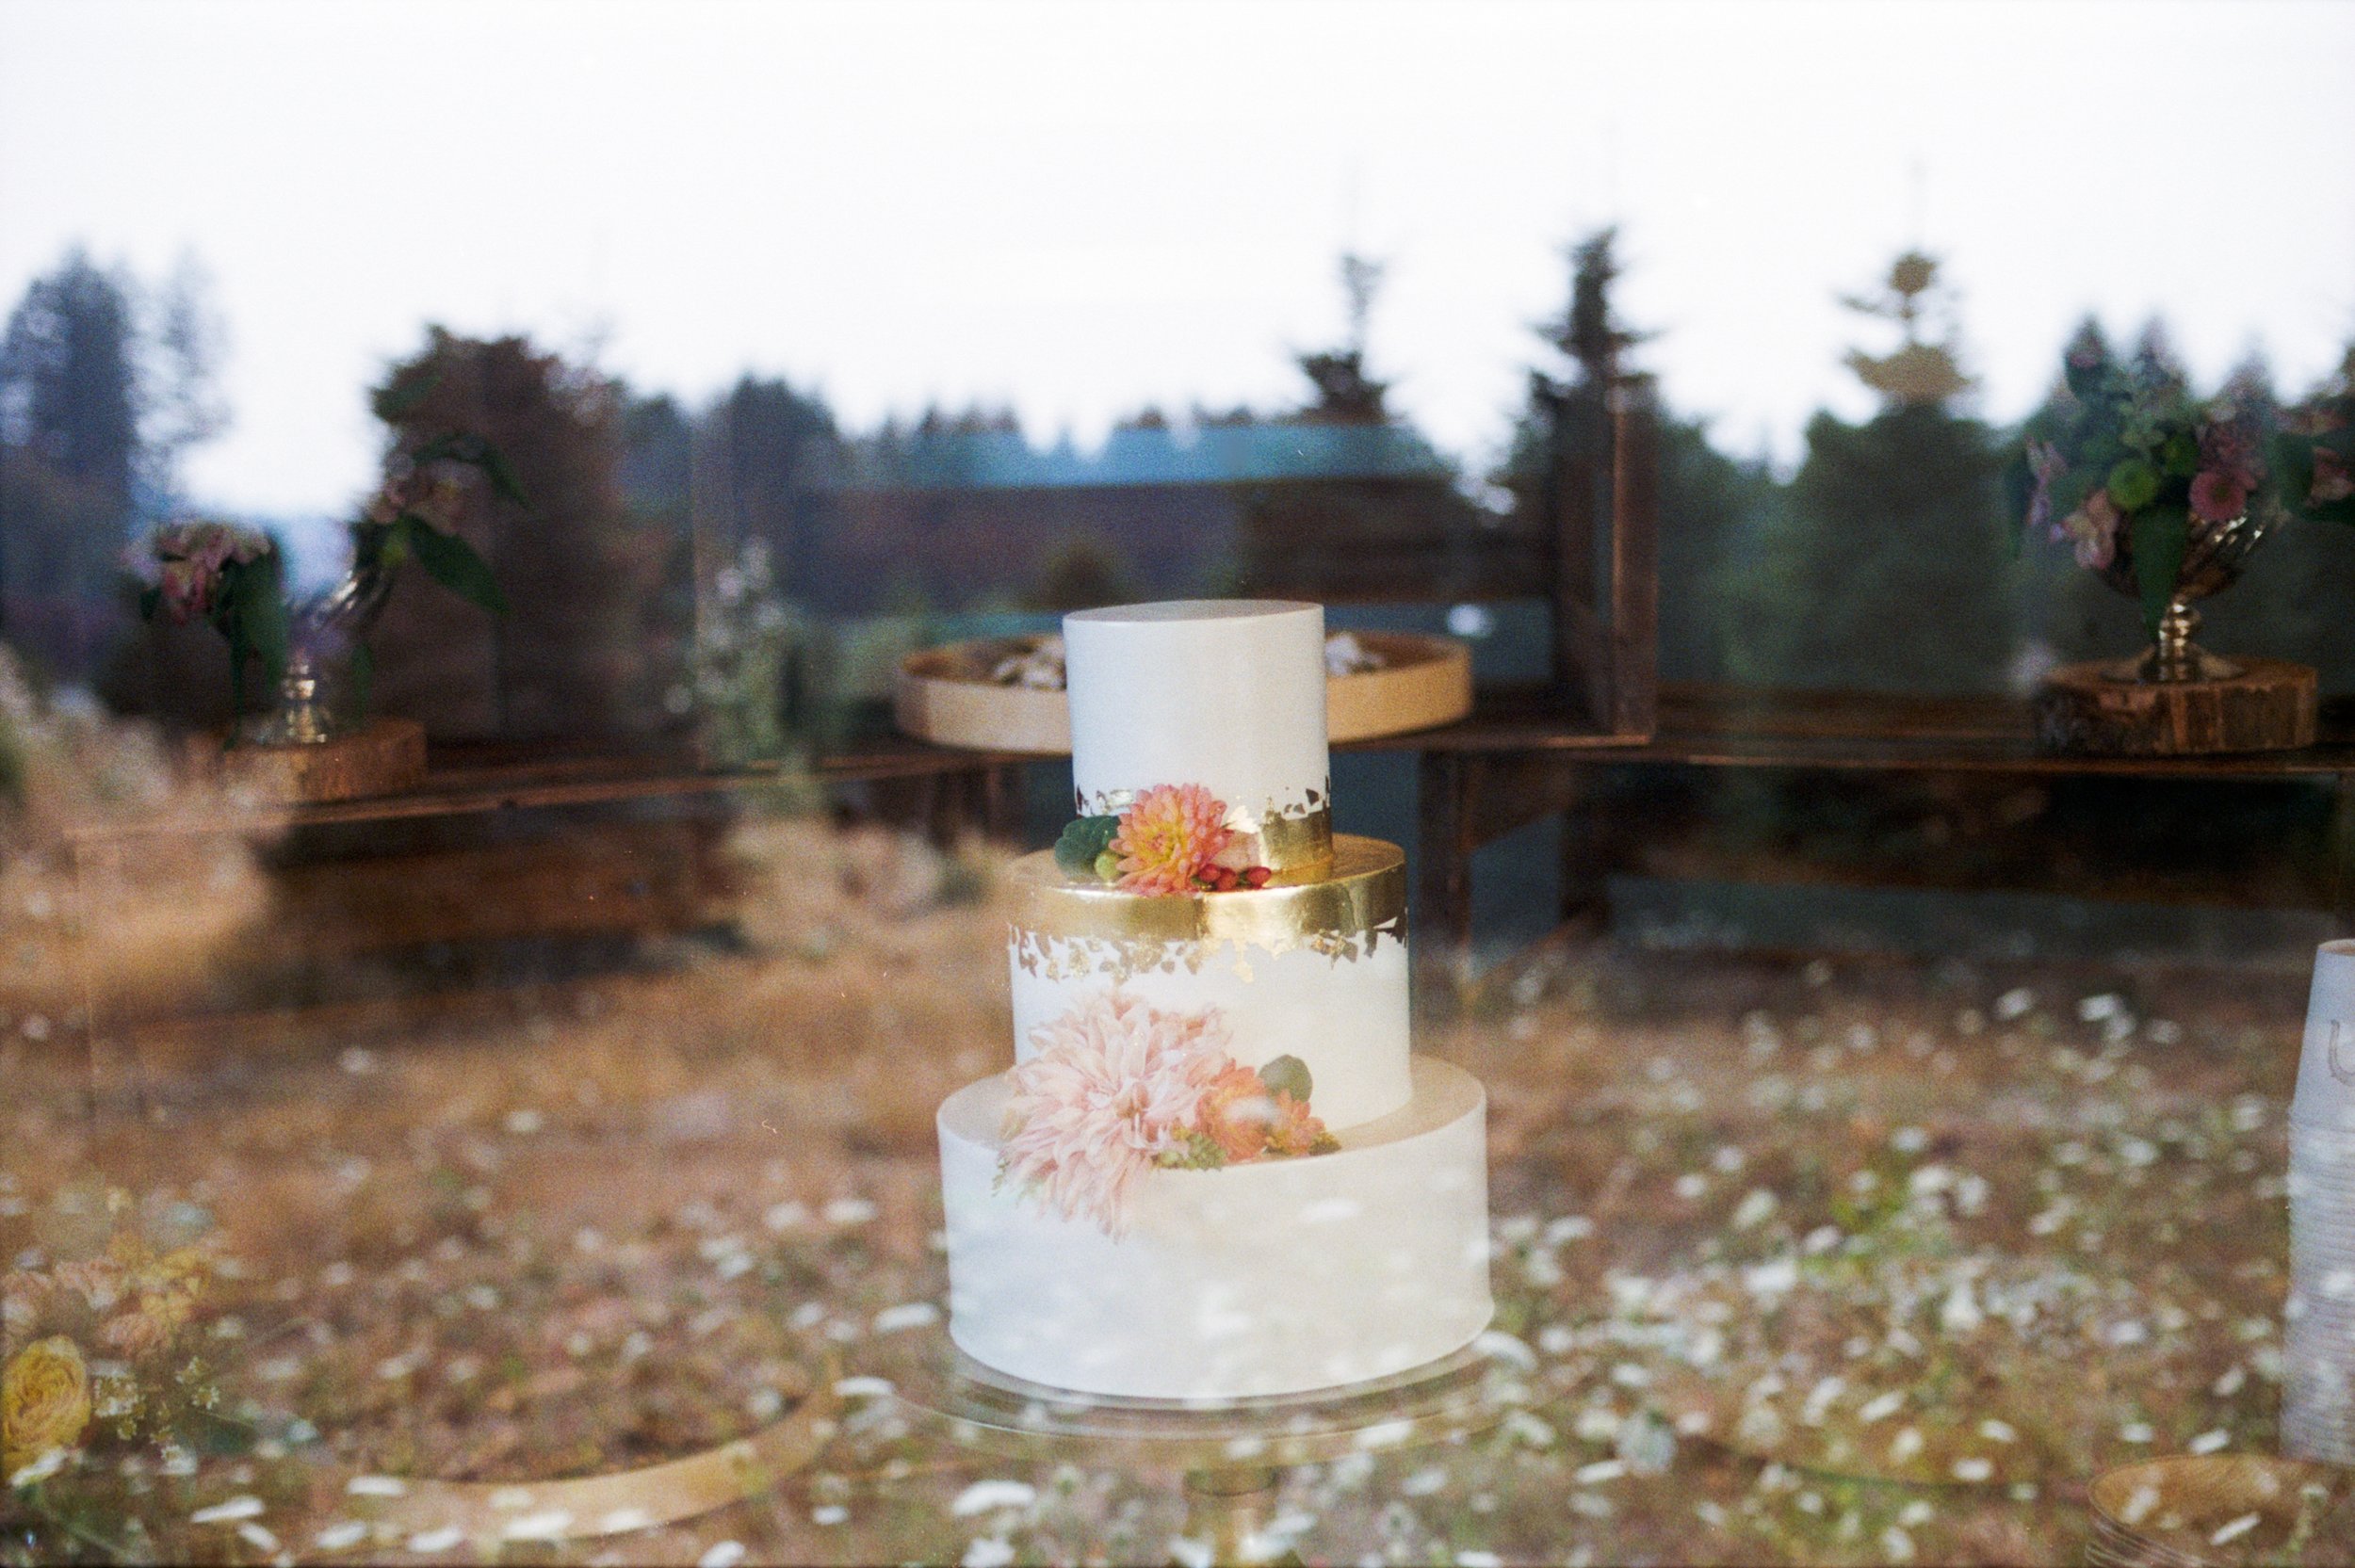
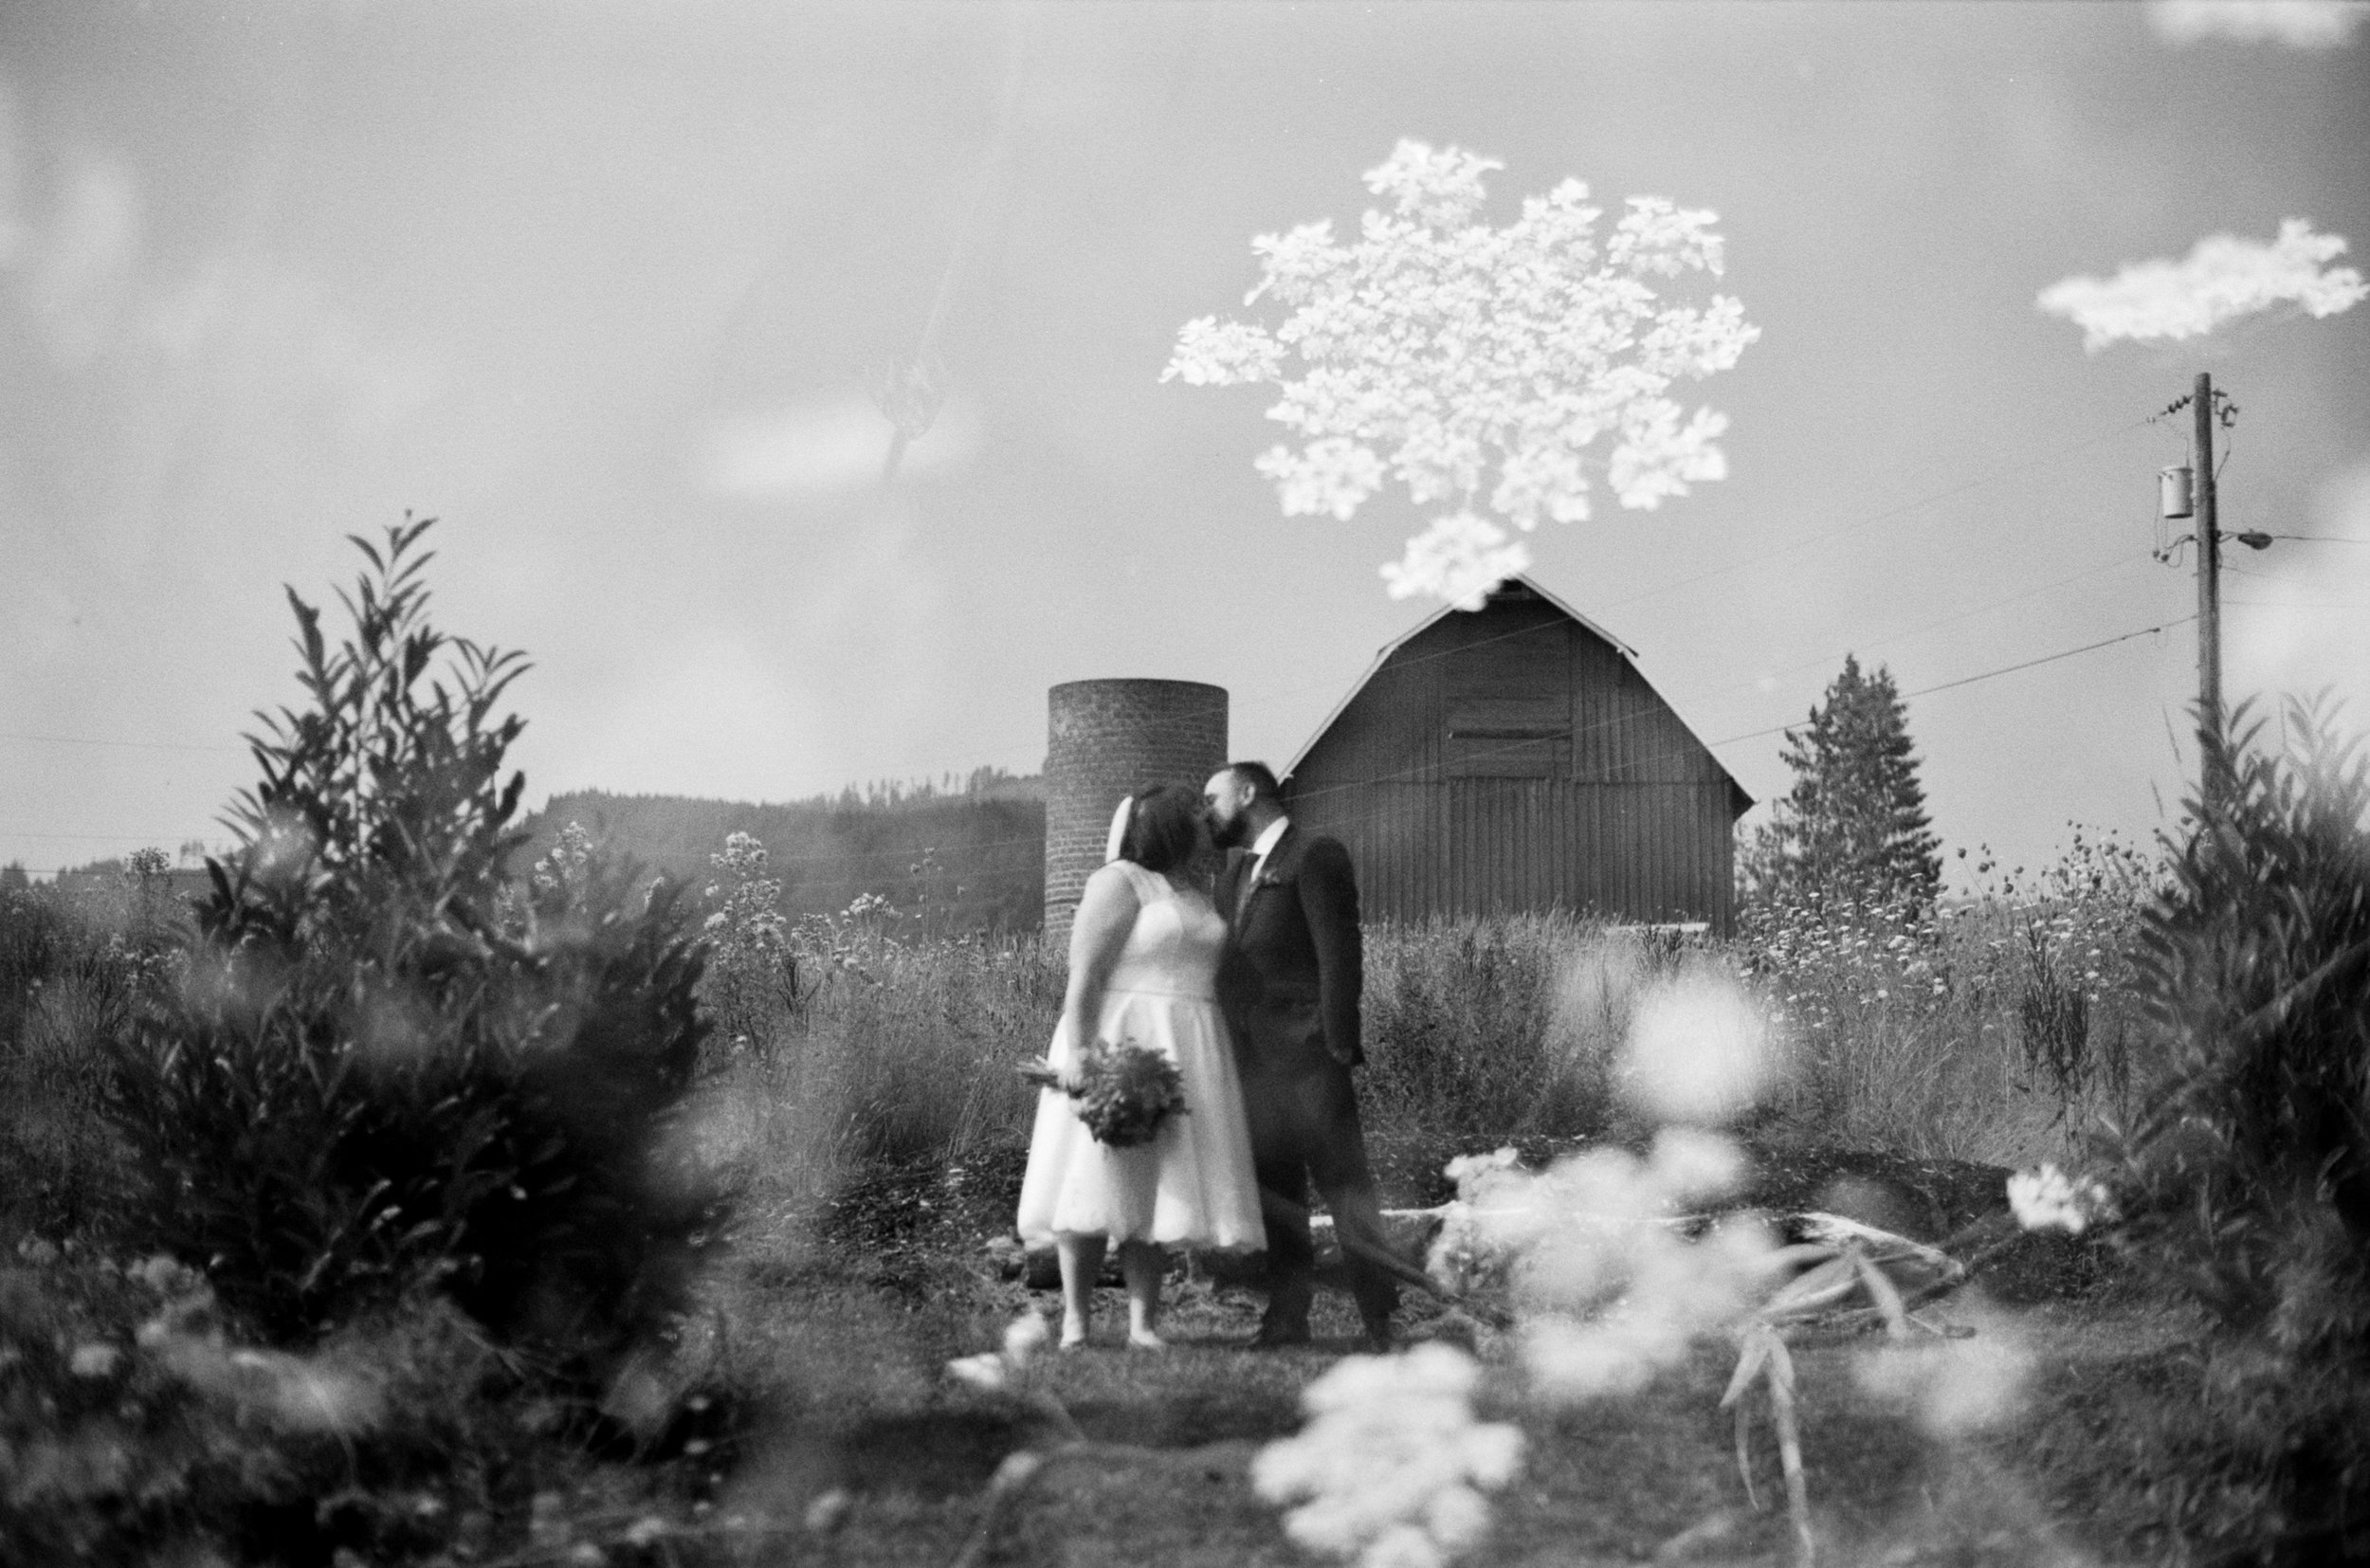
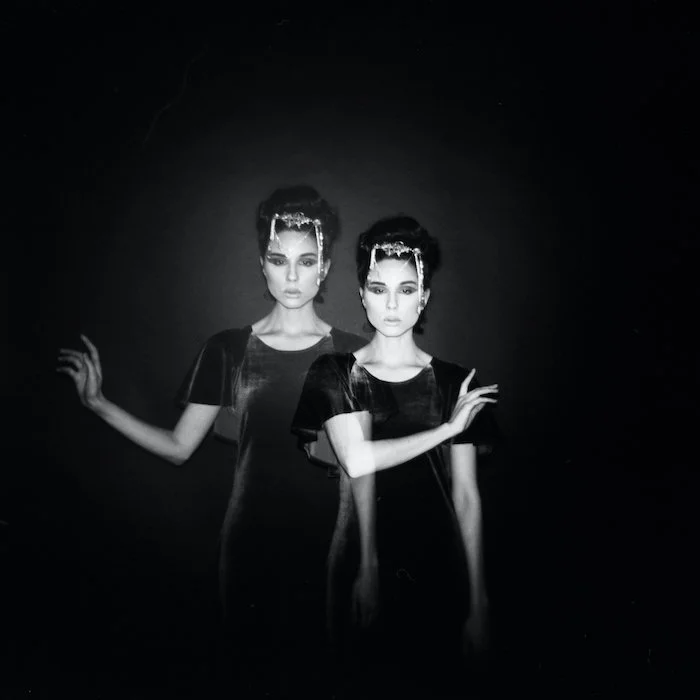
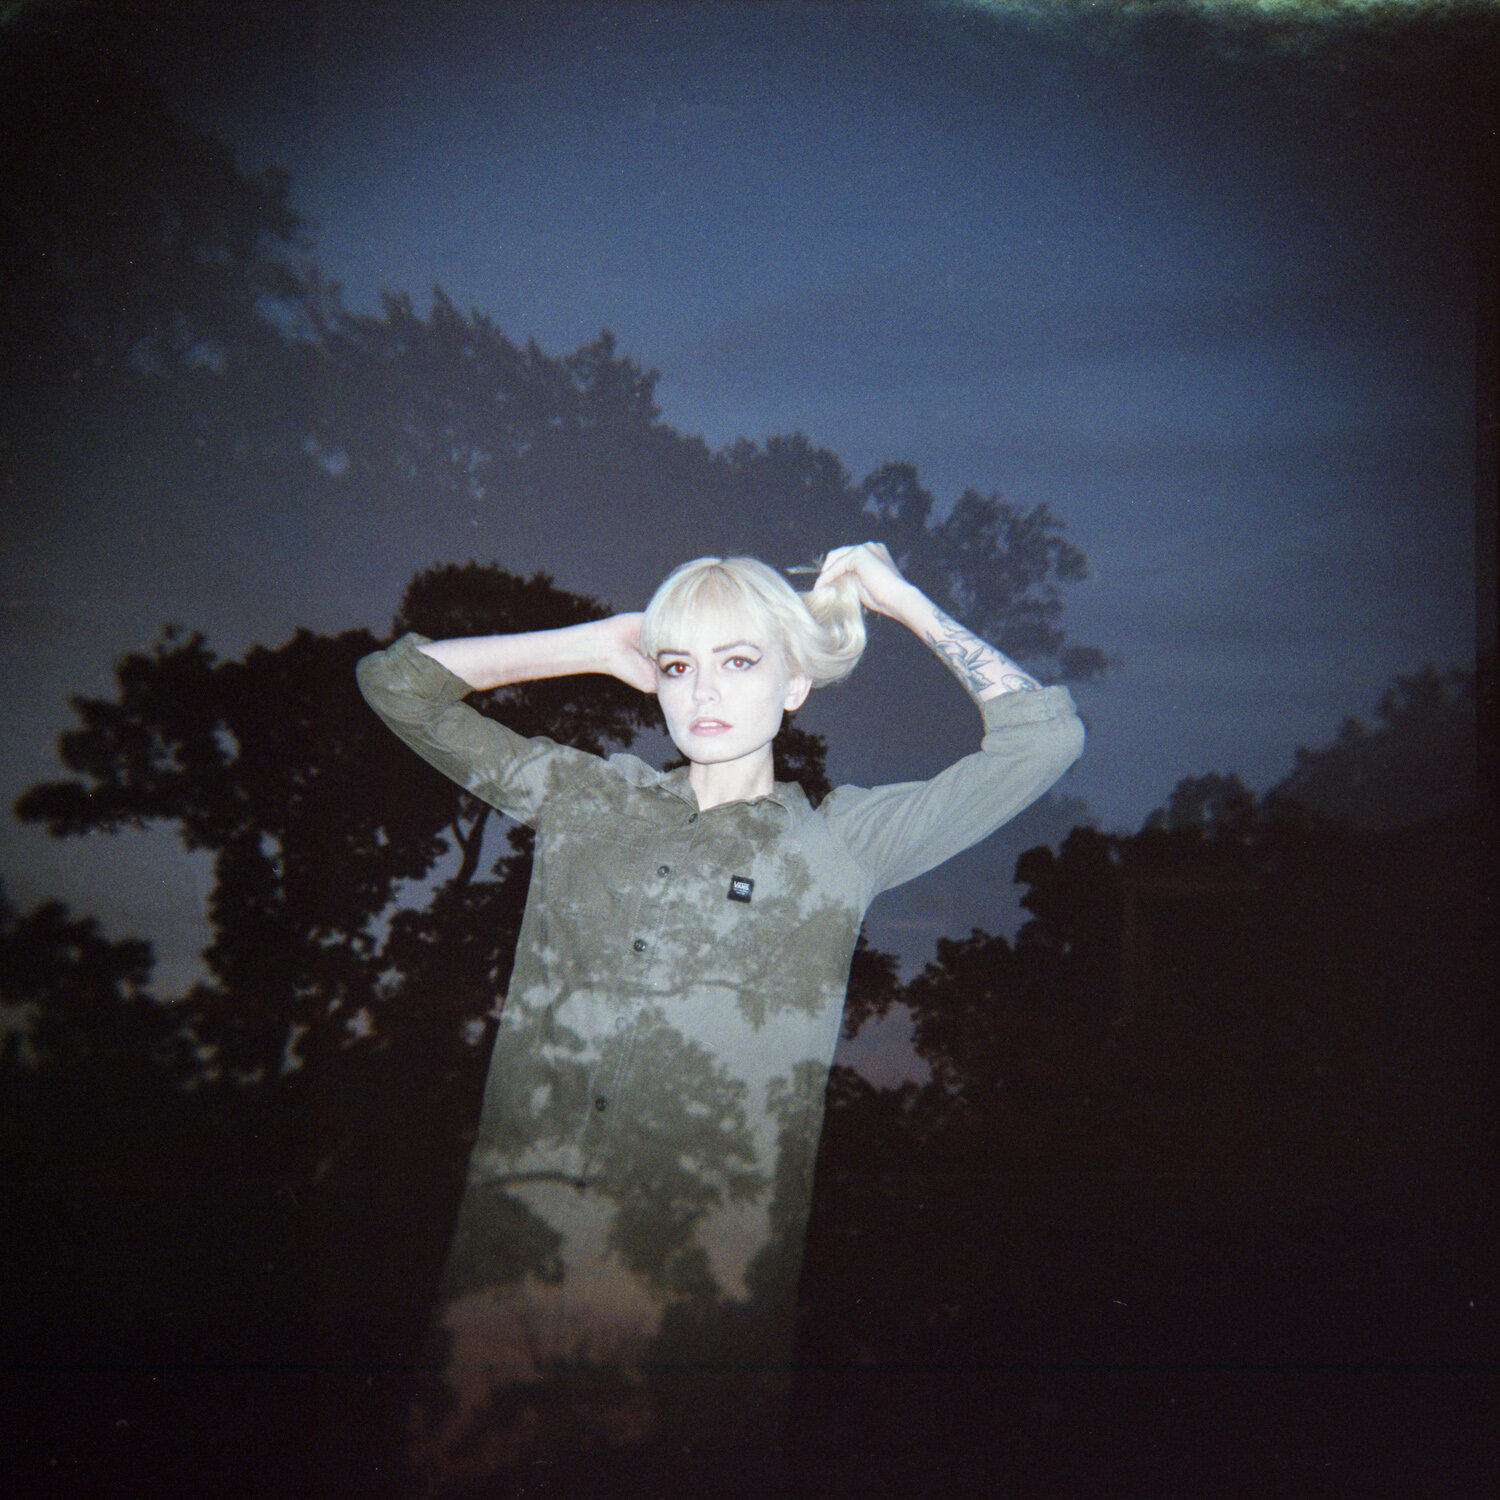
In my experience, you can’t really go wrong with any Kodak film. It’s affordable, saturated and reliable. If you’re like me though, you probably want to have at least some idea of what you’re getting yourself into before purchasing film for your camera. So I wanted to share a few of my favorite photos that I took in Japan using Kodak GC/UltraMax 400 Color Negative 35 mm Film. Of course, depending on the camera you use, your images will be slightly different in terms of exposure and sharpness. I was pleasantly surprised by the bright color tones of this film and the full, deep saturation. Before using this film, I hadn’t really heard much about it. It’s not one of those films that people talk about like Kodak Portra or Kodak Gold. But I found the tones to be true and accurate, with beautiful handling in the shadows and in bright environments. I found the skin tones to be lovely as well - not overly orange or off-color. As a 400 ISO film, it is a little bit grainy, but personally, I don’t mind - it gives it that true “film” look. Plus, we had quite a few cloudy days while we were in Japan and the 400 ISO allowed me to get sharp, bright images in lower light environments. I actually find this film to have a cinematic vibe to it too that I wasn’t expecting! I used a Nikon FE2 for all of these photos, which is an amazing camera. You can read more about it here. Or you can watch my YouTube video about the Nikon FE2 here! As you’ll see, I took quite a few multiple exposures with this film and I’m obsessed with how they turned out. There was great detail in the highlights and nothing ended up over-exposed, which is always great if you love creating multiple exposures like I do. :)

I’ve included a ton of sample photos below using Kodak GC/UltraMax 400 Color Negative Film so you can get an idea of how the film handles in various lighting situations and distances. If you have any questions or comments, please share!

Purchase Kodak GC/UltraMax 400 Color Negative Film on Amazon!

Have a magical day!

<3 Myles Katherine

(By using the links and/or codes in this post it supports Myles Katherine Photography. We may get a small kick back by you doing so.)

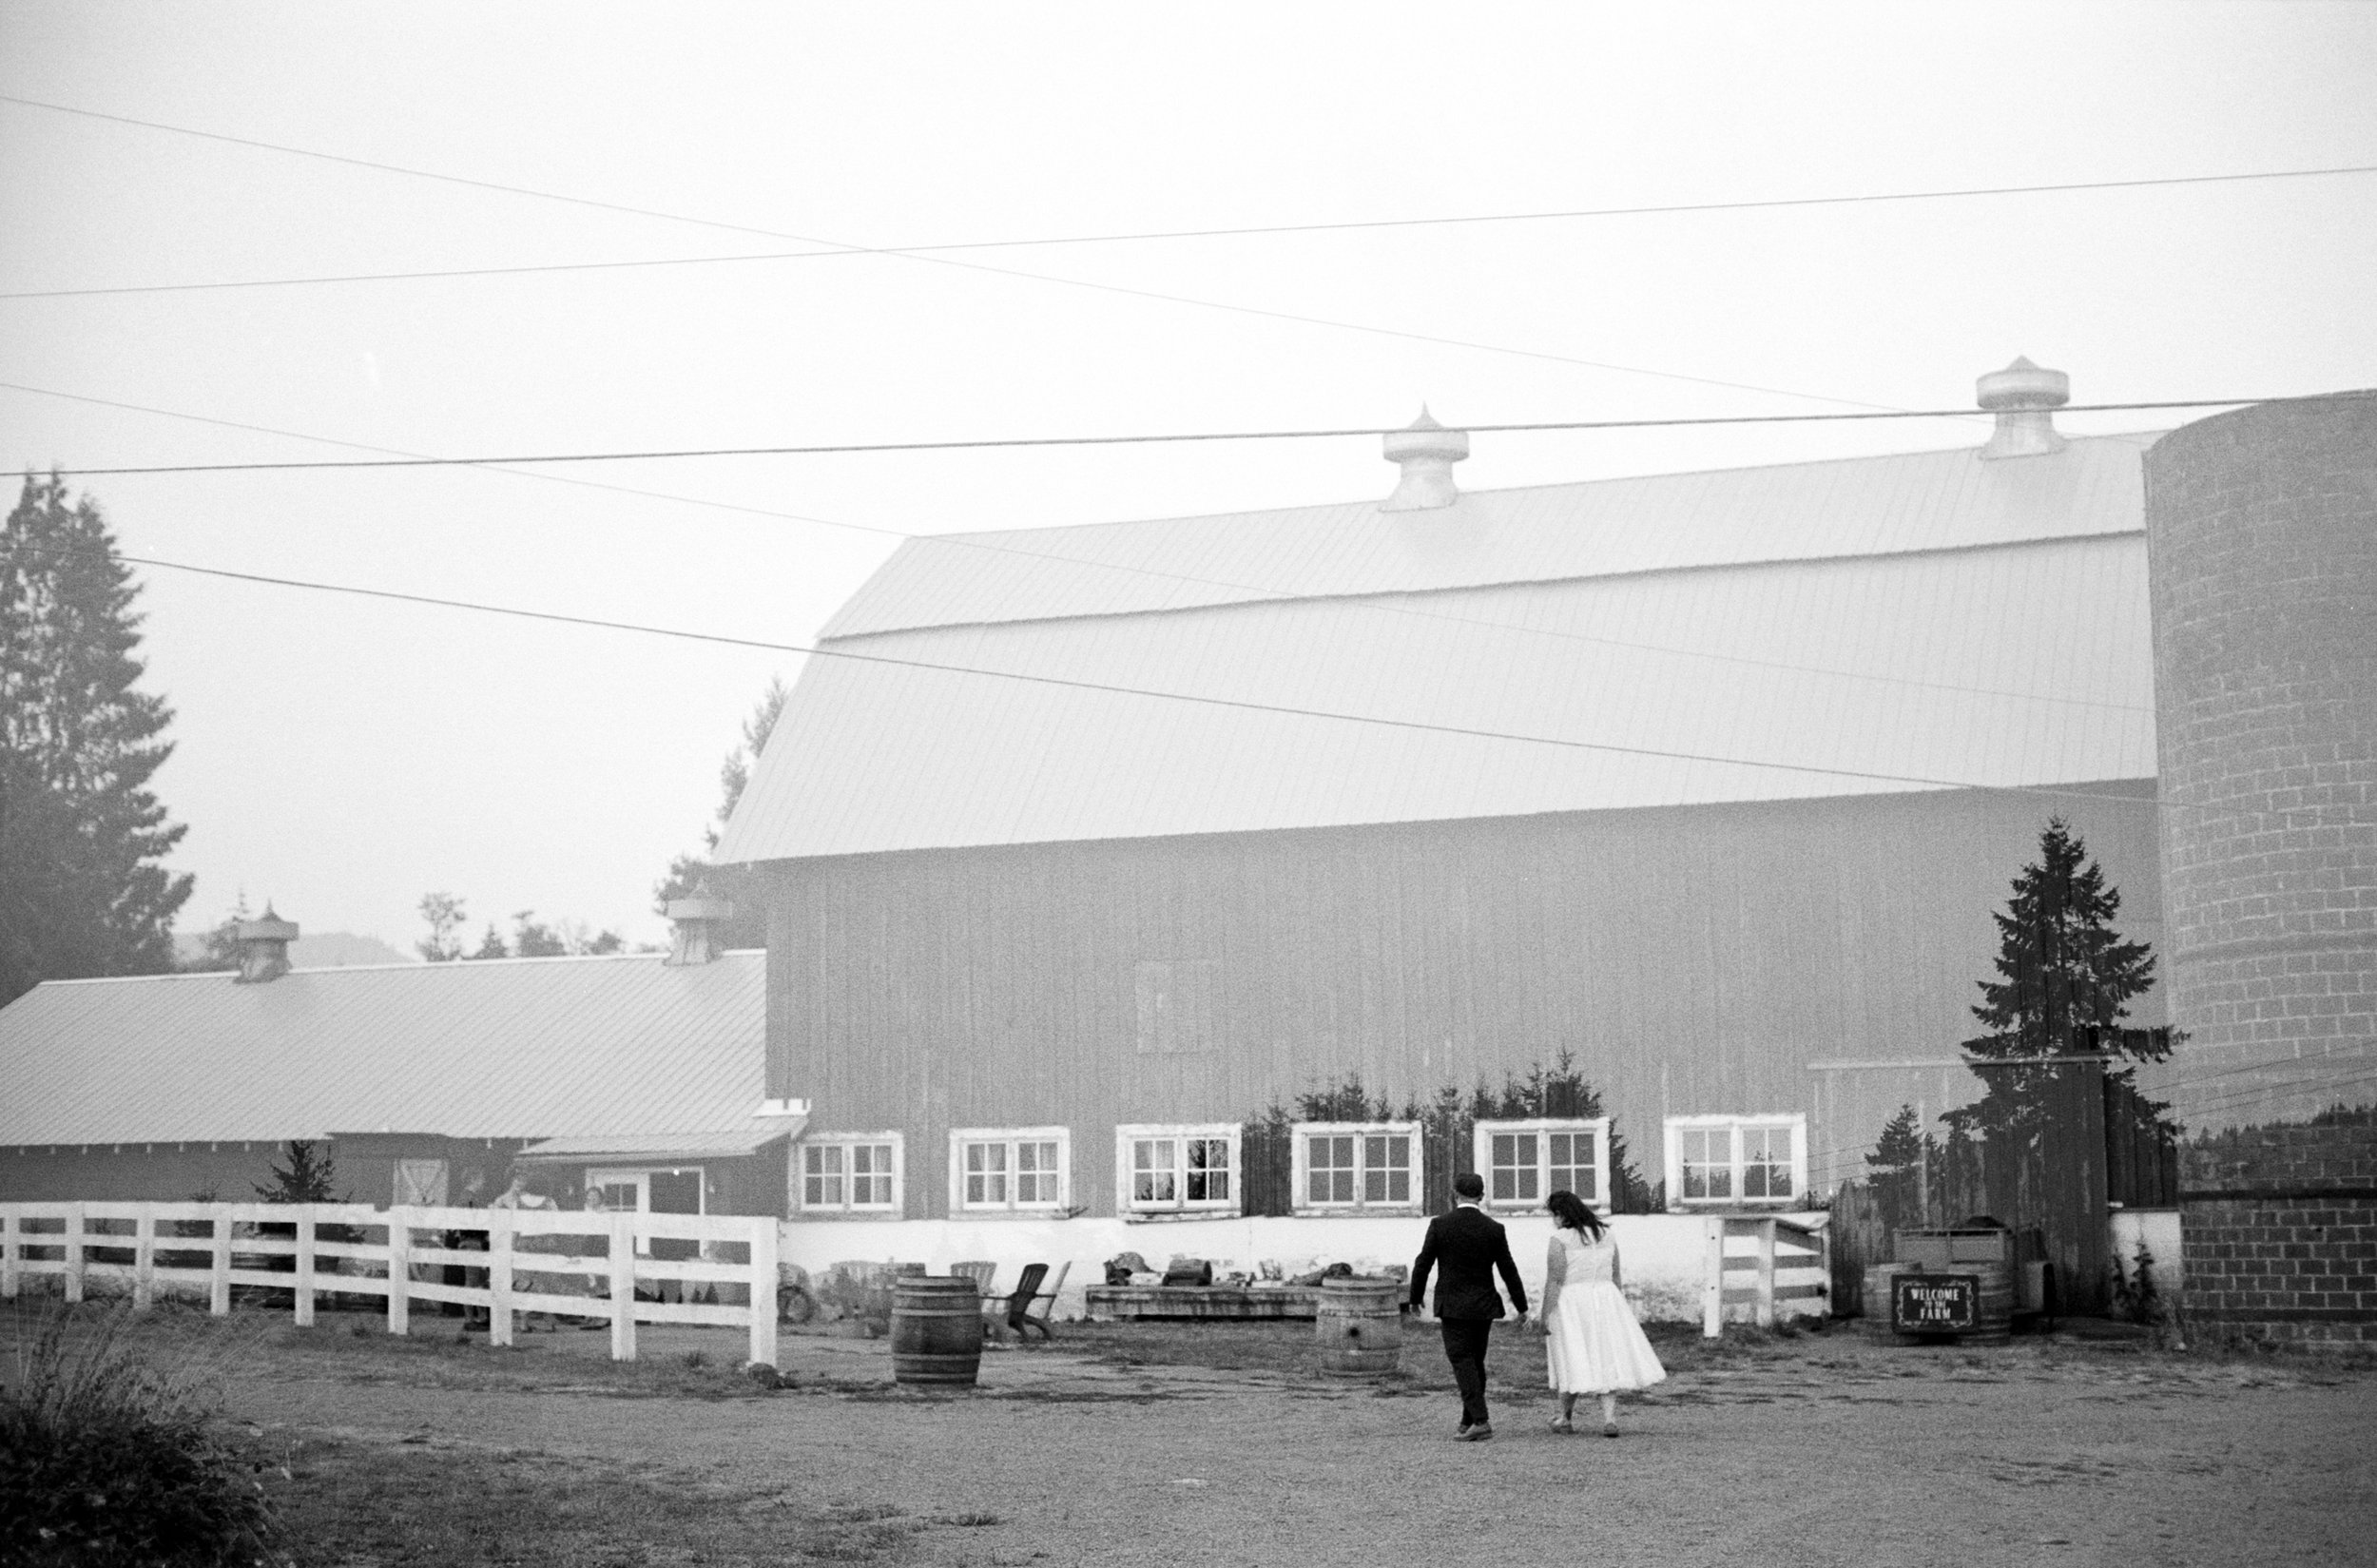
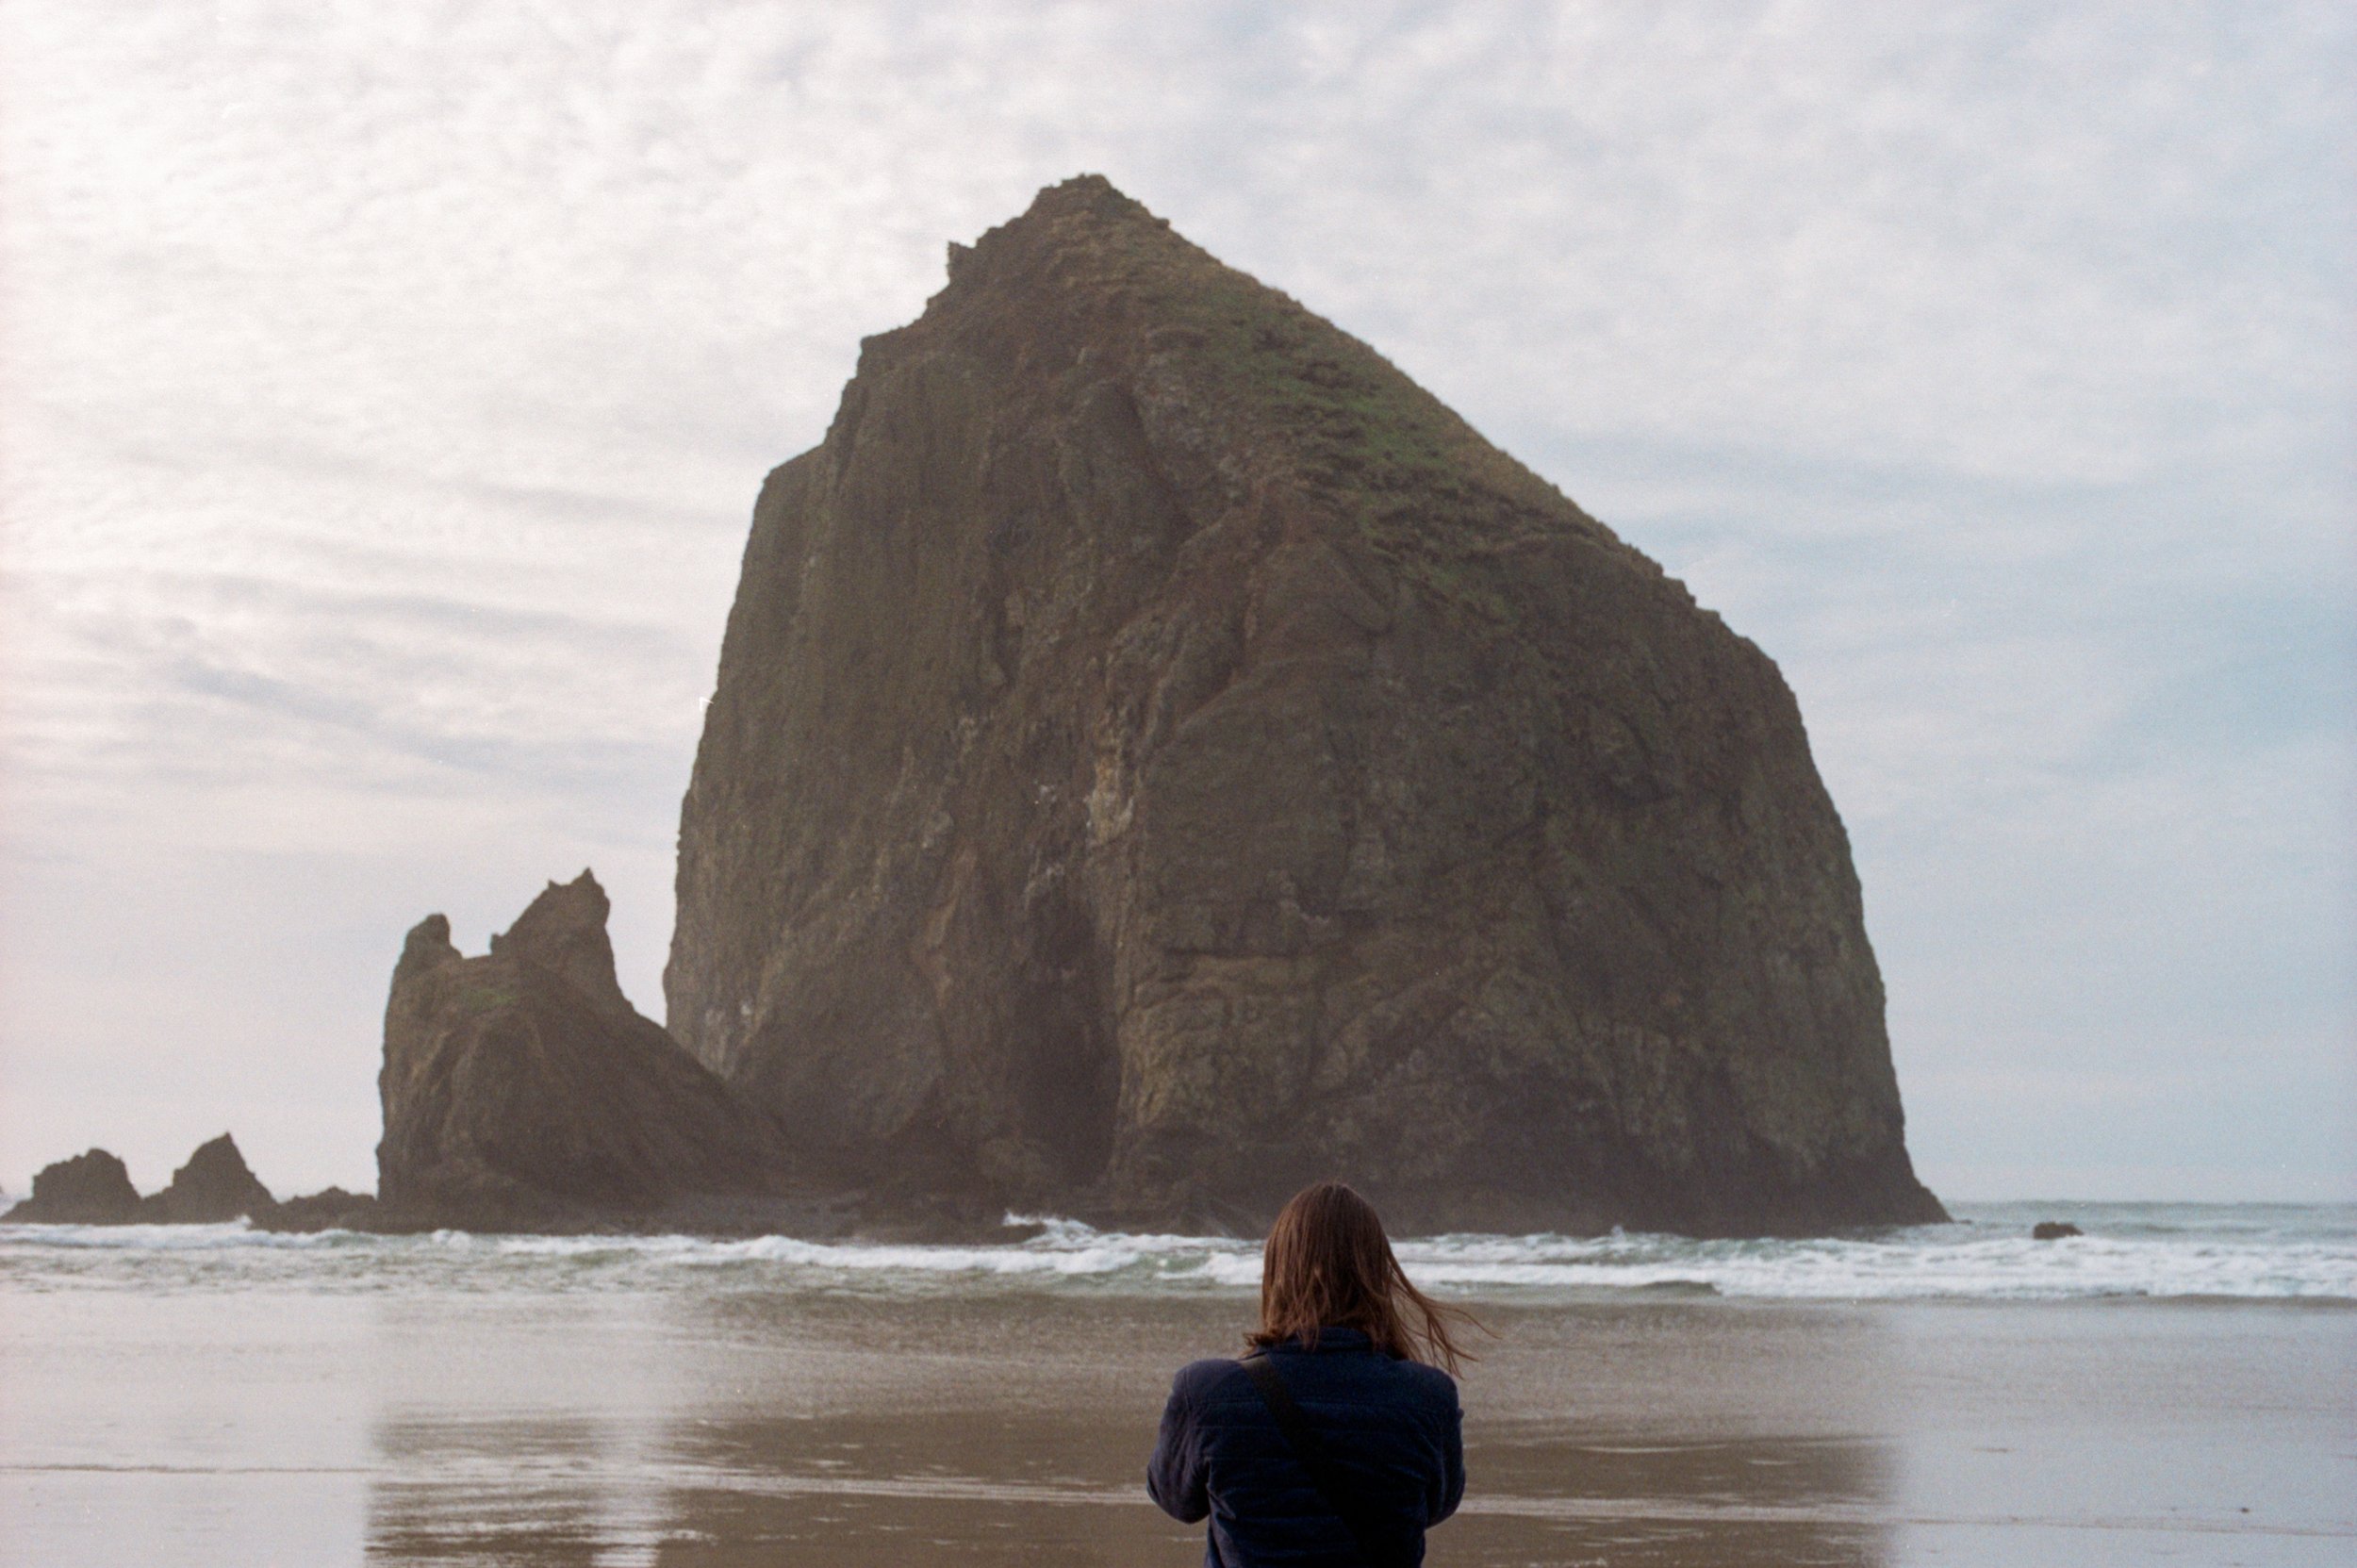
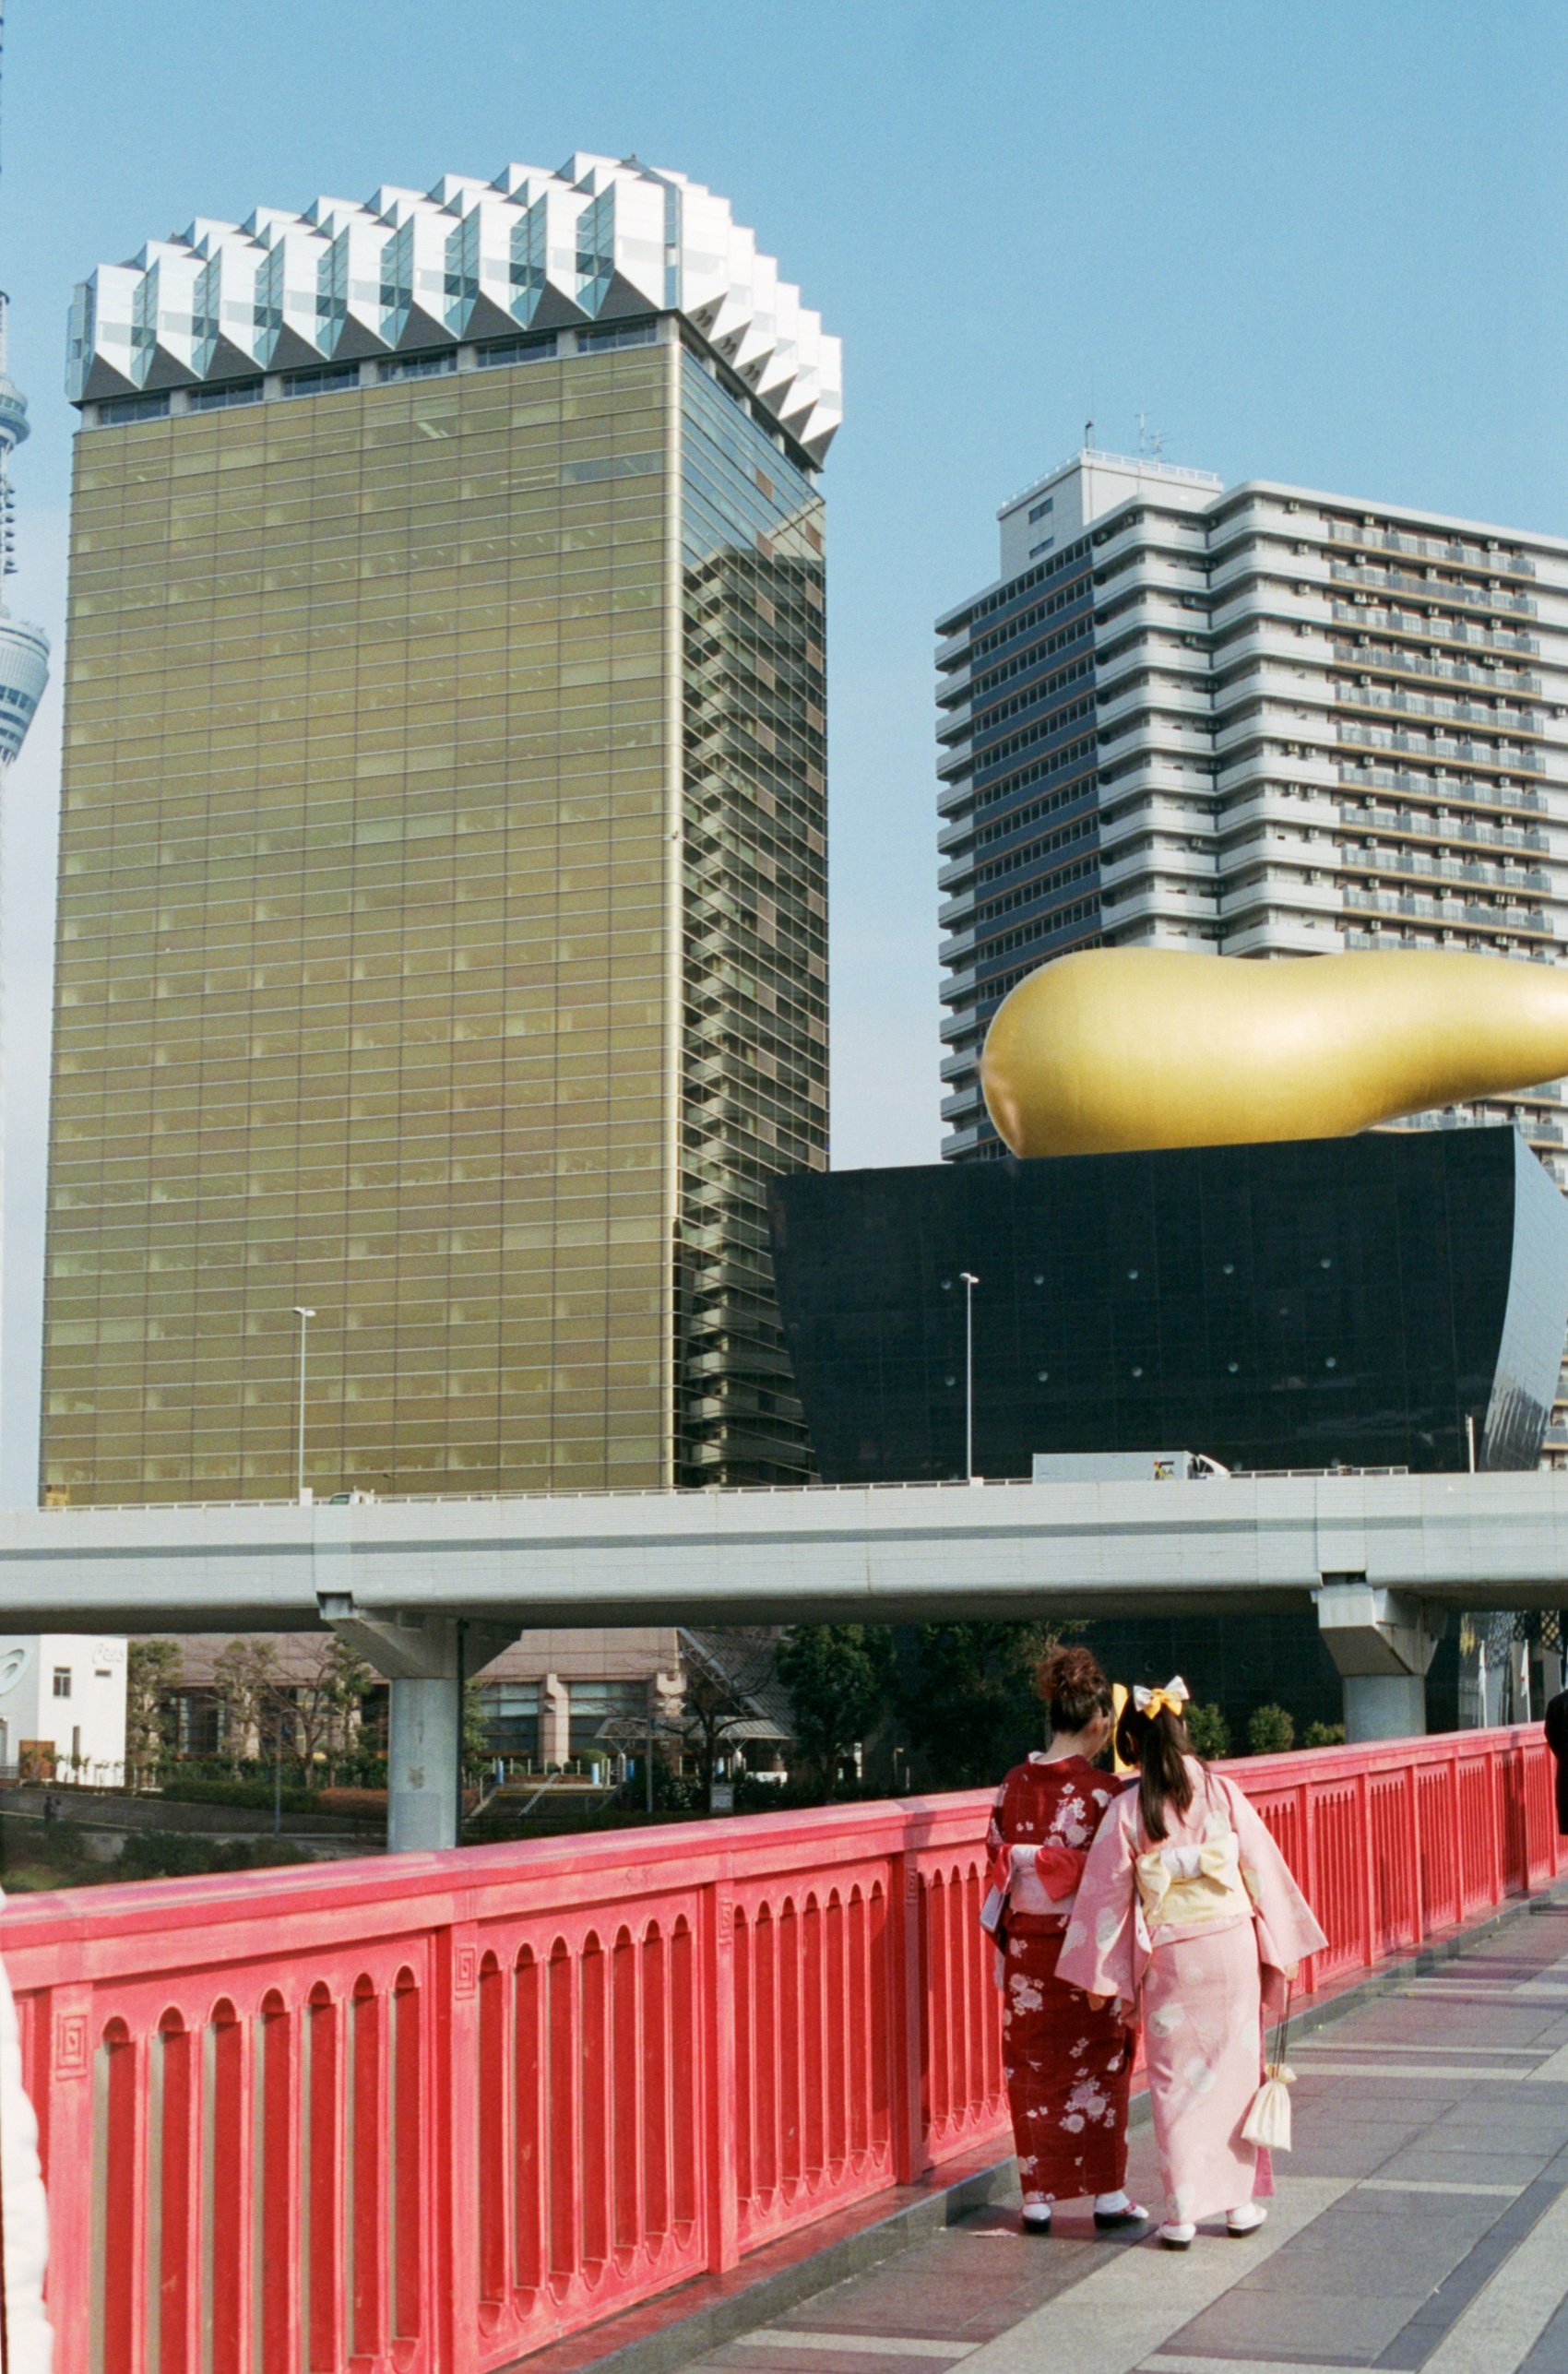
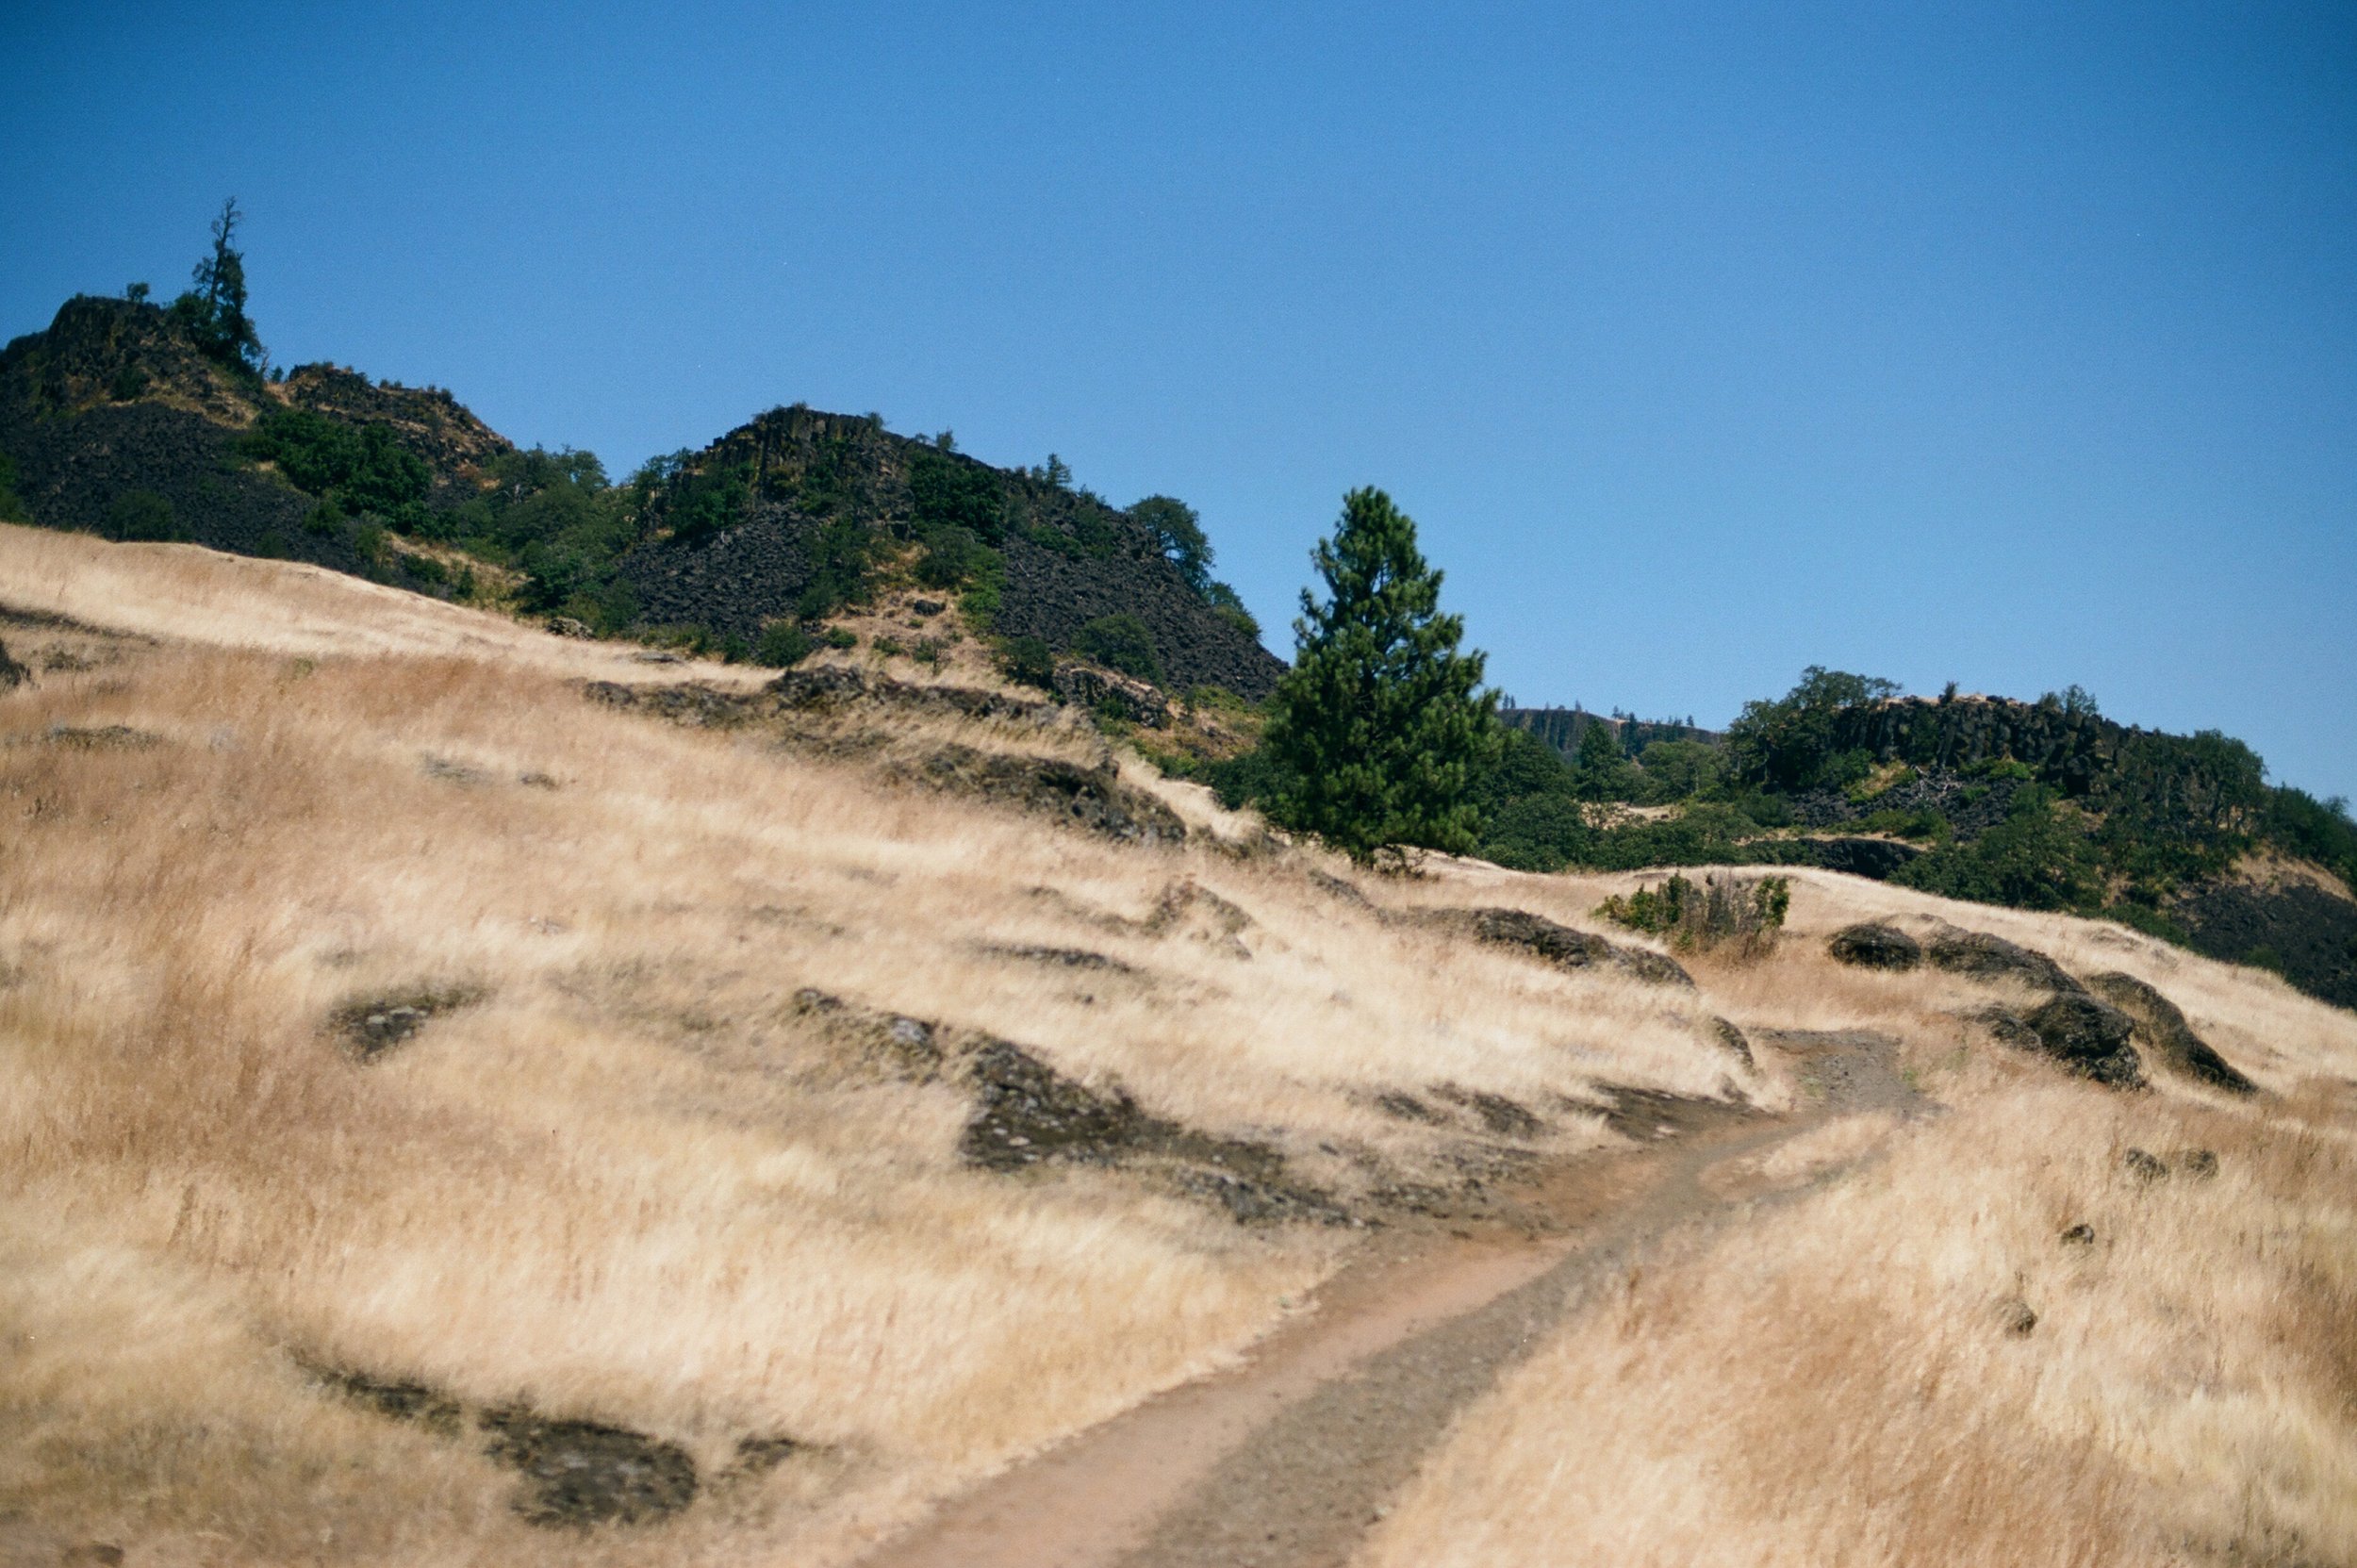
Kodak GC/UltraMax 400 Color Negative 35 Film Sample Photos

(click to enlarge images)

Nikon FE2 Review with Sample Photos | Nikon FE2 vs. Pentax K1000 | The Best 35 mm Camera for Beautiful Multiple Exposures


I’ve had my Nikon FE2 for almost 10 years now and I LOVE it. It was my first “nice” 35 mm camera. Up until the day that I purchased it, I’d been using cheap 35 mm cameras and making it through just fine. However, I was ready for sharper, more expensive-looking film photos with beautiful bokeh and background blur. I wanted my images to look as sharp and high quality as my digital photos from my 5D Mark II but BETTER, with a filmy vibe that couldn’t be achieved with a digital camera. I headed to Blue Moon Camera in Portland, Oregon with the intention of buying a Pentax K1000 upon recommendation from a friend. I didn’t know much about the camera and was going into it somewhat blindly. After chatting with the sales associate though, I quickly realized that the Nikon FE2 was better suited for me and my personal photography needs. The Pentax K1000 didn’t have a multiple exposure feature, so I immediately knew it wasn’t for me. You can sort of “trick” the K1000 into creating a double exposure, but I wanted it to be easy and quick, as I’m often at weddings and don’t have time to guess or mess with rewind buttons. And I’ve learned over the years that I NEED a reliable multiple exposure feature with every camera that I buy. Also, The Nikon Nikkor lenses are known for being SUPER sharp, which was something else I was looking for. AND, most importantly, the Nikon FE2 has Aperture Priority. The Pentax K1000 is a manual-only camera. As a wedding photographer, Aperture Priority is a NECESSITY. I’m honestly SO glad I chose the Nikon FE2 over the K1000 because I think I’ve gotten way more use out of it than I would have with the K1000. It’s just more “me”. I think that’s such an important part of the process when you’re searching for a new camera - don’t get stuck in the idea of one specific camera because it might not be the right one for you. I’m glad I stayed open-minded and went with the one that Blue Moon Camera was recommending.

The Nikon FE2 is a 35 mm film single lens reflex (SLR) camera and was originally manufactured in Japan from 1983 to 1987. It’s super sturdy and well-made, but not too bulky or inconvenient. It’s the perfect travel size, in my opinion, AND it has that beautiful classic film camera look to it. The shutter is extremely satisfying and I love pulling the film advance lever in-between shots. To create a multiple exposure, there is a tiny little lever sitting in front of the main film advance lever. You slide that lever over to the right and hold it while advancing the larger film advance lever. Basically, instead of the film advancing to the next frame, it stays on the same one so you can shoot over it. You can do this as many times as you want on the same frame! It’s super easy, which is why I love this camera so much!

The Nikon FE2 uses F-mount lenses and I personally have the 50mm f/1.4 AF Nikkor lens. It’s important to keep in mind that the lens is technically newer than the camera so the AF feature does NOT work. The lens will be fully manual when attached and will not have any autofocus features. While this is a bummer, most cameras from this time period were fully manual. It’s also part of the fun! I’m not going to lie, manual focusing can be a pain sometimes and takes some getting used to, but the results are WORTH IT.

I have a video on my YouTube channel, Cameras & Cats, about the Nikon FE2 too, so make sure to check that out below! I’ve also included some of my favorite images I’ve taken over the years with the Nikon FE2. I hope you love this camera as much as I do!

You can find links to the camera, as well as my personal film recommendations below!

CAMERA:

Purchase a Nikon FE2 on Amazon!

Purchase a Nikon FE2 on eBay!

Purchase a Nikon FE2 on KEH Camera!

LENS:

50mm f/1.4 AF Nikkor

35-70mm f/3.3 AF Nikkor (more affordable zoom lens)

FILM RECOMMENDATIONS:

Kodak Gold 200 35mm film

Kodak Portra 160 35mm

Lomography 100 35mm film

If you found this post helpful or if you’d like to see more of my work, I’d love it if you considered signing up for my Patreon! For as little as $1 a month, you’ll get early access to all of my YouTube videos, plus tons of photos that I don’t post anywhere else. Depending on which tier you choose, you could also receive seasonal prints and/or discounts! I always use all of the proceeds towards cameras, film & processing. Find out more here!

Thanks so much for stopping by!

<3 Myles Katherine


What is a Double Exposure / Multiple Exposure and How Do You Create One?


This is probably one of my most frequently asked questions. If you follow my work, you know I’m obsessed with double exposures and multiple exposures. At this point, I won’t even buy a camera if it doesn’t have the capability to create them! But what exactly is a “double exposure” or “multiple exposure”?

Well, it’s actually much more simple than you’d think. It’s essentially just an image over top of an image. For example, a “double exposure” is just one image with another image taken over top of it. In film photography, it means the shutter was activated twice over the same film frame. Thus, the film was exposed twice, creating two images, one over top of the other. A “multiple exposure” is typically more than two images over top of each other. You could also refer to them as “triple exposures” or “quadruple exposures”, etc.

Not all film cameras allow you to do this (though I prefer cameras that do)! One of my favorite cameras to use for multiple exposures is the Holga GCFN. I’ve made a full video about this camera on my YouTube channel because I love it so much! It’s easy to accidentally create double and multiple exposures with this camera because you have to manually wind the film between each image. If you forgot to wind the film after you took an image, you’ll end up shooting over the same frame and creating an accidental double exposure! Honestly though, that’s the magic of the Holga camera. Many people don’t enjoy cameras without an automatic film advance because it’s way too easy to forget whether you advanced the film or not. Personally, I prefer to have full control over my images and I don’t mind when those magic images happen on their own. :) I’ve included a few examples at the end of the post, so be sure to scroll down to see!

A few of my other favorite film cameras to use for double exposures are the Nikon FE2 35 mm camera (check out my YouTube video on this camera) and Contax 645 Medium format camera (I have a YouTube video on this one too)! But a Holga GCFN is a great place to start because they are so affordable, ranging from about $40-70 depending on which model you go with (I always recommend the GCFN model).

When it comes to digital photography and multiple exposures, not all camera brands allow you to create in-camera double and multiple exposures. This is why I prefer to shoot Canon, preferably with my Canon 5D Mark IV, because they have a feature built into the camera that makes them super easy and fun to create. I also use a Canon EOS R, but I find it to be a bit slower when taking double/multiple exposures.

The secret to creating amazing double exposures and multiple exposures is to EXPERIMENT. Try shooting different textures, landscapes and portraits, and mix and match to see how it all turns out. I’ll be sharing a blog post soon with a few tips and tricks on creating unique images, so make sure to check back!

If you found this post helpful or if you’d like to see more of my work, I’d love it if you considered signing up for my Patreon! For as little as $1 a month, you’ll get early access to all of my YouTube videos, plus tons of photos that I don’t post anywhere else. Depending on which tier you choose, you could also receive seasonal prints and/or discounts! I always use all of the proceeds towards cameras, film & processing. Find out more here!

Feel free to leave any questions, comments, tips, etc. Thanks for stopping by!

<3 Myles Katherine

Holga GCFN Double Exposure Examples:

Canon Digital Full-Frame Double Exposure Examples: