5 Reasons to Buy a Polaroid One-Step 600 Camera | Film Photography Review of the Polaroid One-Step 600 Camera


(This post contains affiliate links and I will be compensated if you make a purchase after clicking through my links.)

I love Polaroid cameras SO much. There’s nothing quite like the immediate satisfaction of watching a photo develop in front of you. The casual, nostalgic mood and the muted tones give Polaroid photos a truly unique vibe that I have yet to experience with any other camera and film combination.

When I began working as a photographer right after college, my dad stumbled across a few of his old Polaroid cameras that his construction company had used years ago to photograph job sites. I did some googling and found a company called The Impossible Project that had started making film that worked with the old Polaroid cameras. I purchased a few boxes of the film and fell in love the second I started using it. Eventually, The Impossible Project officially gained the rights to the Polaroid name, (after going by Polaroid Originals for a while) and can now be found at Polaroid.com.

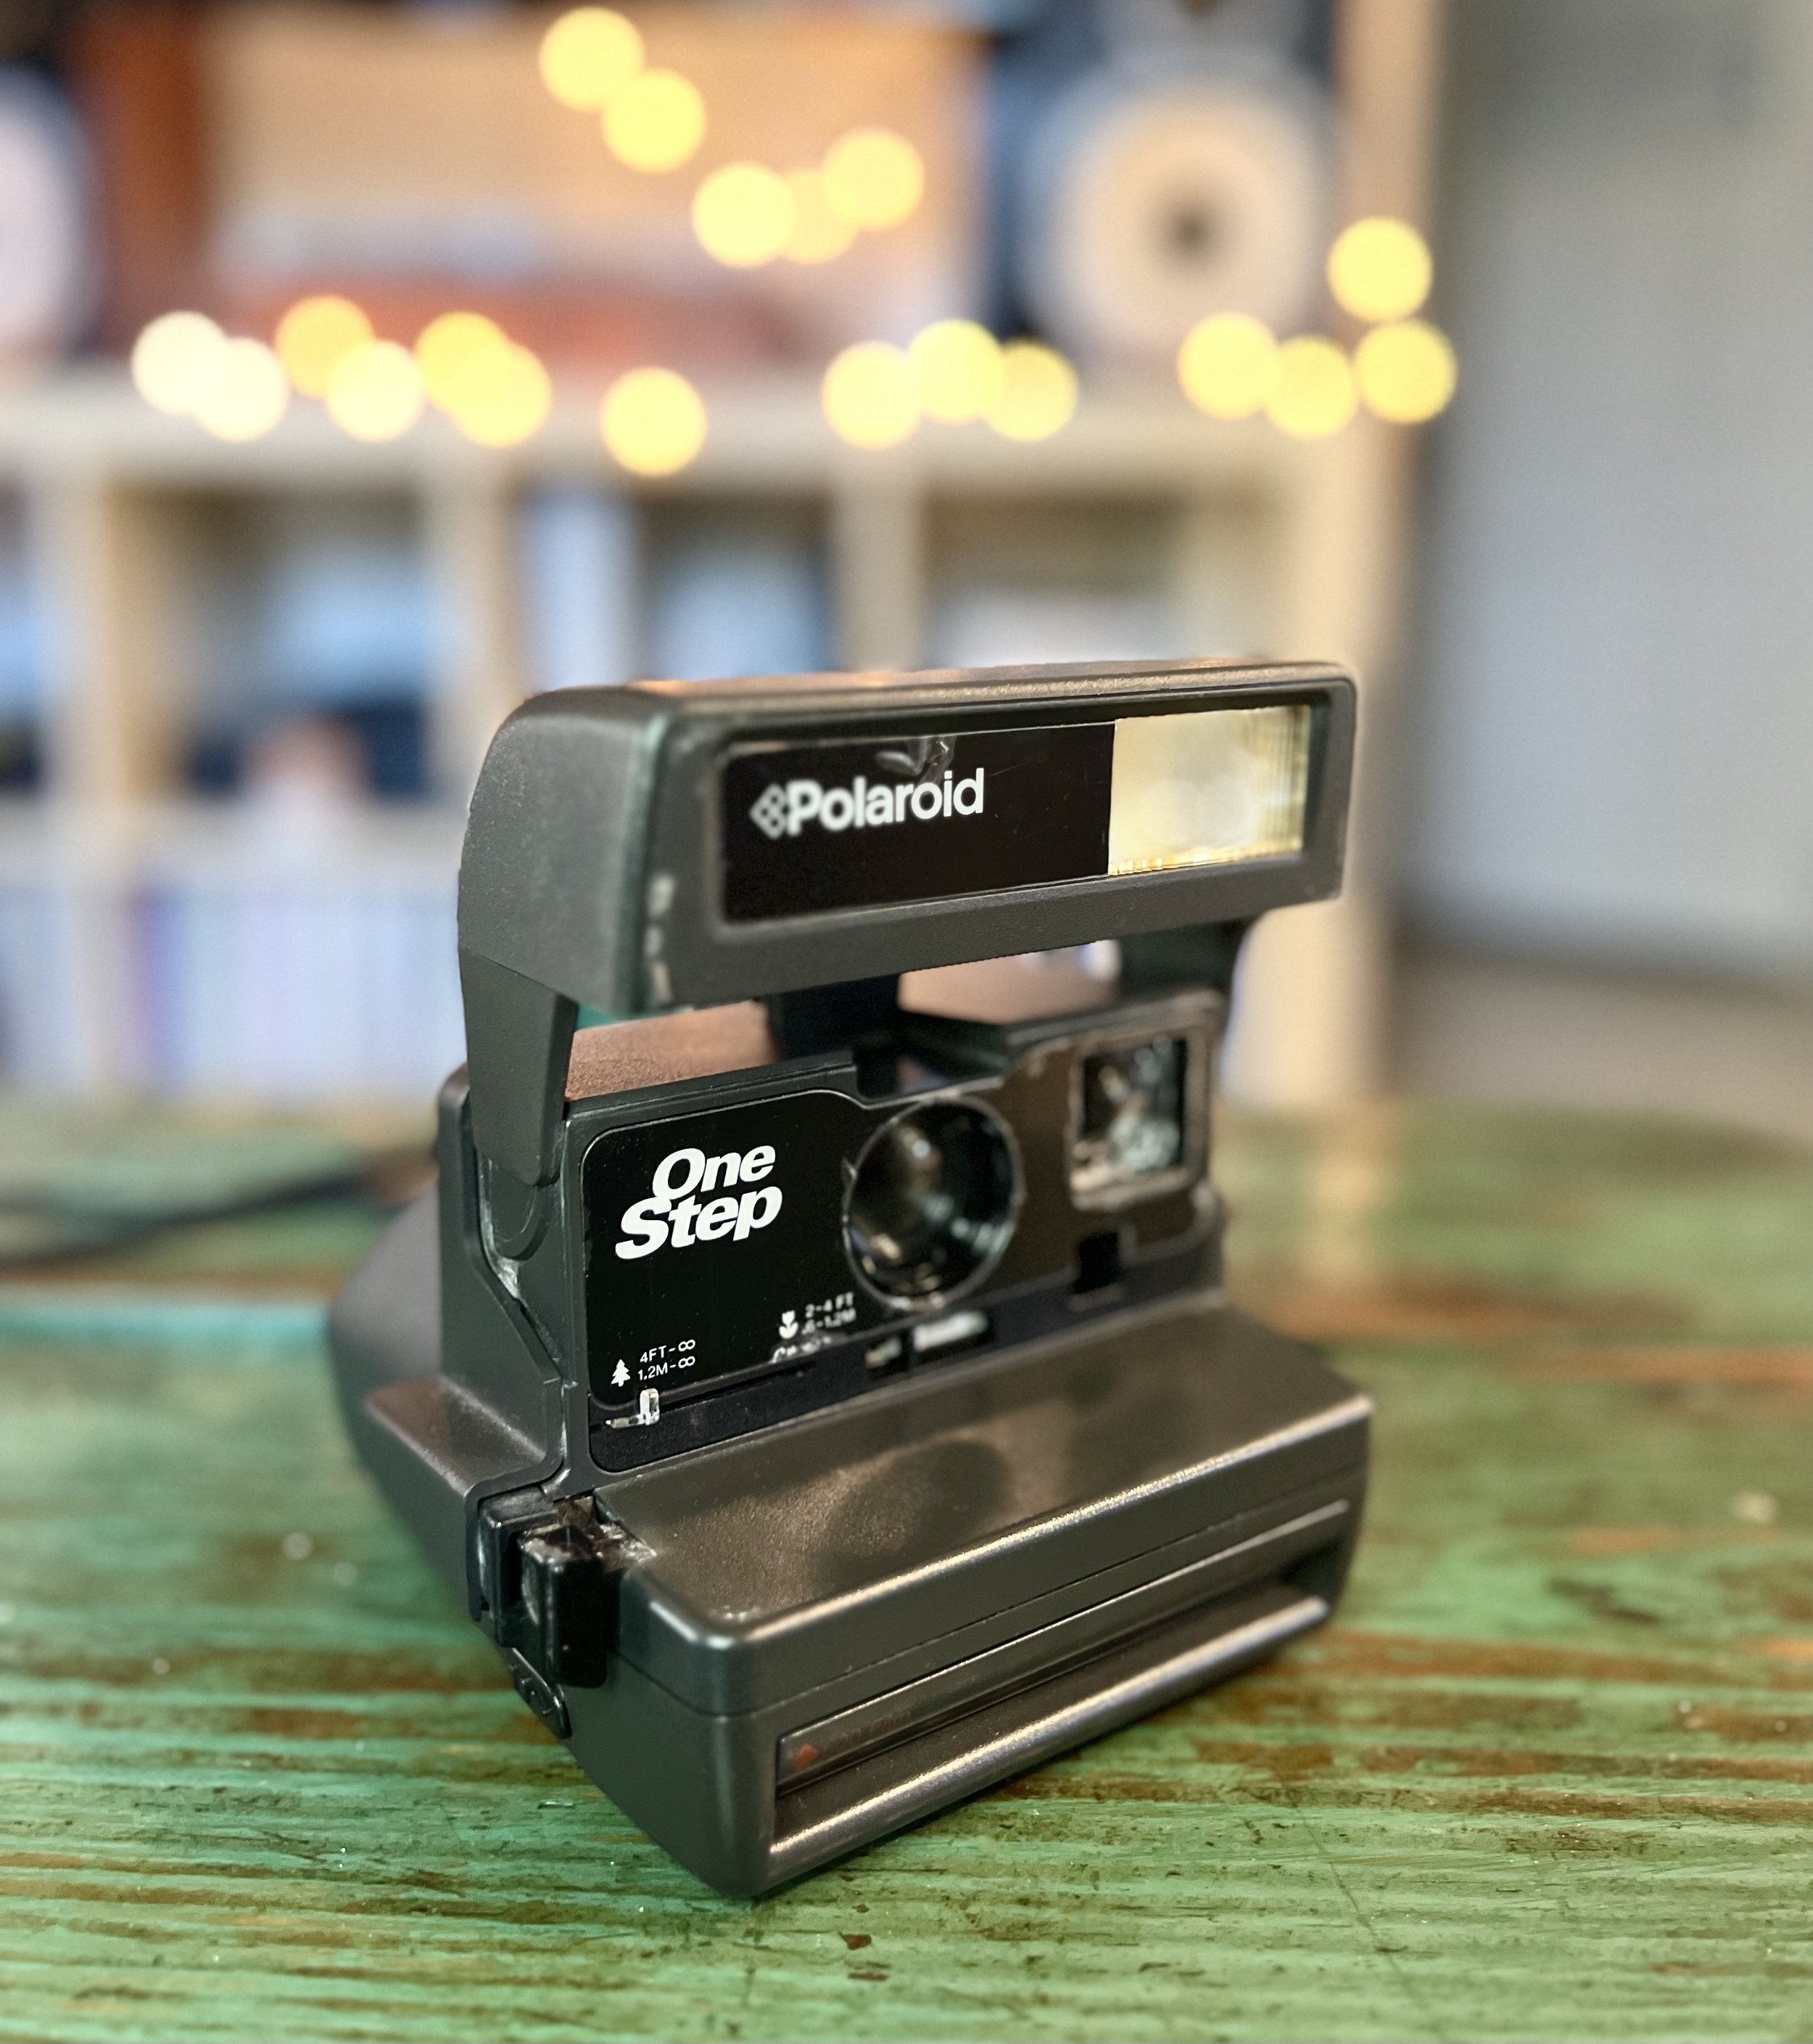
If you can get your hands on a vintage Polaroid 600 camera from a friend or family member, don’t turn it down! These cameras are actually pretty sturdy and it’s rare that I’ve come across one that doesn’t work. The version I’ve been using for the last few years is the Polaroid One-Step 600 camera but there are dozens of different 600 cameras to choose from. I also used a Polaroid Impulse for a while too! If you don’t have any Polaroids lurking in your parent’s basement or grandma’s house, you can always find them online. Or you can try out Polaroid’s brand new cameras such as the Polaroid Now or Polaroid Go.


CAMERA:

Purchase a Polaroid One-Step 600 on Amazon!

Purchase a Polaroid One-Step 600 on eBay!

Purchase a Used Polaroid One-Step 600 on KEH Camera!

Purchase a Polaroid Now or Polaroid Go on Polaroid.com!

FILM:

Purchase 600 film on Amazon!

Purchase 600 film on Polaroid.com!

Tip: Make sure to buy the correct version of the film for your camera, whether that’s 600, SX-70, i-Type or Go film. If it’s listed under “Polaroid Originals”, that’s totally fine - it’s just the name that the company went by before officially becoming Polaroid.


5 reasons to buy a Polaroid 600 Camera:


  1. They are SUPER easy to use!


    While these cameras might be old and somewhat intimidating, they are truly one of the easiest cameras out there to use. You slide the film in, pop open the viewfinder, look through and compress the shutter button. That’s it! However, it may take some getting used to when it comes to lighting conditions and film lightness vs. darkness. Most 600 cameras have a slider that allows some exposure control over the film darkness. If you prefer to shoot in bright conditions, I recommend sliding it a little towards the darker side. If you tend to shoot in lower light conditions, I recommend keeping it in the middle position, or sliding it the tiniest bit toward the brighter end.


  2. There is nothing like it.


    Polaroids can be used to photograph anything and everything. Somehow, they make even the dullest moment seem memorable and exciting. I particularly love using it for fashion portraits and landscapes, but I also love the way some people use it to document parties or events, as it adds a value of nostalgia and automatically looks like it was taken 30 years ago. I’ve used dozens of cameras over the years, but there is nothing quite like taking a classic Polaroid. It’s also nice to have a physical photograph from your shoot to hang on the fridge or put it in a scrapbook. The magic of printed images slowly diminished after digital photography came around, so there’s something thrilling about having an immediate physical copy of your photograph in your hands.


  3. They are sturdy and long-lasting.


    I have yet to stumble across a Polaroid 600 that doesn’t work. I have, however, stumbled across Polaroid SX-70s that don’t work, so I think the 600 version just seems to last longer overall. The version that I use, the Polaroid One-Step, folds up into a square and easily fits inside a camera bag without risking damage to the camera. They are super lightweight and easy to carry around too. Plus, it’s just plain FUN to use the pop-up viewfinder and surprise your friends and family with this unique-looking, vintage camera.


  4. They are affordable.


    While, yes, they have gone up in value over the years, they are still relatively affordable compared to other vintage cameras. You can find different versions of the Polaroid 600 camera in the $30-200 range, but even up to $700 depending on the model and rareness of the camera. From Barbie to LEGO to USPS, there are so many different designs and colors to choose from. Once you start delving into the options, it’s nearly impossible to NOT want to start collecting them all.


  5. You could become a better photographer!

    I truly believe that using film cameras, especially Polaroid cameras, will force you to be more decisive with your images. Considering the fact that you are paying for every image that you take, your brain will automatically let you know if a moment is worth capturing. Oftentimes, I’ll point my Polaroid at a landscape or building, thinking it will make a good photograph, but once I look through the viewfinder, I ask myself, is it special enough? This means you’ll take less images overall and that the ones you do take, will mean something. Not to mention, you’ll become better at composing your images because you’ll immediately see the results and learn from your mistakes. If you accidentally cropped someone out of the shot, or took the photo a little too crooked or off to the side, you’ll see that up close and personal on your printed Polaroid.


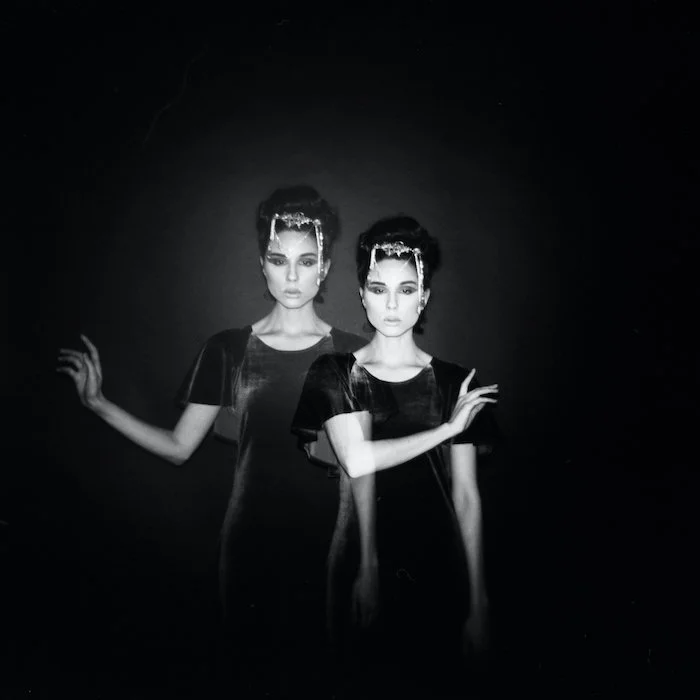
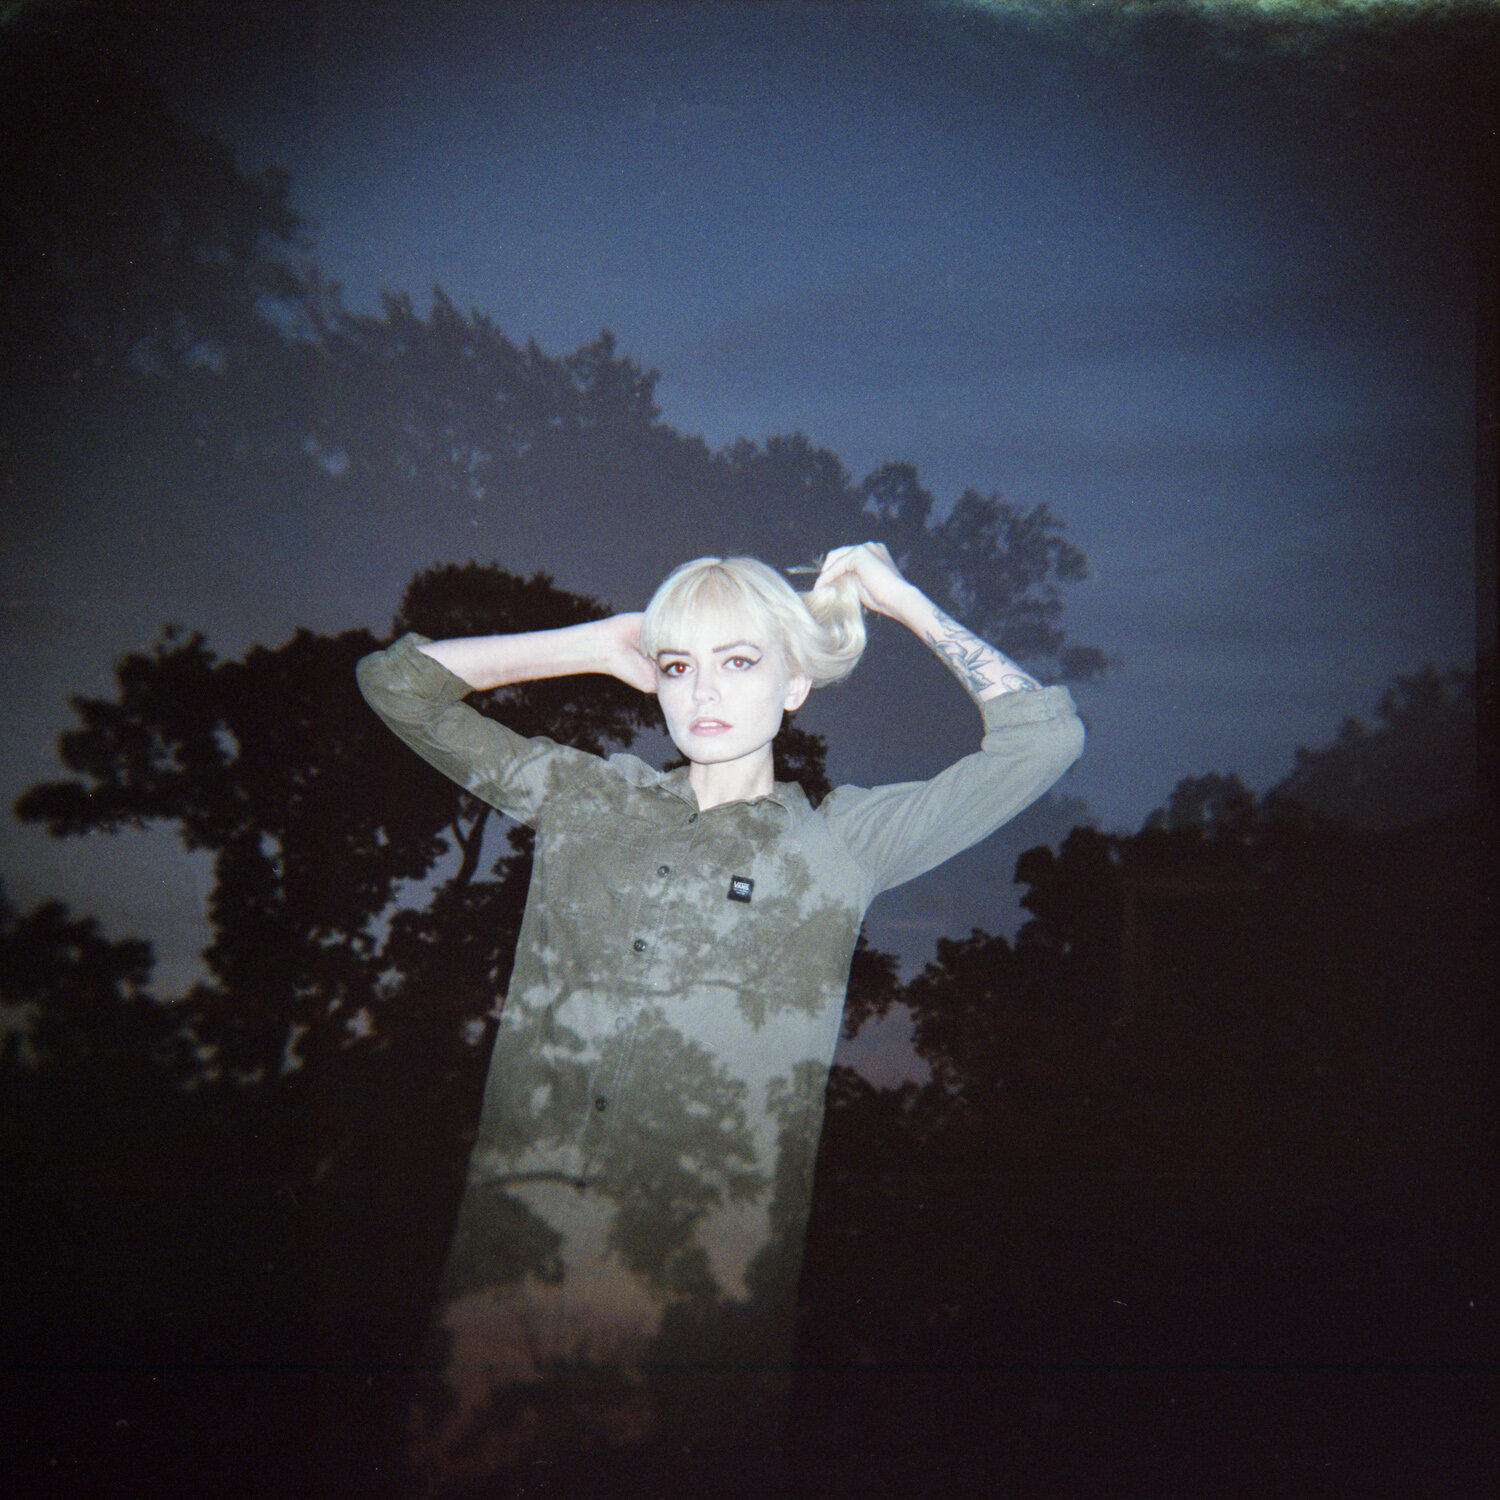
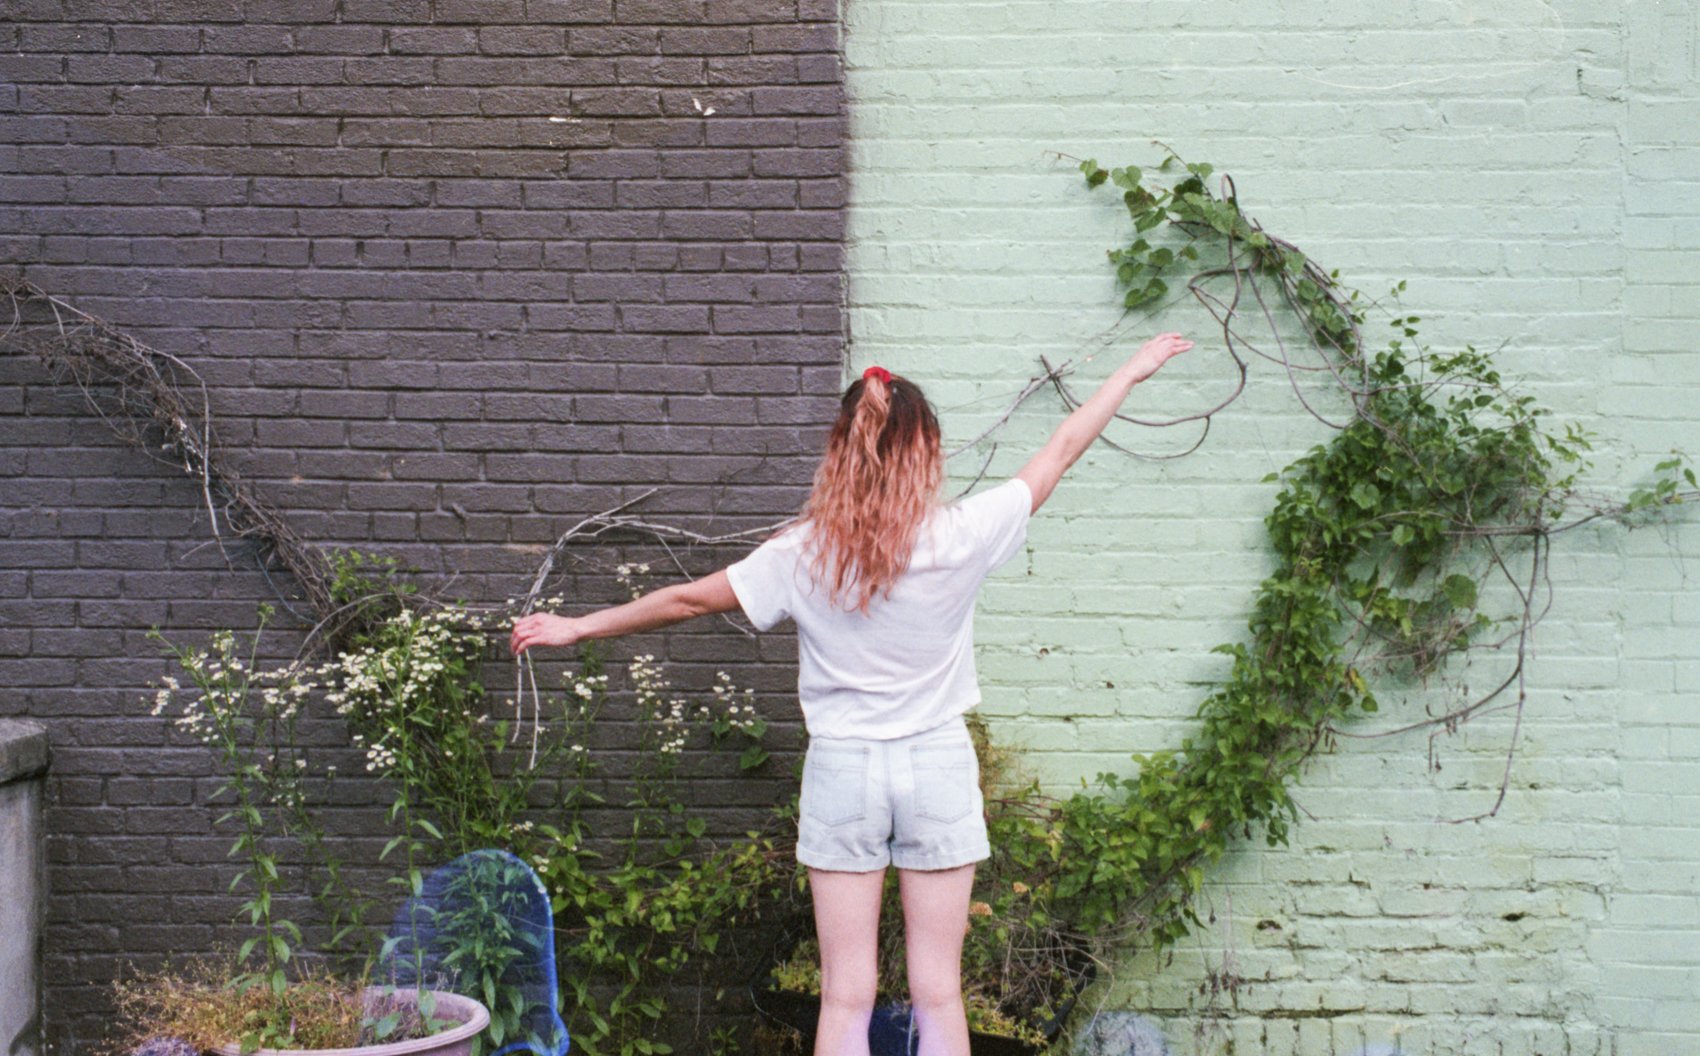
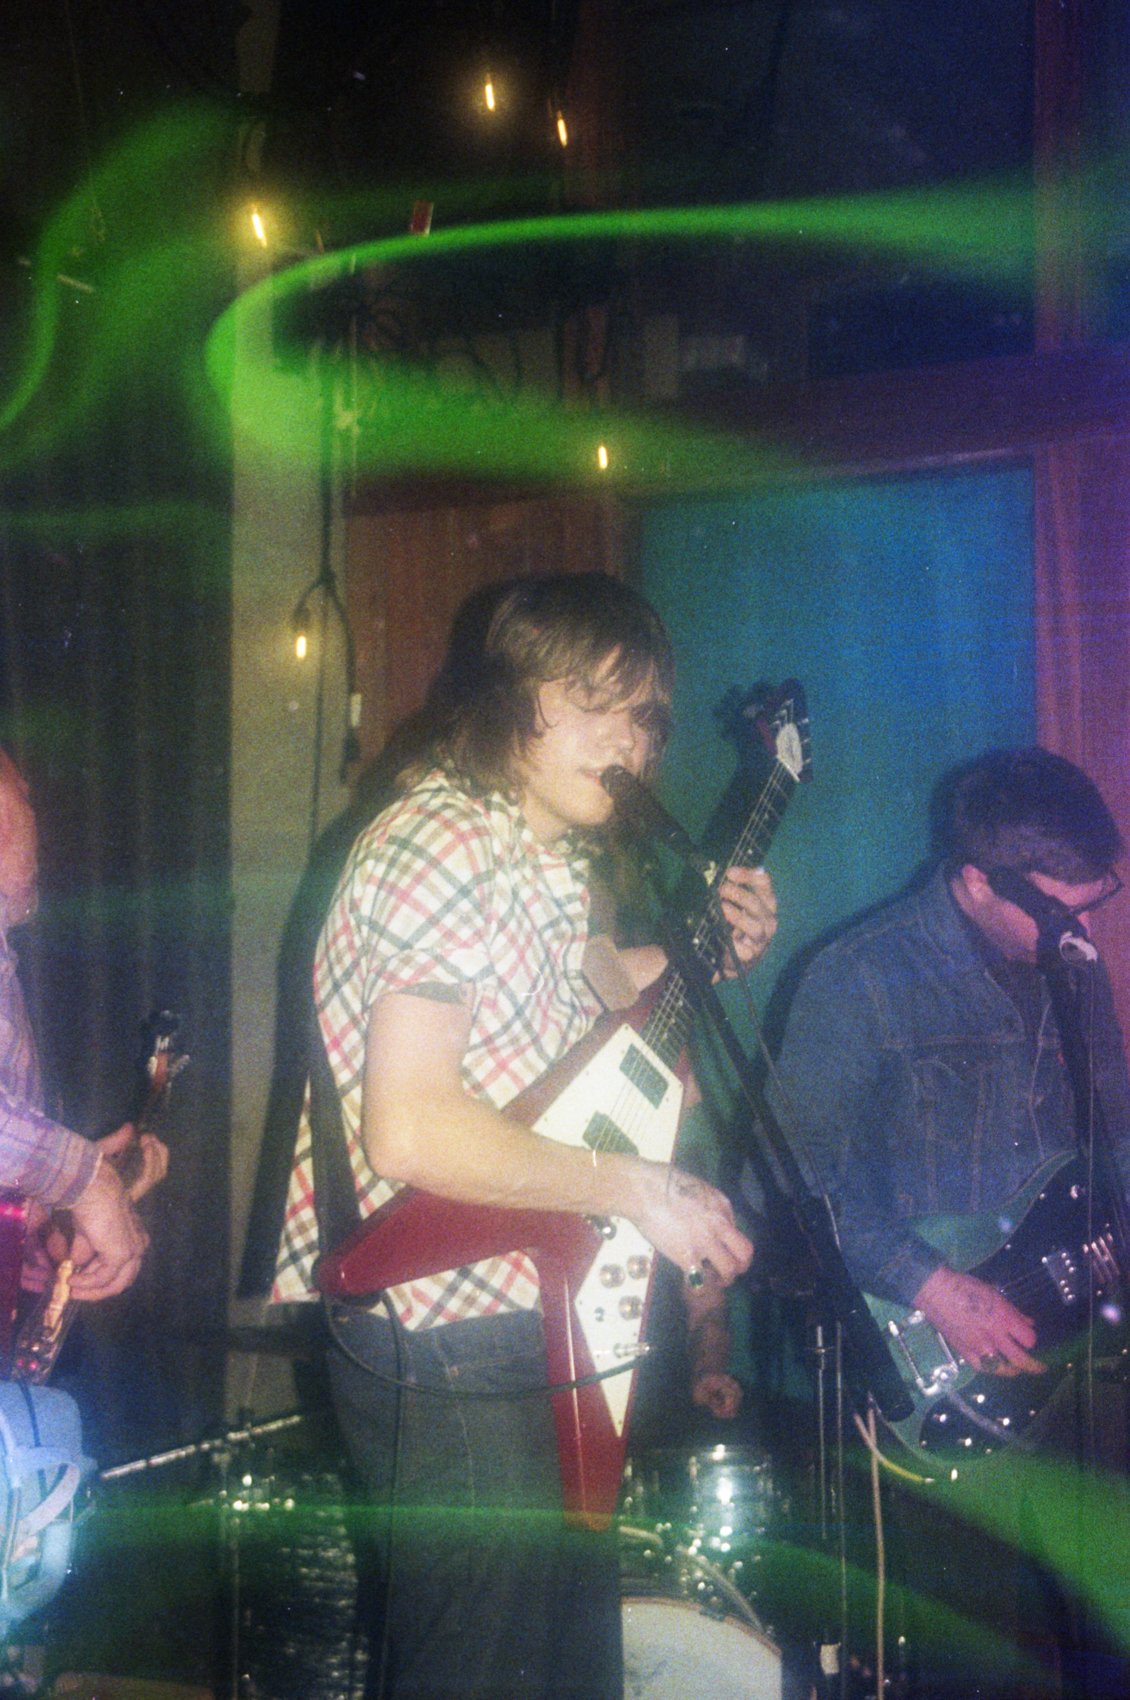
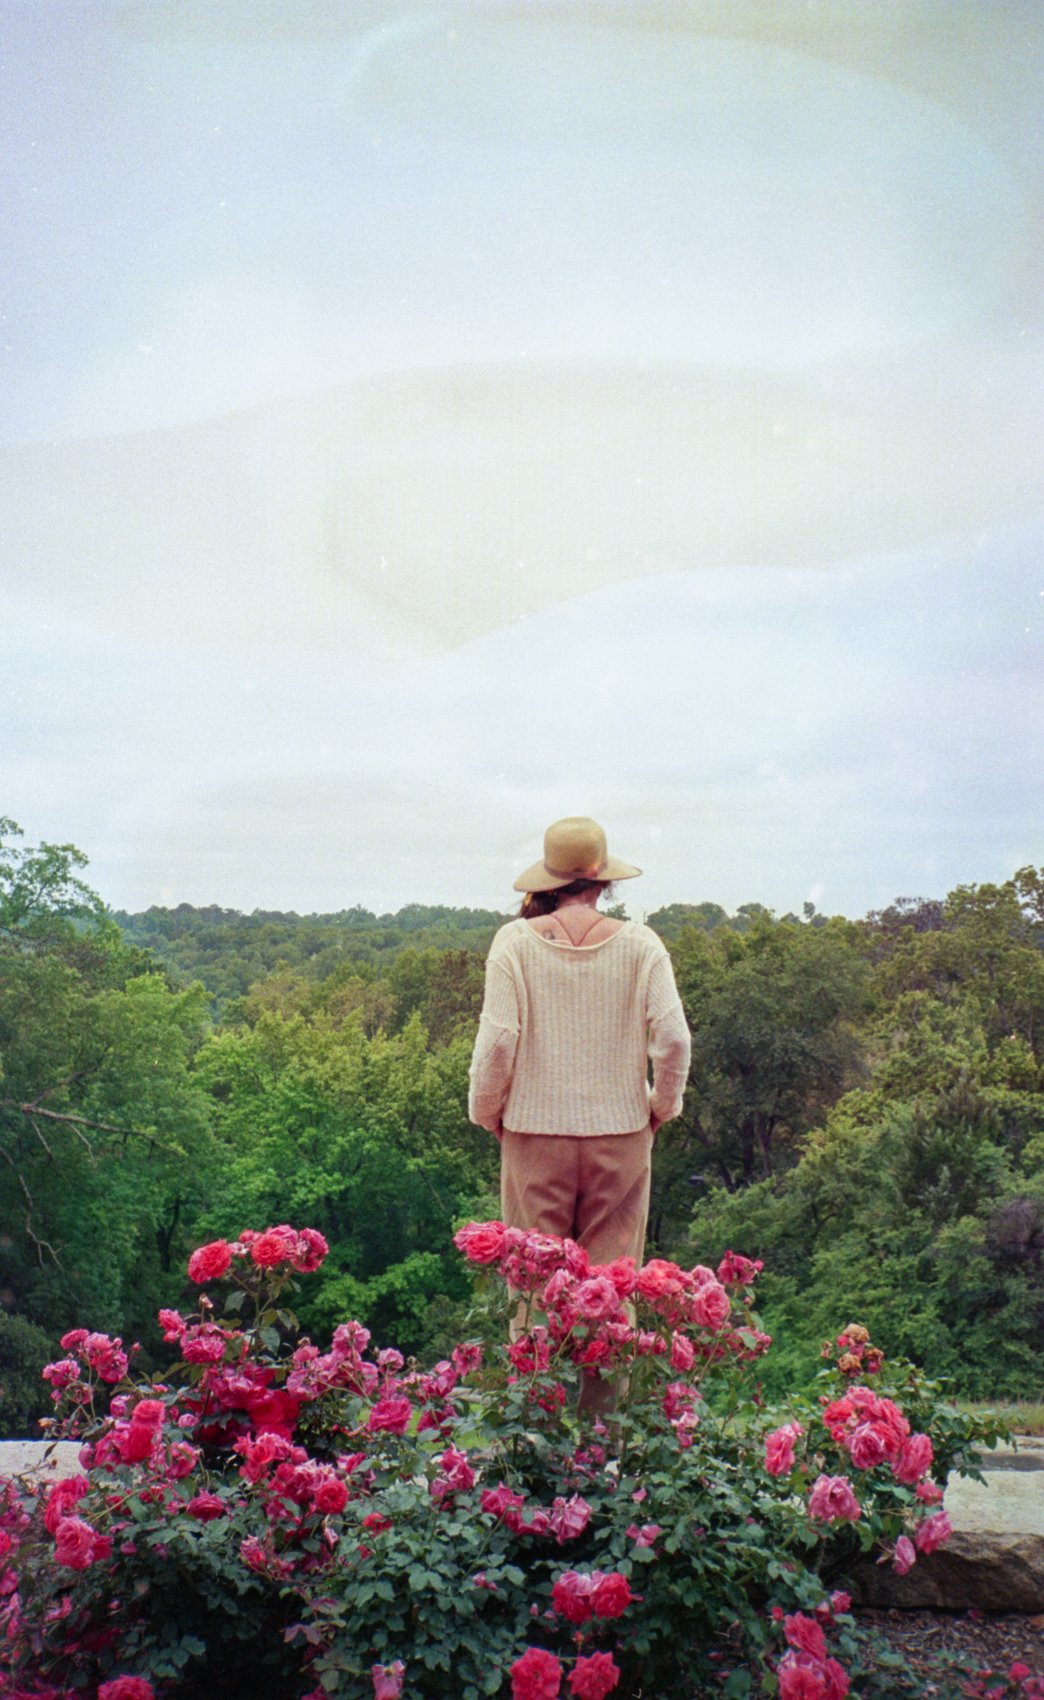
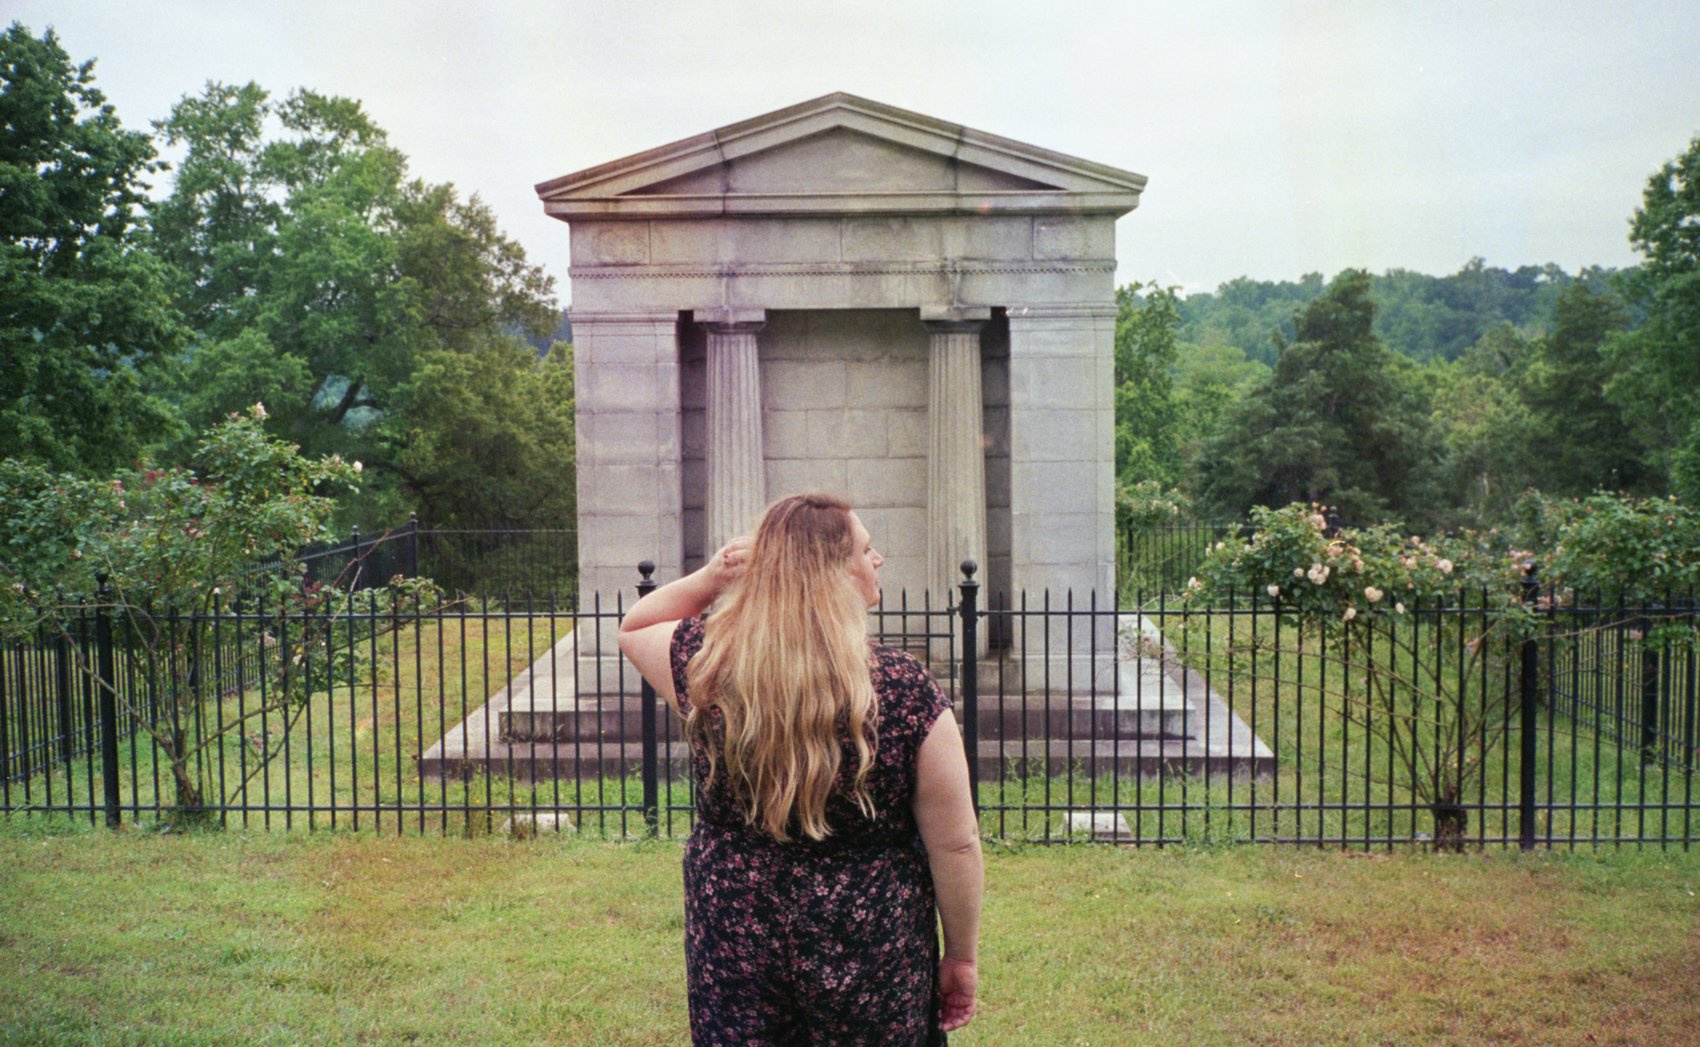
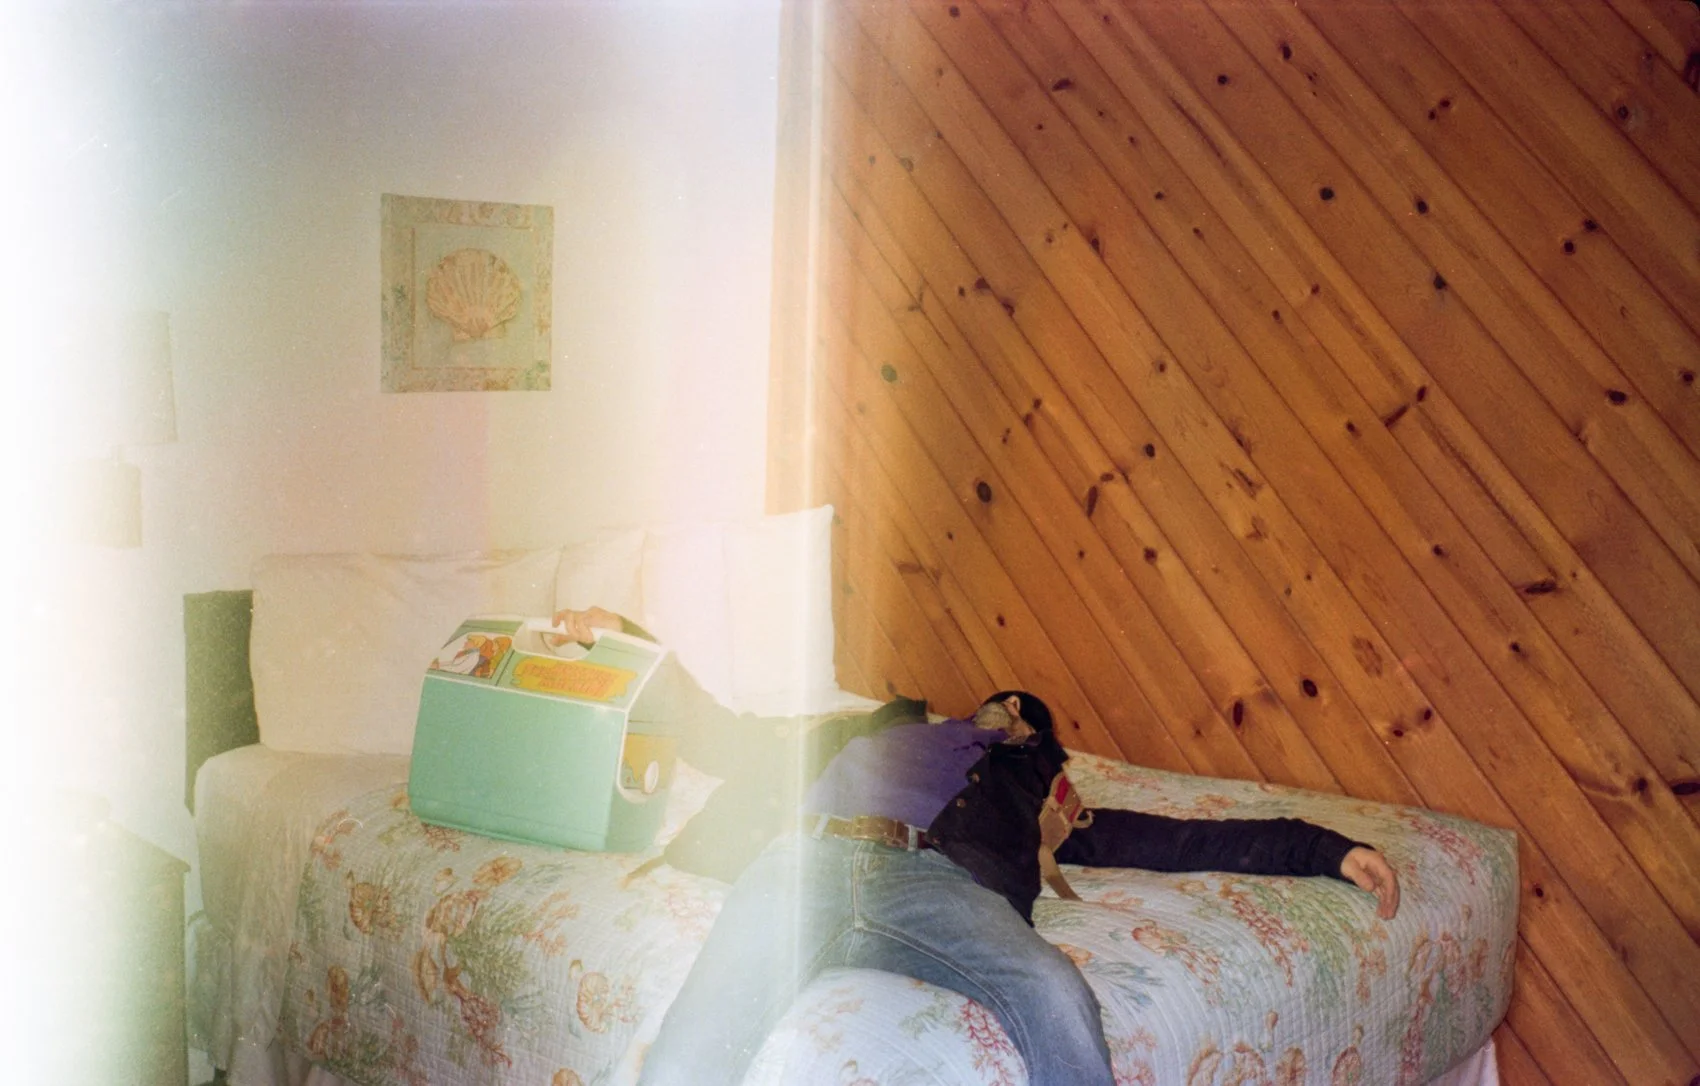
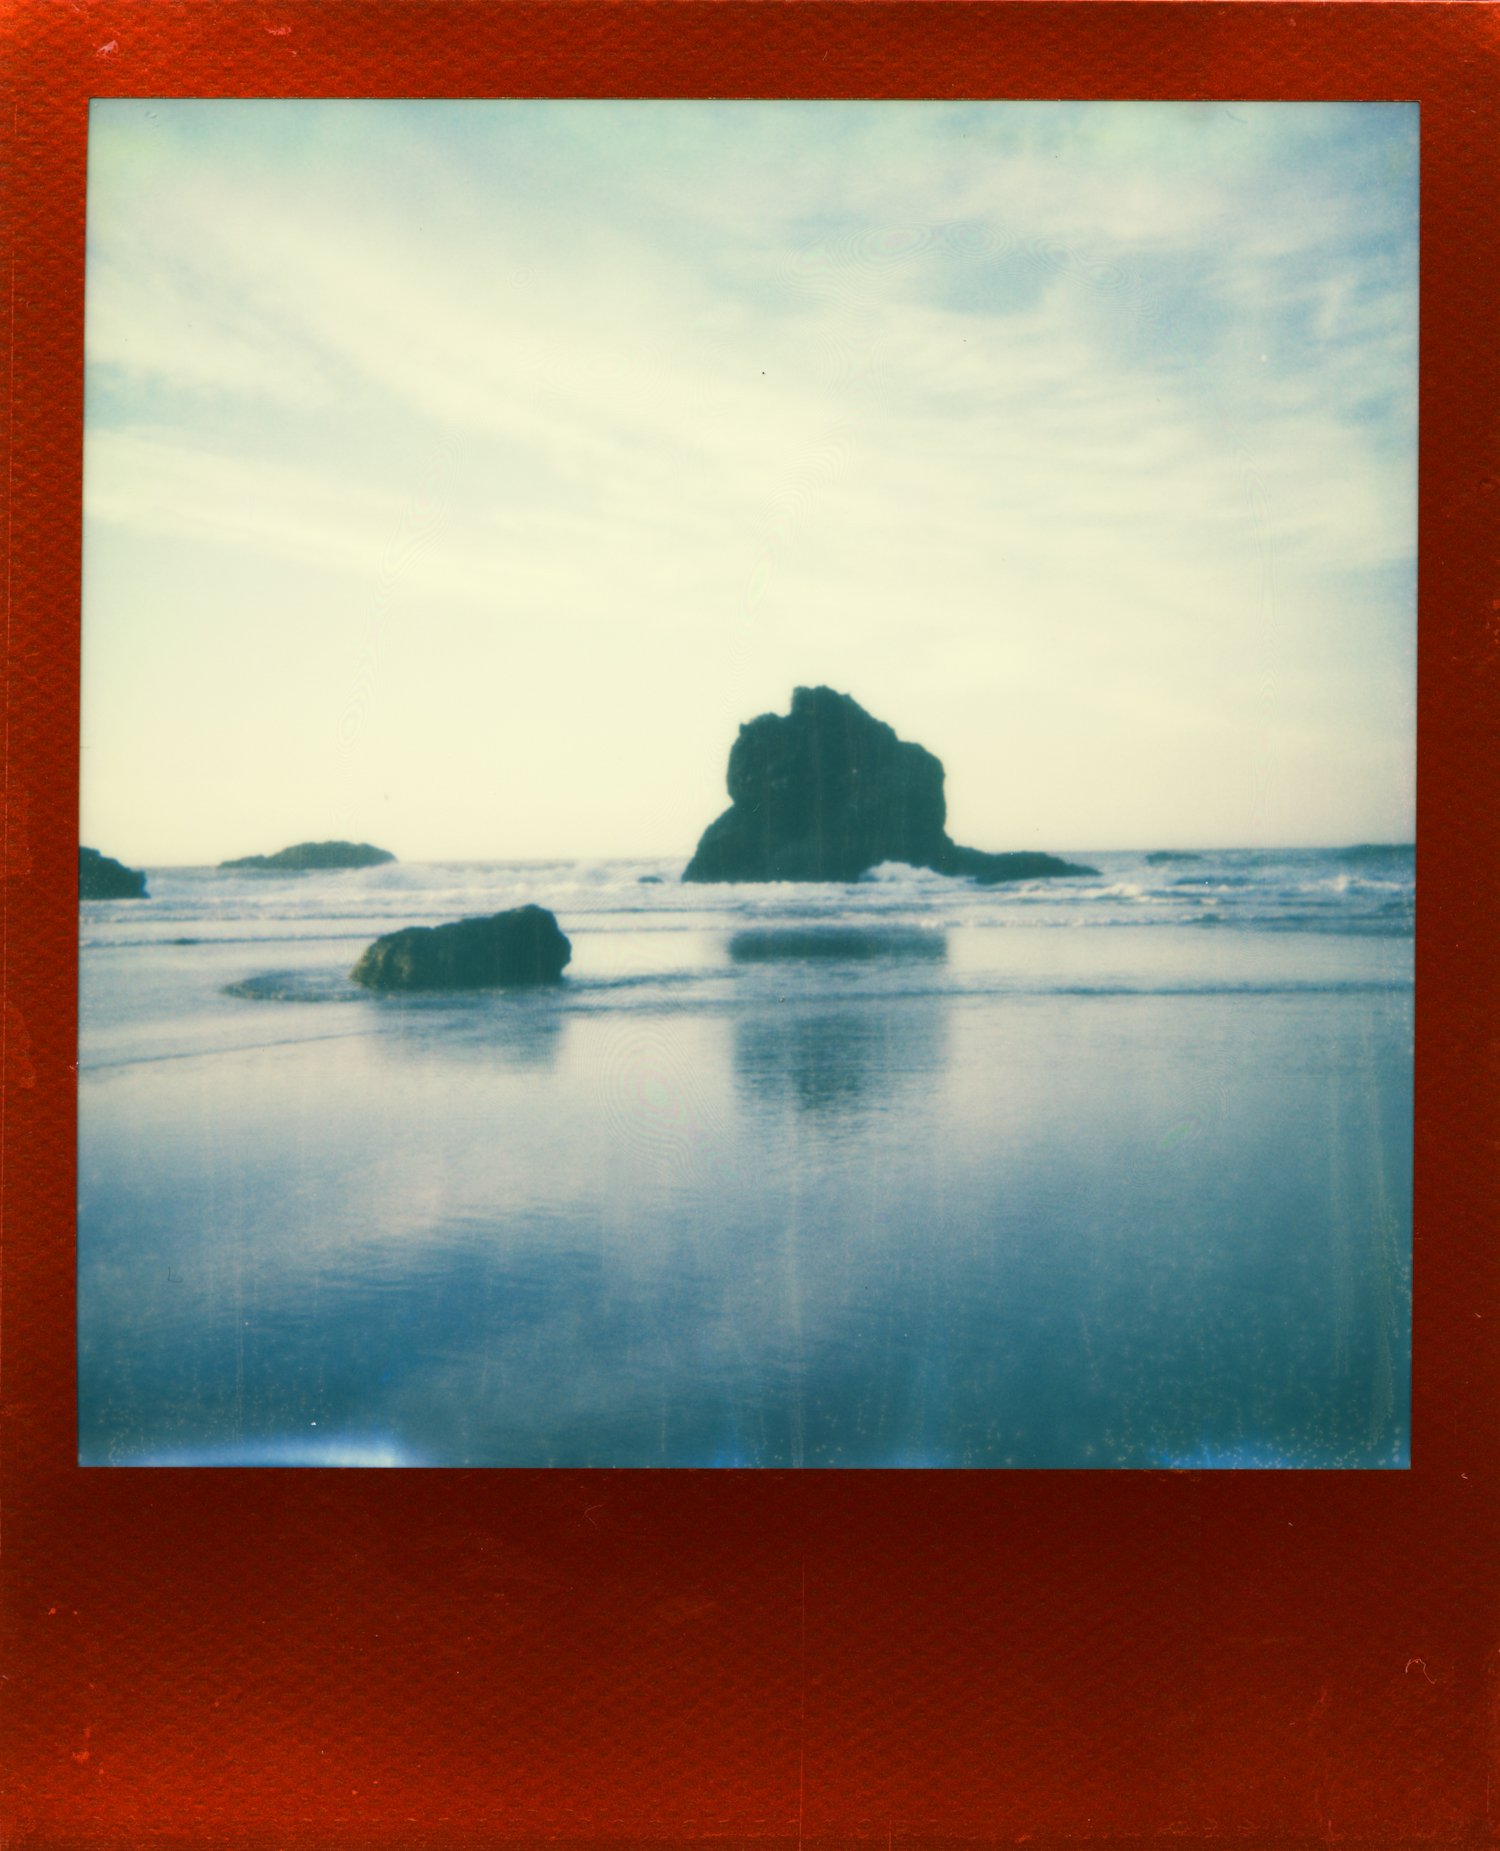
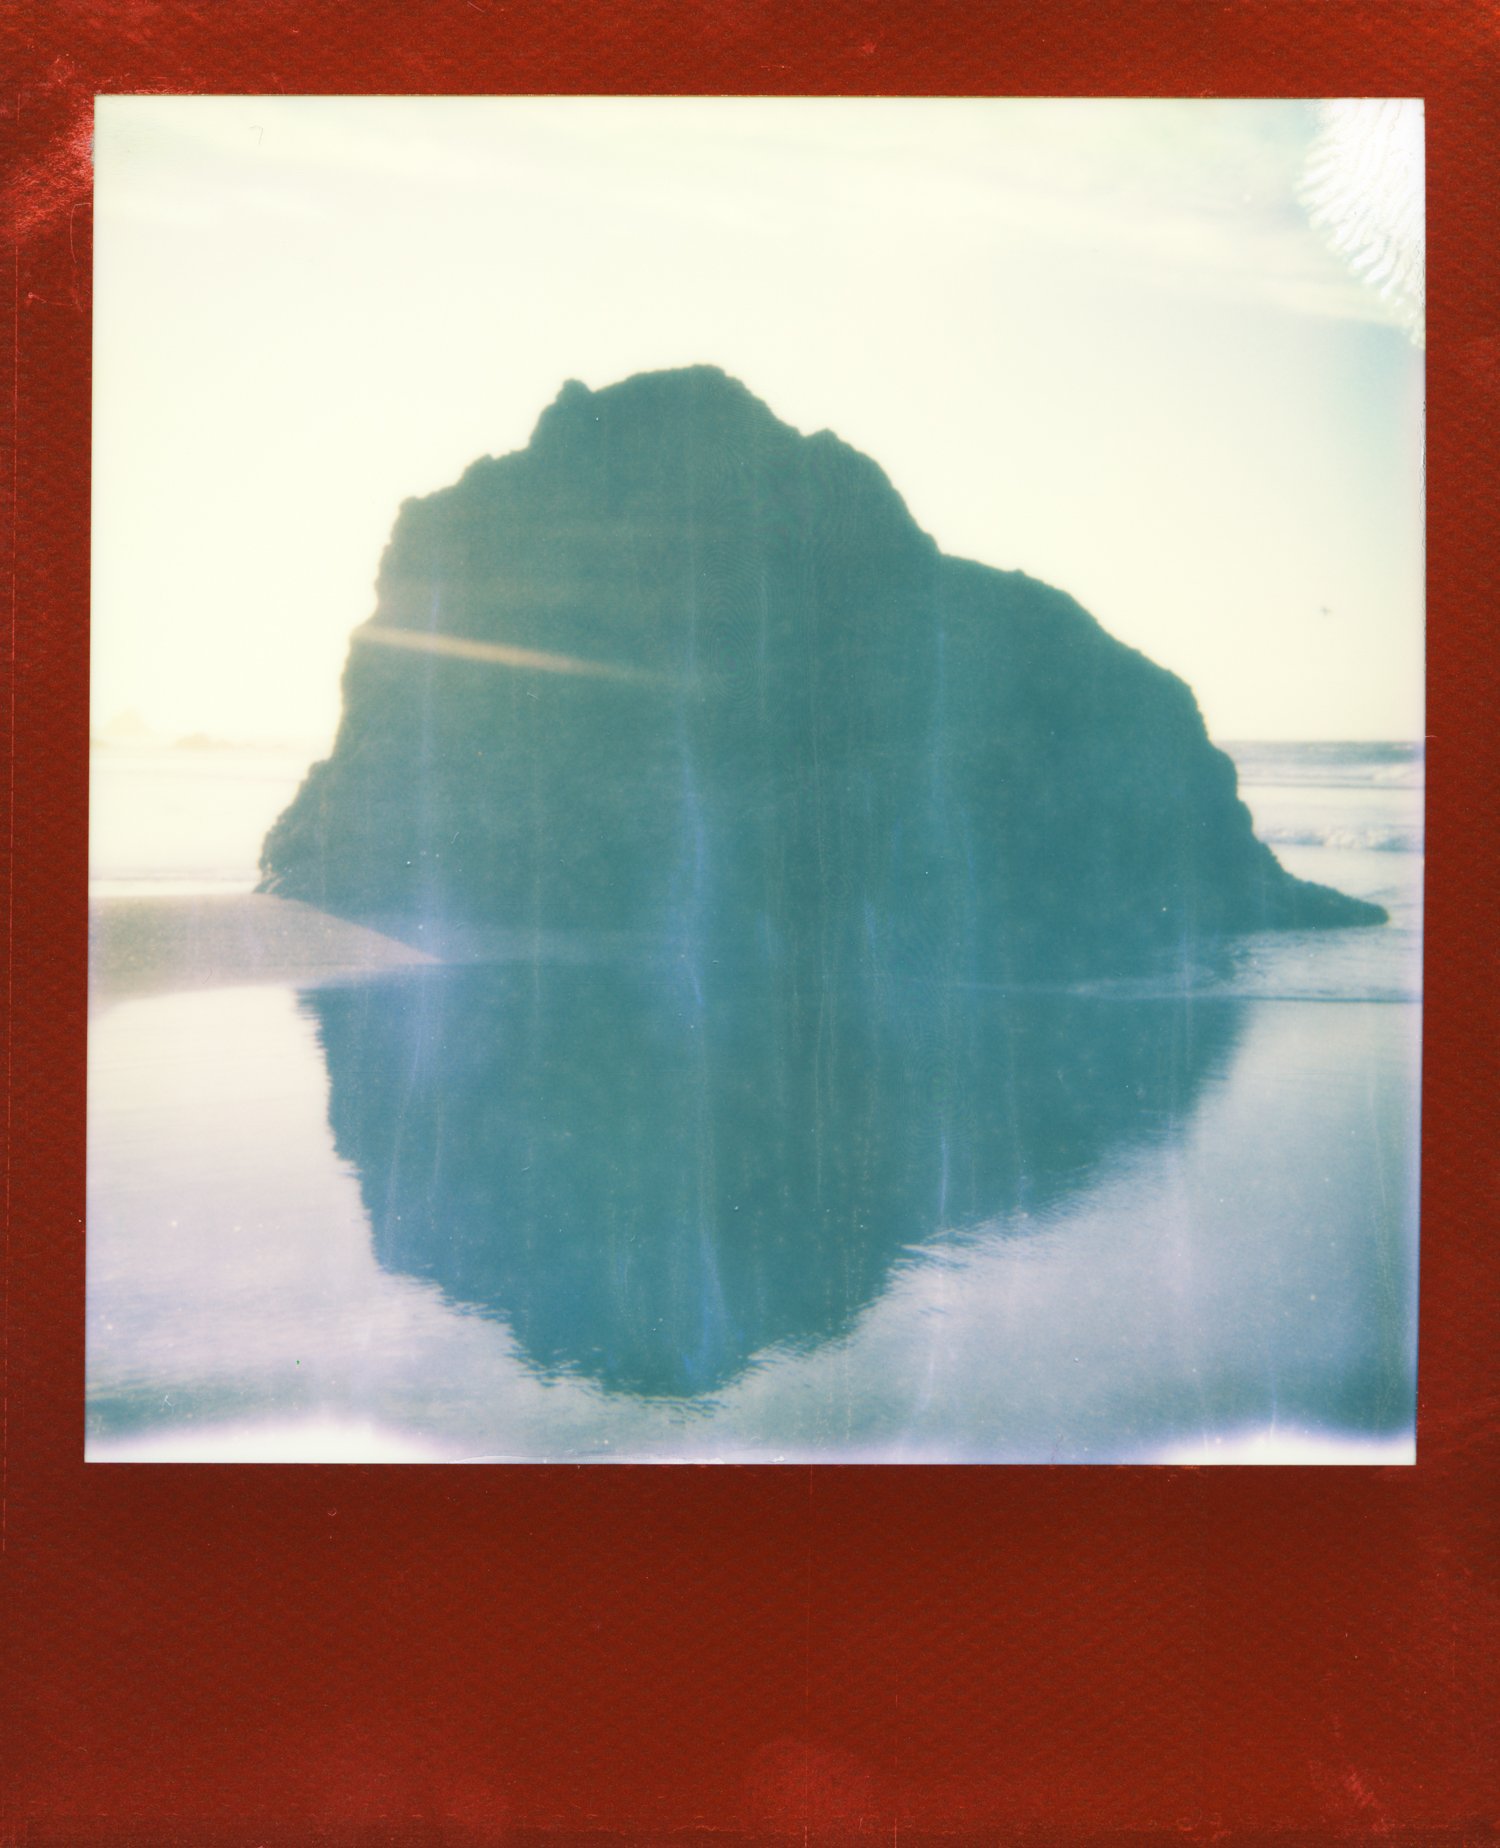
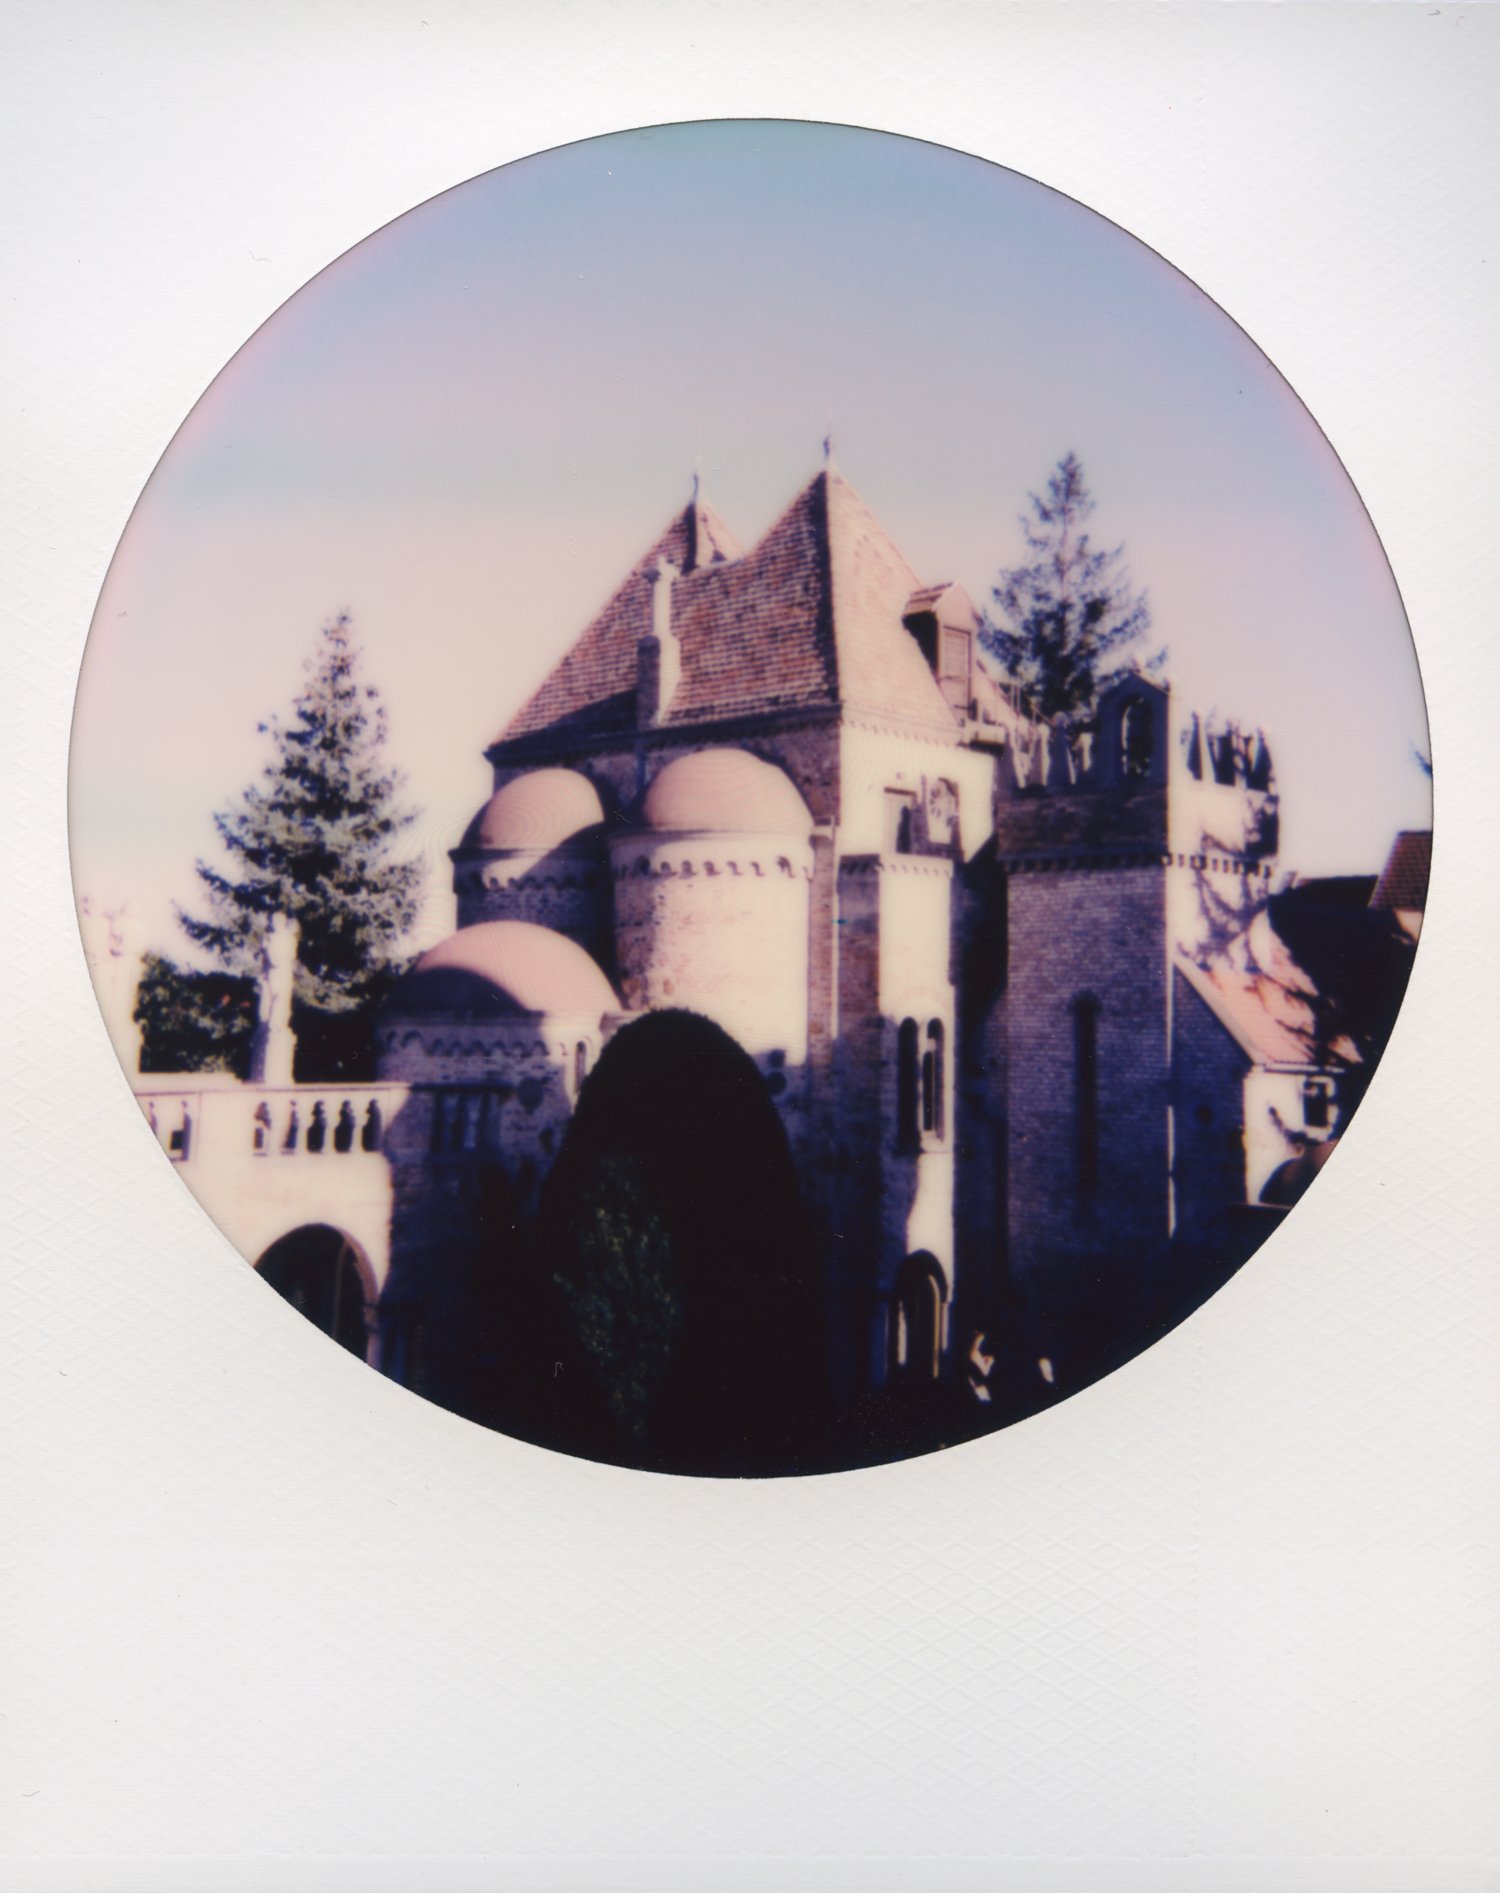
Here are a few sample photos I’ve taken with my Polaroid 600 cameras over the years:

Thanks so much for stopping by! Feel free to leave any questions or comments below. :)

If you found this post helpful or if you’d like to see more of my work, I’d love it if you considered signing up for my Patreon! For as little as $1 a month, you’ll get early access to all of my YouTube videos, plus tons of photos that I don’t post anywhere else. Depending on which tier you choose, you could also receive seasonal prints and/or discounts! I always use all of the proceeds towards cameras, film & processing. Find out more here!

Have a lovely day!

<3 Myles Katherine


What is a Double Exposure / Multiple Exposure and How Do You Create One?


This is probably one of my most frequently asked questions. If you follow my work, you know I’m obsessed with double exposures and multiple exposures. At this point, I won’t even buy a camera if it doesn’t have the capability to create them! But what exactly is a “double exposure” or “multiple exposure”?

Well, it’s actually much more simple than you’d think. It’s essentially just an image over top of an image. For example, a “double exposure” is just one image with another image taken over top of it. In film photography, it means the shutter was activated twice over the same film frame. Thus, the film was exposed twice, creating two images, one over top of the other. A “multiple exposure” is typically more than two images over top of each other. You could also refer to them as “triple exposures” or “quadruple exposures”, etc.

Not all film cameras allow you to do this (though I prefer cameras that do)! One of my favorite cameras to use for multiple exposures is the Holga GCFN. I’ve made a full video about this camera on my YouTube channel because I love it so much! It’s easy to accidentally create double and multiple exposures with this camera because you have to manually wind the film between each image. If you forgot to wind the film after you took an image, you’ll end up shooting over the same frame and creating an accidental double exposure! Honestly though, that’s the magic of the Holga camera. Many people don’t enjoy cameras without an automatic film advance because it’s way too easy to forget whether you advanced the film or not. Personally, I prefer to have full control over my images and I don’t mind when those magic images happen on their own. :) I’ve included a few examples at the end of the post, so be sure to scroll down to see!

A few of my other favorite film cameras to use for double exposures are the Nikon FE2 35 mm camera (check out my YouTube video on this camera) and Contax 645 Medium format camera (I have a YouTube video on this one too)! But a Holga GCFN is a great place to start because they are so affordable, ranging from about $40-70 depending on which model you go with (I always recommend the GCFN model).

When it comes to digital photography and multiple exposures, not all camera brands allow you to create in-camera double and multiple exposures. This is why I prefer to shoot Canon, preferably with my Canon 5D Mark IV, because they have a feature built into the camera that makes them super easy and fun to create. I also use a Canon EOS R, but I find it to be a bit slower when taking double/multiple exposures.

The secret to creating amazing double exposures and multiple exposures is to EXPERIMENT. Try shooting different textures, landscapes and portraits, and mix and match to see how it all turns out. I’ll be sharing a blog post soon with a few tips and tricks on creating unique images, so make sure to check back!

If you found this post helpful or if you’d like to see more of my work, I’d love it if you considered signing up for my Patreon! For as little as $1 a month, you’ll get early access to all of my YouTube videos, plus tons of photos that I don’t post anywhere else. Depending on which tier you choose, you could also receive seasonal prints and/or discounts! I always use all of the proceeds towards cameras, film & processing. Find out more here!

Feel free to leave any questions, comments, tips, etc. Thanks for stopping by!

<3 Myles Katherine

This post contains affiliate links and I will be compensated if you make a purchase after clicking through my links. 

Holga GCFN Double Exposure Examples:

Canon Digital Full-Frame Double Exposure Examples:


How to Make Film Soup - 8 Easy Steps with Results and Film Soaking Tips


I FINALLY made Film Soup! Film Soup is just another way of describing a “film soak” and it really means just that - soaking your film rolls in some sort of liquid to get unique results. I’ve been wanting to try this for years but I somehow never got around to it (and was mostly just terrified that I’d ruin my film)! During COVID-19 though, I was able to find some free time to shoot a few rolls of film for fun and was willing to risk their lives for a film soaking experiment. One of my favorite film photographers, Wendy Laurel, is a film soaking QUEEN and I’ve been paying attention over the years to how she soaks her film. It’s not hard at all, until you get to the point that you have to drop your film into the liquid and hope that it turns out! Luckily, you can’t REALLY mess it up. And in my opinion, the more colorful and strange your photos turn out, the better! It’s a super exciting way to create unique and completely original images, and I’m all about that.

Step 1: Shoot your Film!

Some people soak their film BEFORE they run it through their camera, but I decided not to do this simply because it made me nervous to risk having any sort of chemical or liquid mess up the inside of my camera. Personally, I think it’s much safer to soak your film after you shoot the roll. Plus, if you shoot the roll and decide you DON’T want to risk soaking it, then you’re good to go!

Step 2: Prepare your concoctions

The opportunities are endless when it comes to choosing the liquids to soak your film in. Some of the classic choices are lemon juice, tea, vinegar and salt water. But you can try any kind of liquid you’d like, though it’s probably going to turn out best if it’s something acidic. For each liquid, you just pour a little bit in the bottom of a bowl. There’s no “correct” measurement here - just trust your intuition! A quick lemon squeeze, a few tablespoons of vinegar, etc. It’s totally up to you! That’s the fun of it. :)

Step 3: Pour (almost) boiling water over the liquids

You’ll want to dilute the liquids you chose in Step 2 with hot water. I used boiling water that had cooled down a little bit. Hot water tends to work better than cold water in terms of getting a reaction out of your film. So just pour hot water in each bowl until there’s enough liquid to cover your film roll when you drop it in.

Step 4: Get up the courage to drop your film rolls in the water!

This was the hardest part for me! But it’s also just so thrilling because you have no idea how it’s going to turn out. Drop your film roll into the liquid mixture and let it sit for AT LEAST 15 minutes. My fav photographer I mentioned above, Wendy, usually soaks hers for about an hour. Some people soak their film up to 24 or 48 hours! Again, there are no rules really, but I think 15 minutes at minimum, just to make sure you get some type of result at the end of it all.

Step 5: Rinse the Film

After your film has soaked, you’ll want to rinse the film rolls as best you can to get off any excess chemicals or acid that might continue to dissolve the film. We don’t want the film to disappear into thin air! I rinsed mine with cold water for a good 30 seconds each and then let them each soak in a bowl of clean, cold water for 15 minutes.

Step 6: Let the Film Dry!

You did it! Now, just set the film somewhere safe to dry for at least a week before sending it off to the lab to get developed.

Step 7: Send the film off to get processed (or process it yourself if you’re lucky enough to have a darkroom in your home)!

After a week of drying, you can send off your film to get processed so that you can finally witness your masterpieces! IMPORTANT TIP: Check with your film lab BEFORE you send your film in, to make sure they are able to process soaked film. Some labs aren’t willing to do it, as the chemicals that might still be lingering on the film can alter their chemicals and ruin other people’s film. We DEFINITELY don’t want this to happen. The film lab I usually use actually wasn’t able to do it, so I ended up sending my film to Blue Moon Camera in Portland, Oregon. I made sure to individually label each film roll with what kind of solution I soaked it in so that they could determine the best way to process it in their lab.

Step 8: Obsess over your images!

You did it! I scan my film myself so I had the film sent back to me and then I used my Epson V750 scanner to finally view my images. It was a long wait but TOTALLY worth it. I can’t wait to do it again! And next time, I think I’ll try a 24 hour soak. :)

Let me know how your Film Soup turned out! Feel free to leave any thoughts, comments or questions below! You can also check out my full youtube video showing my first Film Soup experience! Or scroll down to see how my images turned out!

If you found this post helpful or if you’d like to see more of my work, I’d love it if you considered signing up for my Patreon! For as little as $1 a month, you’ll get early access to all of my YouTube videos, plus tons of photos that I don’t post anywhere else. Depending on which tier you choose, you could also receive seasonal prints and/or discounts! I always use all of the proceeds towards cameras, film & processing. Find out more here!

Thanks so much for stopping by! Have a lovely day!

<3 Myles Katherine