Lomography LomoChrome Purple Sample Photos with a Holga 120 GCFN | Review


I’ve heard so many things about Lomography LomoChrome Purple. Some people love it, some people absolutely despise it and some people have never heard of it! Personally, I’m obsessed with it. I love the whimsical world that you can create with it. I get bored with photographing the real world sometimes and I find that LomoChrome Purple brings a little bit of spice and excitement to my film. My favorite day is when I get my film back in the mail and I get to spend it scanning and finding out how my images turned out. The film is super saturated and makes for particularly beautiful landscapes. I find that it can be a bit grainy, especially when you start layering images like I do with multiple exposures. But it’s much less noticeable if you choose to shoot with a better camera. I’ve also used LomoChrome Purple with my Contax 645 and those images are much, much sharper. Overall, though, I’ll take a little bit of grain for some strange, magical purple photos!

You guys know I love the Holga 120 GCFN, so of course, I had to try out the LomoChrome Purple with it. I find the combination to be truly magical. The Holga already has such a dreamy, surreal quality to it, so adding in the LomoChrome Purple really makes the images seem otherworldly.

If you’re not quite ready to venture out into 120 film, LomoChrome Purple also comes in 35 mm, so you can try it out with any ole 35 mm film camera! Plus, it’s just a regular C-41 development process so you can send it to your regular film lab and they’ll know what to do!

I tend to find good deals for LomoChrome purple 120 on eBay, with people getting rid of their film in bulk. Even if its a couple of years expired, it should be perfectly fine as long as it was kept in a relatively temperate environment. If it’s been refrigerated, even better! And as soon as you get it, pop it in the refrigerator to keep it in good, usable condition for as long as possible!

All of the images below are taken with a Holga GCFN and LomoChrome Purple 120 film. I hope these images inspire you to get out there and try it out! Don’t be afraid to get weird and get experimental. We need more uniqueness and creativity out there in the world. :) If you’re feeling REALLY adventurous, you should try out LomoChrome Turquoise, the latest LomoChrome film from Lomography. I don’t love it quite as much but it’s super interesting and I know that there are some people out there that will be able to make some incredible photos with it!

WHERE TO BUY:

Lomography LomoChrome Purple 120 film on eBay

Lomography LomoChrome Purple 35 mm on Amazon

Holga 120 GCFN on Amazon

Holga 120 GCFN on eBay (for more fun colors!)

LomoChome Turquoise on eBay!

Thanks so much for stopping by! Feel free to leave any questions/comments/thoughts below!

<3 Myles Katherine


Review of the Pentax PC35AF-M with Sample Photos in Boston & Salem, Massachusetts


To be honest, I have no idea where my Pentax PC35AF-M came from. It just showed up in my camera collection one day. I think I might have picked it up in a thrift store but I’m not sure! For years, I kind of skipped over it, choosing other cameras instead when I’d pack my camera bag. Recently, I was cleaning out my office and stumbled across it again. When I opened the lens cover, I realized the lens was a 2.8F lens. It made me wonder why I hadn’t given this camera a chance yet! So I loaded it up with a roll of 35mm film and took it with me on a recent trip to Boston & Salem, Massachusetts. I even took it with me to a few fashion shoots I had in Portland, Oregon but somehow I lost that roll of film. I’m pretty devastated about that because I’ve never lost a roll of film. Maybe I’ll come across it one of these days. Or maybe I somehow shot over it and will end up with a roll of double exposures. I sure hope so!

A BRIEF HISTORY OF THE PENTAX PC35AF-M

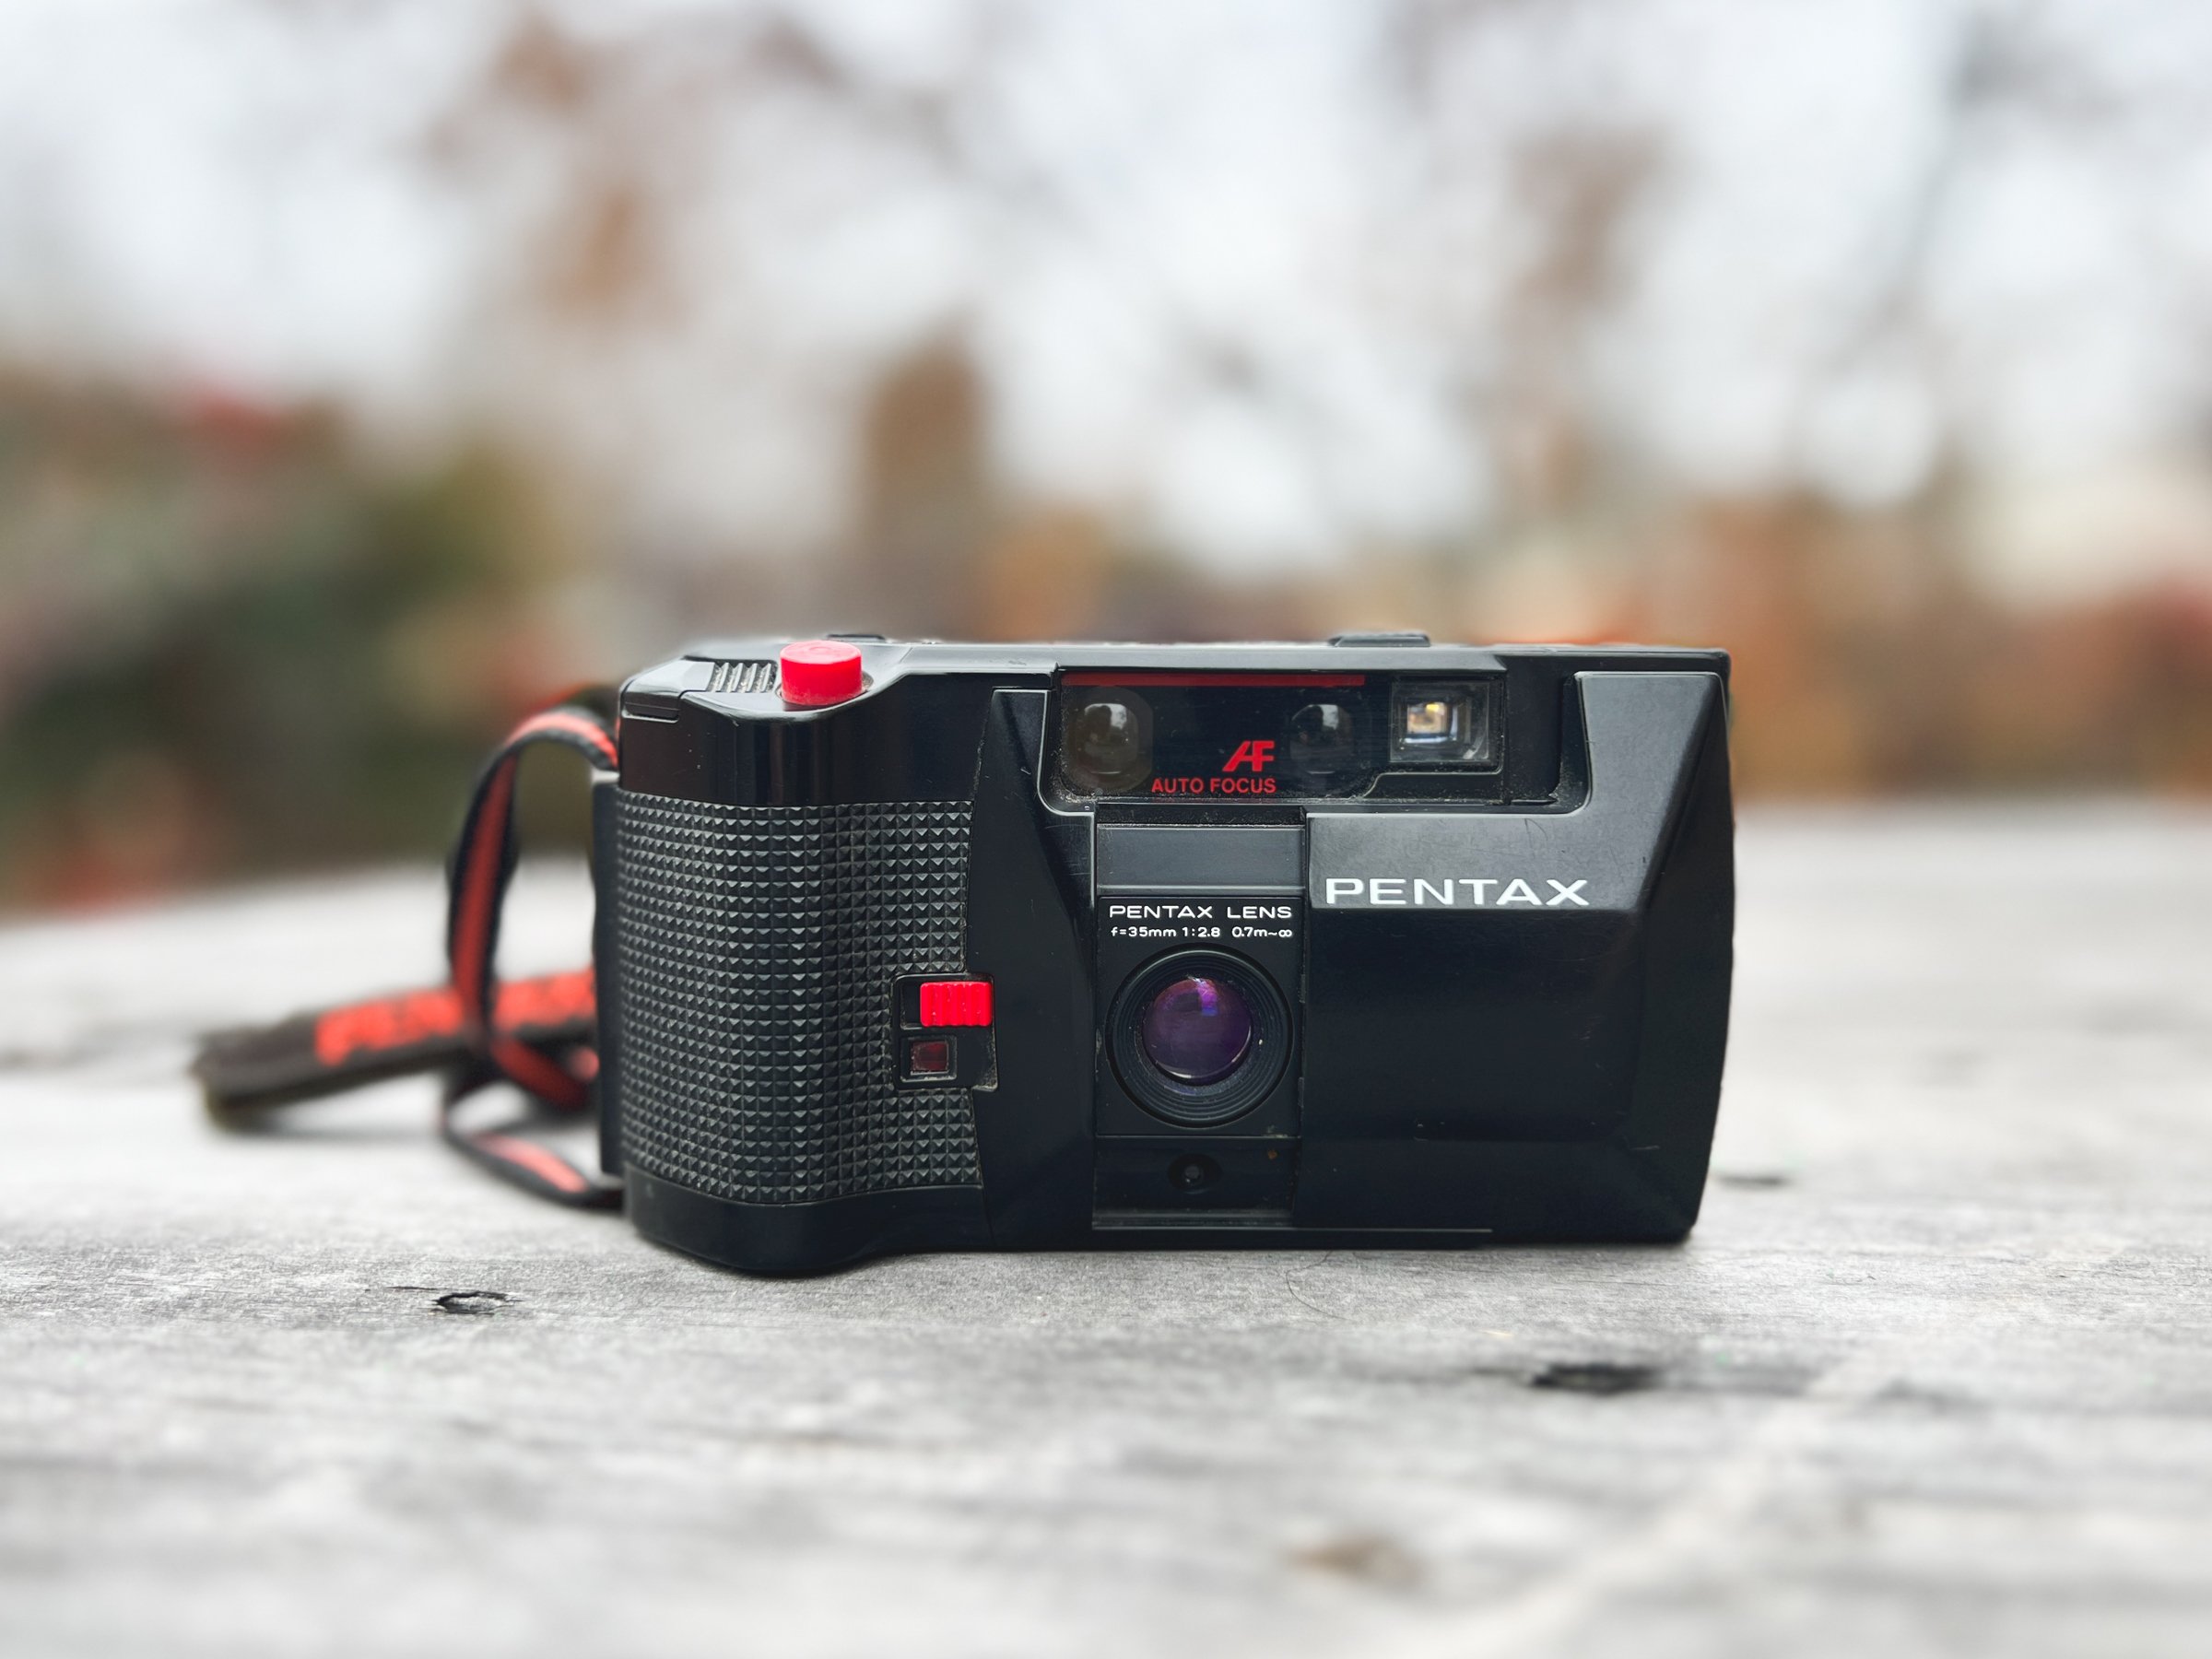
The Pentax PC35AF-M is a 35mm point and shoot autofocus compact camera produced by Asahi Optical Corporation in Japan. It was originally released in 1984, which doesn’t sound that old for a vintage camera, but these days that means it’s 40 years old! In my opinion, they seem to hold up very nicely because of their solid build. The PC35AF-M was a follow-up to the original version of the camera, the Pentax PC35AF. The only difference was a motorized film-advance. The PC35AF was Pentax’s first autofocus compact camera, which is pretty amazing considering how well these little cameras have held up.

INITIAL THOUGHTS

So far, I’m pretty impressed with this camera. It doesn’t look like much but it seems to be becoming a bit of a cult classic in the camera community. It’s still relatively affordable though ($50-200) and I’d recommend scooping one up while you can. You can find them on eBay and places like Mercari. The lens is incredibly sharp for the price and it has quite a heavy, sturdy body for its size. I think this camera still flies under the radar though and I’ve heard of people picking them up in thrift stores for next to nothing. Hopefully you’ll be one of the lucky ones that finds one this way!

FEATURES

If you’re a fan of compact, easy-to-use 35mm point and shoot cameras, this one definitely won’t disappoint. The shutter button makes a strangely satisfying electronic sound and the photos are quite sharp for the price point of this camera. The autofocus system is different than others when it comes to point and shoots, in that you have a bit more control over the subject distance. If you partially depress the shutter button, it shows you in the viewfinder which subject distance it’s choosing. If you decide to change subjects, you can remove your finger from the shutter and redepress the button for the new focusing distance.

I love that is has a pop-up flash. There’s a fun little red button on the side that you pull down and the flash just shoots right up! It gives you a bit more control over the flash, rather than it just popping up on its own when you’re in a low light situation like some other point and shoots. When I was in Boston, I’d bring this camera out with me every night. Since it had a flash and a 2.8F lens, it does pretty well in most lighting conditions and makes a fun nighttime camera.

This camera also has a self-timer, a back-light feature, an ISO switch and automatic film advance. The battery compartment tends to pop open but I just make sure to tape it and I don’t have any problems. It just takes two AA batteries which is super nice. It’s such a pain when I pick up a camera that takes some weird, hard-to-find battery.

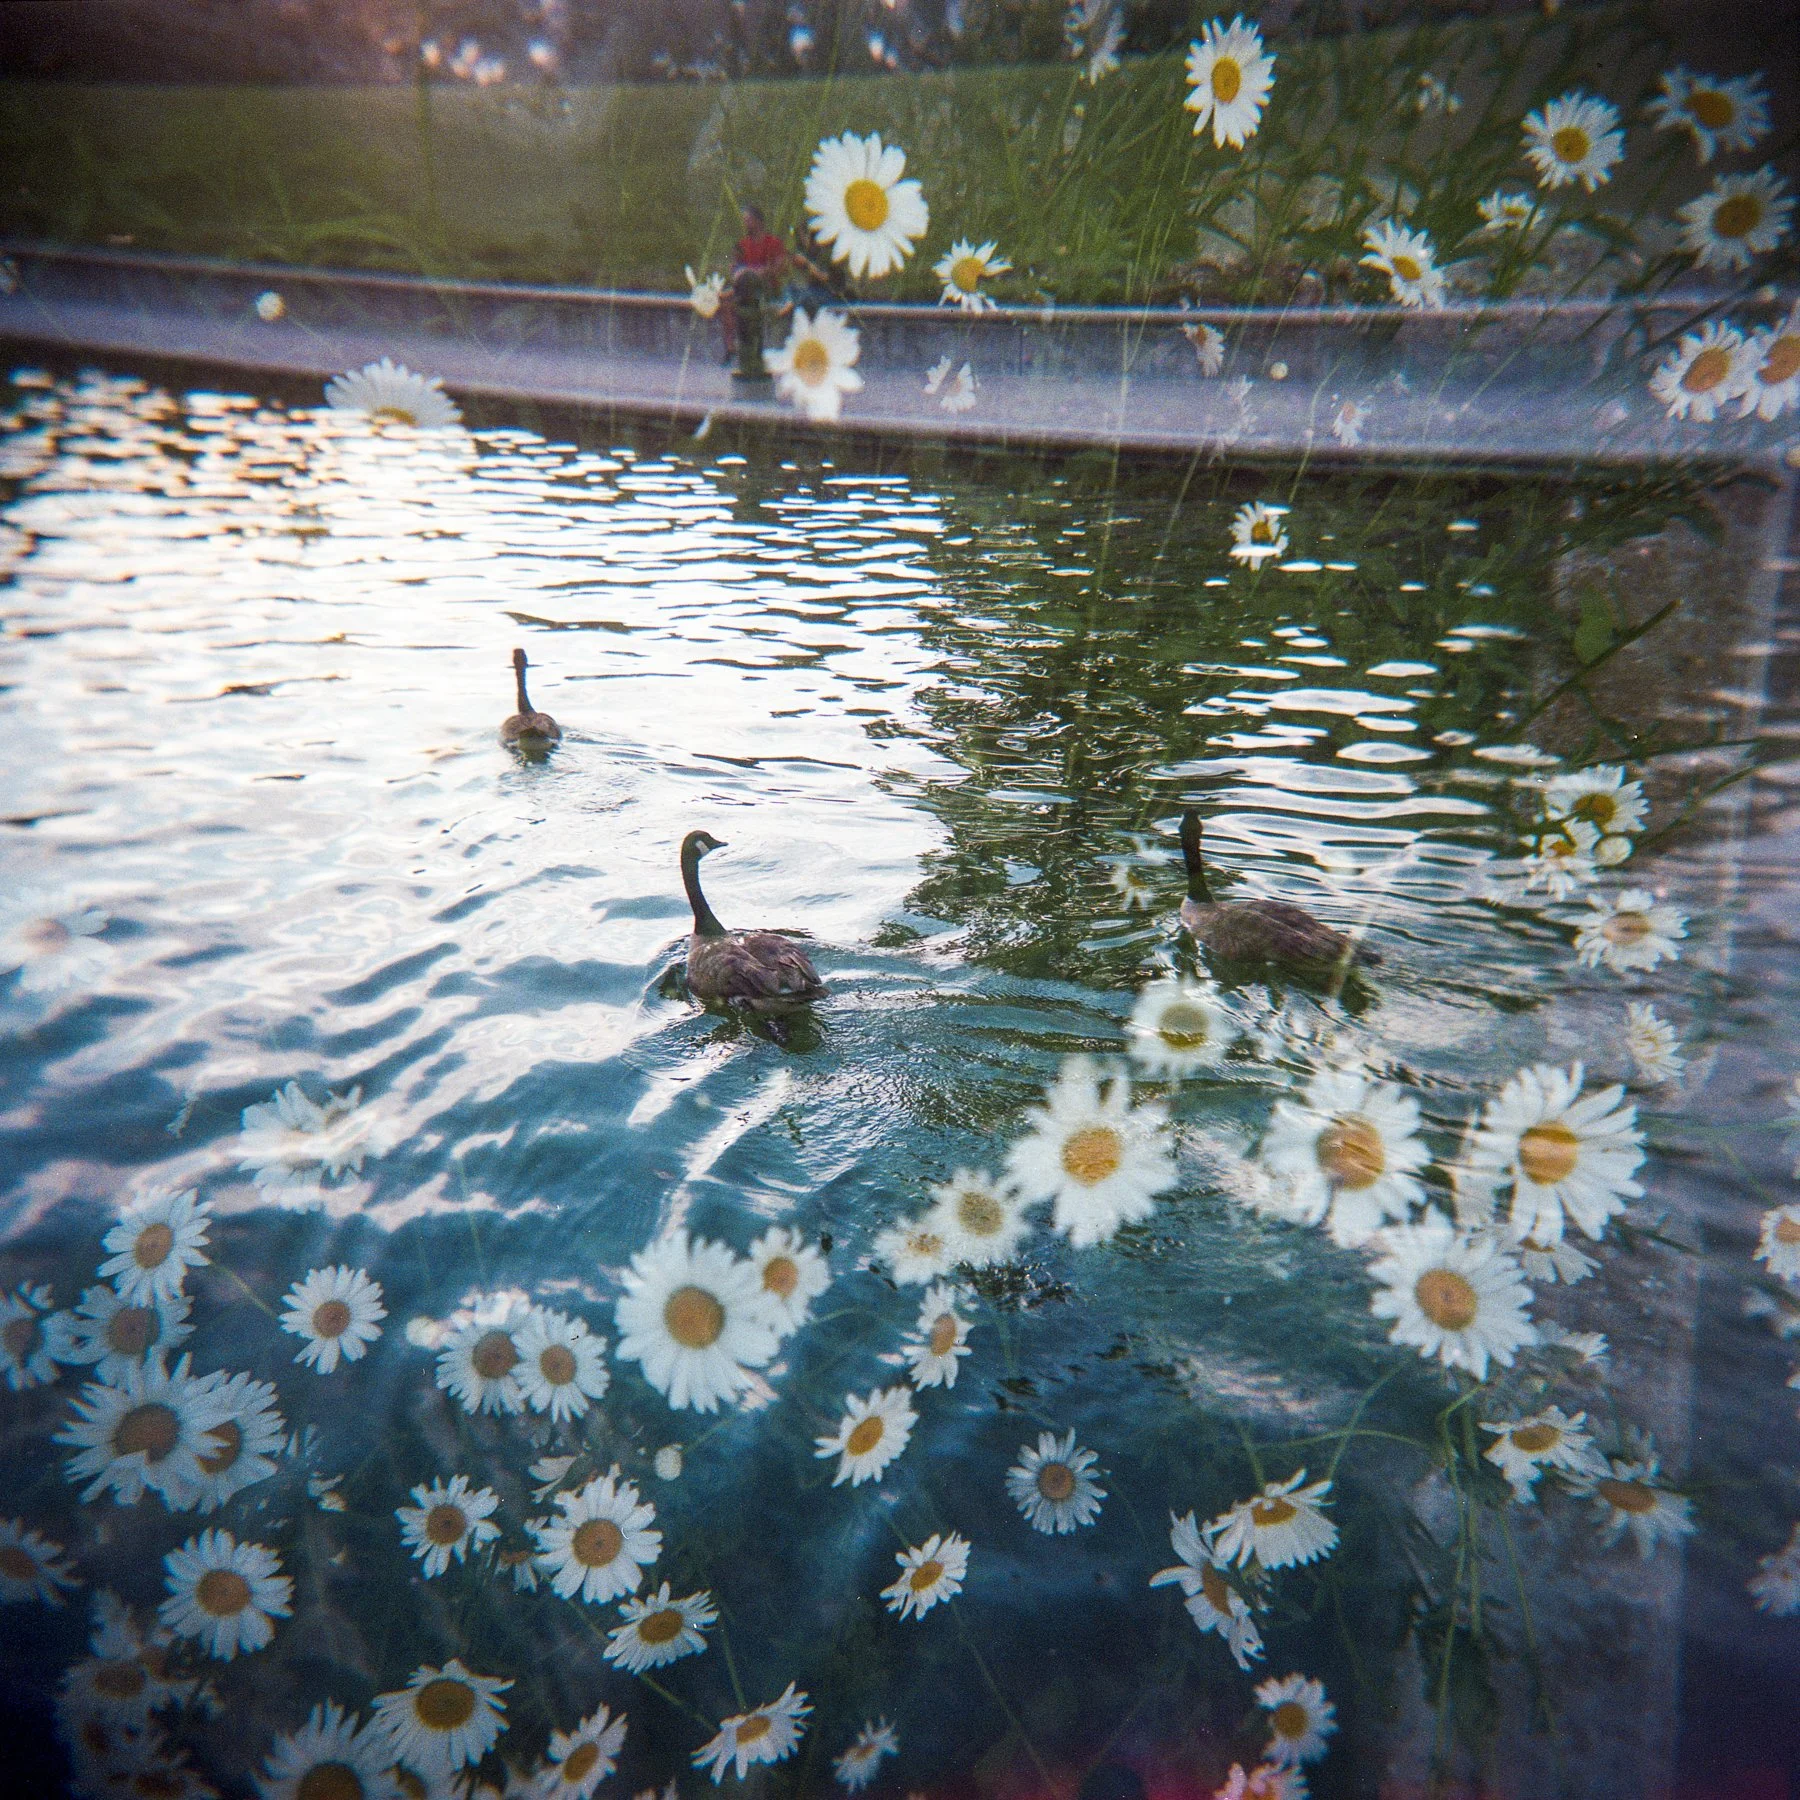
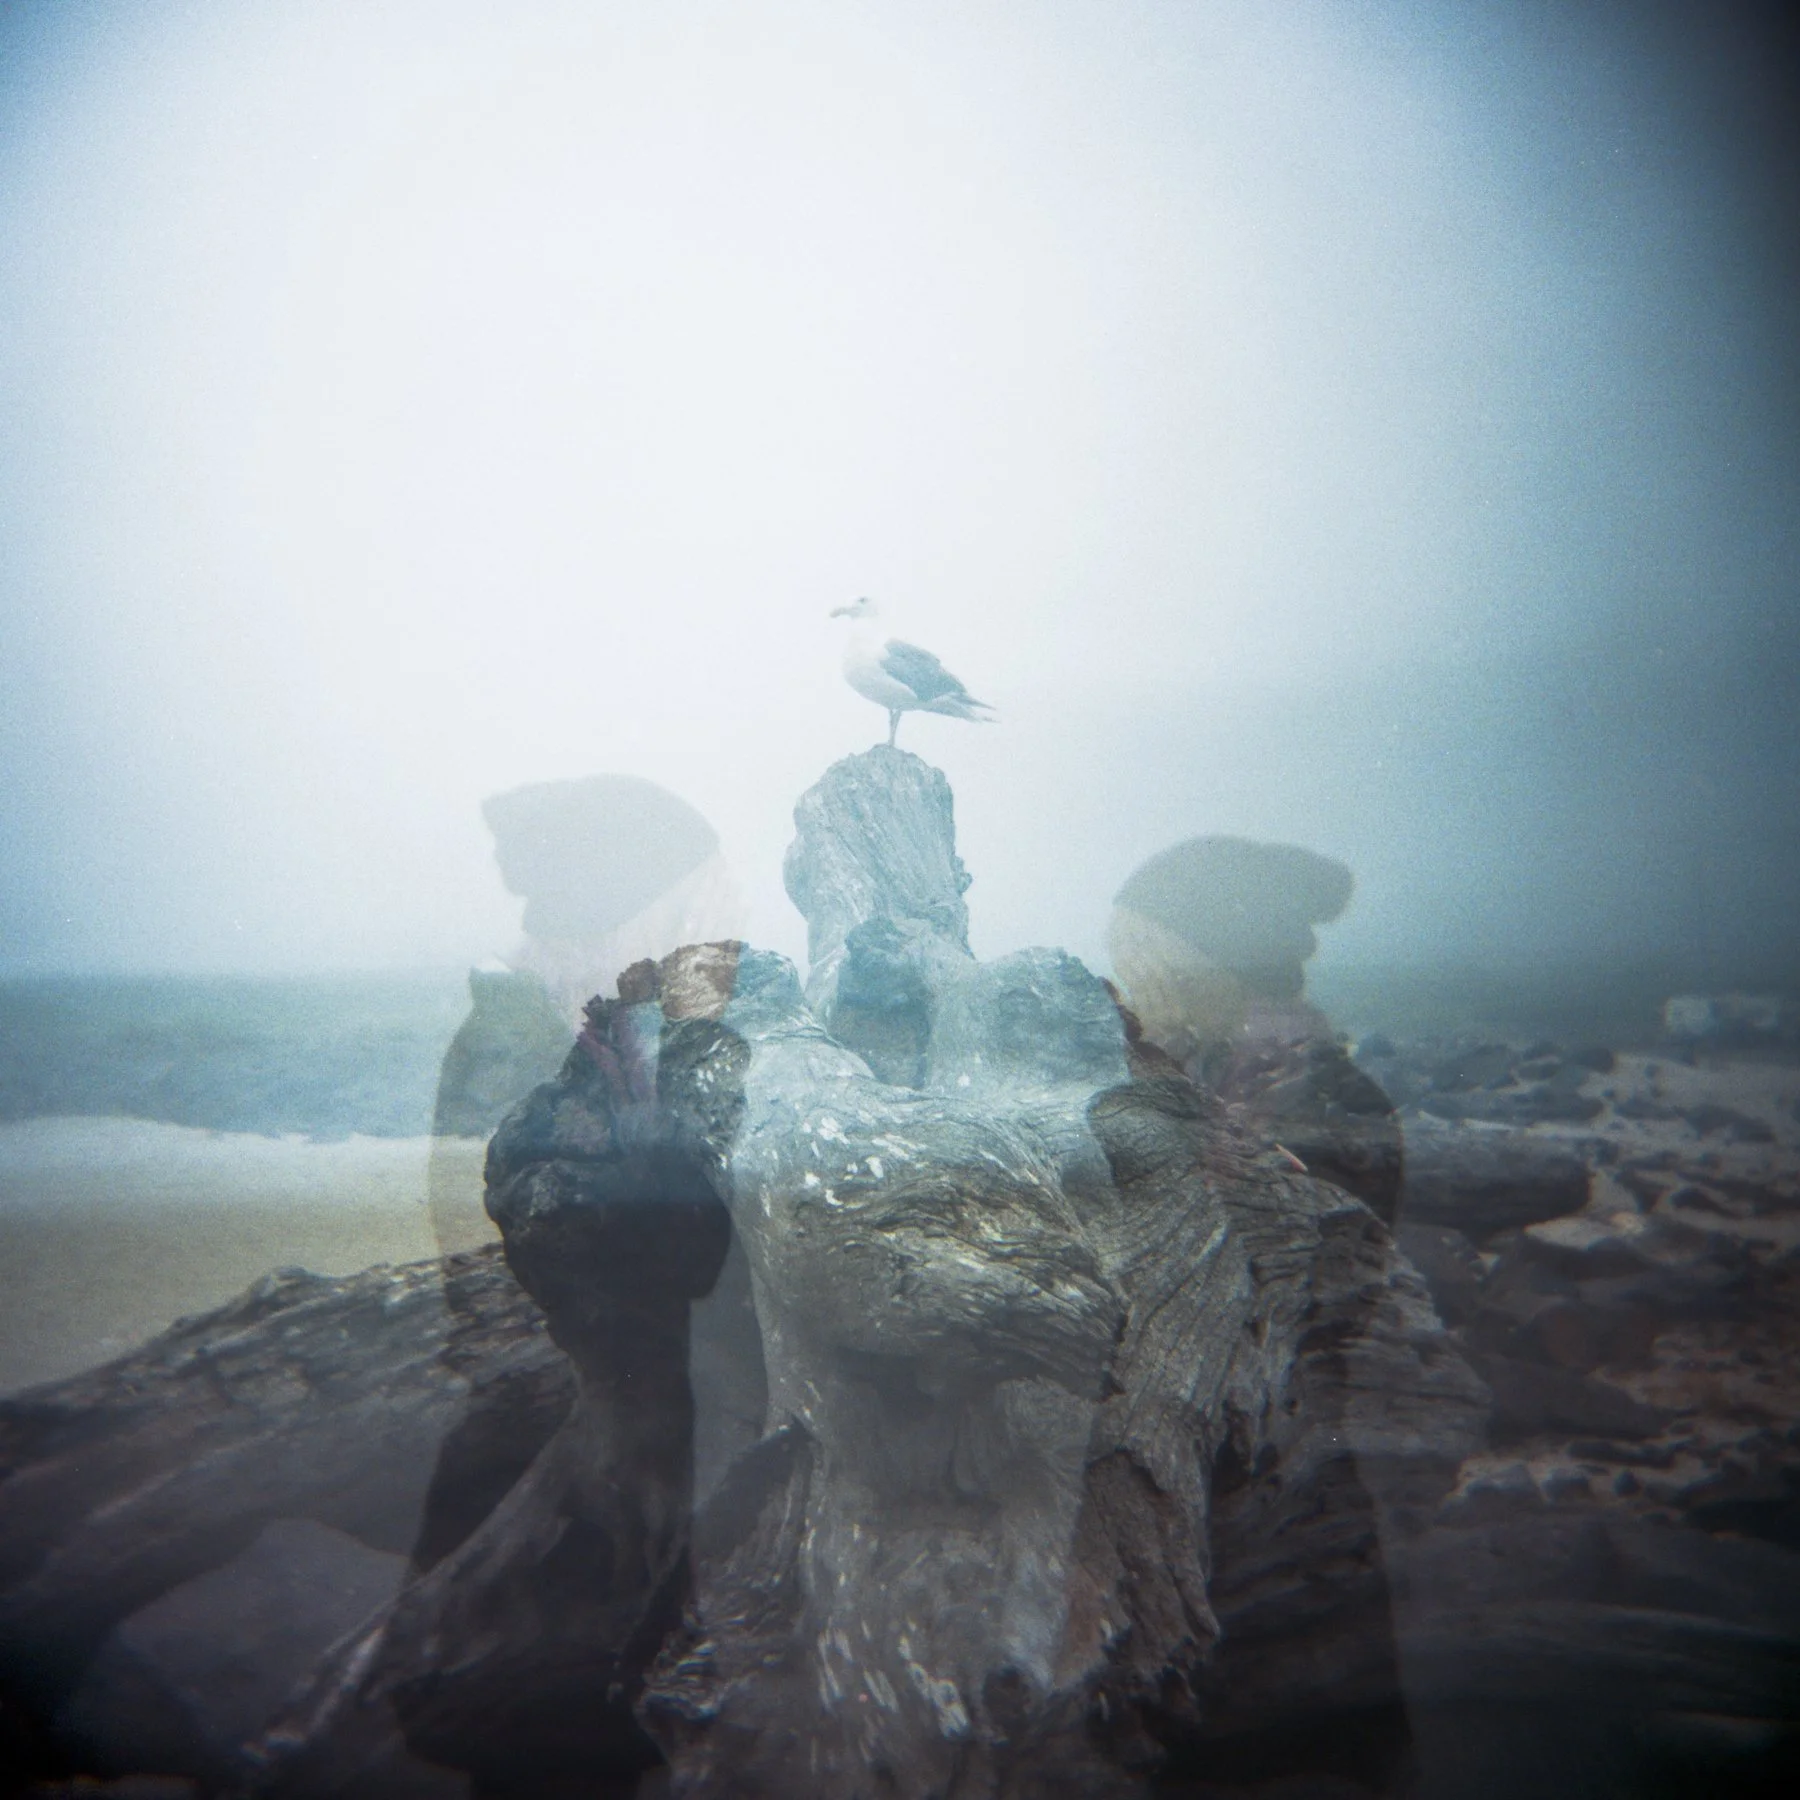
The only downside for me, personally, is that there is no multiple exposure feature. There is a rewind switch on the bottom of the camera though, so you could always rewind the film and shoot over it for that effect. I just prefer to have a built-in multiple exposure option.

SIZE & WEIGHT

This camera is great as a grab-and-go or for street photography. It’s somewhat inconspicuous, though maybe a bit too large to fit in a pants pocket. I had no trouble fitting it in my coat pocket, but it does leave a hefty and questionable lump! To me though, this camera is small because I’m used to dragging around giant cameras. It’s surprisingly heavy for it’s size, 12.2 ounces. The older version of the camera, the PC35-AF, weighs a little less though because it doesn’t have that motorized film advance.

ISSUES & FAULTS

Overall, I haven’t noticed anything terribly faulty with it. I did have an issue with the most recent roll of film I shot with it, though. For some reason, I was having trouble getting the film to wind back all the way after I was done with the roll, so when I opened the back I ended up light-leaking a few images. It doesn’t really bother me because I love light leaked photos, but I do want to figure out what happened. I plan on paying more attention the next time I use the camera so I can fix it!

As I mentioned previously, the fact that it doesn’t have a multiple exposure option is an issue for me, but that’s not a dealbreaker for everyone.

FINAL THOUGHTS

If you come across a Pentax PC35AF-M, definitely don’t leave it behind. With such a sharp lens, this makes a great addition to any camera collection. Plus, the fact that it is so sturdy and substantial leads me to believe that these little cameras will last quite a while. Not to mention that it comes with a built-in springloaded lens cover that helps to protect that 2.8 lens. I haven’t experiemented with the back light feature yet, but I think it’s really going to come in handy if I ever remember to use it!

WHERE TO BUY

eBay

Mercari

Poshmark

KEH Camera

Here are a few of my favorite film options:

Kodak Gold 200

Lomography Color 400

Lomography Color 100

Kodak Portra 160

Kodak Portra 400

Kodak Colorplus 200

I’m going to think twice before leaving this camera behind now. I like to keep at least one 35mm point and shoot camera in my bag at all times and I think it’s going to be fighting in the battle with my Contax T2, to be honest. My Contax isn’t always the most reliable. Plus, if I lose it while I’m traveling I’m out quite a substantial amount of money. Luckily, the Pentax PC35AF-M is affordable and more easily replaced.

I’ve shared a few of my favorite images from this camera so far, but I’ll be sure to add more to this post as I use it more!

Thanks so much for stopping by!

<3 Myles Katherine

SAMPLE PHOTOS (click to enlarge):


How to Create Double Exposures and Multiple Exposures with a Holga Toy Camera | 5 Simple Tips and Tricks with Sample Photos!


How Do You Create Double Exposures and Multiple Exposures with a Holga Toy Camera?

This HAS to be my most frequently asked question. If you follow my work you know I’m obsessed with the Holga and multiple exposures (specifically, the Holga GCFN). I still remember the very first double exposure I ever took and the excitement I felt when I realized what had happened. I suddenly felt like the opportunities were endless when it came to photography. I realized that photography didn’t necessarily need to mimic real life. I could create a world that didn’t exist, by merging photos taken directly from reality. That juxtaposition blew my mind and really catapulted my interest in photography.

It might seem intimidating at first when it comes to creating multiple exposures. I think there’s an innate and expected fear that they’re going to be TERRIBLE. That they won’t make sense. That no one will know what they’re looking at. But guess what, that’s FINE! In fact, it’s better than taking the same boring photo that everyone else takes. It takes some time to get used to layering images and understanding how the final product is going to turn out. But even now, with a decade of experience under my belt, I still don’t feel like I have complete control over my multiple exposures. I always have an expectation in my mind and it never quite fits with how I envision them. Either they’re not as good as I’d hoped, or they’re even better. And usually the ones that I’m just messing around with end up being the best. It’s really better NOT to plan. To just try out different textures and faces and landscapes and see how they turn out.

In case you’re having some trouble getting started though, here are a few tips for creating multiple exposures with a Holga camera. The Holga is one of the best cameras, in my opinion, to try out multiple exposures. But first, you have to understand HOW to take a multiple exposure. It’s actually SUPER simple. After taking a photograph, you just simply don’t wind the film advance dial at all. You just take another photo right over top of the first one. And you can do this as many times as you want, which is why I love the Holga so much. A lot of film cameras will automatically advance to the next frame, leaving you without the option to shoot over top of the first frame. The Holga is meant for multiple exposures. It’s very easy to accidentally take a multiple exposure with the Holga too, simply because it is a manual advance camera. So oftentimes, you might nor even mean to take a photo over top of another one, it just might happen. Actually, it WILL happen at some point if you use the Holga. It’s just part of the magic of the camera!

5 Simple Tips and Tricks for Creating Incredible Double & Multiple Exposures with the Holga Toy Camera

Tip #1 - Try out a portrait over top of a landscape!

This is probably one of my main choices for creating double exposures. It usually ends up quite interesting and beautiful. I’ll shoot the first image on the infinity/mountain setting of the Holga and then shoot the second image as a close-up portrait using the single-person setting on the Holga.

Tip #2 - Try asking your subject to move slightly / try a new pose in-between images

This is another go-to for me when it comes to double exposures. It ends up creating very ghostly, spooky images that are incredibly unique and unpredictable. These are often my favorite photos to get back after a photo shoot.

Tip #3 - Try out different close-up textures as your second image

This one is somewhat of a risk, but oftentimes pays off! If the texture is too much, it can sometimes end up being a big indecipherable mess. But other times, it can add a bit of mystery and atmosphere to your photo.

Tip #4 - Try flipping your camera upside down for a second shot of the same subject

This is really fun to try with cityscapes, buildings and landmarks, mostly because they don’t move and you have enough time to plan out your shot.

Tip #5 - Try having your model step out of the second shot, but keep the background the same

This creates a very ghostly vibe, because the model becomes somewhat hazy and somewhat see-through. This is definitely another one of my favorite multiple exposure methods when using the Holga.

I’ve included a few more samples below of my favorite double/multiple exposures I’ve taken over the years with the Holga. It’s gotten to a point where I won’t even buy a camera anymore if it doesn’t have the option for multiple exposures! It’s become a huge part of my process and I feel extremely limited now when I’m not able to create them. If you’re interested in multiple exposures, you should definitely pick up a Holga and try it out! You can also check out my full review and blog post about the Holga here. Or you can check out my YouTube video! I LOVE the Holga. My main advice though is to be patient when you’re first starting out. You can’t expect perfection when it comes to the Holga. It has a mind of its own. But if you’re willing to learn its eccentricities, it will surprise you.

CAMERA:

Purchase a Holga 120 GCFN on Amazon

Purchase a Holga 120 GCFN on eBay!

Purchase a Holga 120 GCFN on KEH Camera

FILM RECOMMENDATIONS:

Lomography 400 120 film

Kodak Portra 160 120 film

Kodak Portra 400 120 film

#ad

If you’re interested in supporting my work and seeing lots more videos in the future, be sure to check out my Patreon! As a patron, you’ll receive early access to my YouTube videos, as well as access to never-before-seen images and seasonal prints, depending on the tier you sign up for.

Feel free to leave any thoughts/comments/questions/concerns below! Thanks so much for stopping by. :)

<3 Myles Katherine