The Mamiya 645 vs. the Contax 645 | Mamiya 645AF Sample Photos Using Kodak Portra on a Cross Country Road Trip

(By using the affiliate links and/or codes in this blog post, you help support Myles Katherine Photography. I may earn a small commission at no additional cost to you if you make a purchase through these links. Thank you for your support!)

Ugh, I miss my Mamiya 645AF. Over the years I’ve learned to never sell the gear that I love because I always end up regretting it. Yes, I technically upgraded from the Mamiya 645AF to the Contax 645, but there is still something so special to me about the photos I took with the Mamiya 645AF while I had it. Maybe it’s because it was my first professional medium format camera or maybe it’s because something about the images just felt more “me” than my Contax 645. Don’t get me wrong, the Contax 645 is worth every penny and takes incredible photos. You can check out some sample photos I’ve taken with it here. But, because of it’s high price tag, I feel the need to be extra cautious with it when I’m traveling and shooting. In many cases, I just leave it at home because it seems like too much of a risk to be lugging it around haphazardly. With the Mamiya 645, I didn’t overthink, I just brought it with me and didn’t worry as much about the cost if something happened to it.

While I definitely notice a difference in sharpness and quality when it comes to comparing the Mamiya 645AF and the Contax 645, I still have an affinity for the dreamy and playful vibe I got with the Mamiya. The Contax 645 is really geared towards professional photographers and high-end luxury photography. It’s super, ridiculously sharp and quite a bit more reliable than the Mamiya 645. I always had issues with focusing when it came to the Mamiya. The Contax 645 is a workhorse of a camera and I’m never disappointed with the images. You can read my full review of the Contax 645 here, or check out my YouTube video featuring the Contax here! But for anyone just starting out with medium format photography, you will not be disappointed with the Mamiya 645AF. There are so many images I took with it that I still cherish to this day.

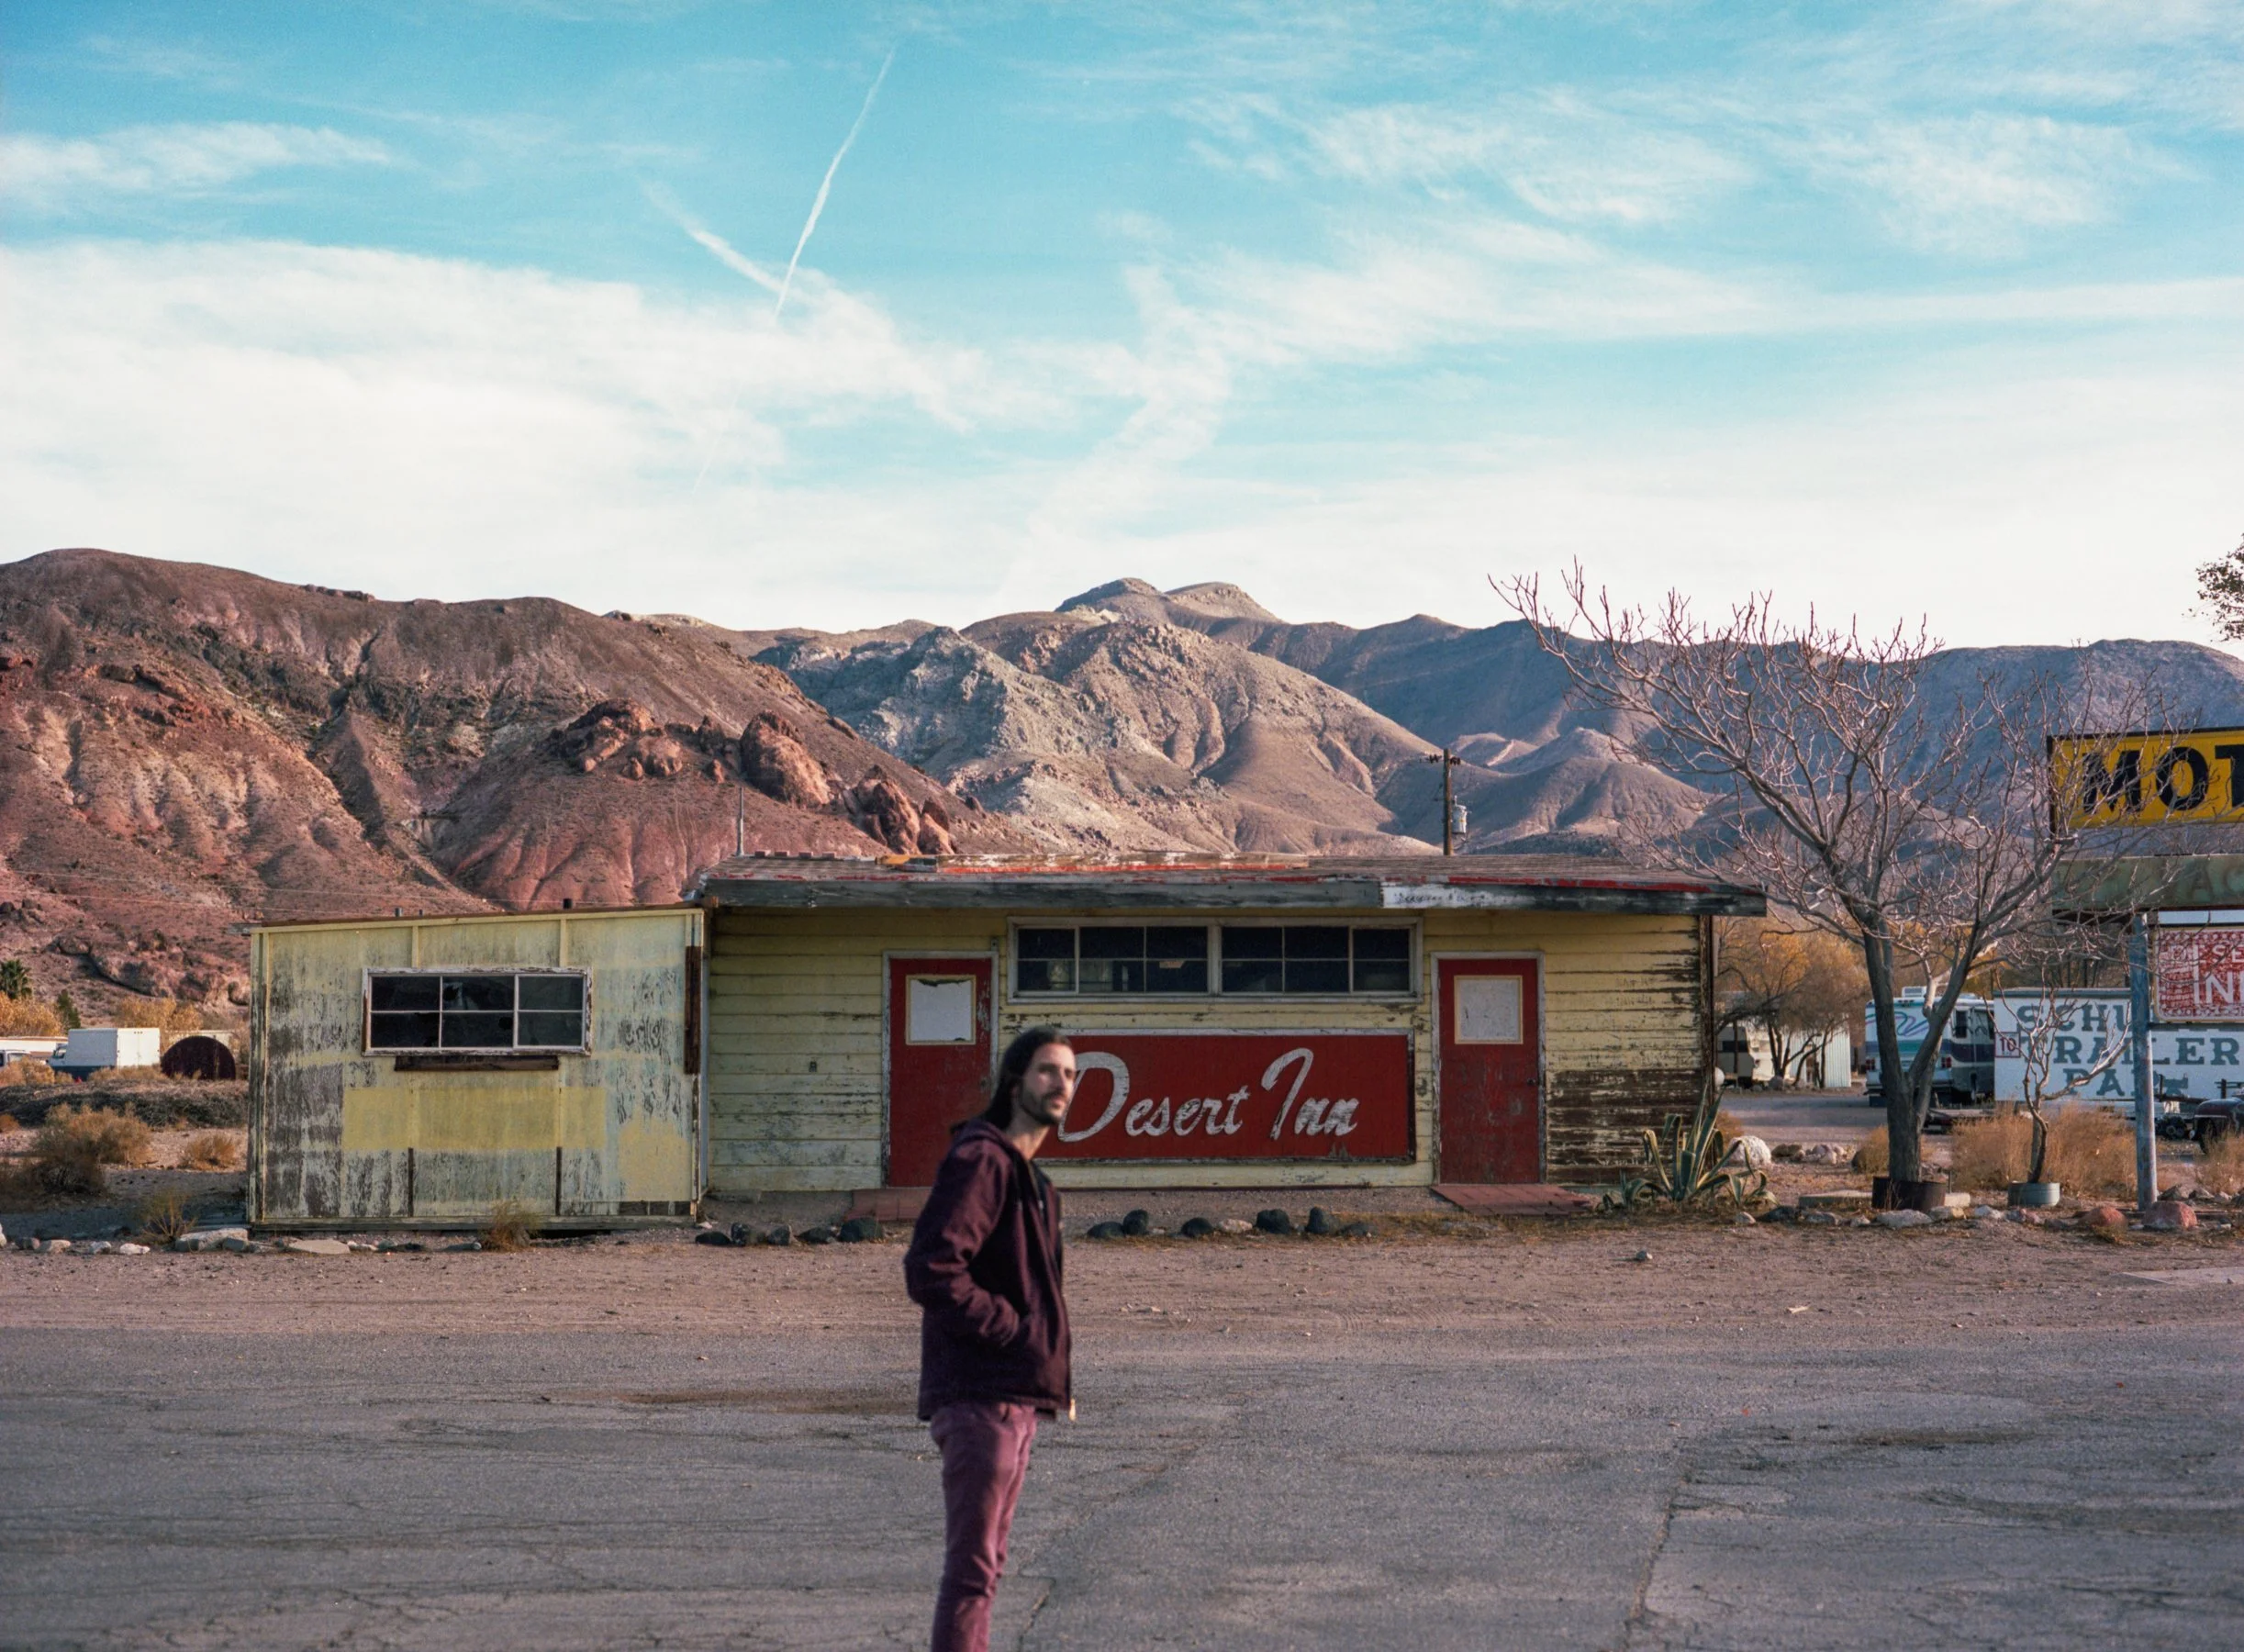
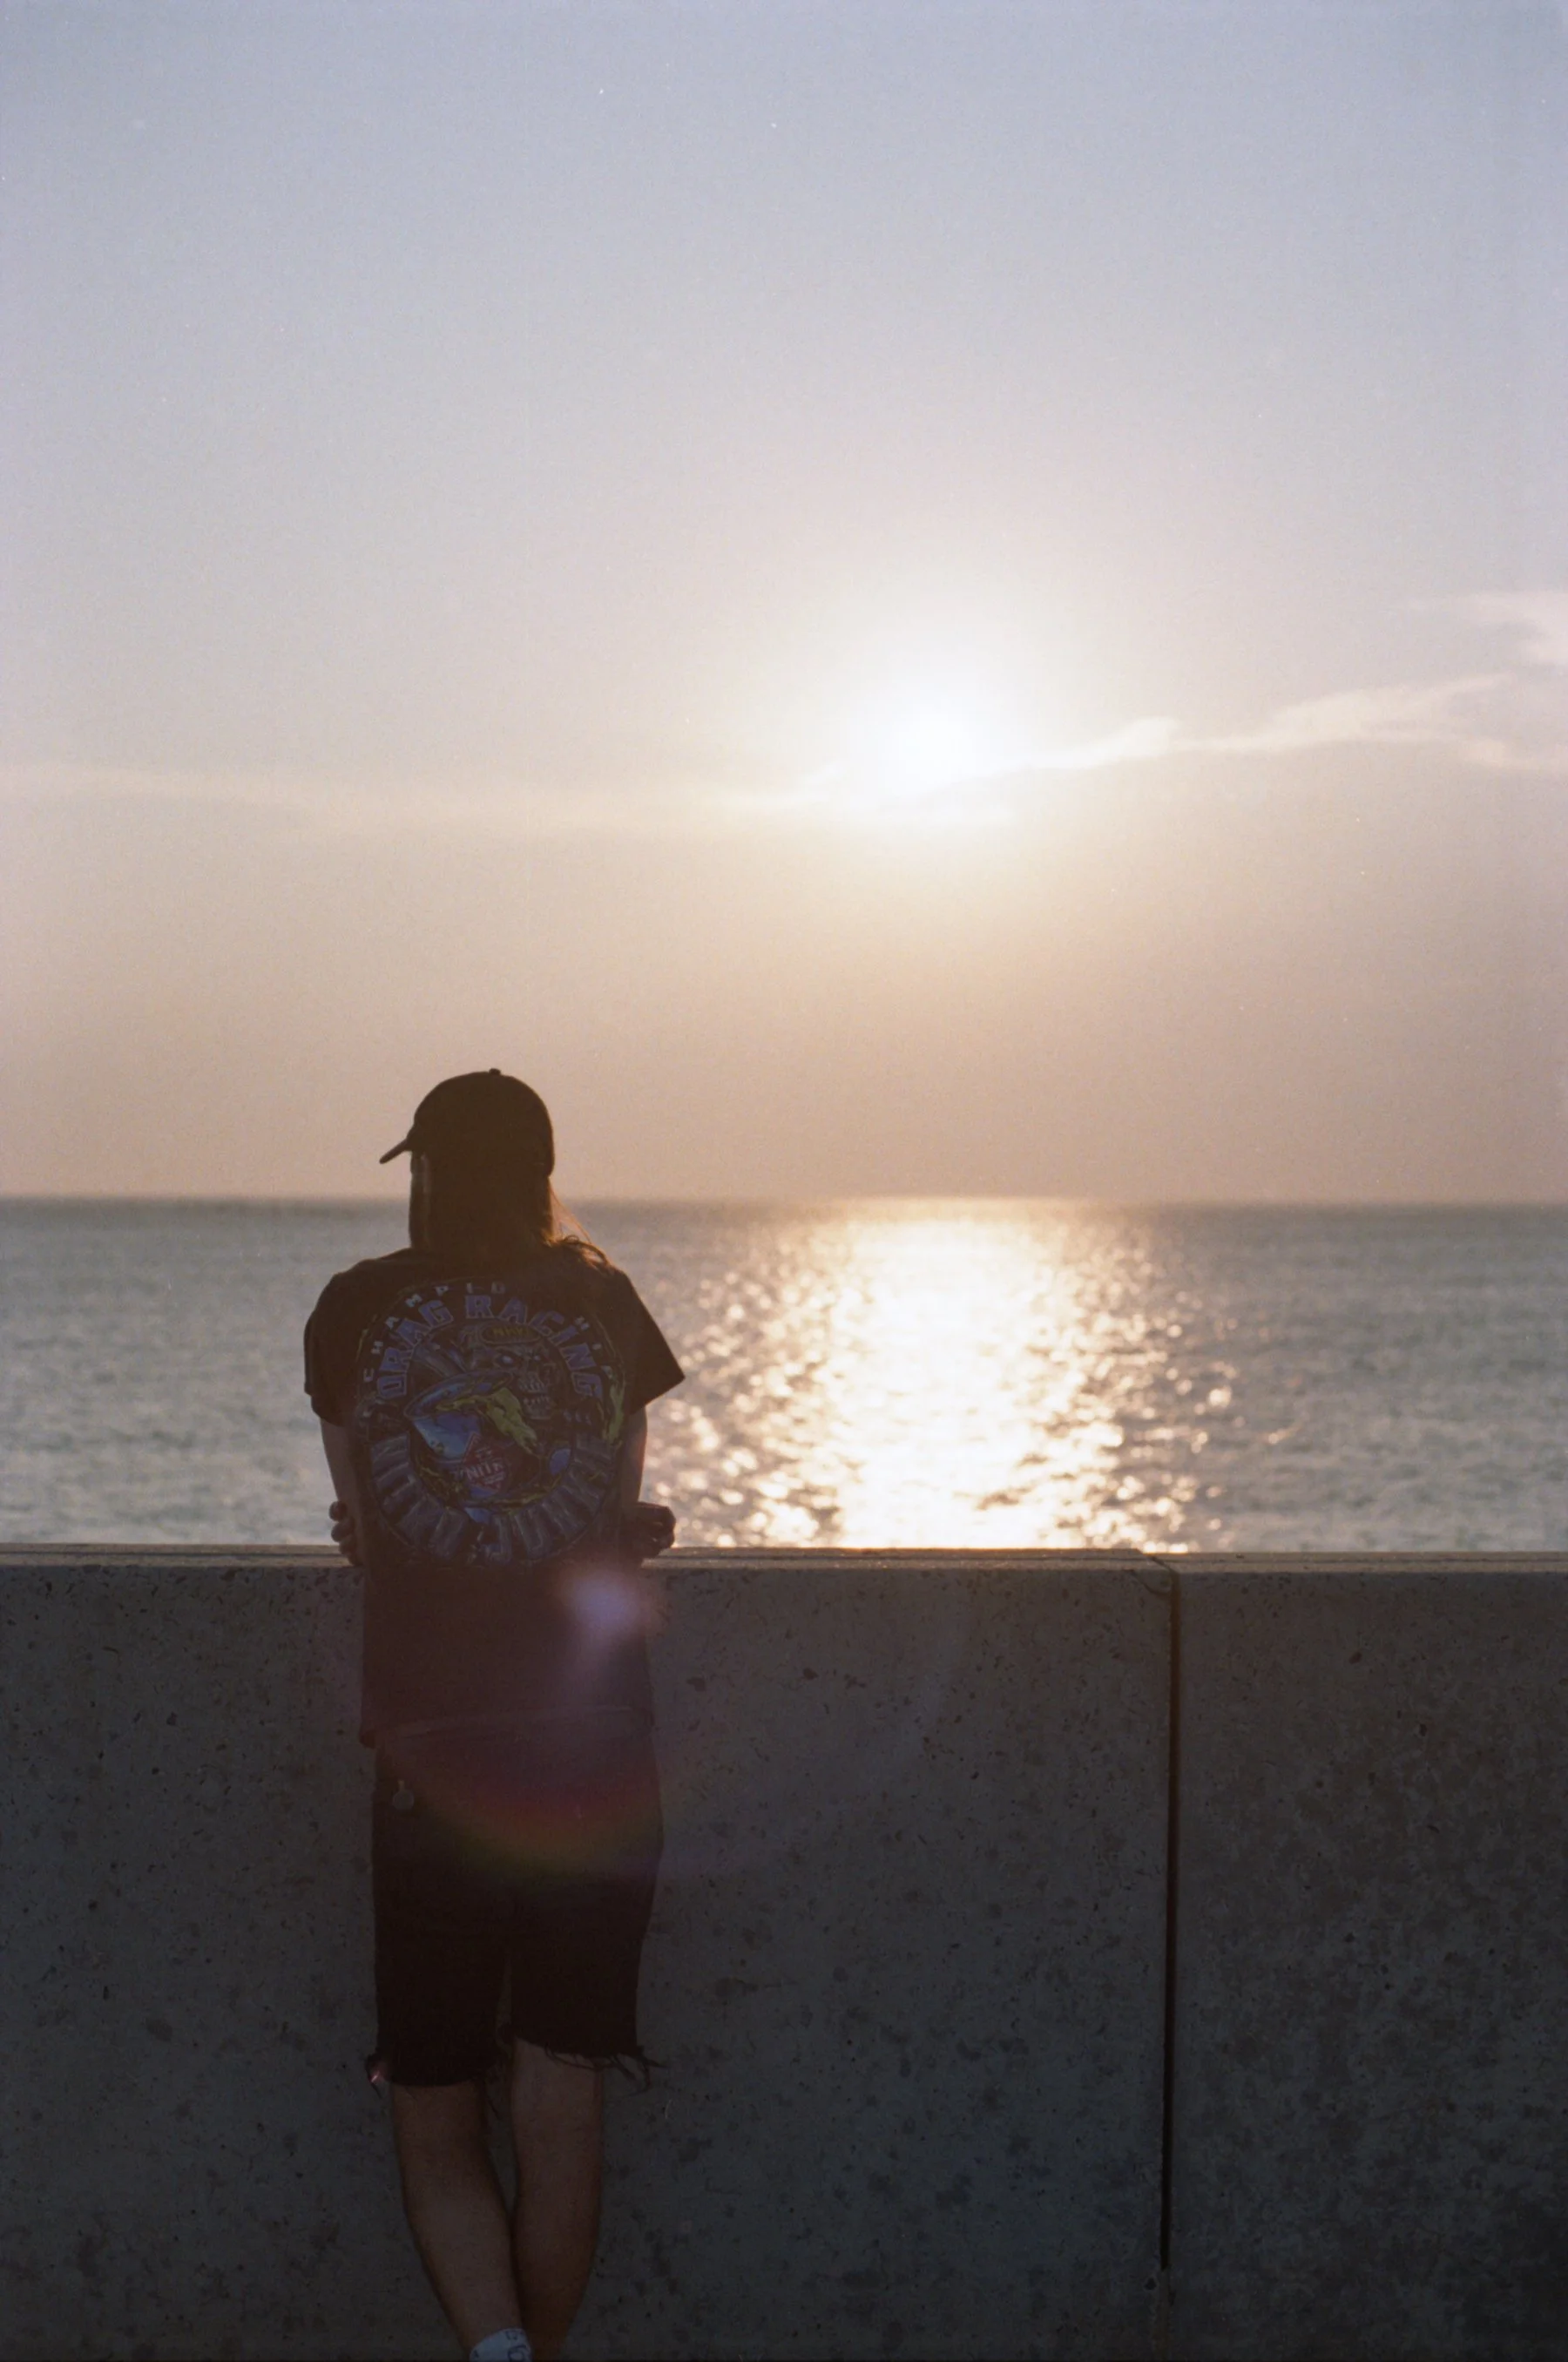
It’s on my wish list to pick up another Mamiya 645AF at some point, just because I’d like to have it back in my collection. Before I sold it, I took it with me on a cross country road trip and I still dream about the photos I took with it. We witnessed a sunrise over the Grand Canyon, the vastness of the Hoover Dam, and the empty, movie-like landscapes across the southwestern United States. I’ve included all of my favorite photographs from that trip below so you can decide if this camera is for you! I used Kodak Portra 160 and Kodak Portra 400 film for these photos, along with the 80 mm f/2.8 lens, which is the standard lens that most people use with it. I tend to shoot with the aperture wide open when I can, which gives me that dreamy, cinematic feel that I love. But, as you will notice in some of the images, sometimes the focusing up close just wasn’t quite right. I think there was an issue with my particular camera though, because I would have trouble with the autofocus and end up just manually focusing my images. That was another reason I sold mine, but I’m hoping if I pick up another one, that it won’t have that issue!

I also love that it is super easy to take multiple exposures with the Mamiya 645AF. I found it much easier to create multiple exposures with the Mamiya than the Contax. It’s easy to forgot that you have the multiple exposure setting on with the Contax, leaving you with triple or quadruple exposures every once in a while! The Mamiya multiple exposure function was nice because you can pre-set the number of images you want to take and that way, you won’t end up shooting more than you’d planned for. I’ve included a few examples of multiple exposures with the Mamiya below!

If you’re thinking of diving into medium format photography, the Mamiya 645AF is a great place to start. The Mamiya will make you fall in love with medium format photography. It’s also nice that it’s relatively affordable (around $1500-$2000), at least compared to the Contax 645 (around $3000-5000 - I recommend buying one on eBay from a highly rated seller)! The Pentax 645 is also a popular medium format camera that runs quite a bit cheaper (around $700-1000) than the Mamiya 645AF and the Contax 645, but I don’t have any personal experience with that one. I’ve heard it’s great though and is on my list to try out in the future! If you’ve never shot with 120 film before, I’d recommend starting out with a Holga GCFN or Diana F+, which are toy cameras that are much more affordable (anywhere from $60-150). The Holga is my favorite camera in the world, and the one camera I never leave home without! You can read my full review with tons of sample photos on my blog here, or watch my YouTube video!

If you’re on the hunt for a pro level medium format camera though, here’s where you can find the Mamiya 645AF or the Contax 645. There are a few different models for the Mamiya 645, but I had the 645AF model. The AFD models are a bit more modern and have the potential to use a digital back (you can usually find one on eBay), which could save you lots of money on film. However, I’m a film girlie through and through so I like to shoot with it the old-fashioned way. But the digital back would be a great place to start and could save you some money while you’re learning the functionalities of the camera. :)


WHERE TO BUY THE MAMIYA 645

KEH Camera

Etsy

CHECK EBAY LISTINGS

MAMIYA 80MM F/2.8 AUTOFOCUS LENS

KEH Camera

Etsy

CHECK EBAY LISTINGS

WHERE TO BUY THE CONTAX 645

KEH Camera

CHECK EBAY LISTINGS

Etsy

WHERE TO BUY THE PENTAX 645

KEH Camera

Etsy

CHECK EBAY LISTINGS

Amazon


FILM RECOMMENDATIONS

Kodak Portra 160 120 film

Lomography 400 120 film

Kodak Gold 200 120 film

Neopan Across 100 Black & White 120 Film

If you found this post helpful or inspiring, I’d love it if you considered signing up for my Patreon! For as little as $1 a month, you’ll get early access to all of my YouTube videos, plus tons of photos that I don’t post anywhere else. Depending on which tier you choose, you could also receive seasonal prints and/or discounts! I always use all of the proceeds towards cameras, film & processing.

If you have any questions, I’m always happy to help! You can contact me here, or leave a comment below! Thanks so much for stopping by! You can also check out my B&H Photo storefront & Amazon Storefront for more camera/film recommendations. :) Have a magical day!

<3 Myles Katherine


(click to enlarge images)

(By using the links and/or codes in this blog post it supports Myles Katherine Photography. We may get a small kick back by you doing so.)

Review of the Sears KS Super II SR 2000 35 mm Film Camera with Sample Photos in Cape Charles, Virginia

(By using the affiliate links and/or codes in this blog post, you help support Myles Katherine Photography. I may earn a small commission at no additional cost to you if you make a purchase through these links. Thank you for your support!)

The Sears KS Super II SR 2000 is quickly becoming one of my favorite 35 mm cameras. It’s somewhat rare though - these days you can pretty much only find one out in the wild or on eBay. When my grandma gave me the camera, along with a handful of expired film rolls from the 1980s, I was so excited. Usually when people give me old cameras, they are typically Polaroids or box cameras (which I’m not complaining because I love them both… I just have so many of them now). But a heavy duty metal frame 35 mm manual focus film camera with a 50mm f/2.0 lens in excellent condition? That’s a dream camera for any film photographer. I don’t think the camera was ever even used! If you’re on the hunt for just the lens, you might be able to find one on eBay!

I also just posted a video about the KS Super II on my YouTube channel if you’d prefer to watch rather than read. :) You can check it out here!

HISTORY

The KS Super II was originally produced in the early 1980s and was released under the Sears brand by Ricoh. It’s also known as the Ricoh XR-7 camera. That version is probably a little bit easier to find out in the wild, since the Sears version was somewhat short-lived. Because it was released by Sears, it was made to be more marketable to the average consumer. It’s a 35 mm SLR camera and has interchangeable lenses. It’s meant for beginner/intermediate photographers but can easily be enjoyed by amateur, semi-professional and professional photographers!

LENS

The camera uses a Pentax K-mount so you have lots of options for lenses. Personally, a 50mm lens is usually my preference for 35mm film cameras. They are typically nice and compact for traveling but also create dreamy, surreal images because of their slightly zoomed-in field of view. If you prefer images that more closely resemble what the human eye sees, a 35 mm lens might be a better option (you might be able to find one on eBay). Zoom lenses are also a great option for any camera because they are more versatile, but they are usually much larger and more difficult to travel with or carry around. You can browse for one on eBay though and see what’s available!

My camera has the 50mm f/2.0 lens. I’m unsure of the brand of the lens because it just says “Lens Japan”. This was probably the kit lens that was sold with the camera so is likely a Ricoh lens or was created as an OEM lens by a Japanese manufacturer specifically for Sears or Ricoh. But, like I mentioned, you could probably find one on eBay!

MAIN SETTINGS

One of the things I love most about this camera is that it has an Aperture Priority or Auto setting. You can set the aperture and it will automatically set the correct shutter speed. This setting makes it a lot easier to use than a fully manual 35 mm cameras. You don’t need to constantly worry about light meters or managing multiple settings at once. Aperture Priority is something I look for in every camera I buy. As a wedding photographer, it’s an absolute necessity for me because it allows me to shoot much quicker and allows for less errors when shooting film. This means less money wasted on film that doesn’t turn out!

The KS Super II is pretty limited overall but is made to be incredibly easy to use for both beginners and professionals. The main settings are “L”, “A” and “X”. The “L” is a lock setting that prevents the shutter from accidentally engaging. It also protects the battery from being drained. So basically, you just use this setting when you aren’t using the camera. The “A” is the Aperture Priority setting I mentioned above. The “X” setting is for using a mounted flash. It will set the shutter speed to around 1/125th of a second to create nicely exposed flash images.

The camera also has a self-timer button, exposure compensation adjustment, ISO setting, tripod mount, and manual film advance. Unfortunately, there is no option for multiple exposure, though you can always press the film rewind button and wind the film back a turn or turn and a half to overlap your images. It’s difficult to get images that are perfectly overlapped though. I’ve included a few examples below.

(expired film)

BODY

The body is likely made from a metal alloy which is sturdy and durable. It doesn’t feel super heavy though, which is really nice for traveling. One of my favorite 35 mm cameras, the Nikon FE2, feels similar when holding it and reminds me a lot of the KS Super II. As a full-time photographer who travels a lot and shoots a lot of weddings, it’s not uncommon for me to drop a camera (oops…). The KS Super II feels strong enough to withstand a few spills, which is so important to me. It’s definitely not a fragile camera!

It also just has that retro, vintage 80s film camera look with the all-black body and clean edges. It’s perfect for walking around town with friends or slinging over your shoulder for a day at the park. It looks cute on a shelf too!


PROS

  1. Easy to Use, Beginner-Friendly settings like “Aperture Priority”

  2. Sturdy, Metal Alloy Body

  3. Decently Sharp Lens Options like the 50 mm f/2.0 Lens

  4. Great for Travel

  5. Has that Classic 80s 35 mm Film Camera Vibe

CONS

  1. Limited Settings - No Fully Manual Option

  2. No Dedicated Option for Multiple Exposures (Though You Can Press the Film Rewind Button and Manually Overlap Frames)

  3. Manual Film Advance (Personally, I like Manual Film Advance because it Reminds Me that I’m Using a Film Camera!)


BATTERY

The KS Super II uses two 1.5V LR44/SR44 batteries, or you can use one CR-1/3N lithium battery. The shutter will still decompress without a battery, but the light meter will not function. These batteries can be difficult to find, but I haven’t had trouble picking them up on Amazon.


FINAL THOUGHTS

I’ve shot 3 rolls so far with the KS Super II and I absolutely love it so far. While I prefer my Nikon FE2 because of it’s multiple exposure option, I still see myself bringing this camera out of adventures every once in a while. I’d definitely recommend this camera for beginner film photographers because it’s a great way to get used to the functionality of a film camera without it being too overwhelming. If you see one of these at a thrift store, grab it! It’s likely that it still works because these cameras were made to last. However, always be sure to check the battery compartment for corrosion. In many cases, you can clean corrosion off but in some cases, it will make the camera non-operational and might not be fixable.

Two of the rolls I’ve shot have been expired, so I’ve really only shot one roll that fully showcases the capabilities of the camera. I still need to try out the flash setting and the self-timer, so that will be on my to-do list for next time. :) I think the imagers are decently sharp, though maybe not quite as spectacular as the images I can get with my Nikon FE2.

I’ve included tons of sample photos below so you can decide if this camera is for you!


WHERE TO BUY

Camera Body

Shop Etsy

Shop eBay

50 MM CAMERA LENS

Shop eBay

Shop Etsy


WHERE TO BUY THE RICOH XR-7 (IF YOU’D PREFER THE ORIGINAL VERSION)

Shop Etsy

Shop eBay


35 MM FILM RECOMMENDATIONS

(You can also check out my blog post about Unique Film Stocks for 35 mm Cameras here or my Top 5 Favorite Color Films for 35 mm Cameras here.)

Kodak Gold 200 35 mm Film

Kodak Portra 160 35 mm Film

Kodak Portra 400 35 mm Film

Kodak Pro Image 100 35 mm Film

If you found this post helpful or inspiring, I’d love it if you considered signing up for my Patreon! For as little as $1 a month, you’ll get early access to all of my YouTube videos, plus tons of photos that I don’t post anywhere else. Depending on which tier you choose, you could also receive seasonal prints and/or discounts! I always use all of the proceeds towards cameras, film & processing.

If you have any questions, I’m always happy to help! You can contact me here, or leave a comment below! Thanks so much for stopping by! You can also check out my B&H Storefront or Amazon storefront for more camera/film recommendations. :) Have a magical day!

<3 Myles Katherine


Shooting Kodak Ektar 100 with a Holga GCFN in Portugal!

(By using the affiliate links and/or codes in this blog post, you help support Myles Katherine Photography. I may earn a small commission at no additional cost to you if you make a purchase through these links. Thank you for your support!)

I’ve been forcing myself to step outside my box and try out some new film stocks lately. I tend to stick with Lomography film or Kodak Portra 400 and Kodak Gold 200, but Kodak Ektar 100 is one of those films I always hear about but just never got around to trying. I decided to take a roll with me to Portugal and test it with my Holga GCFN. After getting my film back and scanning it, I’ve definitely learned a few things about it. It has an overall blue undertone, that particularly shows up if you’re shooting in lower light (like a cloudy day or shadowed setting). It definitely favors bright lighting and sunshine. The next time I shoot with it, I’ll be sure to take it with me to the beach on a sunny day. However, the blue undertones add a nice moodiness that is unlike any other film I’ve shot with. It has a dreary graininess that is endearing and calming in a way. In general though, it’s a good rule of thumb to shoot in bright light with any film under 200 ISO. Sometimes, I forget what kind of film I put in my Holga so I end up being surprised by the results. Next time I load my Holga, I’m planning to tape a piece of paper on the back of my camera with the film stock I put inside just so I don’t forget!

I also posted a YouTube video about shooting with Ektar 100 with the Holga in Portugal, so if you’d like to see the making behind these photos, make sure to give my video a watch here!

If you found this post helpful or inspiring, I’d love it if you considered signing up for my Patreon! For as little as $1 a month, you’ll get early access to all of my YouTube videos, plus tons of photos that I don’t post anywhere else. Depending on which tier you choose, you could also receive seasonal prints and/or discounts! I always use all of the proceeds towards cameras, film & processing.

If you have any questions, I’m always happy to help! You can contact me here, or leave a comment below! Thanks so much for stopping by! You can also check out my Amazon storefront for more camera/film recommendations. :) Have a magical day!

<3 Myles Katherine

WHERE TO BUY:

Kodak Ektar 100 - 120 film

B&H Photo Video

Adorama

Kodak Ektar 100 - 35 mm film

Amazon

Adorama

B&H Photo Video

Holga 120 GCFN Camera (read more about the Holga GCFN on my blog here!)

Amazon

B&H Photo Video

Check eBay Listings