• About
  • Portfolio
  • Blog
  • Services
  • PRINT SHOP
  • Contact
Menu

Myles Katherine Photography

  • About
  • Portfolio
  • Blog
  • Services
  • PRINT SHOP
  • Contact

Review of Lomography's Lomomatic 110 Zebra Crossing Camera & Flash Using LomoChrome Color ’92 Film and B&W Orca 110 Film | My First Two Rolls of Film

March 5, 2025

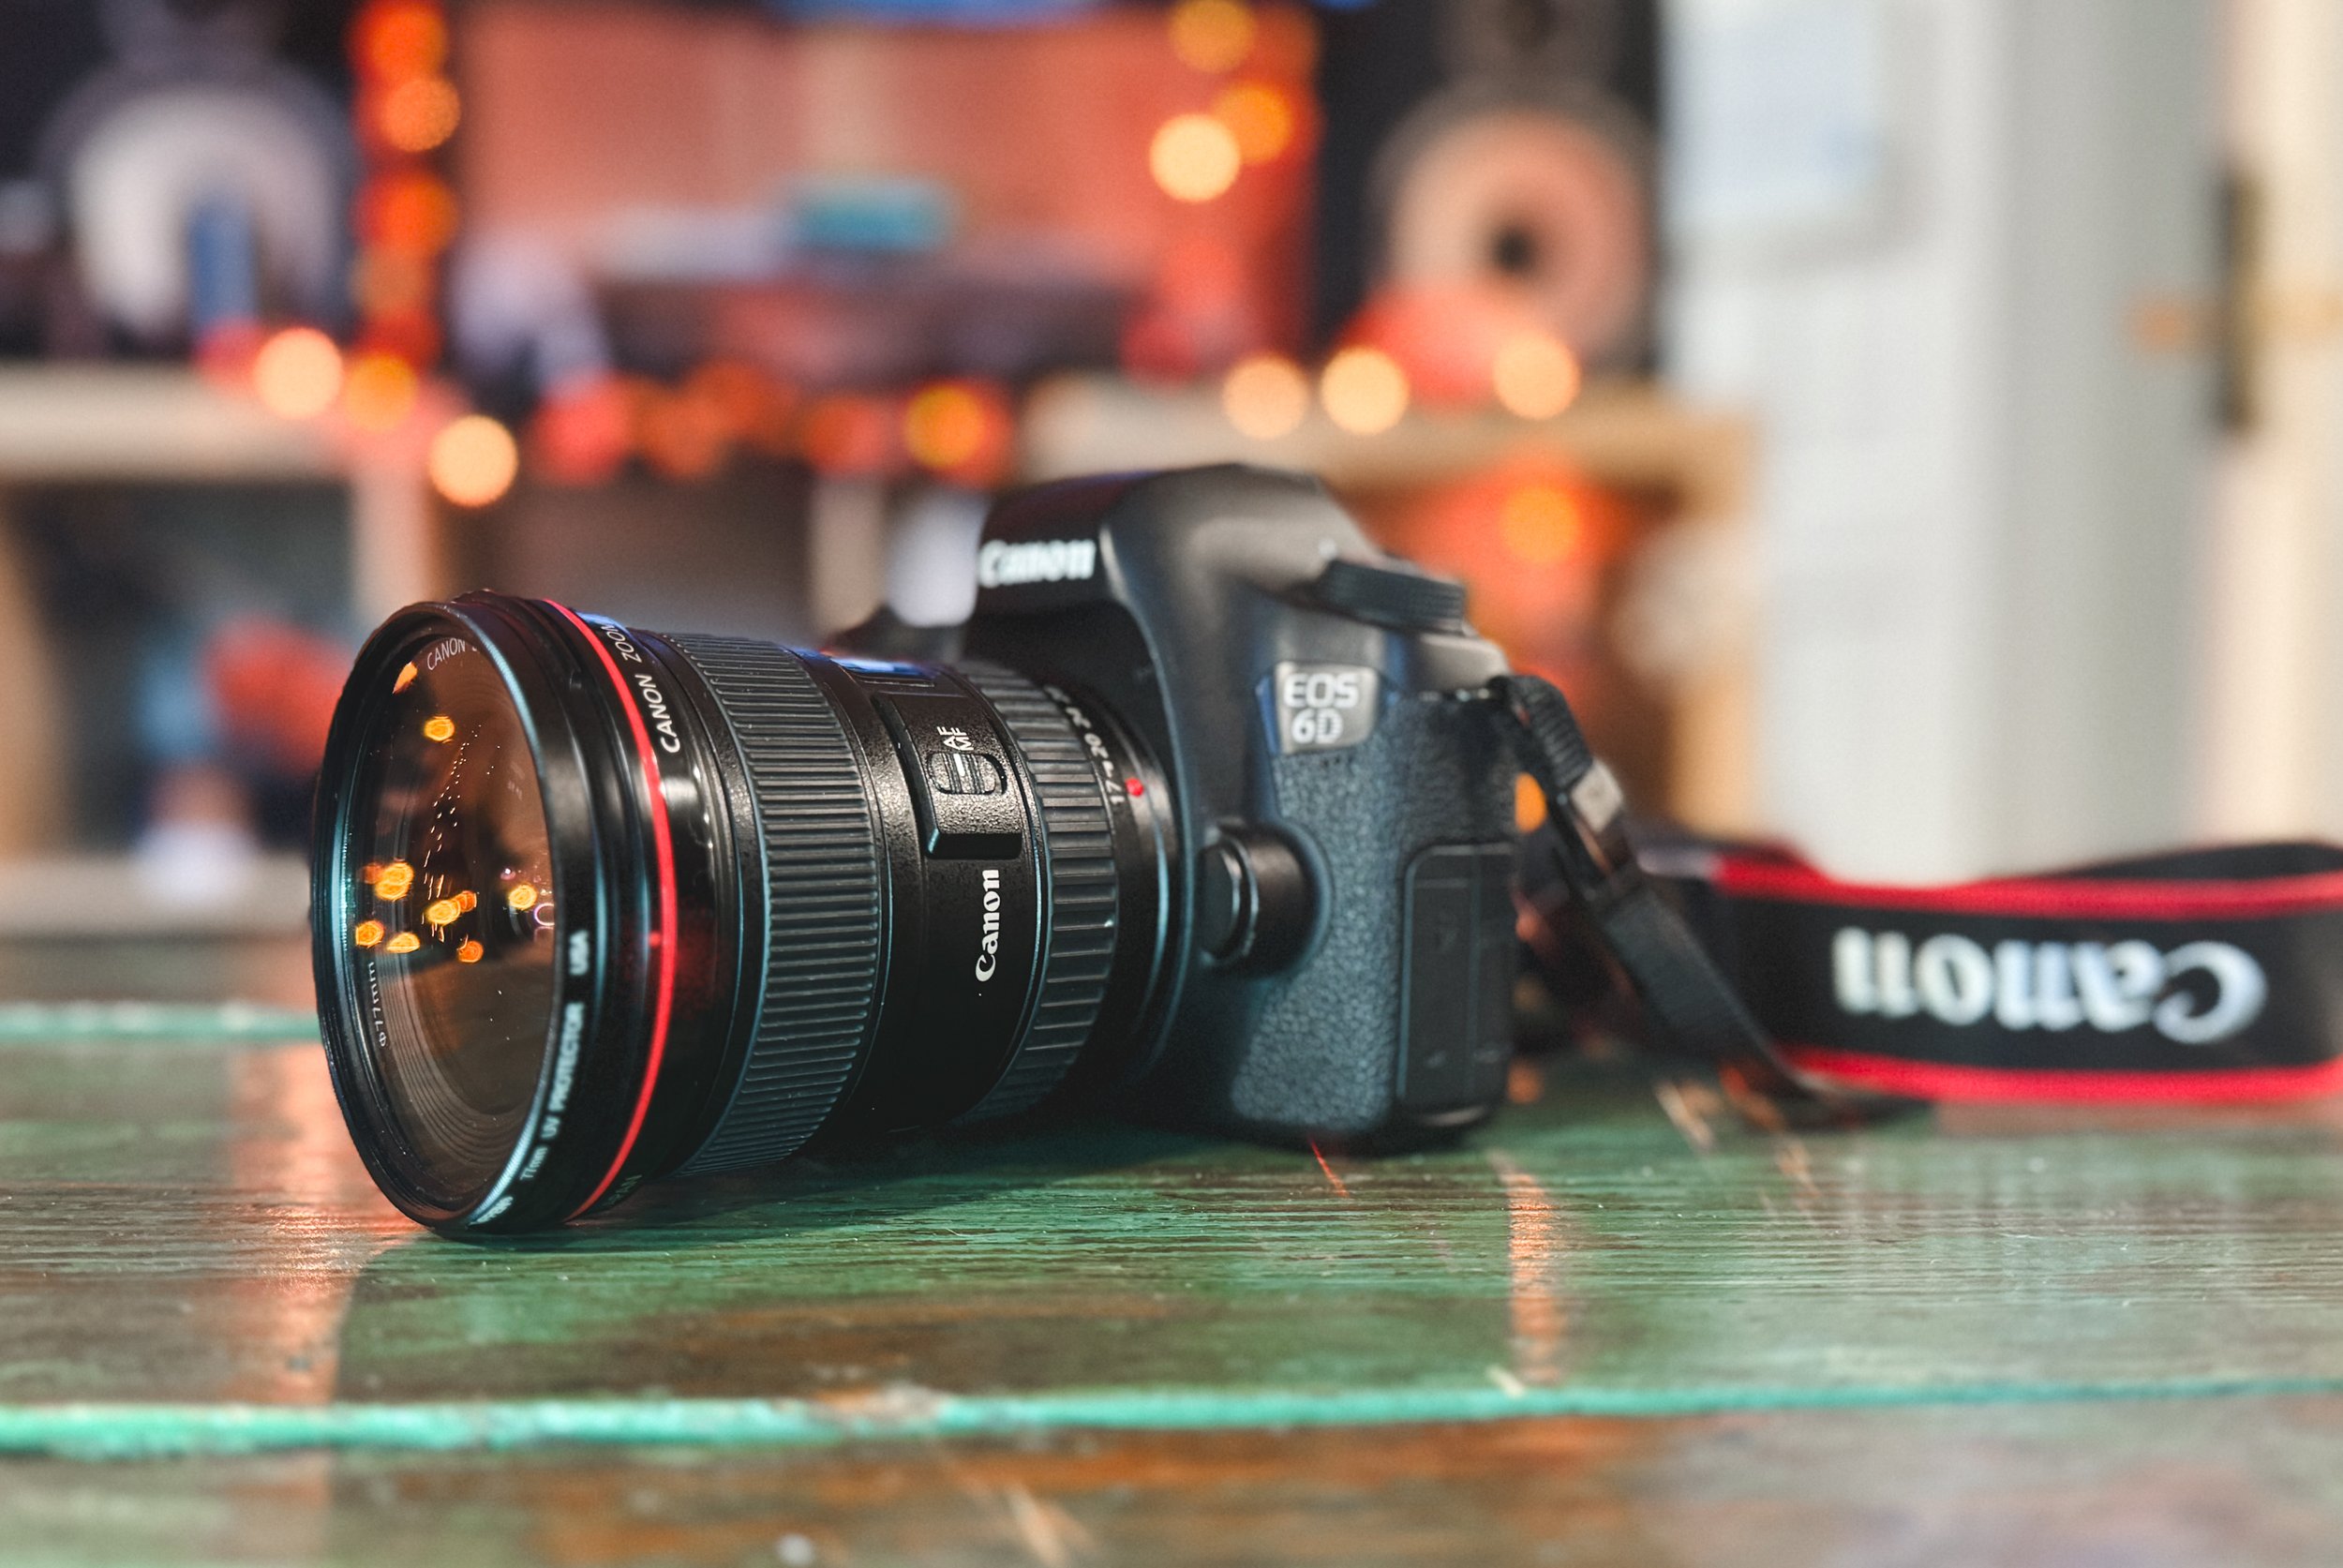
I’m so excited to team up with Lomography for this blog post featuring the Lomomatic 110 Zebra Crossing Camera. I’ve been wanting to try out a 110 camera for years and it was honestly as fun as I’d hoped. There are a lot of things I love about this camera, but there are also a few snags I ran into that I’m hoping to sort out while shooting my next roll of film. As with any film camera, it takes some time and patience to learn a new camera, and especially a new film format. 110 film has been around since the 1970s and is known for it’s retro vibes and easy-to-load film cartridges. You can find vintage 110 film cameras on Etsy and eBay, but Lomography went above and beyond and created their own version of the 110 camera. They have tons of different styles and colors, but I wanted to share the pros and cons I discovered through my first two rolls of film with the Lomomatic 110 Zebra Crossing, so that your experience using 110 film goes smoothly and you end up with beautiful photos! And if you’d prefer to watch rather than read, I have a full video on my YouTube video about this camera too! You can watch it here!

PROS OF THE LOMOMATIC 110

  1. Perfect for Travel

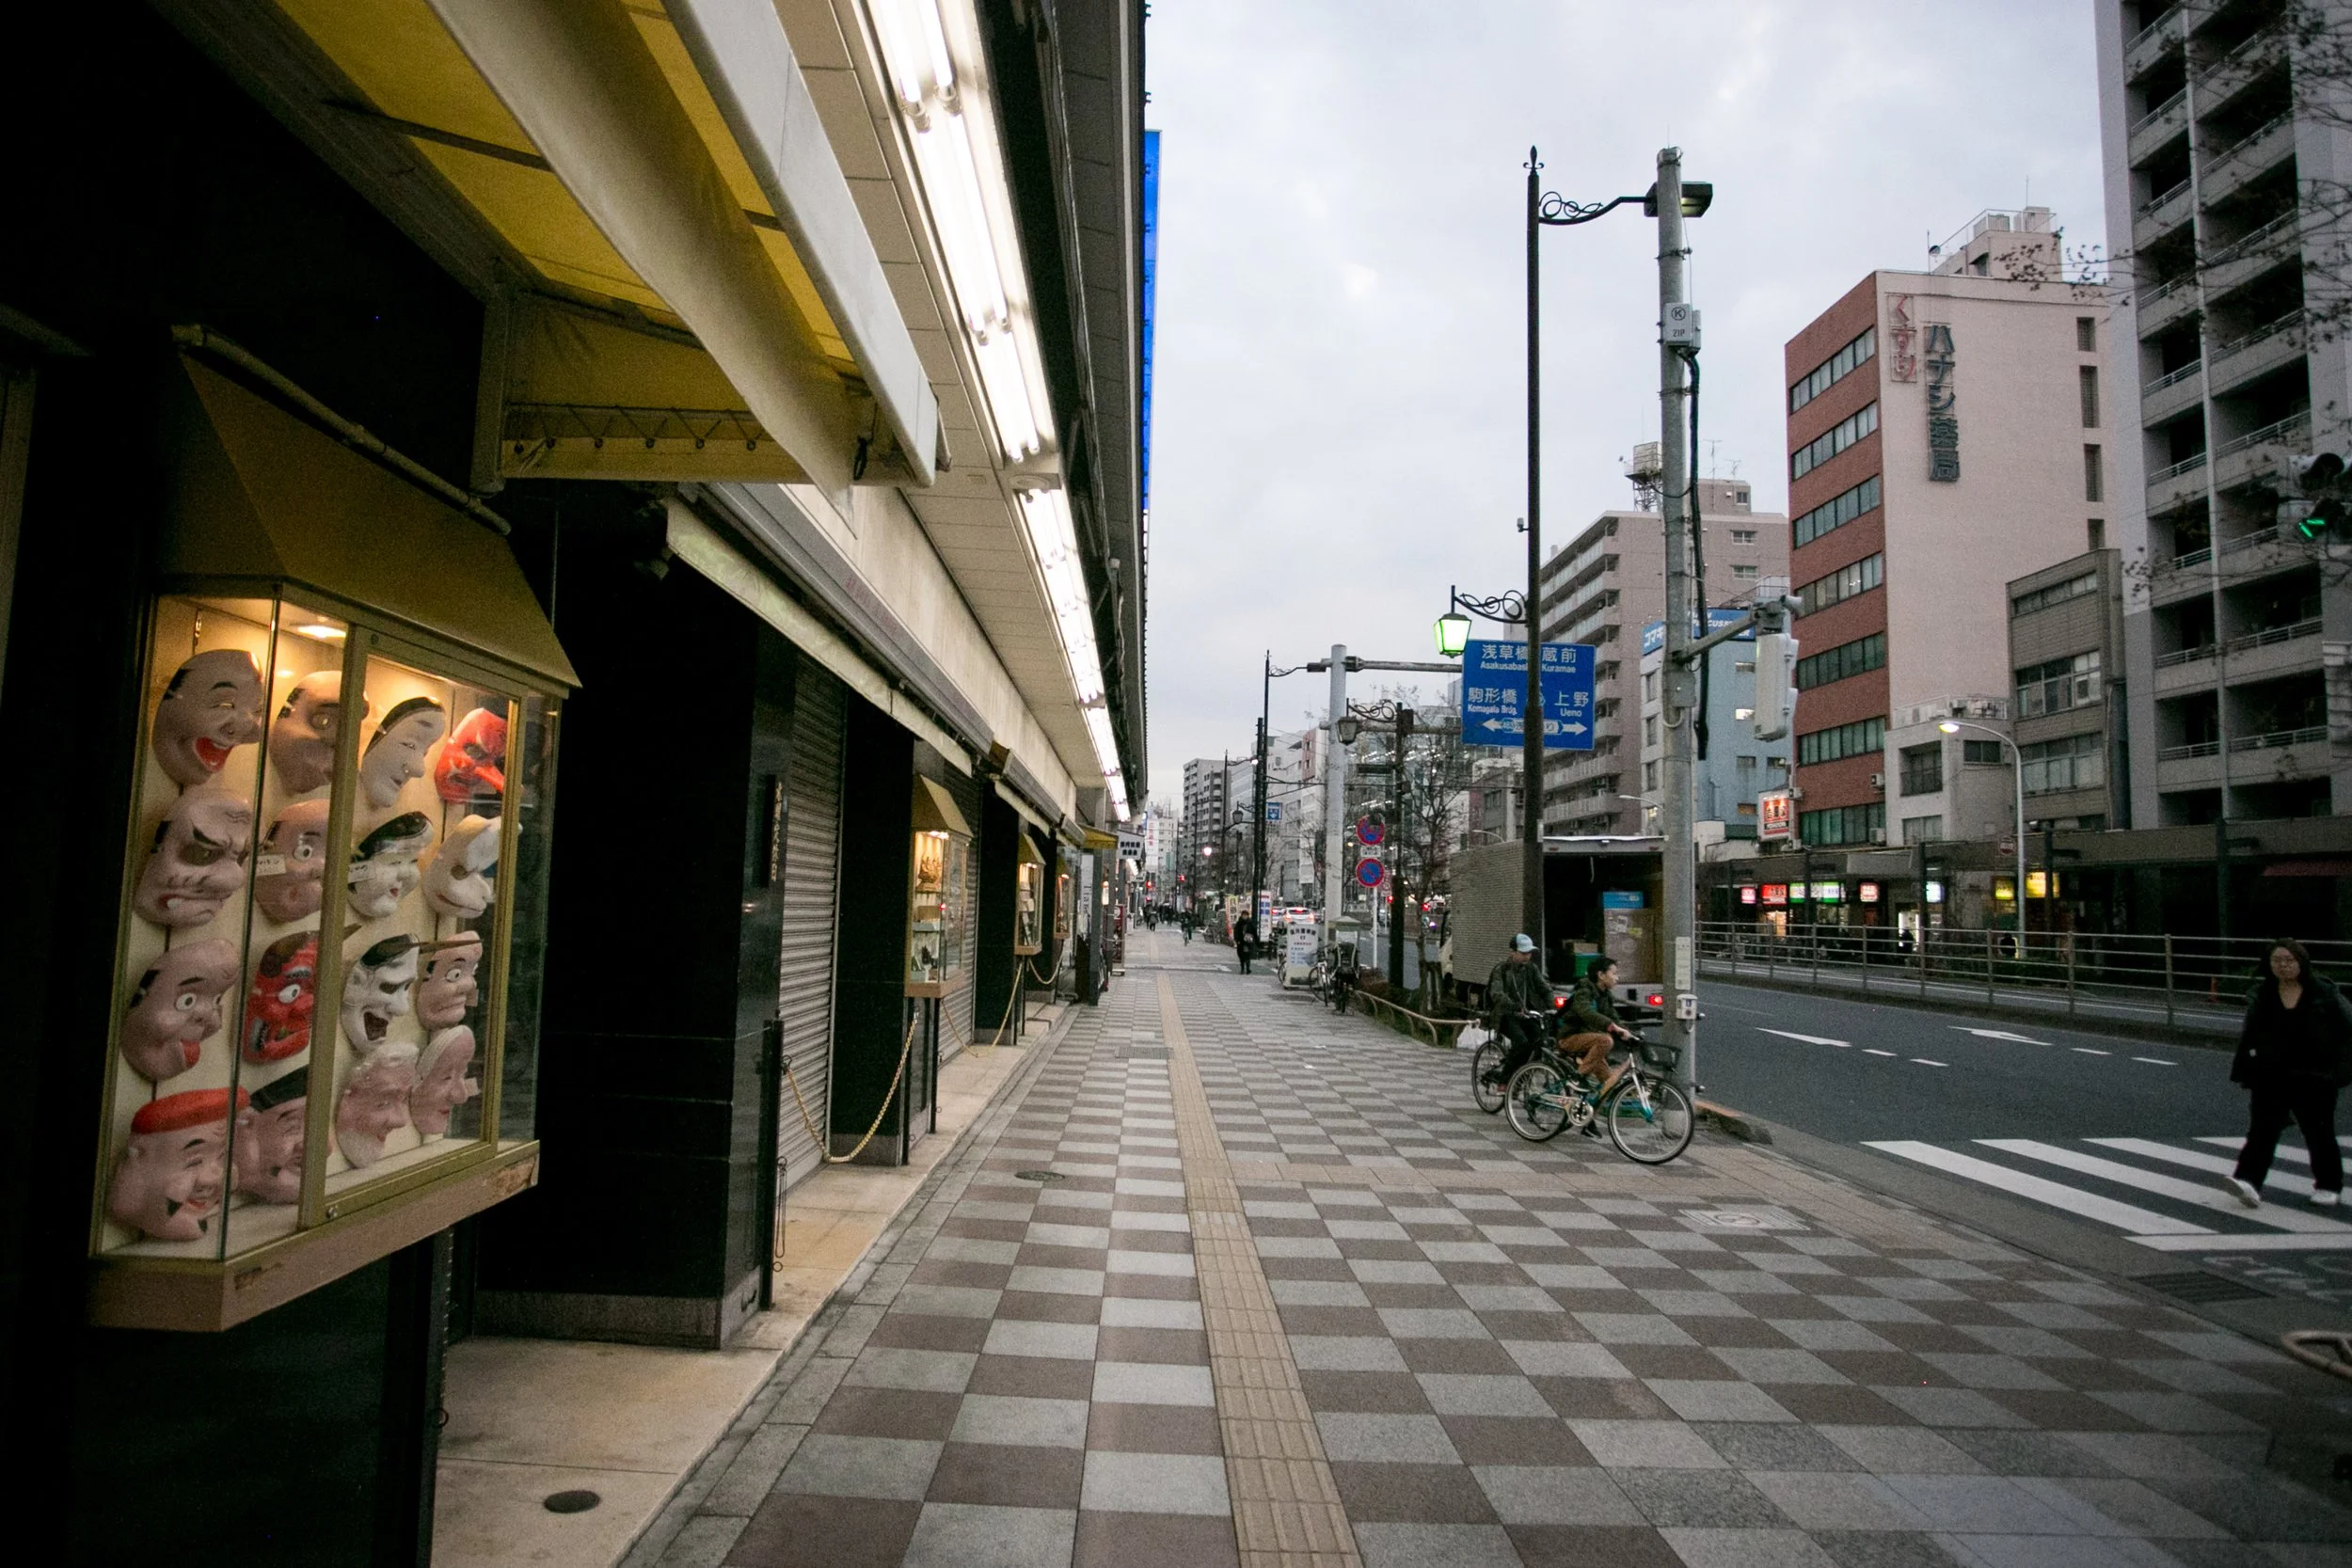
    I think my favorite thing about this camera is the portability. It’s so small and convenient. It was super easy to take with me wherever I went. I used the wrist strap most of the time, which made it simple to use quickly when I stumbled across something I wanted to photograph. It’s definitely one of the smallest cameras I own, and it’s nice that I don’t have to worry about a detachable lens or anything like that that might get damaged easily. You guys know I like to travel with at least 5-8 cameras and the fact that I can squeeze this camera in any camera bag is a huge pro for me, and means I can take it with me on more adventures!

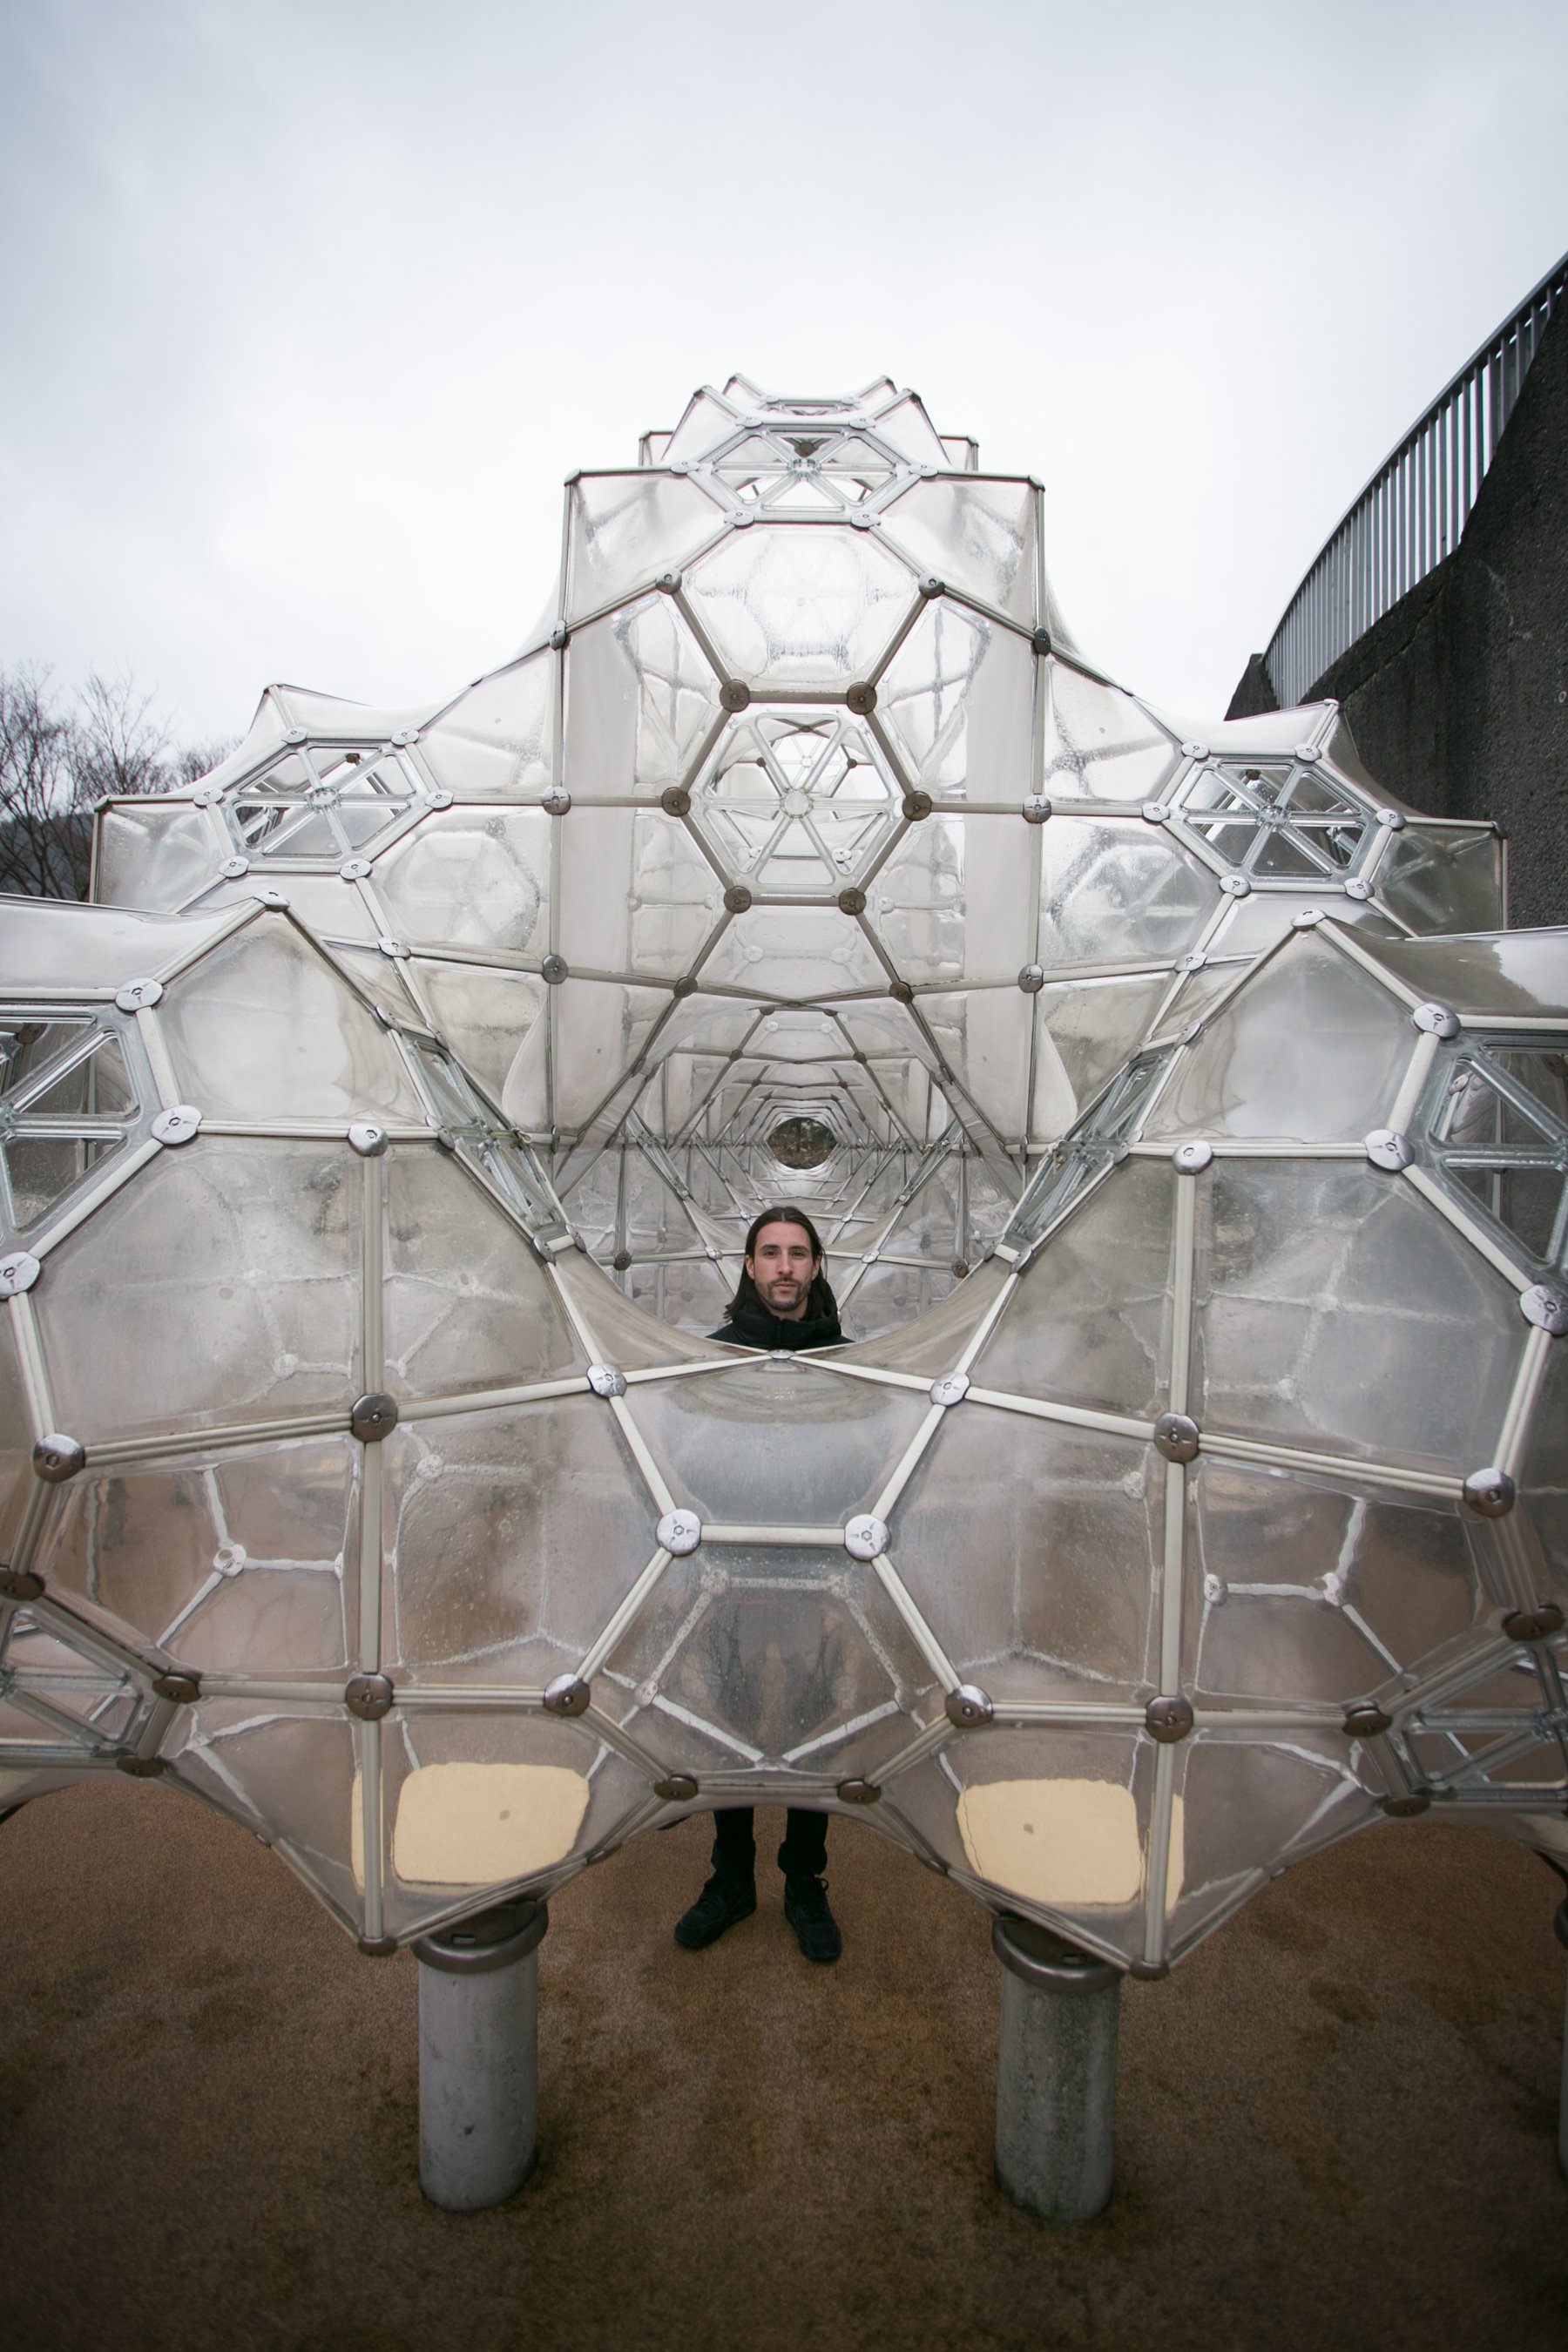
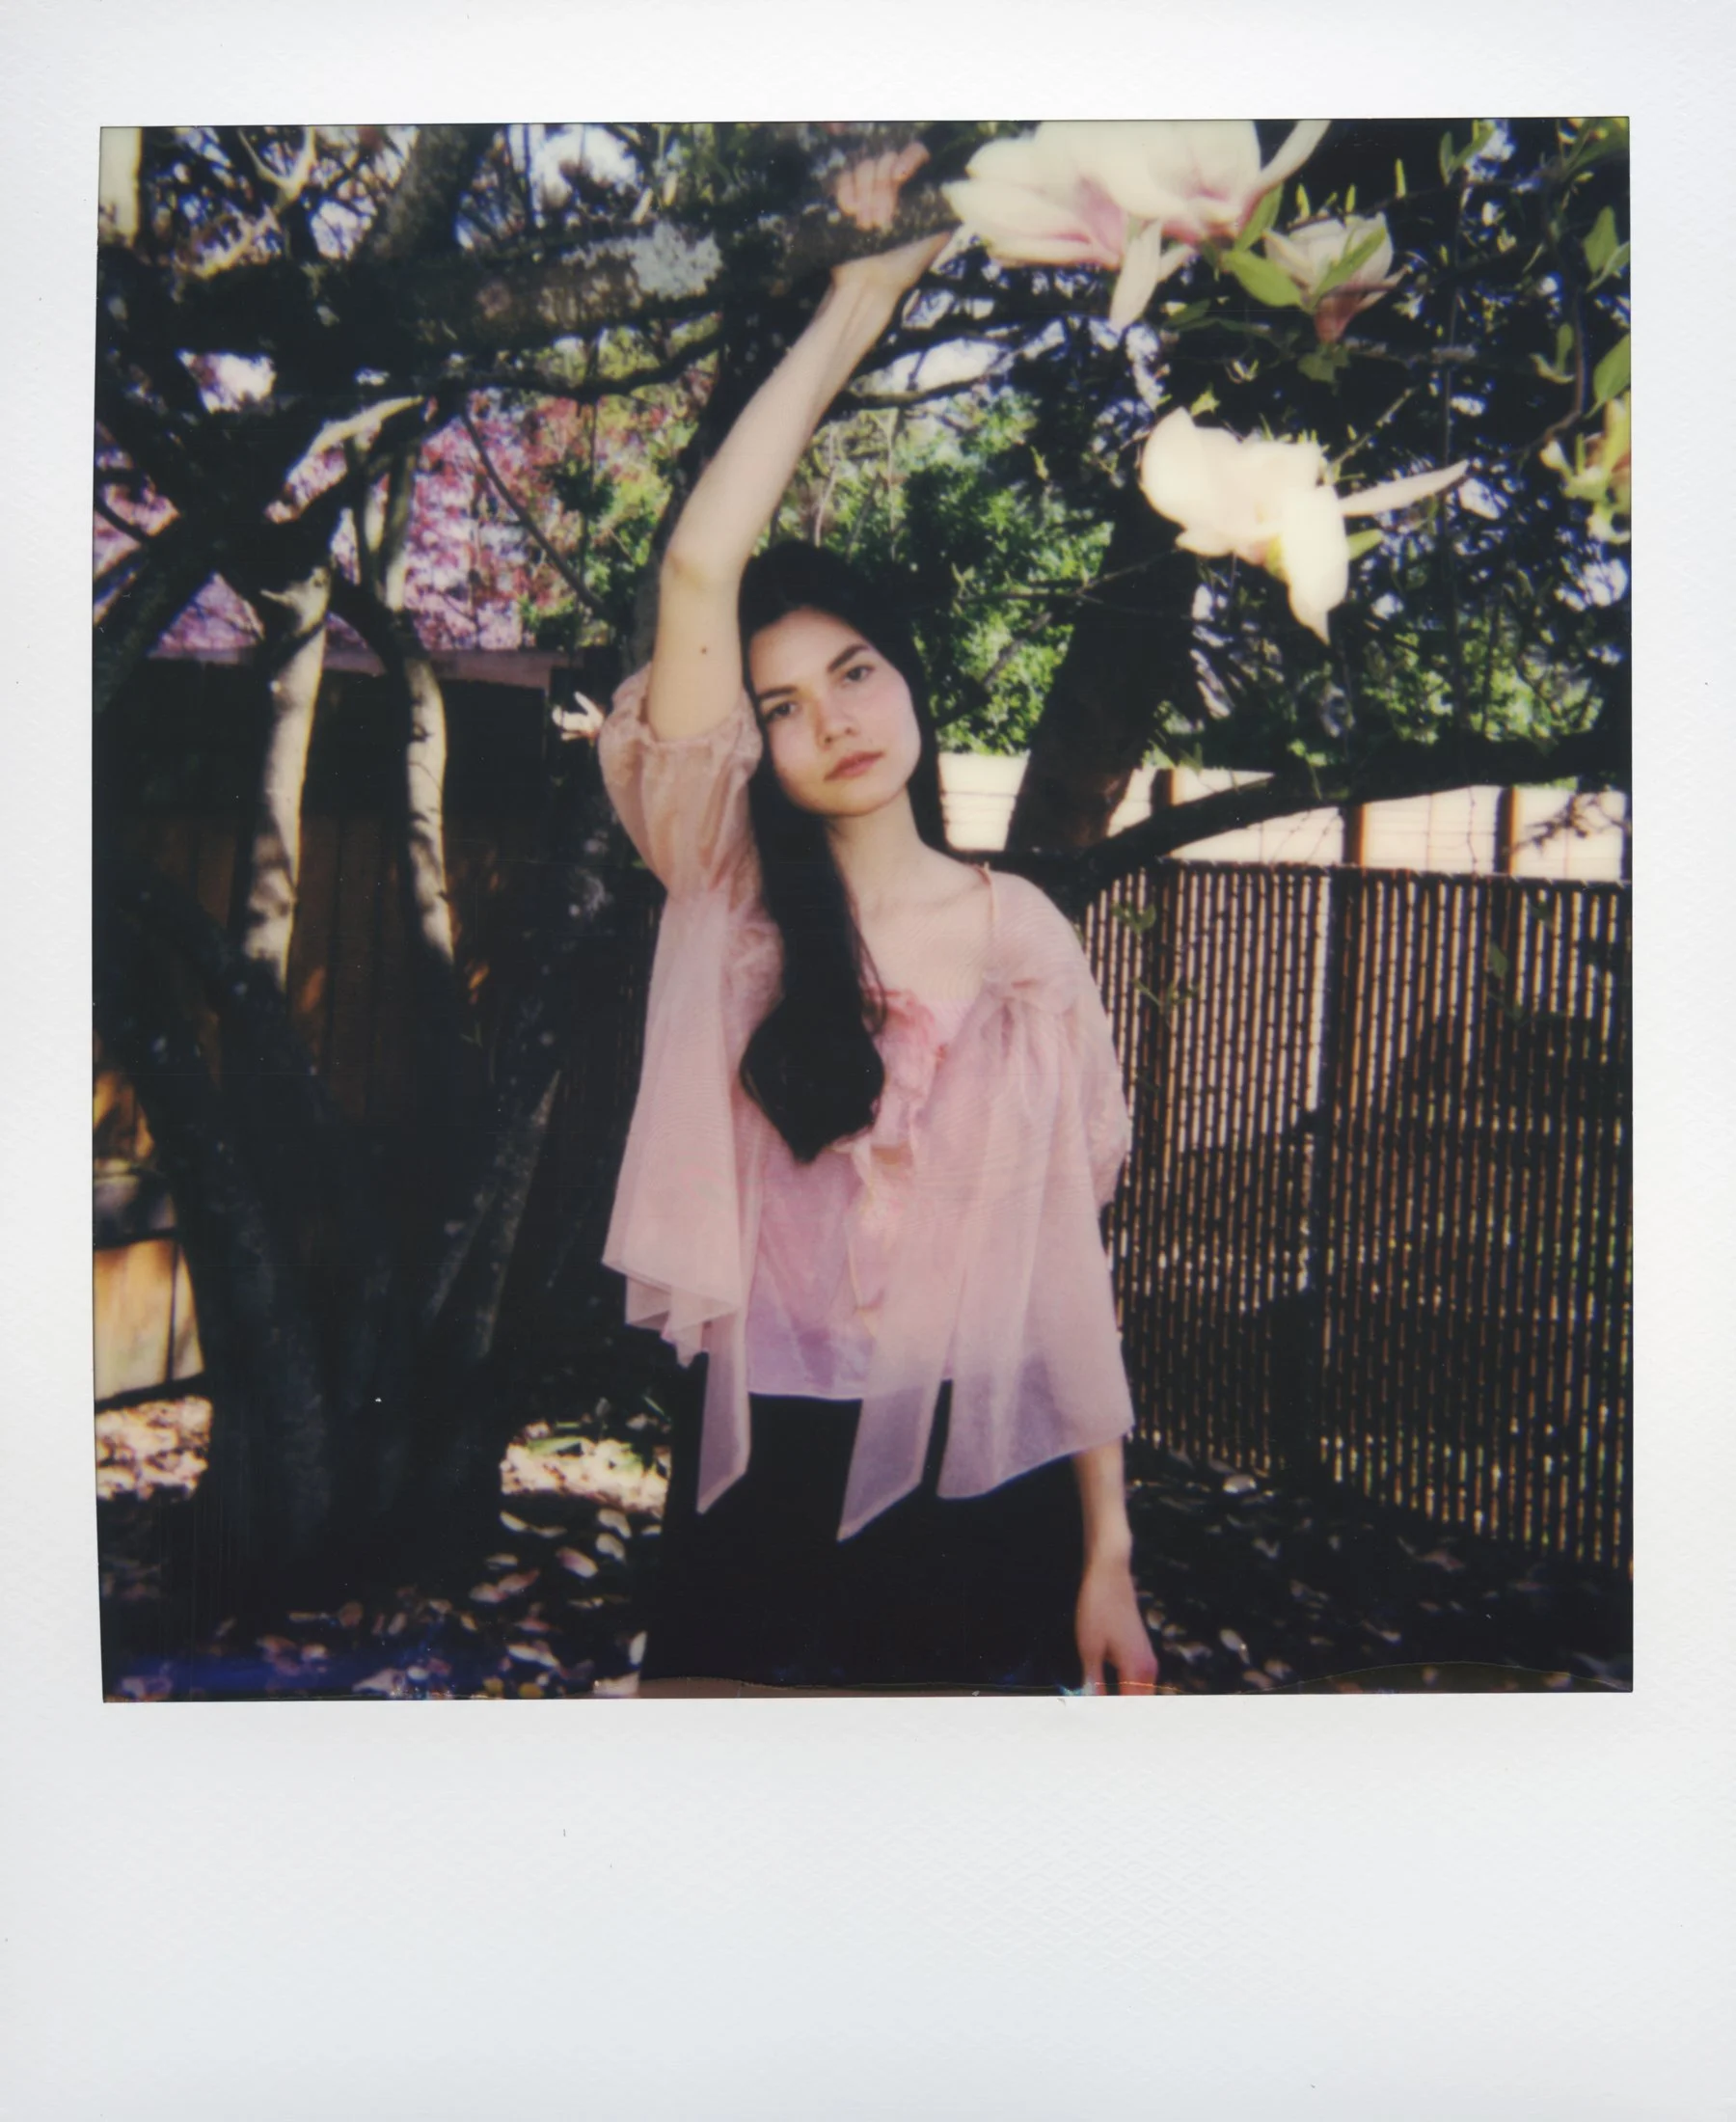
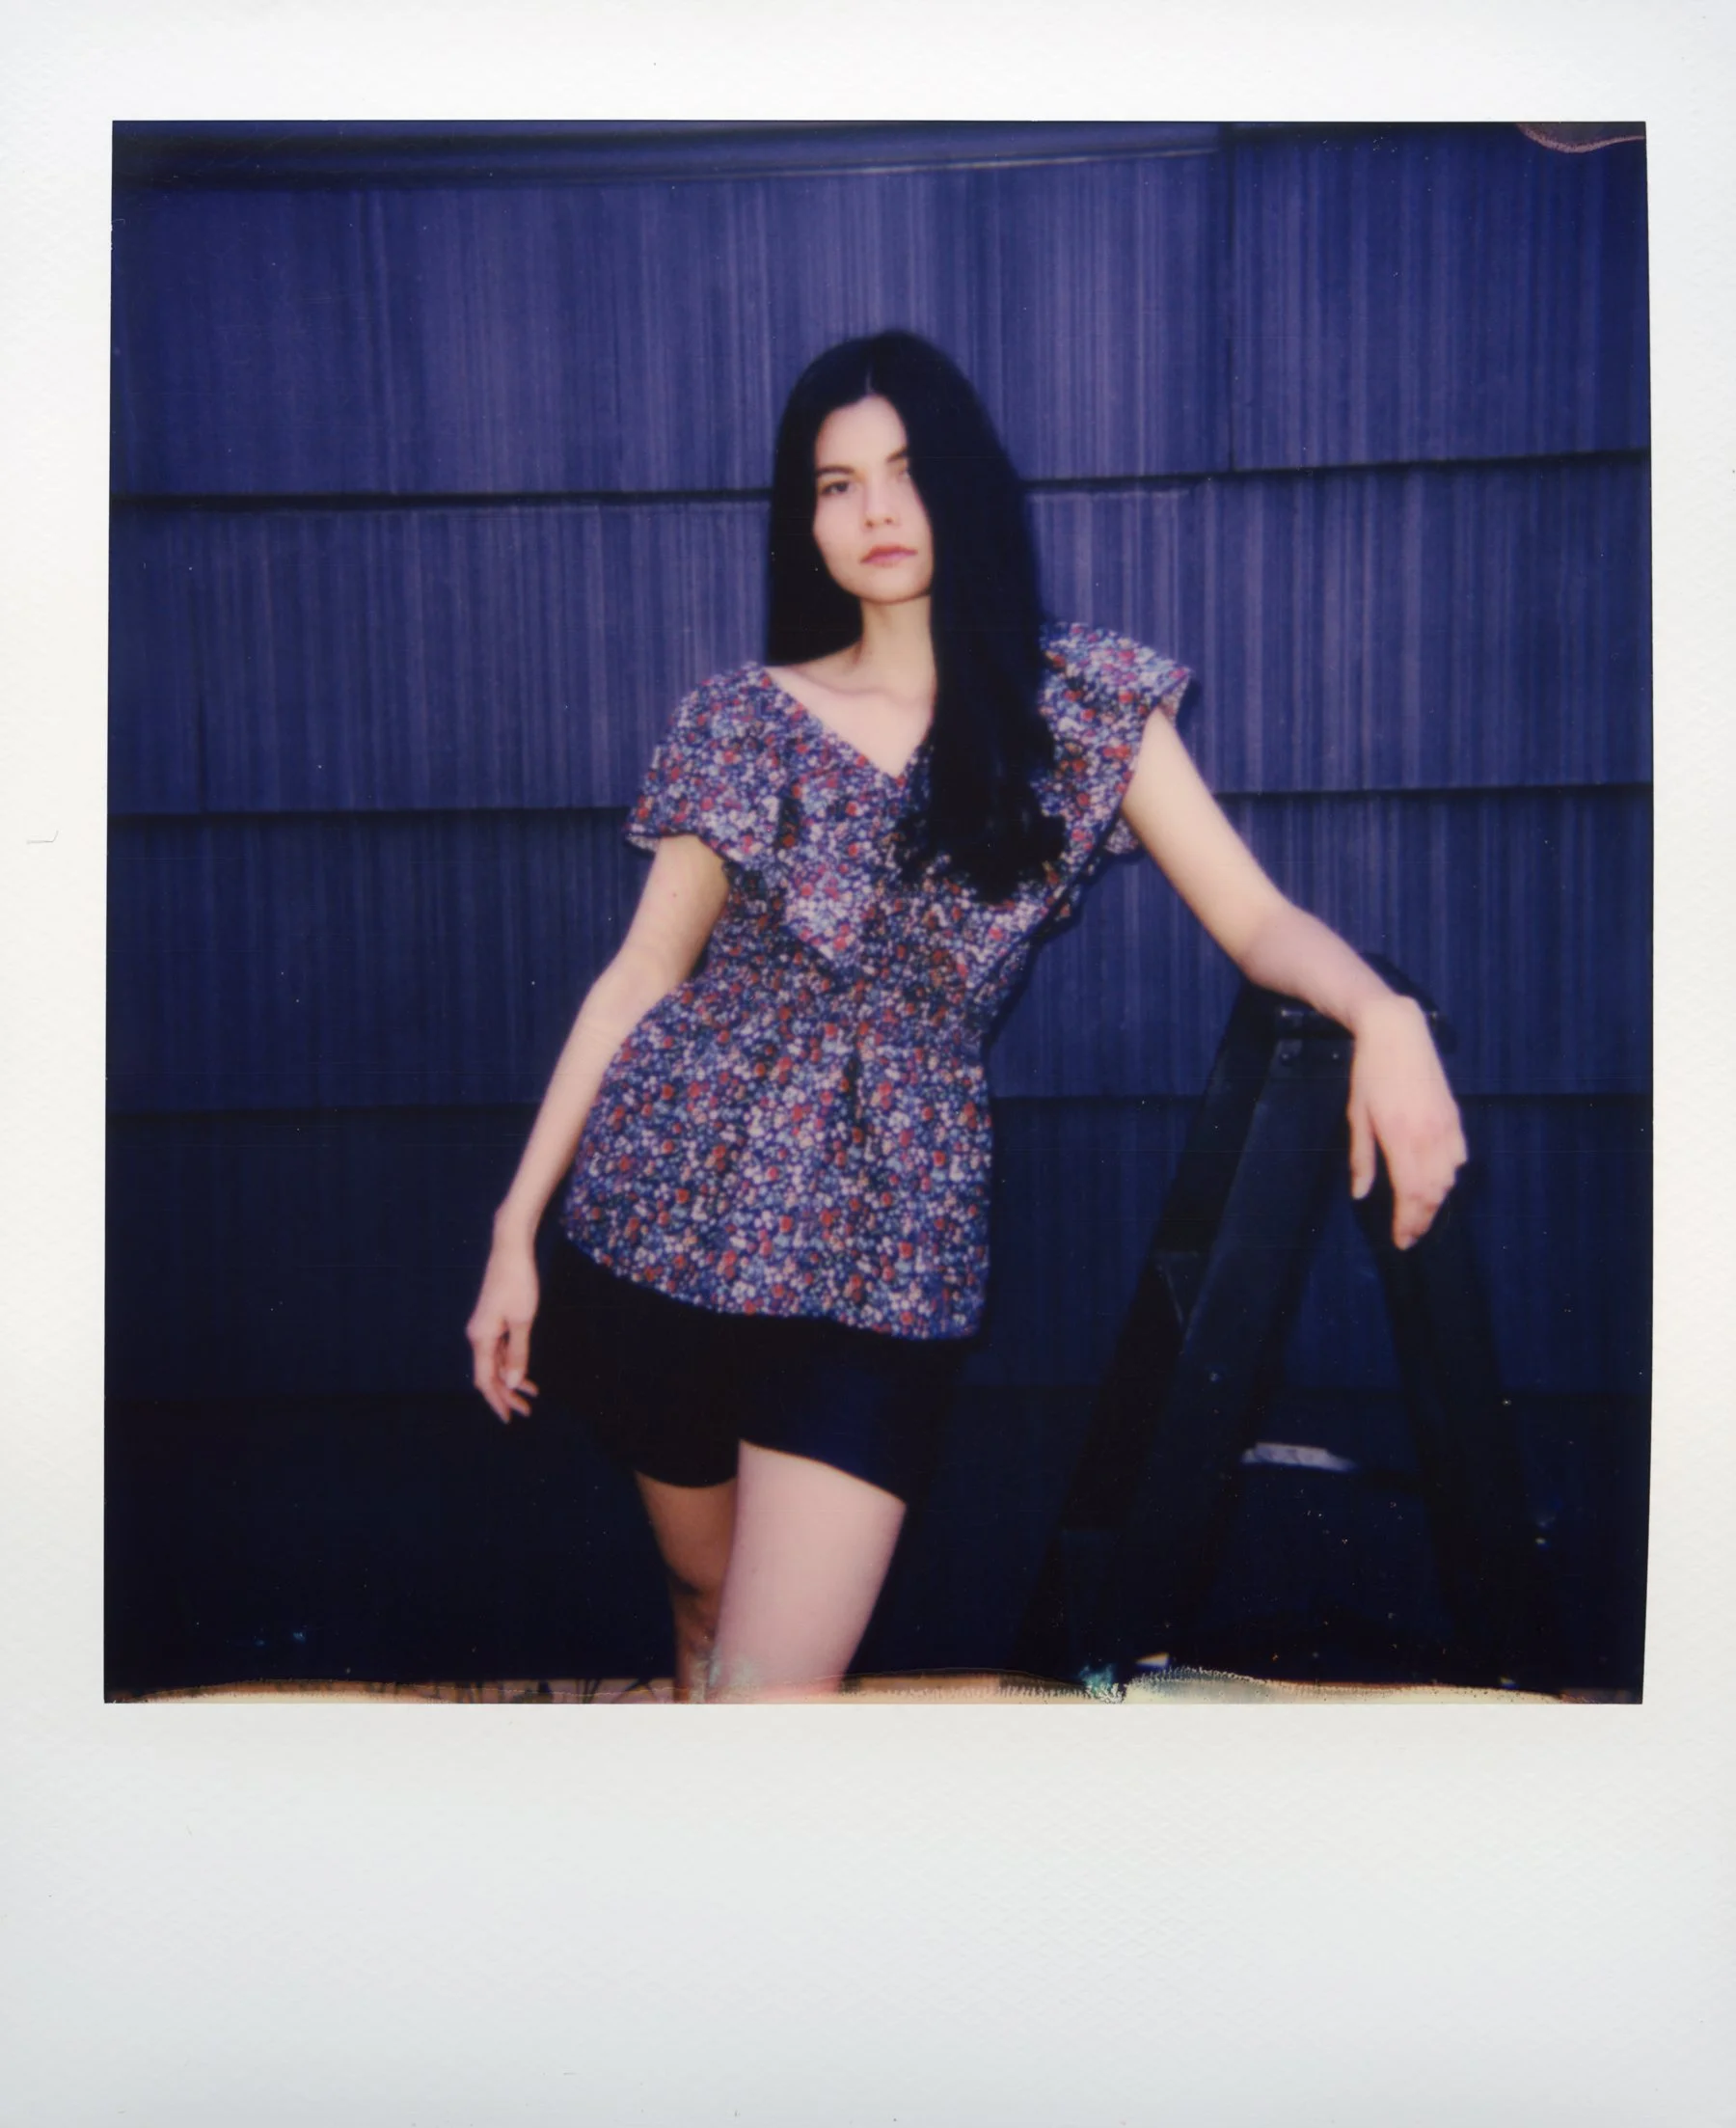
  2. The Photos are Grainy & Vibe-y

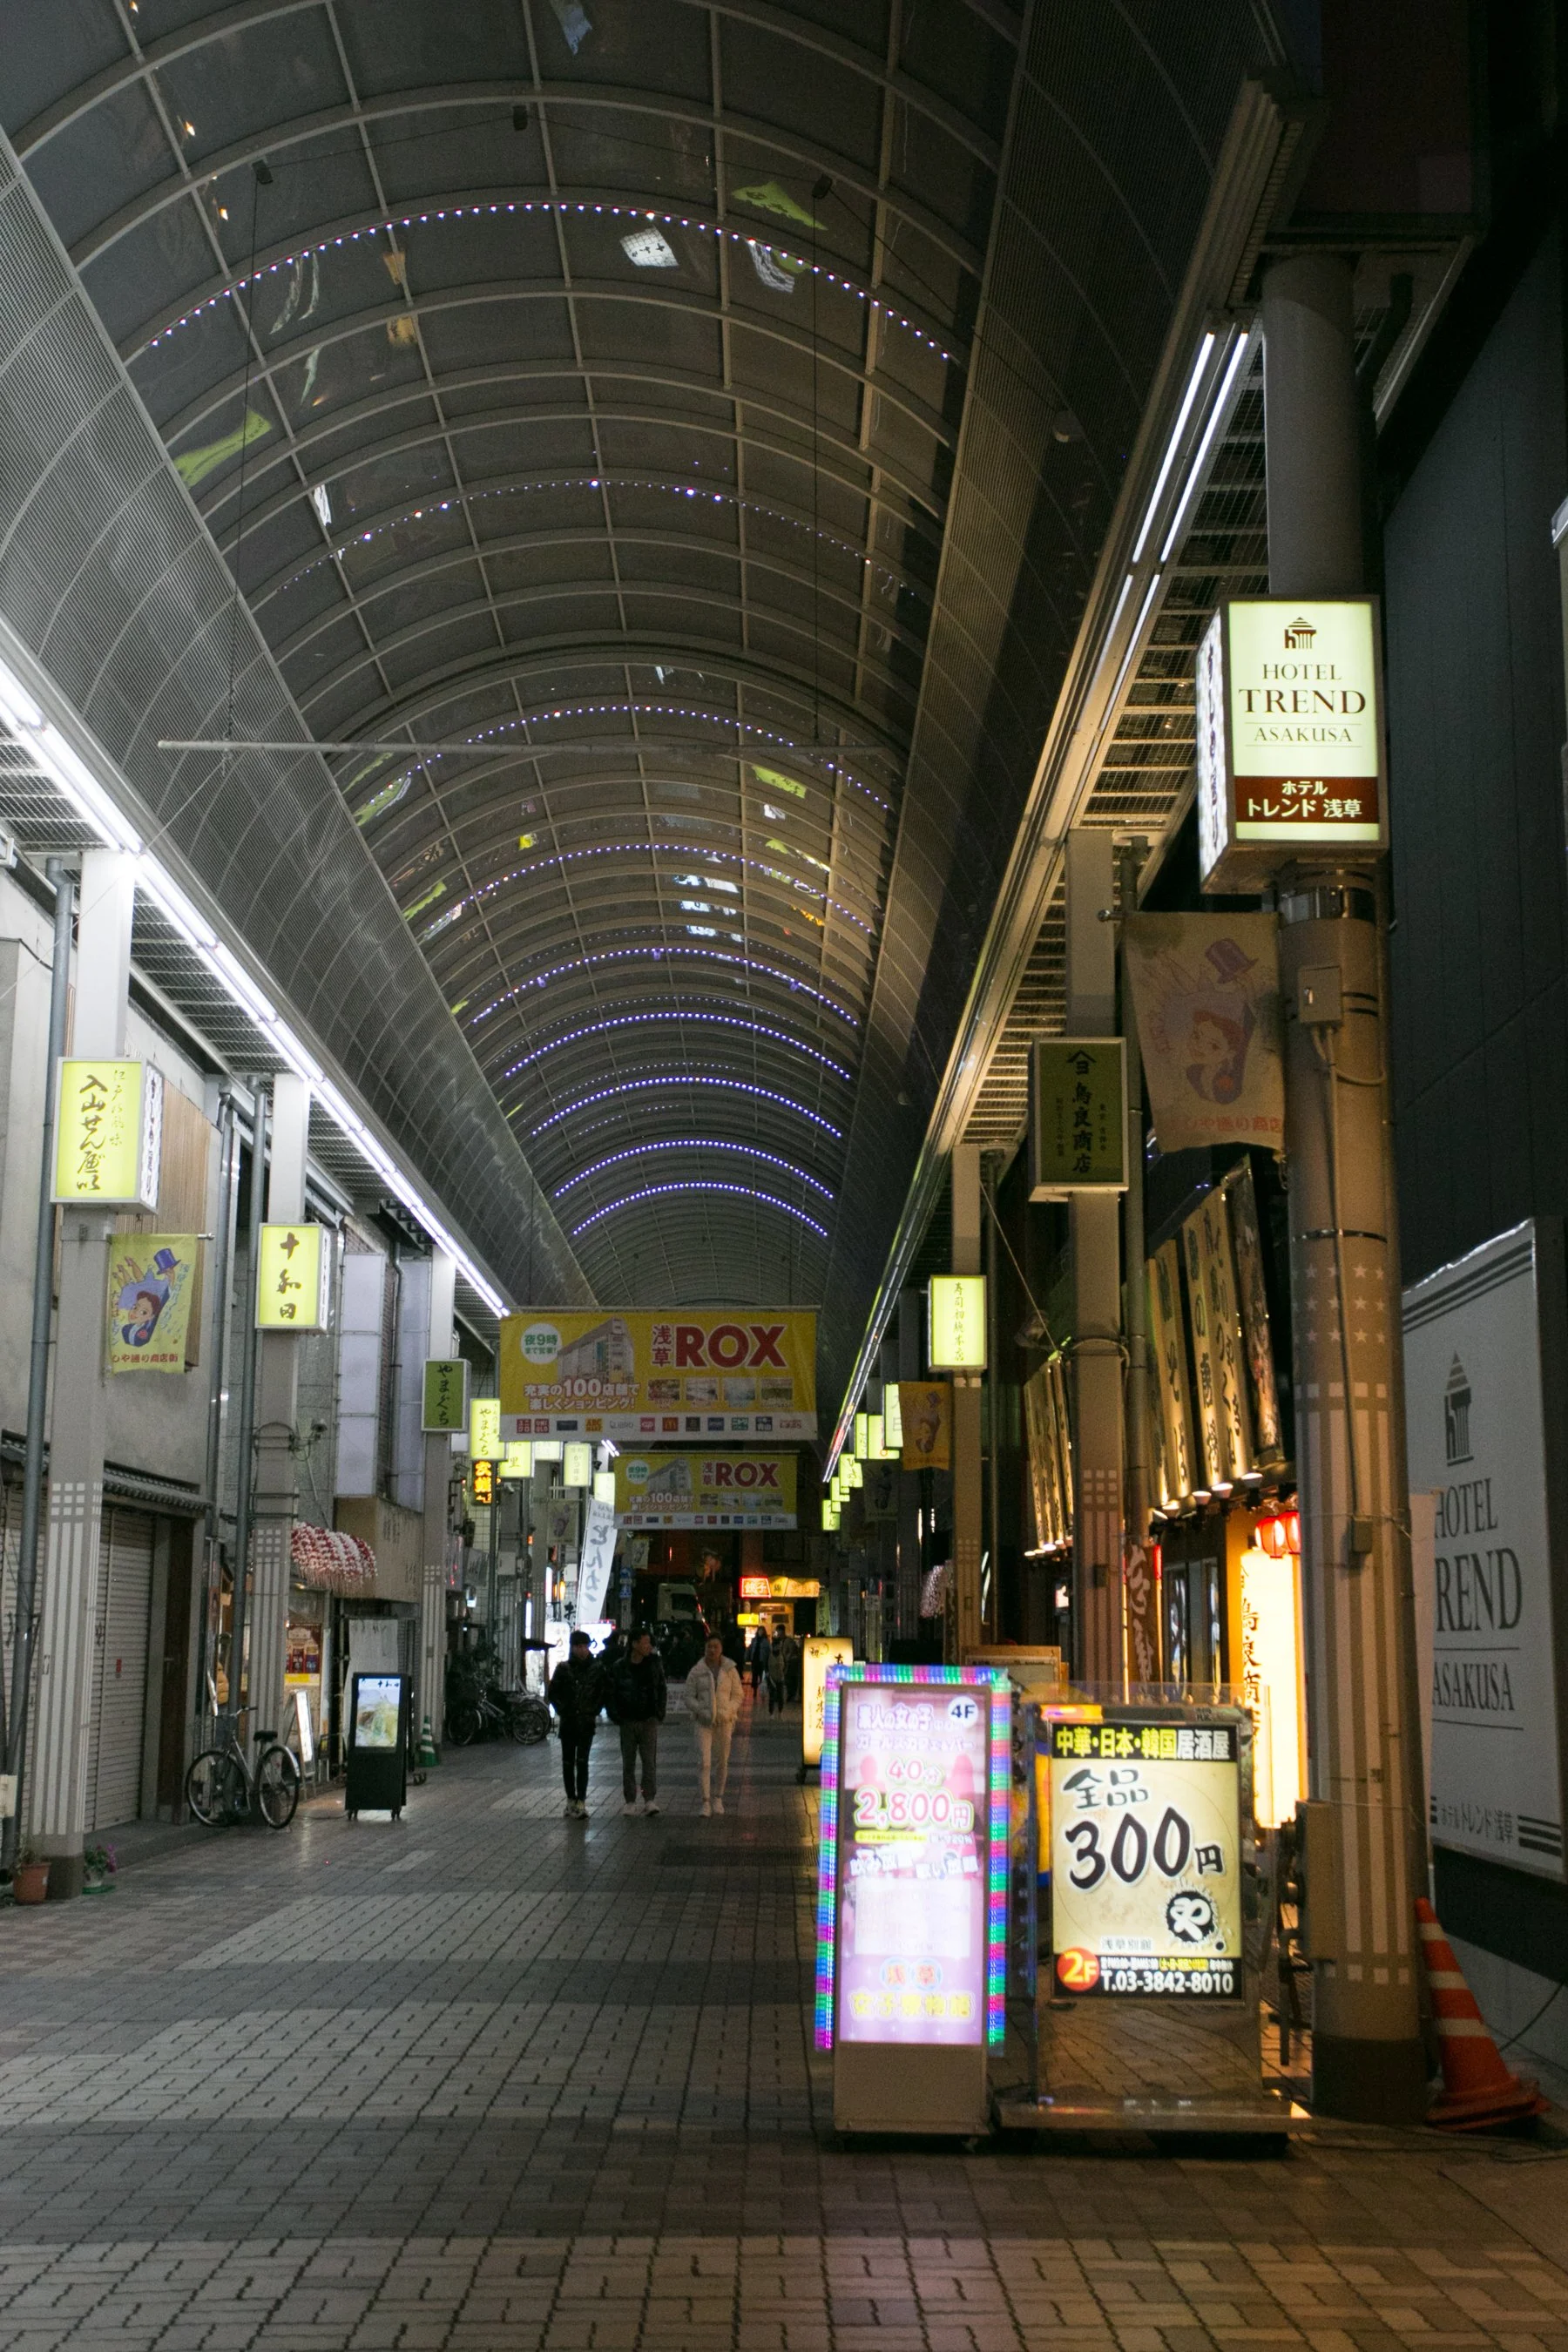
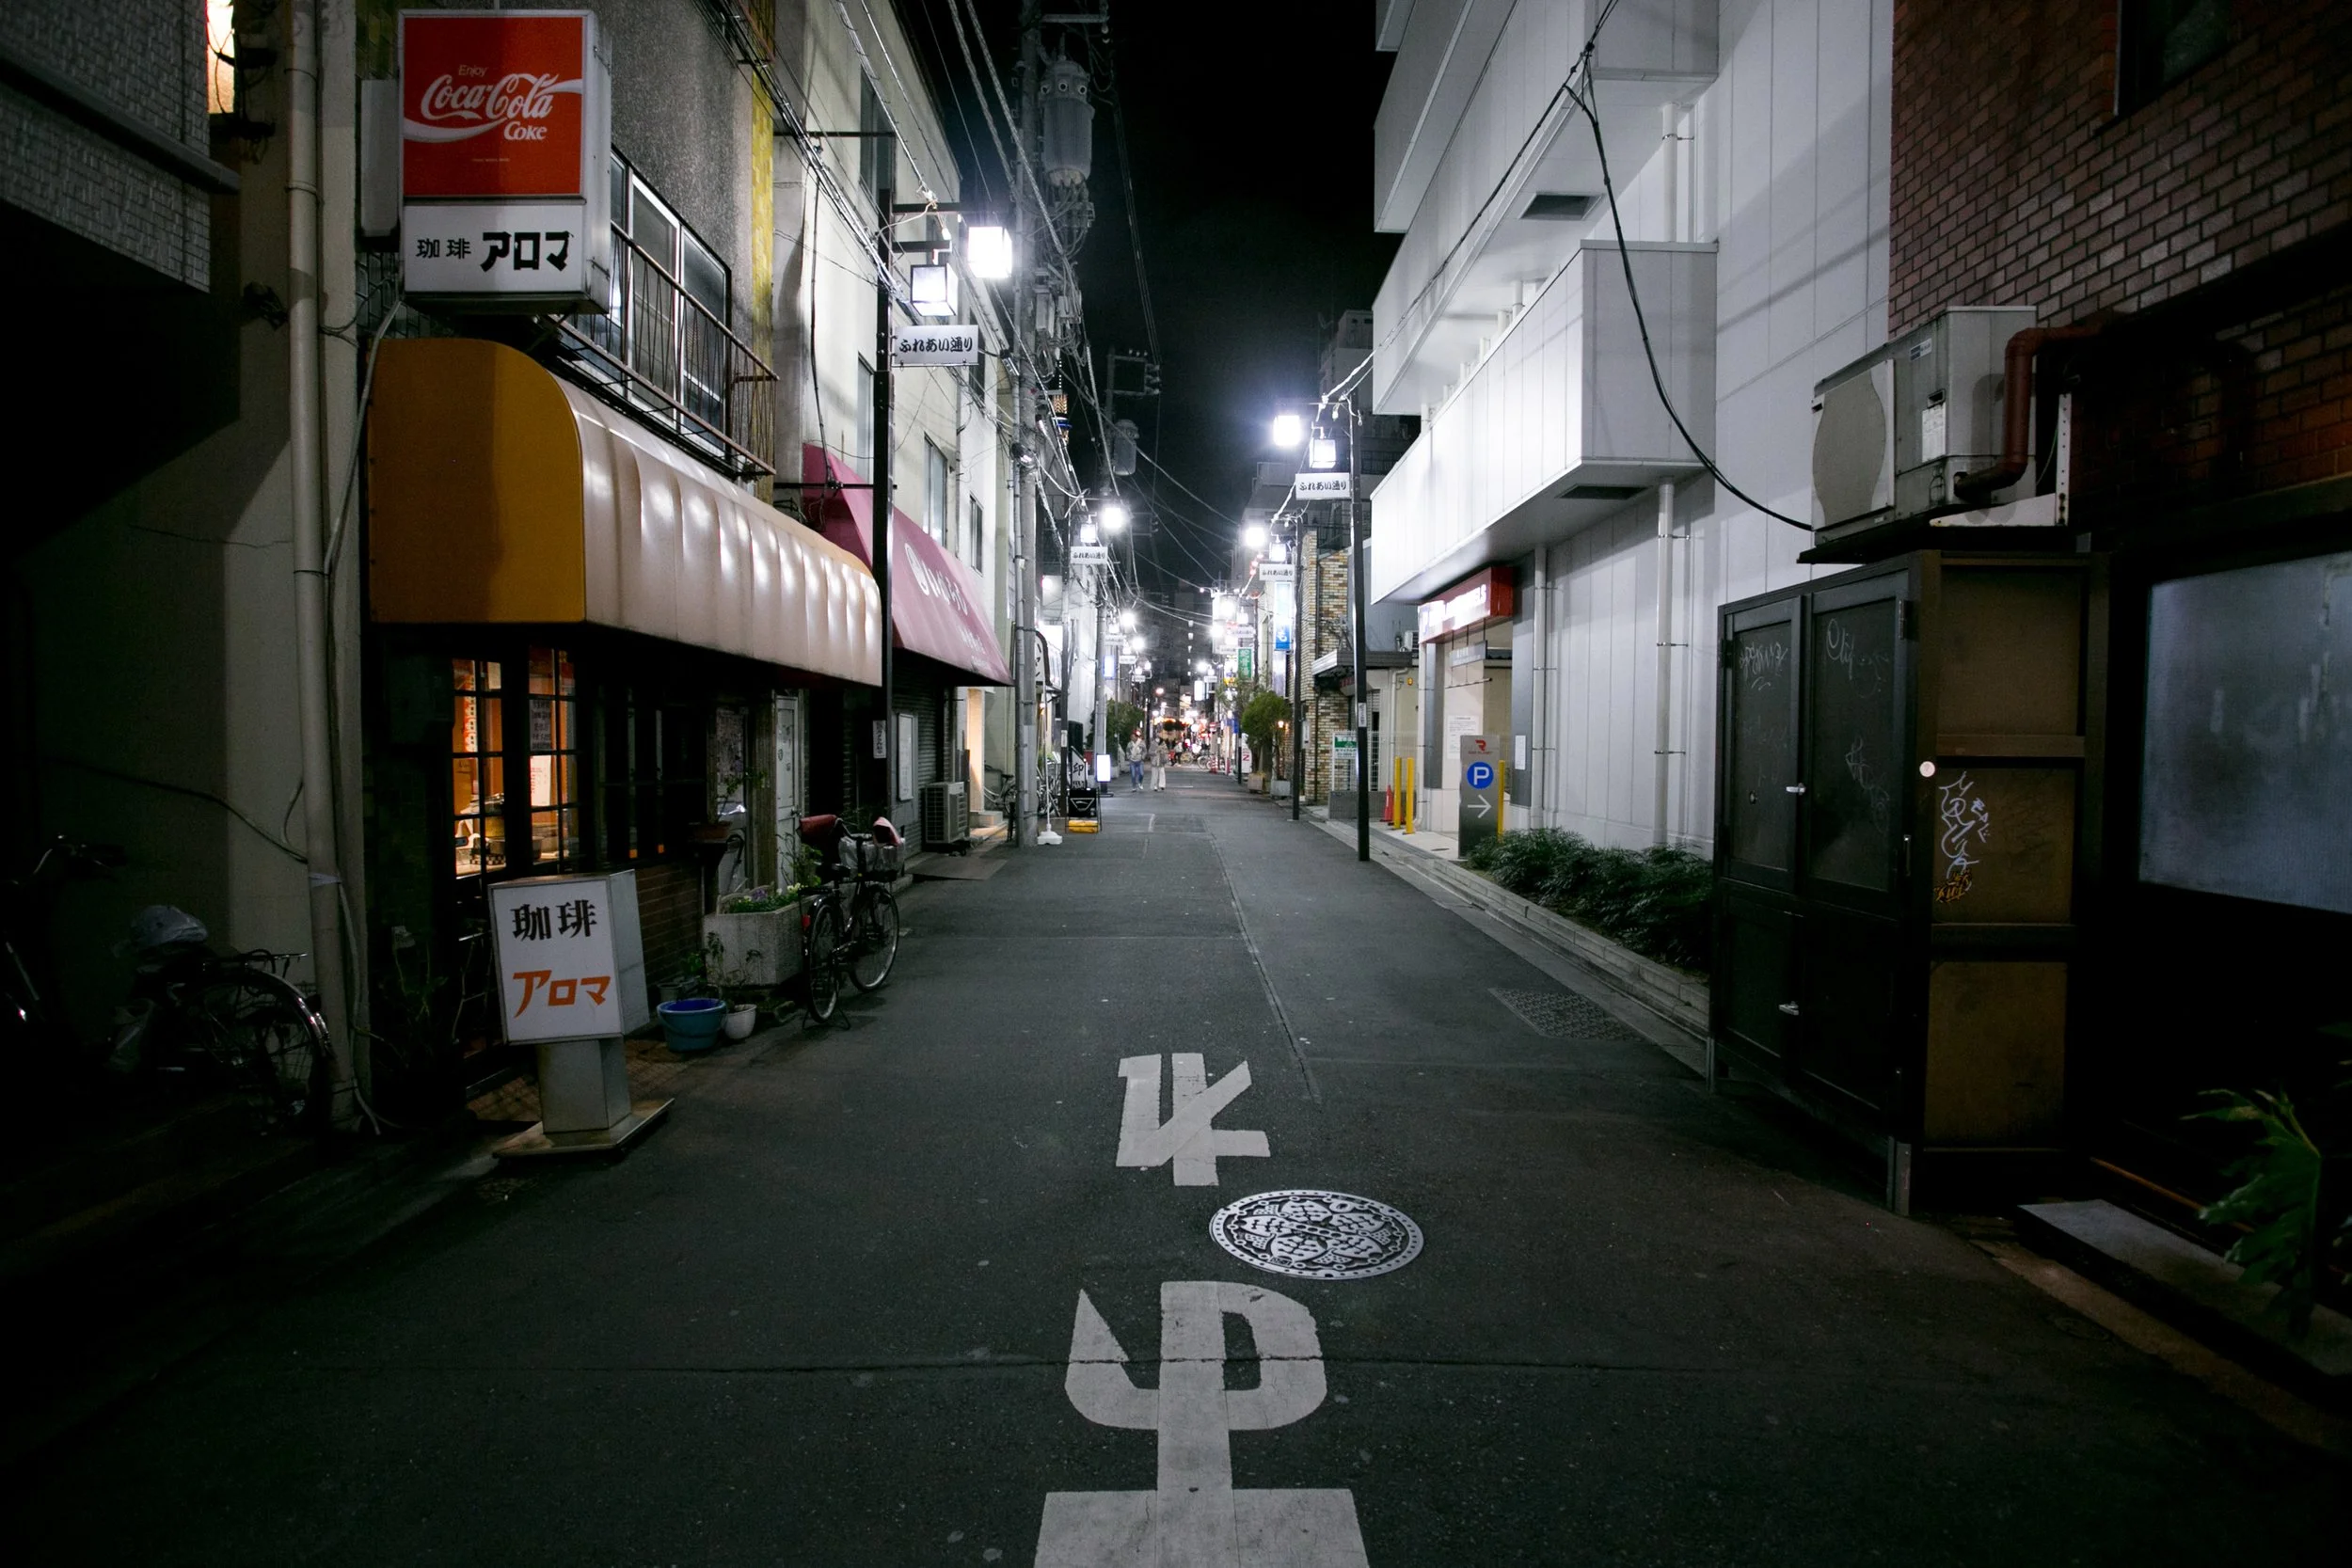
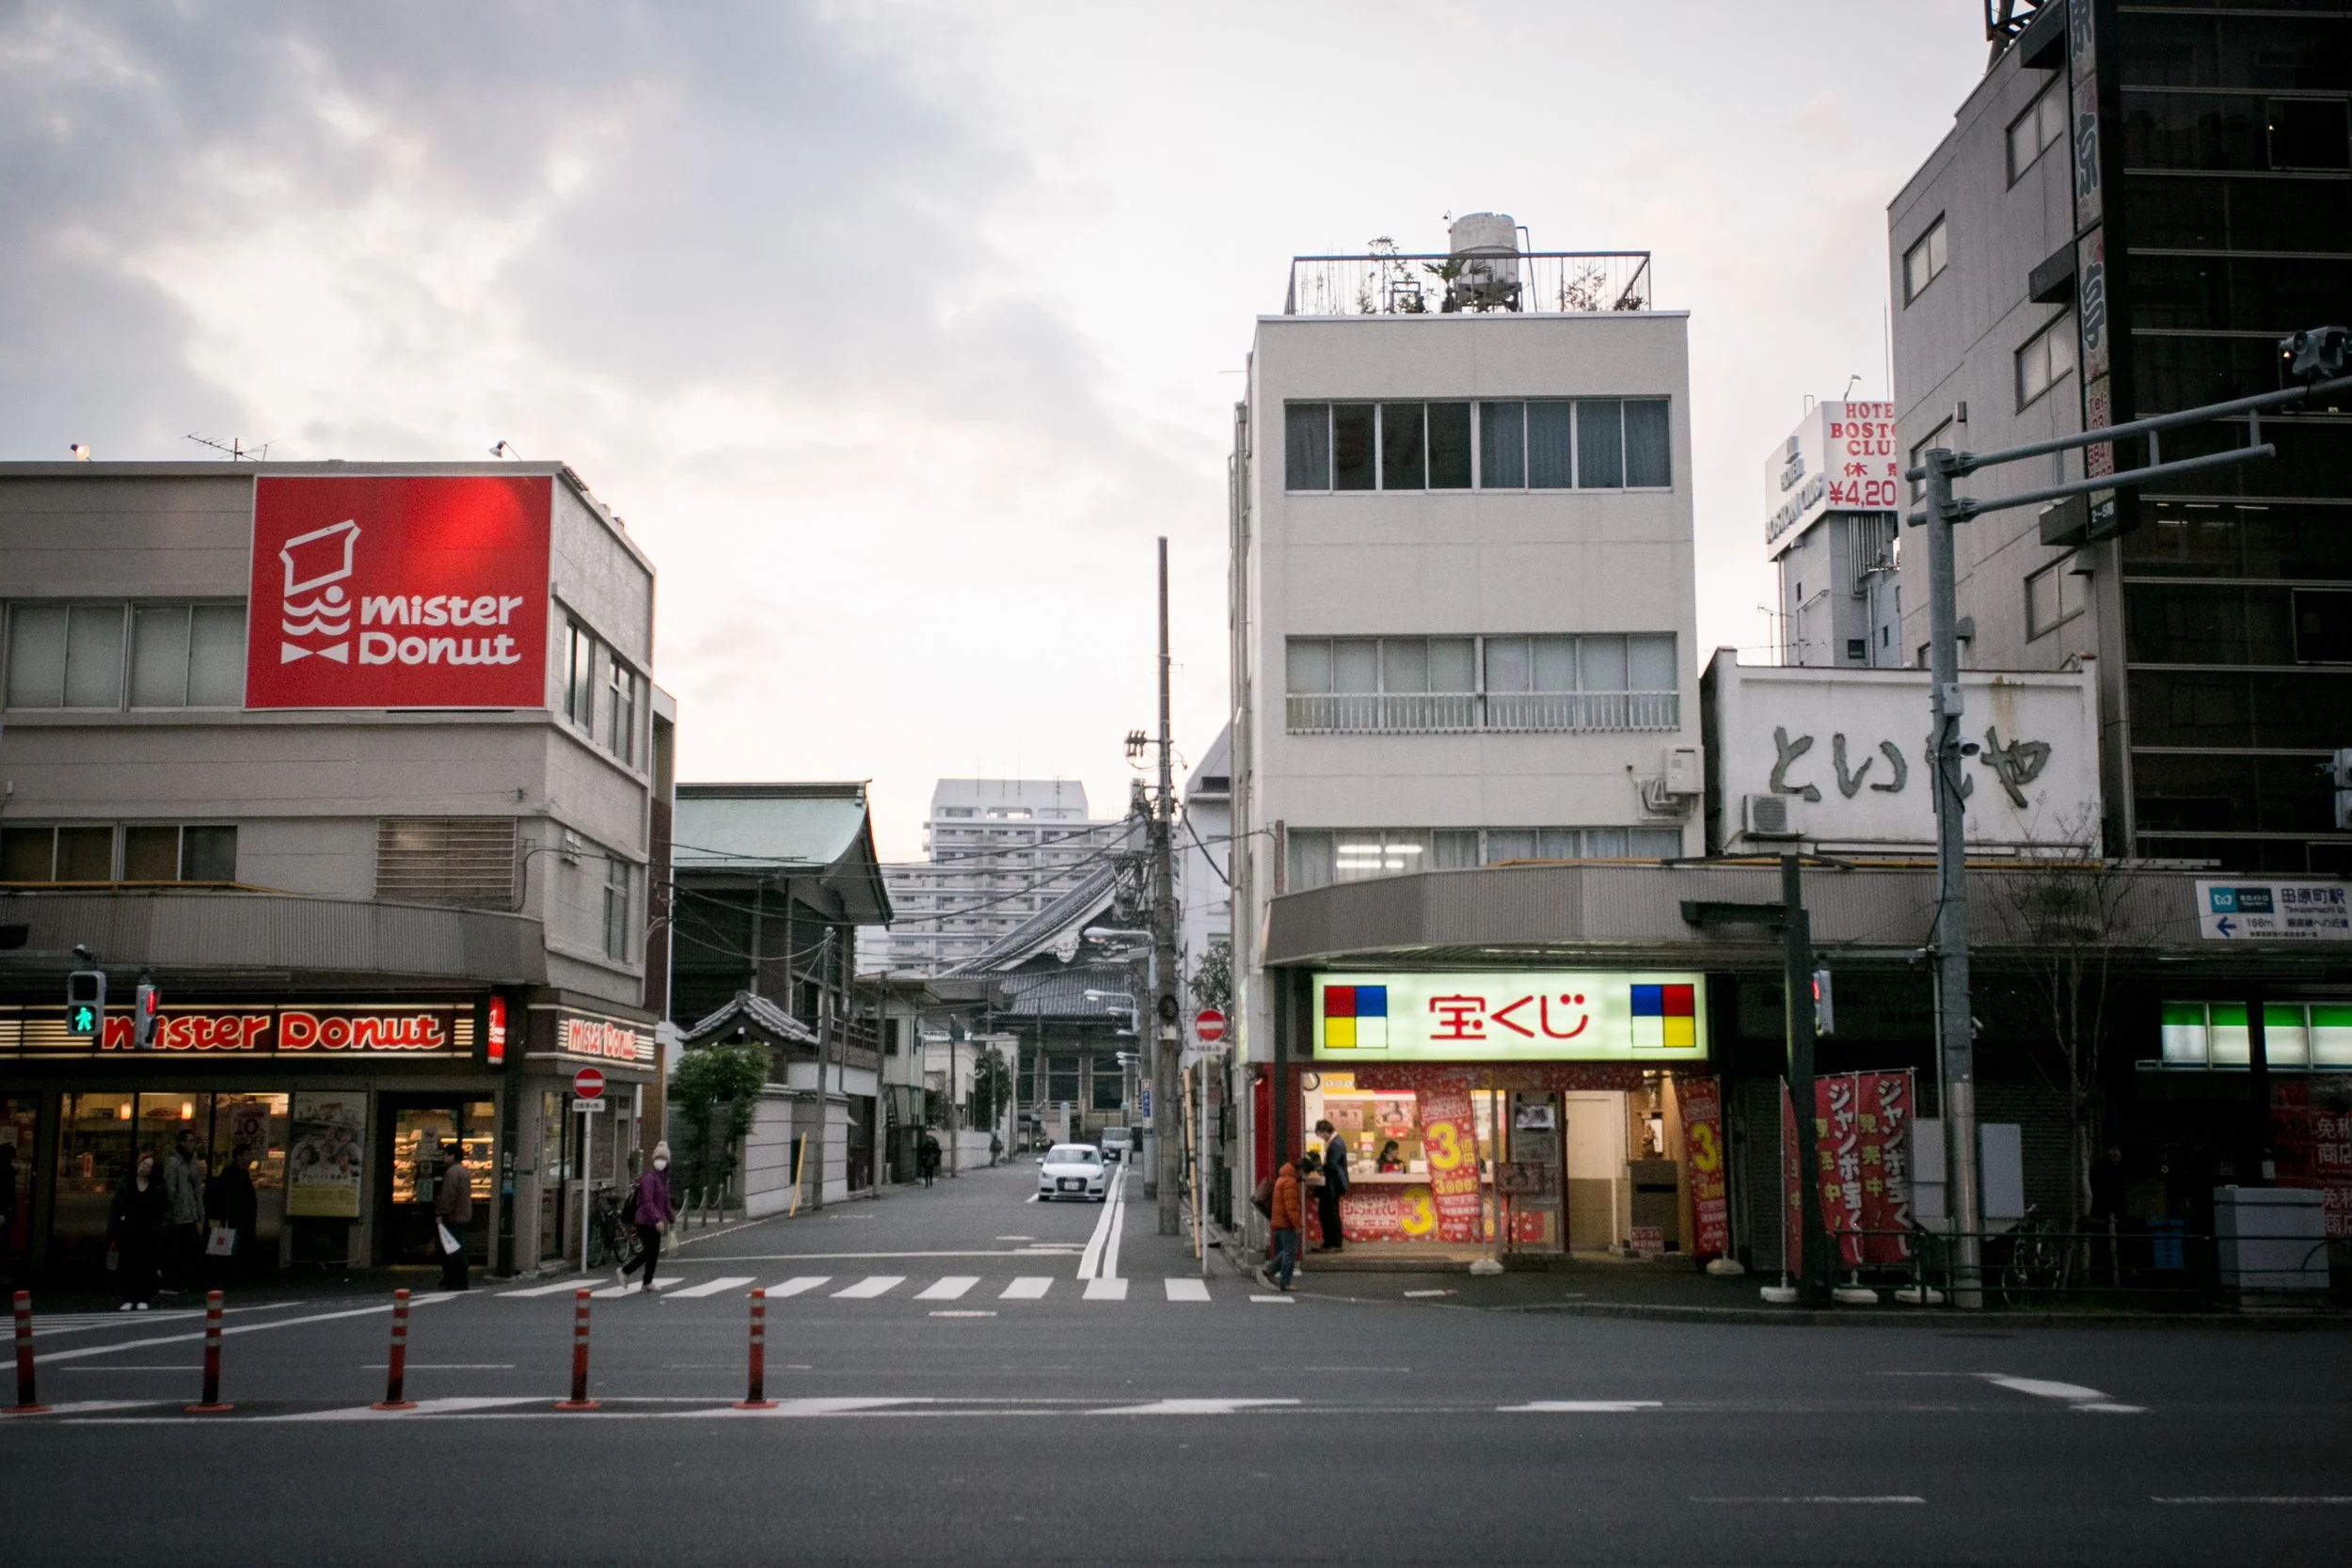
    I wasn’t expecting super sharp photos going into this process, but the photos are even more old school that I thought they’d be. I absolutely love vintage-looking photographs with lots of grain that look like they’re from hundreds of years ago. There is something so addicting about creating photographs that are strange and unusual (because I, myself, am strange and unusual). I know that not everyone feels the same way, but I encourage you to step outside your comfort zone! This camera will definitely make you do that. :) I did learn that this camera requires a lot of light to function properly, so I’d recommend only shooting in very bright conditions, or using the flash if you’re inside or in the shade. You’ll notice some of my images have motion blur or aren’t fully in focus, and that’s because the images were taken close to sunset and the shutter was too slow. Next time, I’ll be sure to shoot in full daylight with this camera. It’s also important to make sure you have the correct distance setting for each image before you take it.

  3. Lots of Creative Features for Such a Small, Affordable Camera

    I was surprised by how many different options and features this camera is capable of. If you follow my work, you know I’m obsessed with multiple exposures. The fact that this camera has a dedicated multiple exposure button is a huge plus for me. I’m actually going to be ordering more 110 film today because now that I’m sitting here writing this blog post, I feel antsy to test out another roll! I’ve learned so much with my first two rolls and can’t wait to learn from my mistakes and go into it with a little more user knowledge. It also has various distance settings, a flash, flash filters, a bulb setting, and two aperture settings - day (f/5.6) & night (f/2.8). For such a tiny camera, the creative control is really nice.

CONS OF THE LOMOMATIC 110

  1. The Film Doesn’t Advance Occasionally

    The main issue I have with this camera is that sometimes the film doesn’t advance when you close it and pull it back open. The film counter will sometimes stay on the same number. I’ve watched a few videos from other photographers and they seem to run into the same issue. However, on my second roll of film, I think I figured out what was happening. You have to make sure you push the shutter button down all the way when taking your photo. I believe what happens is that you think you’ve captured your image, but really, the shutter wasn’t decompressed and you actually didn’t even take your photo! If you just make sure to fully push the button all the way, you should be totally fine.

  2. The Frames Become Misaligned

    By the end of both of my first two rolls of film, I noticed the frames became misaligned. This is probably because I began to close the camera and then changed my mind and opened it back up. So, essentially, the film began to advance a little but then was stopped. So, whatever you do, make sure to fully open and close the camera in between shots and you shouldn’t run into this problem. I’ll be testing this theory out again with my next roll of film, but it makes sense that halfway closing the camera would cause the frames to get out of line.

  3. Film Development is Expensive

    It’s difficult to find labs that will process 110 film. Personally, I used Blue Moon Camera in Portland, Oregon. I also had to buy a 110 film holder for my Epson Perfection V750 Pro Scanner so that I could save some money by scanning the film myself. It was a bit of an investment just to experiment with this camera. However, I do think that I’ll feel a bit better about the whole thing if I follow the tips mentioned above for my next roll of film. It’s definitely more of a hobby camera and not something I would use at a client photo shoot, mostly because I don’t have the functionality fully down yet. I’m hoping in the future I will feel differently.

(example of the frames being misaligned)


FINAL THOUGHTS

I’m so glad that Lomography has created their own 110 camera. It’s incredibly important as photographers and hobbyists to support these dying film formats. I love that 110 film hasn’t disappeared from the world yet and that Lomography is working to keep it alive. While I do think that the camera has a few glitches and requires a bit of a learning curve, it was still an absolute blast to use. It might even be the most fun I’ve had in years trying out a new camera. I plan to test out more of the fun features with my next roll of film.

The Lomomatic 110 is something special though. You’ll be hard-pressed to find another company that values film photography as much as Lomography. The fact that they’ve put time into developing a 110 camera, along with a handful of different film options to choose from, is truly a miracle in today’s world. I always love checking out what Lomography is up to and the new cameras that they release.

I’m honestly so excited to try this camera out again and see what I end up with. I recommend shooting only one roll for your first time so that you can learn from any mistakes you might have made. Make sure to check the aperture, ISO, and distance settings before taking each shot too. I had the wrong distance setting for a few of my images and it definitely makes a difference if you want your images as sharp as possible with a camera like this.

While it is a pricey venture to get into shooting 110 film, it’s always fun for me to try out new cameras and learn something about photography along the way. As my first 110 film experience, it was exciting and different for me. I get bored easily and this camera kept me on my toes. I’ll be sure to share my next roll of film with you!

WHERE TO BUY


Lomomatic 110 Camera & Flash

Lomography.com

eBay.com (used)

Etsy (vintage 110 cameras)


110 Film Cartridges

B&H Photo Video

Lomography.com

Amazon

Etsy (vintage 110 film)

(By using the links and/or codes in this blog post it supports Myles Katherine Photography. We may get a small kick back by you doing so.)

If you found this post helpful or inspiring, I’d love it if you considered signing up for my Patreon! For as little as $1 a month, you’ll get early access to all of my YouTube videos, plus tons of photos that I don’t post anywhere else. Depending on which tier you choose, you could also receive seasonal prints and/or discounts! I always use all of the proceeds towards cameras, film & processing.

If you have any questions, I’m always happy to help! You can contact me here, or leave a comment below! Thanks so much for stopping by! You can also check out my B&H Photo storefront & Amazon Storefront for more camera/film recommendations. :) Have a magical day!

<3 Myles Katherine

View fullsize lomomatic110-B&W Orca 110-samplephotos-19.jpg
View fullsize lomomatic110-B&W Orca 110-samplephotos-14.jpg
View fullsize lomomatic110-B&W Orca 110-samplephotos-5.jpg
View fullsize lomomatic110-B&W Orca 110-samplephotos-10.jpg
View fullsize lomomatic110-B&W Orca 110-samplephotos-18.jpg
View fullsize lomomatic110-B&W Orca 110-samplephotos-2.jpg
View fullsize lomomatic110-B&W Orca 110-samplephotos-15.jpg
View fullsize lomomatic110-B&W Orca 110-samplephotos.jpg
View fullsize lomomatic110-B&W Orca 110-samplephotos-12.jpg
View fullsize lomomatic110-B&W Orca 110-samplephotos-17.jpg
View fullsize lomomatic110-B&W Orca 110-samplephotos-13.jpg
View fullsize lomomatic110-B&W Orca 110-samplephotos-3.jpg
View fullsize lomomatic110LomoChrome Color ’92-110samplephotos-8.jpg
View fullsize lomomatic110LomoChrome Color ’92-110samplephotos-11.jpg
View fullsize lomomatic110LomoChrome Color ’92-110samplephotos-2.jpg
View fullsize lomomatic110LomoChrome Color ’92-110samplephotos-5.jpg
View fullsize lomomatic110LomoChrome Color ’92-110samplephotos-16.jpg
View fullsize lomomatic110LomoChrome Color ’92-110samplephotos-10.jpg
View fullsize lomomatic110LomoChrome Color ’92-110samplephotos-17.jpg
View fullsize lomomatic110LomoChrome Color ’92-110samplephotos-9.jpg
View fullsize lomomatic110LomoChrome Color ’92-110samplephotos-3.jpg
View fullsize lomomatic110LomoChrome Color ’92-110samplephotos-13.jpg
View fullsize lomomatic110LomoChrome Color ’92-110samplephotos-7.jpg
View fullsize lomomatic110LomoChrome Color ’92-110samplephotos-4.jpg
View fullsize lomomatic110LomoChrome Color ’92-110samplephotos-12.jpg
View fullsize lomomatic110LomoChrome Color ’92-110samplephotos-14.jpg
View fullsize lomomatic110LomoChrome Color ’92-110samplephotos-15.jpg
View fullsize lomomatic110LomoChrome Color ’92-110samplephotos.jpg


In Camera Reviews, FIlm Reviews Tags lomomatic 110 review, lomomatic 110 camera review, lomomatic 110 zebra crossing review, lomomatic 110 sample photos, lomomatic 110 example photos, lomochrome color '92 110 sample photos, B&W orca 110 film review, b&w orca 110 sample photos, b&w orca 110 example photos, lomochrome color '92 110 film review, lomochrome color, lomochrome color '92 110 example photos, 110 camera review, best 110 camera, best 110 camera for beginners, 110 film photography, 110 film photography samples, lomography 110 camera review, vintage 110 film samples, 110 film camera review, lomography 110 film camera review, 110 lomomatic camera review, initial thoughts lomomatic 110 camera, rva film photographer, rva film photography, richmond va film photographer, camera blog, vintage film camera blog, camera review blog, myles katherine, cameras and cats, cameras and cats youtube
Comment

Canon EF 17-40mm f/4L USM Lens Review with Sample Photos in Japan!

October 1, 2024

WHY DID I BUY THE CANON EF 17-40MM F/4L USM LENS?

You might know that the Canon 24-70mm f/2.8L II lens is my absolute favorite Canon lens, but when I started doing occasional real estate photography for AirBnb and local businesses, I needed a lens that was a little bit wider. I didn’t want to make a huge investment into yet another super expensive lens, especially because I knew that I could use my 24-70mm lens for most situations when it came to real estate photos. I really just needed something I could use for tight and cramped spaces like small bathrooms, bedrooms, and kitchens. The Canon EF 17-40mm f/4L USM Lens seemed like the best price for what I was looking for. It’s an L series lens, which is Canon’s pro level lens series, but at a fairly reasonable price of $600 (especially compared to the price tag of $1899 for the 24-70mm lens). Though, I actually bought mine gently used so I got an even better deal (you can find them used on KEH Camera or eBay). At this point in my life, I rarely ever steer away from the L series lenses, except in the case of the Canon 50mm f/1.4 lens that has a special place in my heart. I have yet to try the RF lenses yet, though it’s on my wish list for next year. :)

WHY DID I BRING THE CANON 17-40MM F/4 L LENS TO JAPAN OVER THE CANON 24-70MM F/2.8 L II LENS?

When I was debating which cameras and lenses to bring with me to Japan, I was torn between bringing my beloved Canon 24-70mm lens and my newer Canon 17-40mm lens. I like to bring a digital camera with me on my trips, along with a handful of film cameras. I mostly use the digital camera as a backup to my film cameras, many of which can be unreliable. It’s mostly just for peace of mind because I actually rarely end up using my digital cameras on my trips! Knowing this, I decided to leave my heavy and large Canon 24-70mm lens behind for the first time on a major trip. The 17-40mm lens is 0.67 pounds lighter, which doesn’t sound like much, but makes a huge difference when I’m lugging a giant camera backpack around a foreign country. Not to mention, it took up less space in my camera bag, allowing me to bring an extra film camera… Yes. I realize that filling that space with another camera probably doesn’t help with my dilemma of a heavy backpack…

THOUGHTS ON THE QUALITY OF THE IMAGES

While the 17-40mm lens doesn’t quite have that professional and super sharp quality to the images that I’m used to with the 24-70mm lens (I think I’ve been spoiled!), it got the job done. And even going through the photos now for this blog post, I’m pleasantly surprised by how beautiful these images turned out. You can really only notice a difference when you zoom in on the images in Adobe Photoshop or Lightroom and compare the overall sharpness and the noise in the shadows and corners. It really was a great backup to my film cameras and worked in all lighting conditions, even dark city streets and low-light rooms. And because of it’s ability to capture super wide shots, I easily managed to photograph the stunning architecture of Japan. I always love a wide lens for traveling. I prefer to use the 17-40mm lens with my Canon 5D Mark IV or Canon 6D over my Canon EOS R because I find that the additional lens adapter that I have to use with the EOS R tends to add additional distortion to the edges of the photos when shooting wide. One of the main differences I noticed between the 17-40mm f/4 lens and the 24-70mm f/2.8 lens is the fact that the 24-70mm lens handles edge distortion much better. Portraits look more natural and the added aperture value of the 24-70mm makes for better images overall. However, when I’m traveling, I’m mostly capturing landmarks and buildings, so it worked out just fine! If you’re going more for portraits or detail photos, the 24-70mm would definitely be a better option.

Did I miss my Canon 24-70mm f/2.8 lens?

Yes. I always do, mostly just because the 24-70 is my heart and soul in a lens. But looking at my images now, I think the 17-40mm lens fulfilled my needs as a backup camera on my trip. I never really end up doing much with my digital images after my trips. I tend to lean towards my film images for sharing on social media and blog posts. Though, if for some reason, my film didn’t turn out from my trip, it’s nice to know that I’d have these images to remember our trip by.

Make sure to scroll to the bottom of the post to see more of my favorite images I took in Japan with the Canon EF 17-40mm f/4L USM Lens. I hope these help you to decide if this lens is for you! If you’re on a budget looking for an affordable but professional lens, the 17-40 mm lens would be a great option to start with. Plus, you can always upgrade later! You could also check out my blog post about the Canon EF 24-70mm f/2.8L II USM Lens for comparison. I also posted a video on my YouTube channel about all of the cameras I ended up taking with me on my trip to Japan. You can watch it here!

WHERE TO BUY THE CANON EF 17-40MM F/4 L USM ZOOM LENS

Amazon

B&H Photo Video

KEH Camera (used)

eBay (used)


WHERE TO BUY THE CANON EF 24-70MM F/2.8L II USM ZOOM LENS

Amazon

B&H Photo Video

KEH Camera (used)

eBay (used)

#ad #affiliate

If you found this post helpful or inspiring, I’d love it if you considered signing up for my Patreon! For as little as $1 a month, you’ll get early access to all of my YouTube videos, plus tons of photos that I don’t post anywhere else. Depending on which tier you choose, you could also receive seasonal prints and/or discounts! I always use all of the proceeds towards cameras, film & processing. Find out more here!

If you have any questions, I’m always happy to help! You can contact me here, or leave a comment below! Thanks so much for stopping by! You can also check out my B&H storefront or Amazon storefront for more camera/film recommendations. :) Have a magical day!

<3 Myles Katherine

(click to enlarge images)

View fullsize canonEF17-40mmf-4samplephotos-japan-29.jpg
View fullsize canonEF17-40mmf-4samplephotos-japan-28.jpg
View fullsize canonEF17-40mmf-4samplephotos-japan-7.jpg
View fullsize canonEF17-40mmf-4samplephotos-japan-3.jpg
View fullsize canonEF17-40mmf-4samplephotos-japan-6.jpg
View fullsize canonEF17-40mmf-4samplephotos-japan-5.jpg
View fullsize canonEF17-40mmf-4samplephotos-japan.jpg
View fullsize canonEF17-40mmf-4samplephotos-japan-4.jpg
View fullsize canonEF17-40mmf-4samplephotos-japan-2.jpg
View fullsize canonEF17-40mmf-4samplephotos-japan-8.jpg
View fullsize canonEF17-40mmf-4samplephotos-japan-19.jpg
View fullsize canonEF17-40mmf-4samplephotos-japan-10.jpg
View fullsize canonEF17-40mmf-4samplephotos-japan-11.jpg
View fullsize canonEF17-40mmf-4samplephotos-japan-9.jpg
View fullsize canonEF17-40mmf-4samplephotos-japan-13.jpg
View fullsize canonEF17-40mmf-4samplephotos-japan-14.jpg
View fullsize canonEF17-40mmf-4samplephotos-japan-15.jpg
View fullsize canonEF17-40mmf-4samplephotos-japan-16.jpg
View fullsize canonEF17-40mmf-4samplephotos-japan-18.jpg
View fullsize canonEF17-40mmf-4samplephotos-japan-17.jpg
View fullsize canonEF17-40mmf-4samplephotos-japan-20.jpg
View fullsize canonEF17-40mmf-4samplephotos-japan-22.jpg
View fullsize canonEF17-40mmf-4samplephotos-japan-21.jpg
View fullsize canonEF17-40mmf-4samplephotos-japan-23.jpg
View fullsize canonEF17-40mmf-4samplephotos-japan-24.jpg
View fullsize canonEF17-40mmf-4samplephotos-japan-25.jpg
View fullsize canonEF17-40mmf-4samplephotos-japan-26.jpg
View fullsize canonEF17-40mmf-4samplephotos-japan-27.jpg
View fullsize canonEF17-40mmf-4samplephotos-japan-30.jpg
View fullsize canonEF17-40mmf-4samplephotos-japan-31.jpg
View fullsize canonEF17-40mmf-4samplephotos-japan-35.jpg
View fullsize canonEF17-40mmf-4samplephotos-japan-33.jpg
View fullsize canonEF17-40mmf-4samplephotos-japan-32.jpg
View fullsize canonEF17-40mmf-4samplephotos-japan-34.jpg
View fullsize canonEF17-40mmf-4samplephotos-japan-36.jpg
View fullsize canonEF17-40mmf-4samplephotos-japan-38.jpg
View fullsize canonEF17-40mmf-4samplephotos-japan-40.jpg
View fullsize canonEF17-40mmf-4samplephotos-japan-41.jpg
View fullsize canonEF17-40mmf-4samplephotos-japan-43.jpg
View fullsize canonEF17-40mmf-4samplephotos-japan-39.jpg
View fullsize canonEF17-40mmf-4samplephotos-japan-46.jpg
View fullsize canonEF17-40mmf-4samplephotos-japan-47.jpg
View fullsize canonEF17-40mmf-4samplephotos-japan-44.jpg
View fullsize canonEF17-40mmf-4samplephotos-japan-48.jpg
View fullsize canonEF17-40mmf-4samplephotos-japan-45.jpg
View fullsize canonEF17-40mmf-4samplephotos-japan-49.jpg
View fullsize canonEF17-40mmf-4samplephotos-japan-50.jpg
View fullsize canonEF17-40mmf-4samplephotos-japan-53.jpg
View fullsize canonEF17-40mmf-4samplephotos-japan-54.jpg
View fullsize canonEF17-40mmf-4samplephotos-japan-52.jpg
In Camera Reviews, Travel Tags Canon EF 17-40mm f/4L USM Lens Review, Canon EF 17-40mm f/4L USM Lens sample photos, canon 17-40mm lens review, canon 17-40mm f/4 lens sample photos, canon 17-40 f/4 example photos, best canon lenses, best canon lens for travel, best zoom canon camera lens, best affordable canon lens, best affordable canon zoom lens, canon 17-40mm lens example photos, canon 24-70mm f/2.8 L II review, canon 24-70 f/2.8 sample photos, canon camera review, canon 24-70 mm f/2.8 L ii sample photos, best canon 24-70 lens, best canon zoom lens, best zoom lens canon camera, review of the canon 17-40mm lens, review of the canon 17-40mm f/4 lens, Canon EF 17-40mm f/4L USM Lens, review of the Canon EF 17-40mm f/4L USM lens, photography blog, professional photography blog, rva photographer, rva wedding photographer, rva travel photographer, travel photographer canon, canon camera examples, review of canon camera, review of canon cameras, where to buy canon lenses, where to buy used canon lenses, where to buy used camera gear, richmond va photgorapher, richmond va real estate photography
Comment

Polaroid Impulse 600 Review, How-To and Tips for Getting a Good Polaroid plus Sample Photos!

August 15, 2024

I have SO MANY vintage Polaroid 600 cameras. I’m not really sure how it happened, but I’m running out of space to store them! I’ve thought about selling a few but I’m so obsessed with the way they each look that I couldn’t bear to give them away. Polaroid cameras have such a retro look to them and it’s rare that I stumble across one that’s actually broken. They hold up really well and seemingly last forever if you take decent care of them. The Polaroid Impulse that I have actually belonged to my dad. He used it to photograph building sites back in the 80s and 90s for his construction company. It’s strange to think that they actually documented projects that way, but I guess when you don’t have a cell phone or digital camera, you aren’t left with many options! Make sure to scroll to the bottom of the post to see some sample photos I’ve taken with the Polaroid Impulse! I’ve also written a blog post about the Polaroid One-Step, a very similar vintage Polaroid 600 camera.

The Polaroid Impulse was originally produced in 1988. It’s extremely basic and easy to use. It takes 600 film, which you can buy on Polaroid.com now. It’s a long story, but for a few years, Polaroid film actually ceased to exist. Then, a company called The Impossible Project came along and began re-making instant film to fit in the old 600 Polaroid cameras. Eventually, they changed their name to Polaroid Originals, and then finally got the rights to the actual Polaroid name!

The Impulse only has a few adjustable settings so it’s practically a point-and-shoot camera. There is definitely no need to be intimidated by this type of 600 camera. On the front of the camera, there is a light/dark slider that is just for adjusting how bright or dark you’d like your film to be. I typically have mine set slightly to the right for a darker image. I tend to shoot mostly in bright sunlight and I don’t want my images too blown out. The hollow triangle represents a “lighten” setting, while the filled-in triangle represents the “darken” setting.

This post contains affiliate links and I will be compensated if you make a purchase after clicking through my links. 

To turn on the camera, there is a pop-up flash on the top right side. You simply push the flash down and it will pop up, open the shutter, and turn on the light next to the shutter button on the back. If the light is red, the camera is not quite ready to take a photo. If it’s green, you’re ready to shoot!

The only other setting is a distance slider located on the top left of the camera. Your options are 2-4 ft or 4 ft to infinity. The camera automatically is set to the 4ft to infinity setting, but if you’re planning on taking a closer image of your subject, you can use your finger to slide the lever to the left for the 2-4 ft option. You actually have to hold your finger there the whole time or it will snap back to the 4 ft to infinity setting. Or maybe that’s just my camera and the button doesn’t stay. You never know with these old cameras!

The Polaroid Impulse is fully autofocus which makes it super easy to travel with. You don’t have to spend your time focusing on your subject. You just pop up the flash and take your photo!

To load the film, there is a sliding lever on the front right side of the camera. You slide it forward and the mouth of the camera will drop down. If there is film already in the camera, you remove it by pulling the tab and sliding it out. So easy! Then, to add a new pack of film, you just make sure the pack goes in with the tab facing out and on the bottom. Once you close the mouth of the camera back up, a cover with automatically come out of the camera. This cover was protecting your images from light and now the film is correctly loaded and your camera is ready to use!

A FEW TIPS FOR SHOOTING WITH POLAROID CAMERAS

  1. As soon as you take your image, flip the camera upside down so your polaroid is not exposed to direct sunlight. Polaroids are extremely sensitive while they’re developing. As soon as the Polaroid has fully ejected from the camera, use your fingers to carefully grip the edges. DO NOT touch the actual photo while it is developing or you will end up with fingerprints on it! Sometimes the fingerprints can be fun and add a certain aesthetic, but if that’s not what you’re going for, just grip the edges and carefully put the Polaroid somewhere safe.

  2. Keep the Polaroid decently warm while it’s developing. I’ve learned the hard way that in extremely cold weather, a Polaroid will not develop correctly. Now, I just automatically slide the Polaroid into my pocket to develop if it’s not at least 70 degrees outside. If it’s over 75 or 80 degrees, I’ll put the Polaroid in a dark bag to develop because then I know I won’t squish it or bend it if I sit down.

  3. Don’t shoot in extremely dark environments unless you have studio lights or additional fill light. Even in a decently lit house and the flash going off on the camera, it’s still not enough light to get a bright polaroid of your subject if they are more than a few feet away. I typically use a ring light in my studio to light my subject if I’m shooting polaroids. This tends to provide enough light to get a lovely Polaroid portrait!

  4. Hold the camera as still as possible while taking the photo. It’s easy to want to rush to flip the camera upside down so that your Polaroid isn’t exposed to the sunlight if you’re outdoors. But just make sure to be patient and do your best to not shake the camera while pressing the shutter button. If the camera doesn’t have enough light, you’ll notice the shutter is slower. I’ve experienced this if I’m shooting close to sunset and the light is falling from the sky. The shutter will be a bit slower and sometimes my subject will appear blurry. But it’s a fun way to capture beautiful colors in the sky!

  5. Make sure your film is at least room temperature when shooting. Personally, I store my film in the refrigerator so that it lasts longer. I always make sure to let the film warm up before putting it in my camera and shooting. Again, this film is so sensitive to light and temperature changes!

  6. Try not to stand too far away from your subject if you’re creating portraits. I’ve noticed that it’s better to be within at least within 8 feet of your subject so that the on-camera flash can reach them. If you’re further than that, your subject may appear too dark in your image. If you’re outside in bright light though, this probably won’t matter. But if your subject is in the shade, you’ll definitely want that flash to reach them.

  7. HAVE FUN! Polaroids are perfect for party vibes, family portraits, candid moments, album covers, travel memories, and artsy photo shoots. I always take a few polaroids at every photo shoot because I like to collect them! It’s a great way to remember all of the shoots I’ve done and they’re perfect for scrapbooking, journaling and hanging on the wall. It’s just nice to have a physical print from a shoot afterwards and everyone loves sharing them on social media.

View fullsize polaroidimpulse600samplephotos-4.jpg
View fullsize polaroidimpulse600samplephotos-2.jpg

FINAL THOUGHTS

Try not to get too stressed out if you take a few polaroids that don’t turn out. It takes some getting used to, but once you get the hang of it, Polaroids are a great way to impress the photography community because some people just don’t have the patience to learn the quirks of these vintage cameras. Yes, they can be frustrating in some ways, but they are also incredibly straightforward in other ways. It’s taken me years to feel like I’ve fully figured out the best way to get a good Polaroid, and even now, I’ll take one that doesn’t turn out the way I’d hoped. Mostly, it’s when the weather outside isn’t cooperating temperature-wise. I’ve photographed a few weddings outside in winter temperatures and the Polaroids have a slightly dark and blue cast to them. That’s why it’s so important to use your body heat from your pockets to keep them warm while developing. But make sure not to put the developing part of the image directly against your skin or you will get oil on the polaroid that will affect the development process. That’s why a pocket is best! It takes about 10-15 minutes for them to fully develop, so after that you can store them in whatever temperature you’d like because they won’t be changing after that point. My absolute favorite 600 film to shoot with is the round frame 600 film. There’s just something so nostalgic and calming about the round Polaroids. It’s almost like they’ve already been framed and are ready for an art gallery.

WHERE TO BUY THE POLAROID IMPULSE CAMERA

Amazon

Etsy

KEH Camera

eBay

WHERE TO BUY POLAROID 600 FILM

Polaroid.com

Amazon

WHERE TO BUY POLAROID 600 ROUND FRAME FILM

Polaroid.com

If you prefer to buy a NEW Polaroid-style camera (as opposed to vintage), Polaroid.com has the Polaroid I-2, the Polaroid Now+, and the Polaroid Go cameras. They are all super cute and it’s definitely on my list to pick up one of these soon. I just have to decide which one!!!

If you found this post helpful or if you’d like to see more of my work, I’d love it if you considered signing up for my Patreon! For as little as $1 a month, you’ll get early access to all of my YouTube videos, plus tons of photos that I don’t post anywhere else. Depending on which tier you choose, you could also receive seasonal prints and/or discounts! I always use all of the proceeds towards cameras, film & processing. Find out more here!

If you have any questions, I’m always happy to help! You can contact me here, or leave a comment below! Thanks so much for stopping by! You can also check out my Amazon storefront for more camera/film recommendations. :) Have a magical day!

<3 Myles Katherine

View fullsize polaroidimpulse600samplephotos.jpg
View fullsize polaroidimpulse600samplephotos-3.jpg
View fullsize polaroidimpulse600examplephotos-14.jpg
View fullsize polaroidimpulse600examplephotos-13.jpg
View fullsize polaroidimpulse600examplephotos-10.jpg
View fullsize polaroidimpulse600examplephotos-11.jpg
View fullsize polaroidimpulse600examplephotos-12.jpg
View fullsize polaroidimpulse600examplephotos-15.jpg
View fullsize polaroidimpulse600examplephotos-16.jpg
View fullsize polaroidimpulse600examplephotos-17.jpg
View fullsize polaroidimpulse600examplephotos-2.jpg
View fullsize polaroidimpulse600examplephotos-18.jpg
View fullsize polaroidimpulse600examplephotos-19.jpg
View fullsize polaroidimpulse600examplephotos-3.jpg
View fullsize polaroidimpulse600examplephotos-20.jpg
View fullsize polaroidimpulse600examplephotos-21.jpg
View fullsize polaroidimpulse600examplephotos-5.jpg
View fullsize polaroidimpulse600examplephotos-6.jpg
View fullsize polaroidimpulse600examplephotos-7.jpg
View fullsize polaroidimpulse600examplephotos-8.jpg
View fullsize polaroidimpulse600examplephotos-9.jpg
View fullsize polaroidimpulse600examplephotos.jpg
In Film Photography, Camera Reviews Tags tips for polaroid photographs, tips for taking polaroids, how to take polaroids, best polaroid camera, polaroid impulse camera, polaroid impulse 600, polaroid 600 film samples, polaroid impulse 600 review, polaroid impulse, polaroid 600 round frame review, polaroid 600 film, polaroid 600, polaroid 600 sample photos, reasons to buy a polaroid 600 camera, sample photos polaroid 600, what kind of film does a polaroid impulse take, polaroid impulse review, film photography blog, film camera review blog, film cameras for beginners, film camera reviews, film cameras, rva photographer, rva wedding photographer, richmond va wedding photographer, richmond va polaroid photographer, rva polaroid photography, rva musician photographer, polaroid impulse how-to, how to use the polaroid impulse, polaroid round frame photos, polaroid 600 camera
2 Comments
← Newer Posts Older Posts →

Subscribe

Sign up with your email address to receive news and updates.

We respect your privacy.

Thank you!

Subscribe

Sign up with your email address to receive news and updates.

We respect your privacy.

Thank you!

INSTAGRAM

Marie Antoinette has been one of my favorite movies for a long time, but when I saw it on the big screen for the first time at the @hollywoodtheatr I was completely obsessed with everything about it visually. If you haven&rsquo;t seen it, you should.
Decisions. 🔮
.
@arosevan | 35mm | muah by @thebirdbones .
.
.
.
.
#pdxfashion #analogfeatures #shootfilmmag #shootfilmunder1000 #heyfsc #unvaeljournal #spicollective #gominimalmag #nowherediary 
#photocinematica #dreamermagazine #filmwave #bestfilmp
Throwback to one of my first Portland fashion shoots, featuring super stunner @casstronaut. 🌚
.
Polaroid 600 film | #polaroidweek
.
.
.
Hair &amp; makeup: @jessicabelknap
Styling: Marissa Essex
.
#pdxfashion #roidweek #instantfilm #polaroid #shootit
Missing springtime in Portland. 🌸
.
.
.
.
Model: @hemlocckk
Hair &amp; makeup: @thebirdbones
.
#pdx #rva #rvaphotographer #springtime #springgoth #darkfashion #fashion #muah #darkbeauty #portbox #portraitvision_ #allfloraleverything #bossgirls

When you click on links to various merchants on this site and make a purchase, this can result in this site earning a commission. Affiliate programs and affiliations include, but are not limited to, the eBay Partner Network, Awin, Shareasale, B&H Photo Video, and others. As an Amazon Associate I earn from qualifying purchases.

PRIVACY POLICY & DISCLAIMERS