Canon RF 28-70mm f/2 L USM Lens Review - Is it Worth the Cost? - Why I Chose It Over the Canon RF 24-105mm f/2.8 L IS USM Z Lens

(By using the affiliate links and/or codes in this blog post it supports Myles Katherine Photography. We may get a small kick back by you doing so.)

Here we go - the Canon RF 28-70mm f/2 L USM Lens. It took me WEEKS to decide between this lens and the Canon RF 24-105mm f/2.8 L IS USM Z Lens. They both had so many positive attributes. I desperately wanted a lens with a longer zoom capability for weddings, but the idea of having an f/2.0 aperture on a zoom lens, with the stunning portrait & bokeh capabilities of a prime lens, was also majorly enticing. After over a decade as my main lens, my Canon EF 24-70mm f/2.8 II L USM lens had finally kicked the bucket. It was time for an upgrade. I had an upcoming wedding on the books and needed to make a decision pronto so I could have it in time for the wedding. I even pulled my husband into the discussion and we spent days trying to decide what made the most sense for me and my style of photography. I wanted to share the three main reasons why I chose this lens over the highly desired Z lens so that, hopefully, I can help you in your decision!

  1. Beauty Over Functionality

The main question I kept asking myself was, is it more important to create beautiful images or have better functionality and reach at a high-paying event like a wedding? I’ve always wanted more zoom at weddings. I’ve been using the Canon EF 24-70mm f/2.8 II L USM lens for over a decade as my main lens at weddings. Every time I was standing in the aisle at a wedding and the couple was exchanging wedding rings, I dreamt of having just a little more reach to get close ups of their hands and rings. I imagined beautiful candid moments of guests across the room who didn’t realize I was taking their photograph. I wished I could zoom in on a mountain off in the distance or a butterfly on a flower and create images that only true nature photographers could achieve. But at the end of the day, I’ve always valued beauty and creativity over functionality. While this isn’t the case for every photographer, I realized it was for me. I wanted that extra background blur for my wedding portraits. I wanted just a bump of an upgrade to the low-light images I’d been creating for years. I wanted something BETTER than the images I’d been able to create with an f/2.8 aperture. I wanted to WOW my clients with dreamy, intimate portraits that were better than the norm. I knew this lens would give me that extra dose of magic I was looking for.

2. Low-light ABILITIES

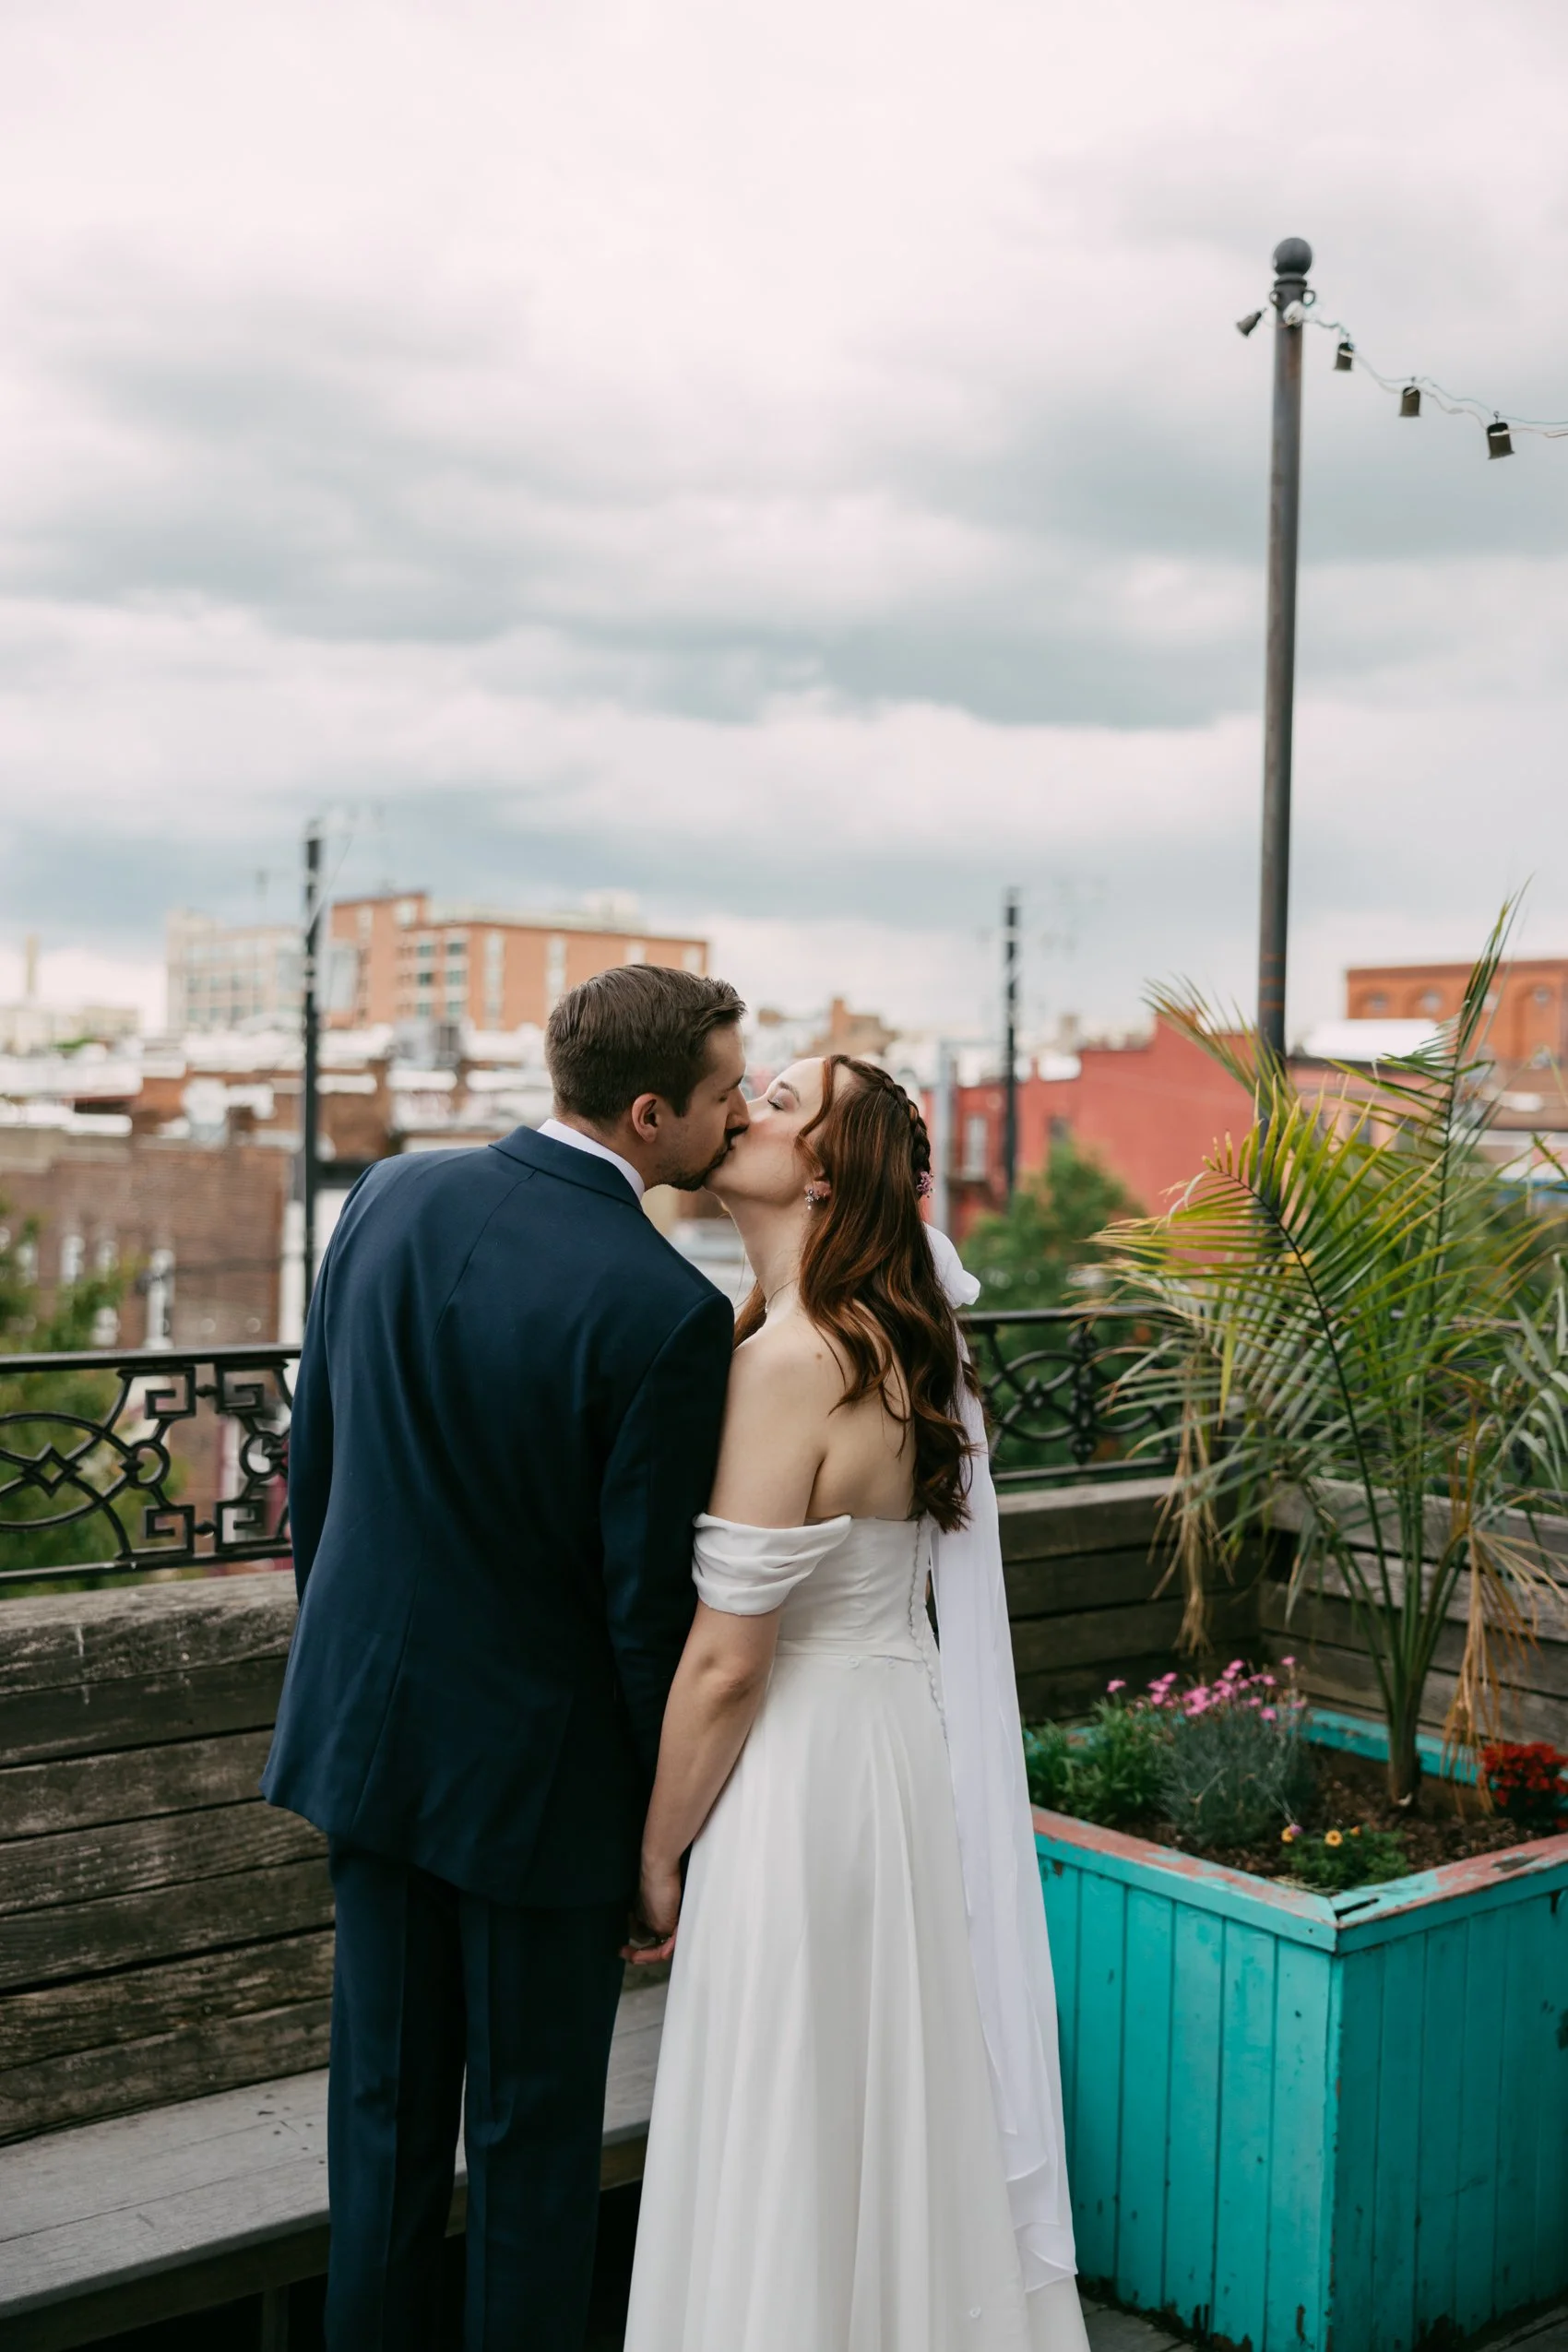
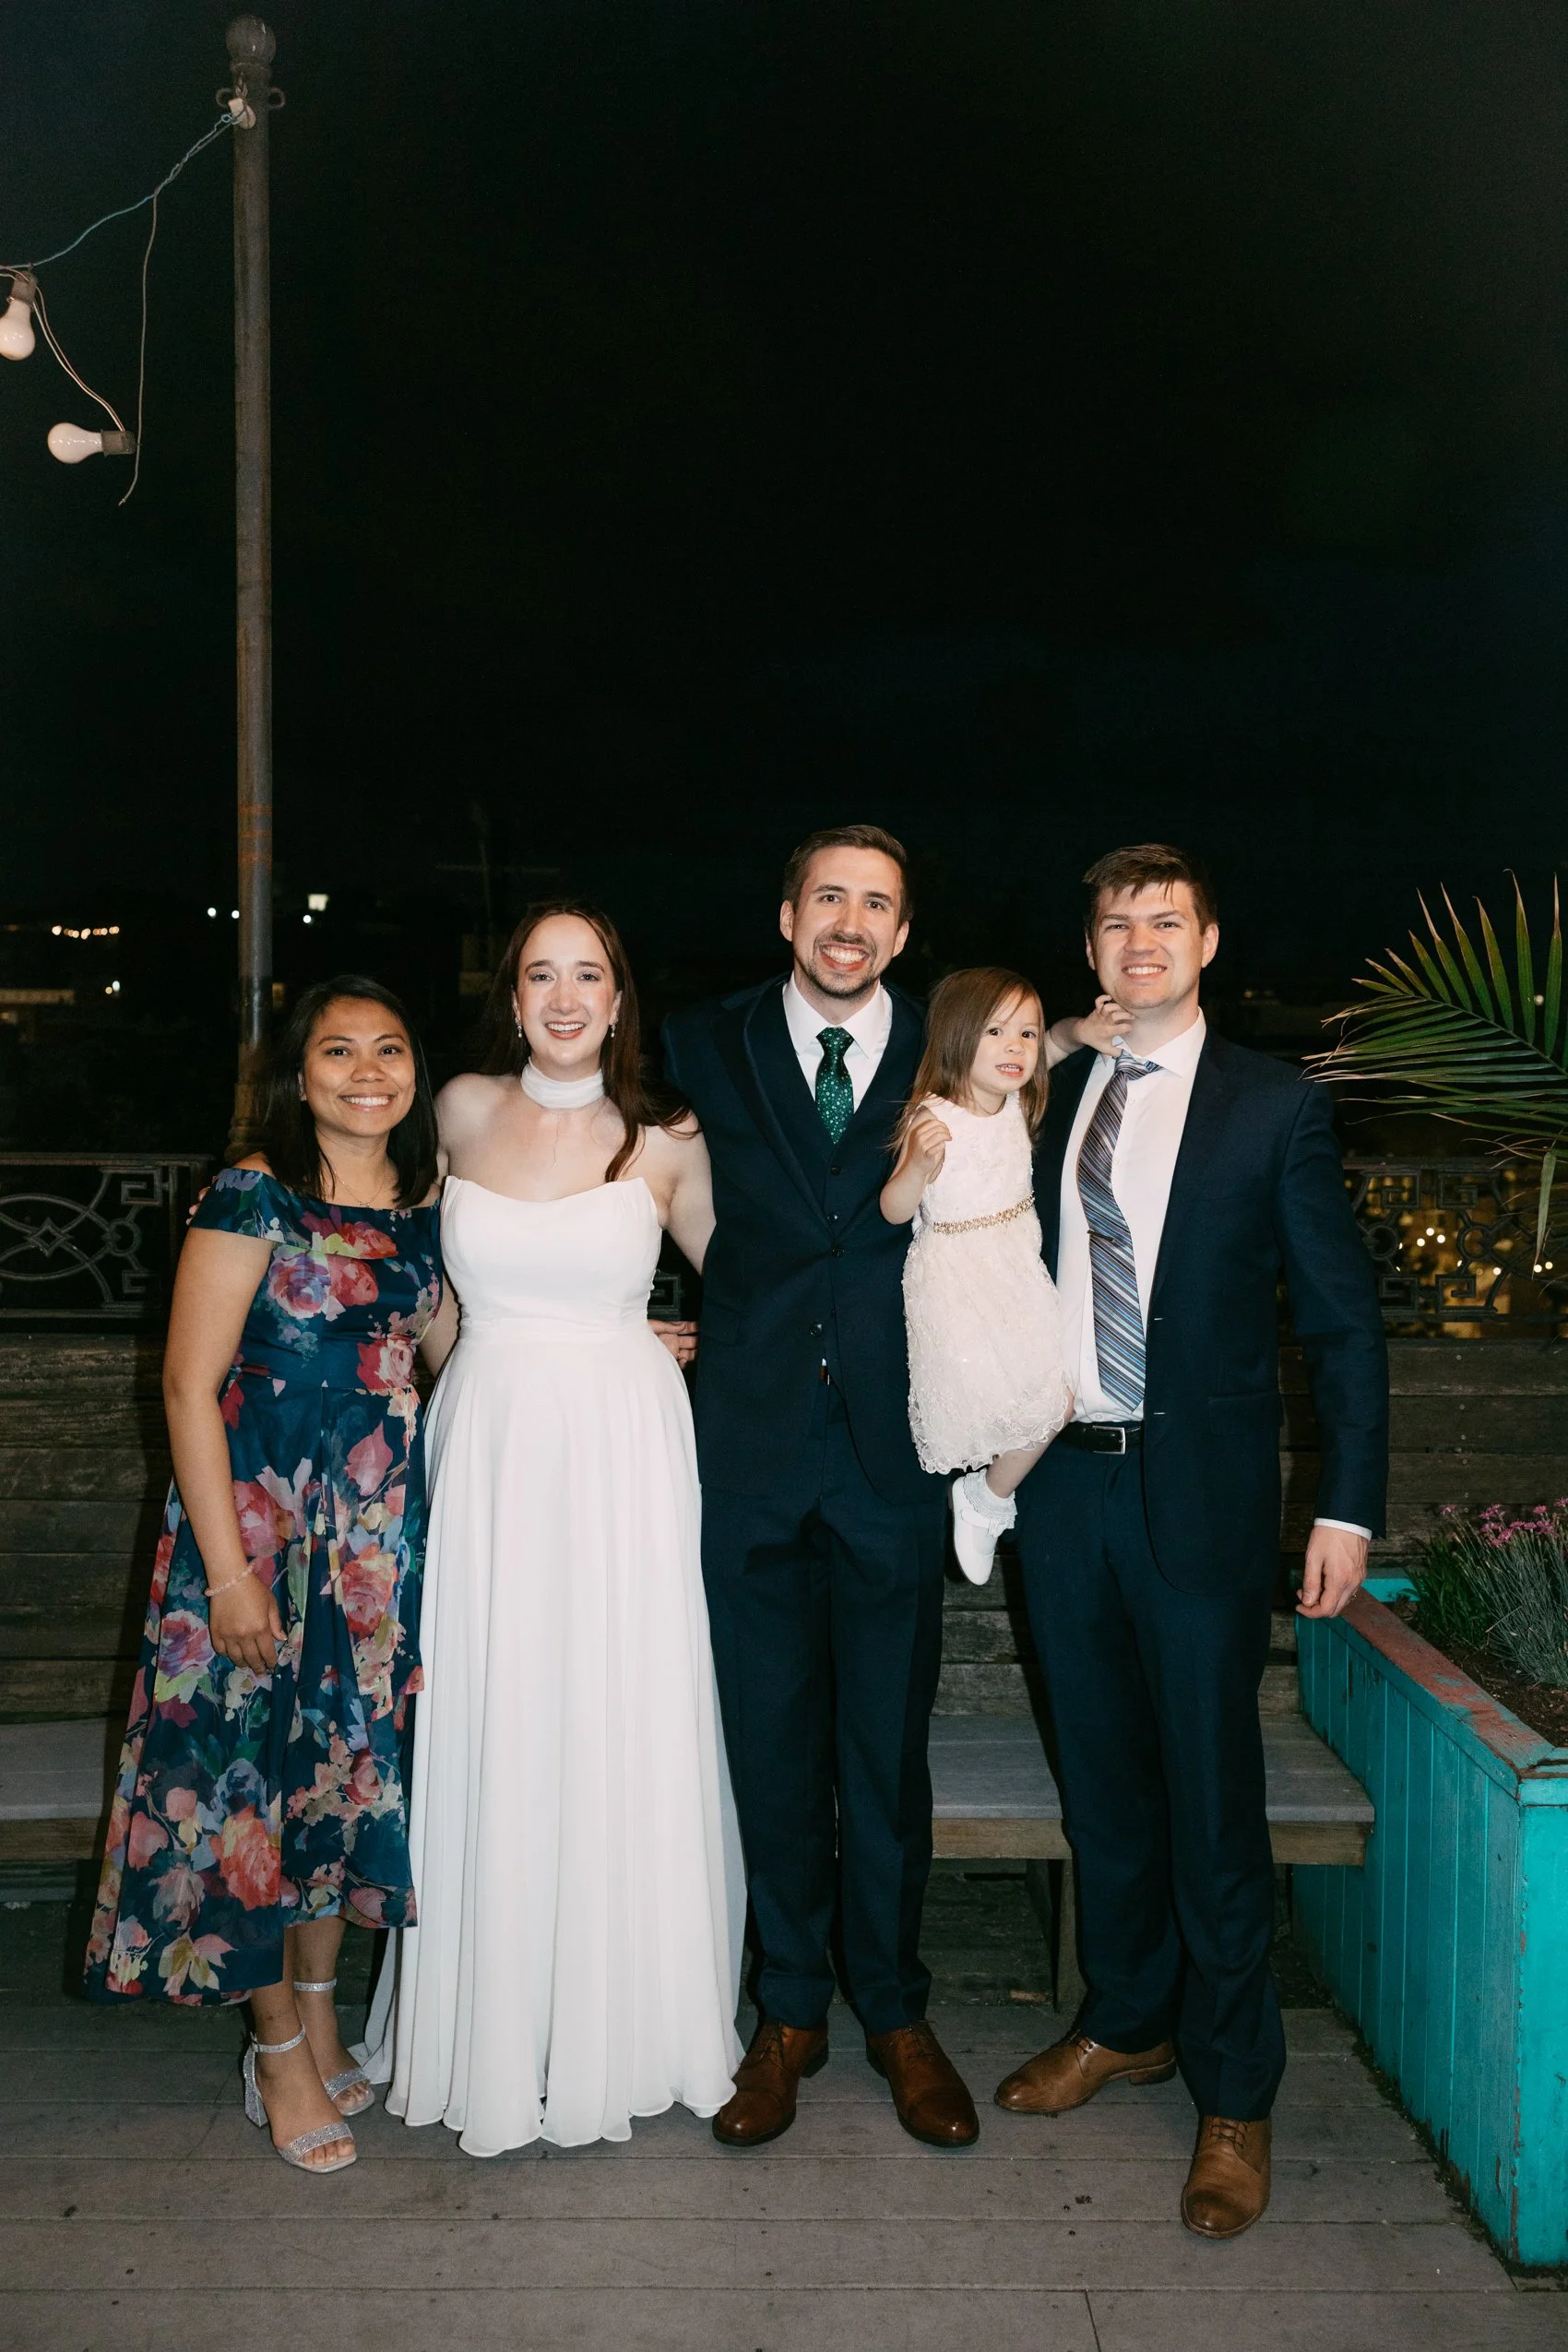
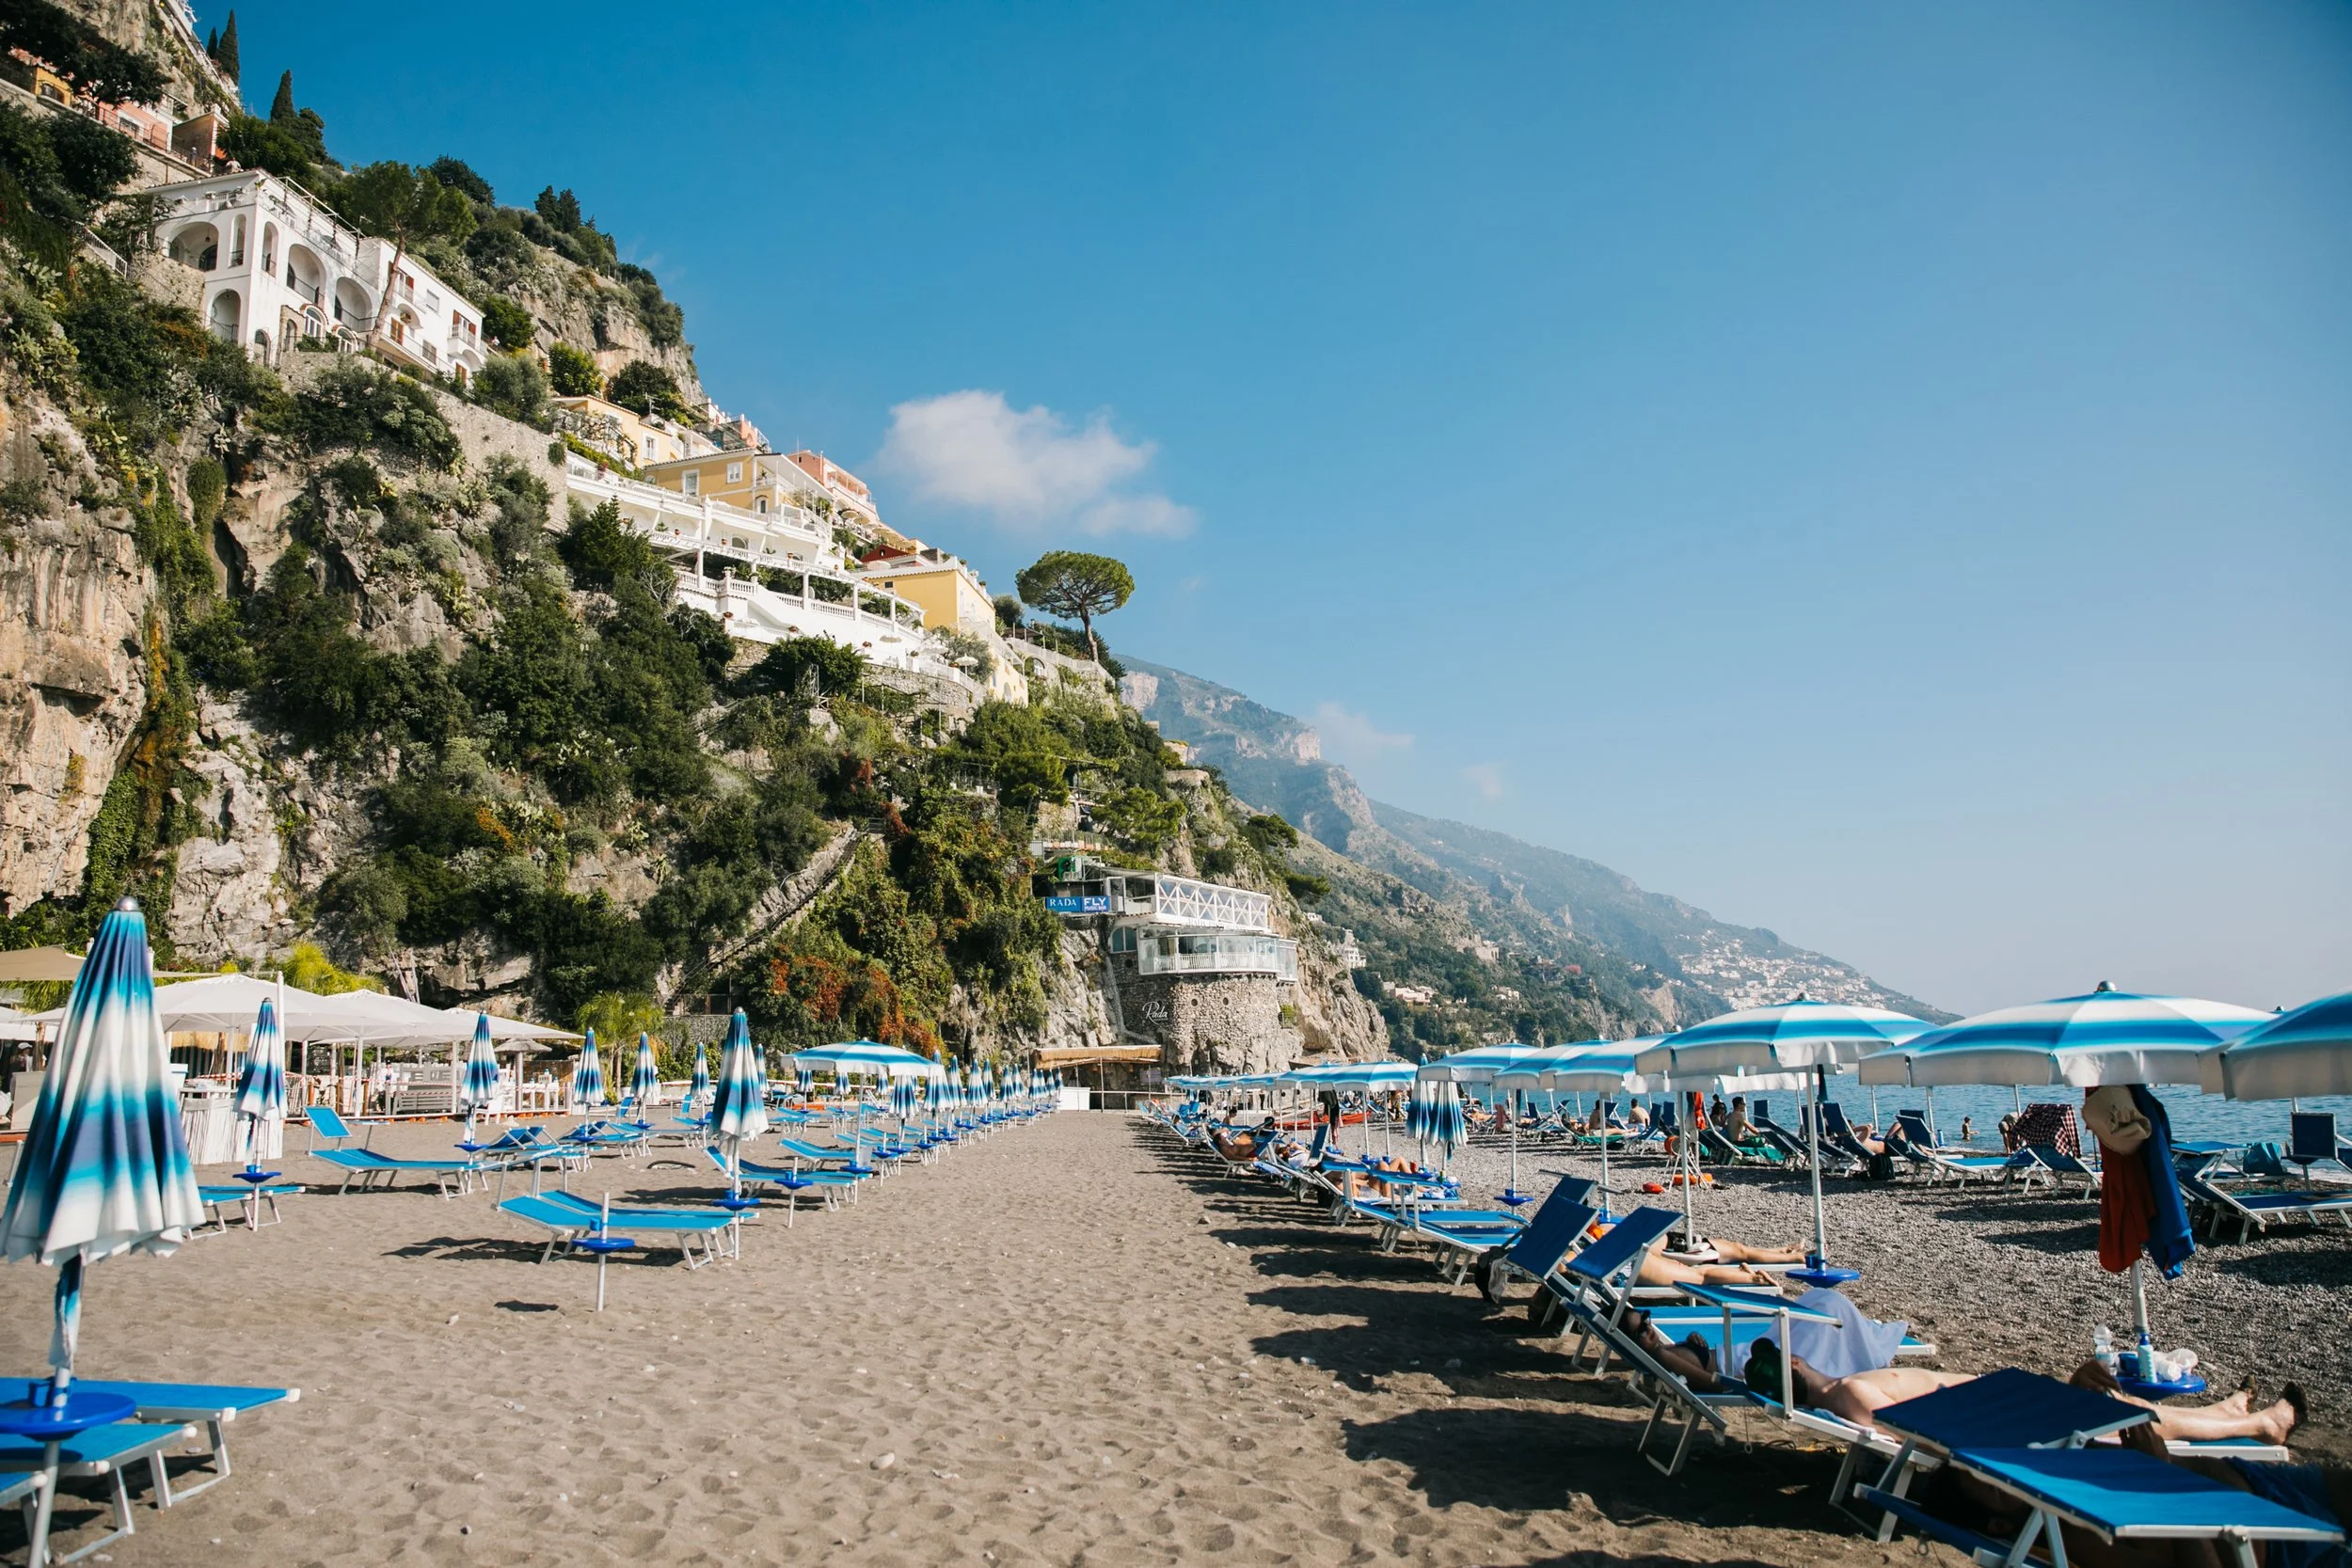
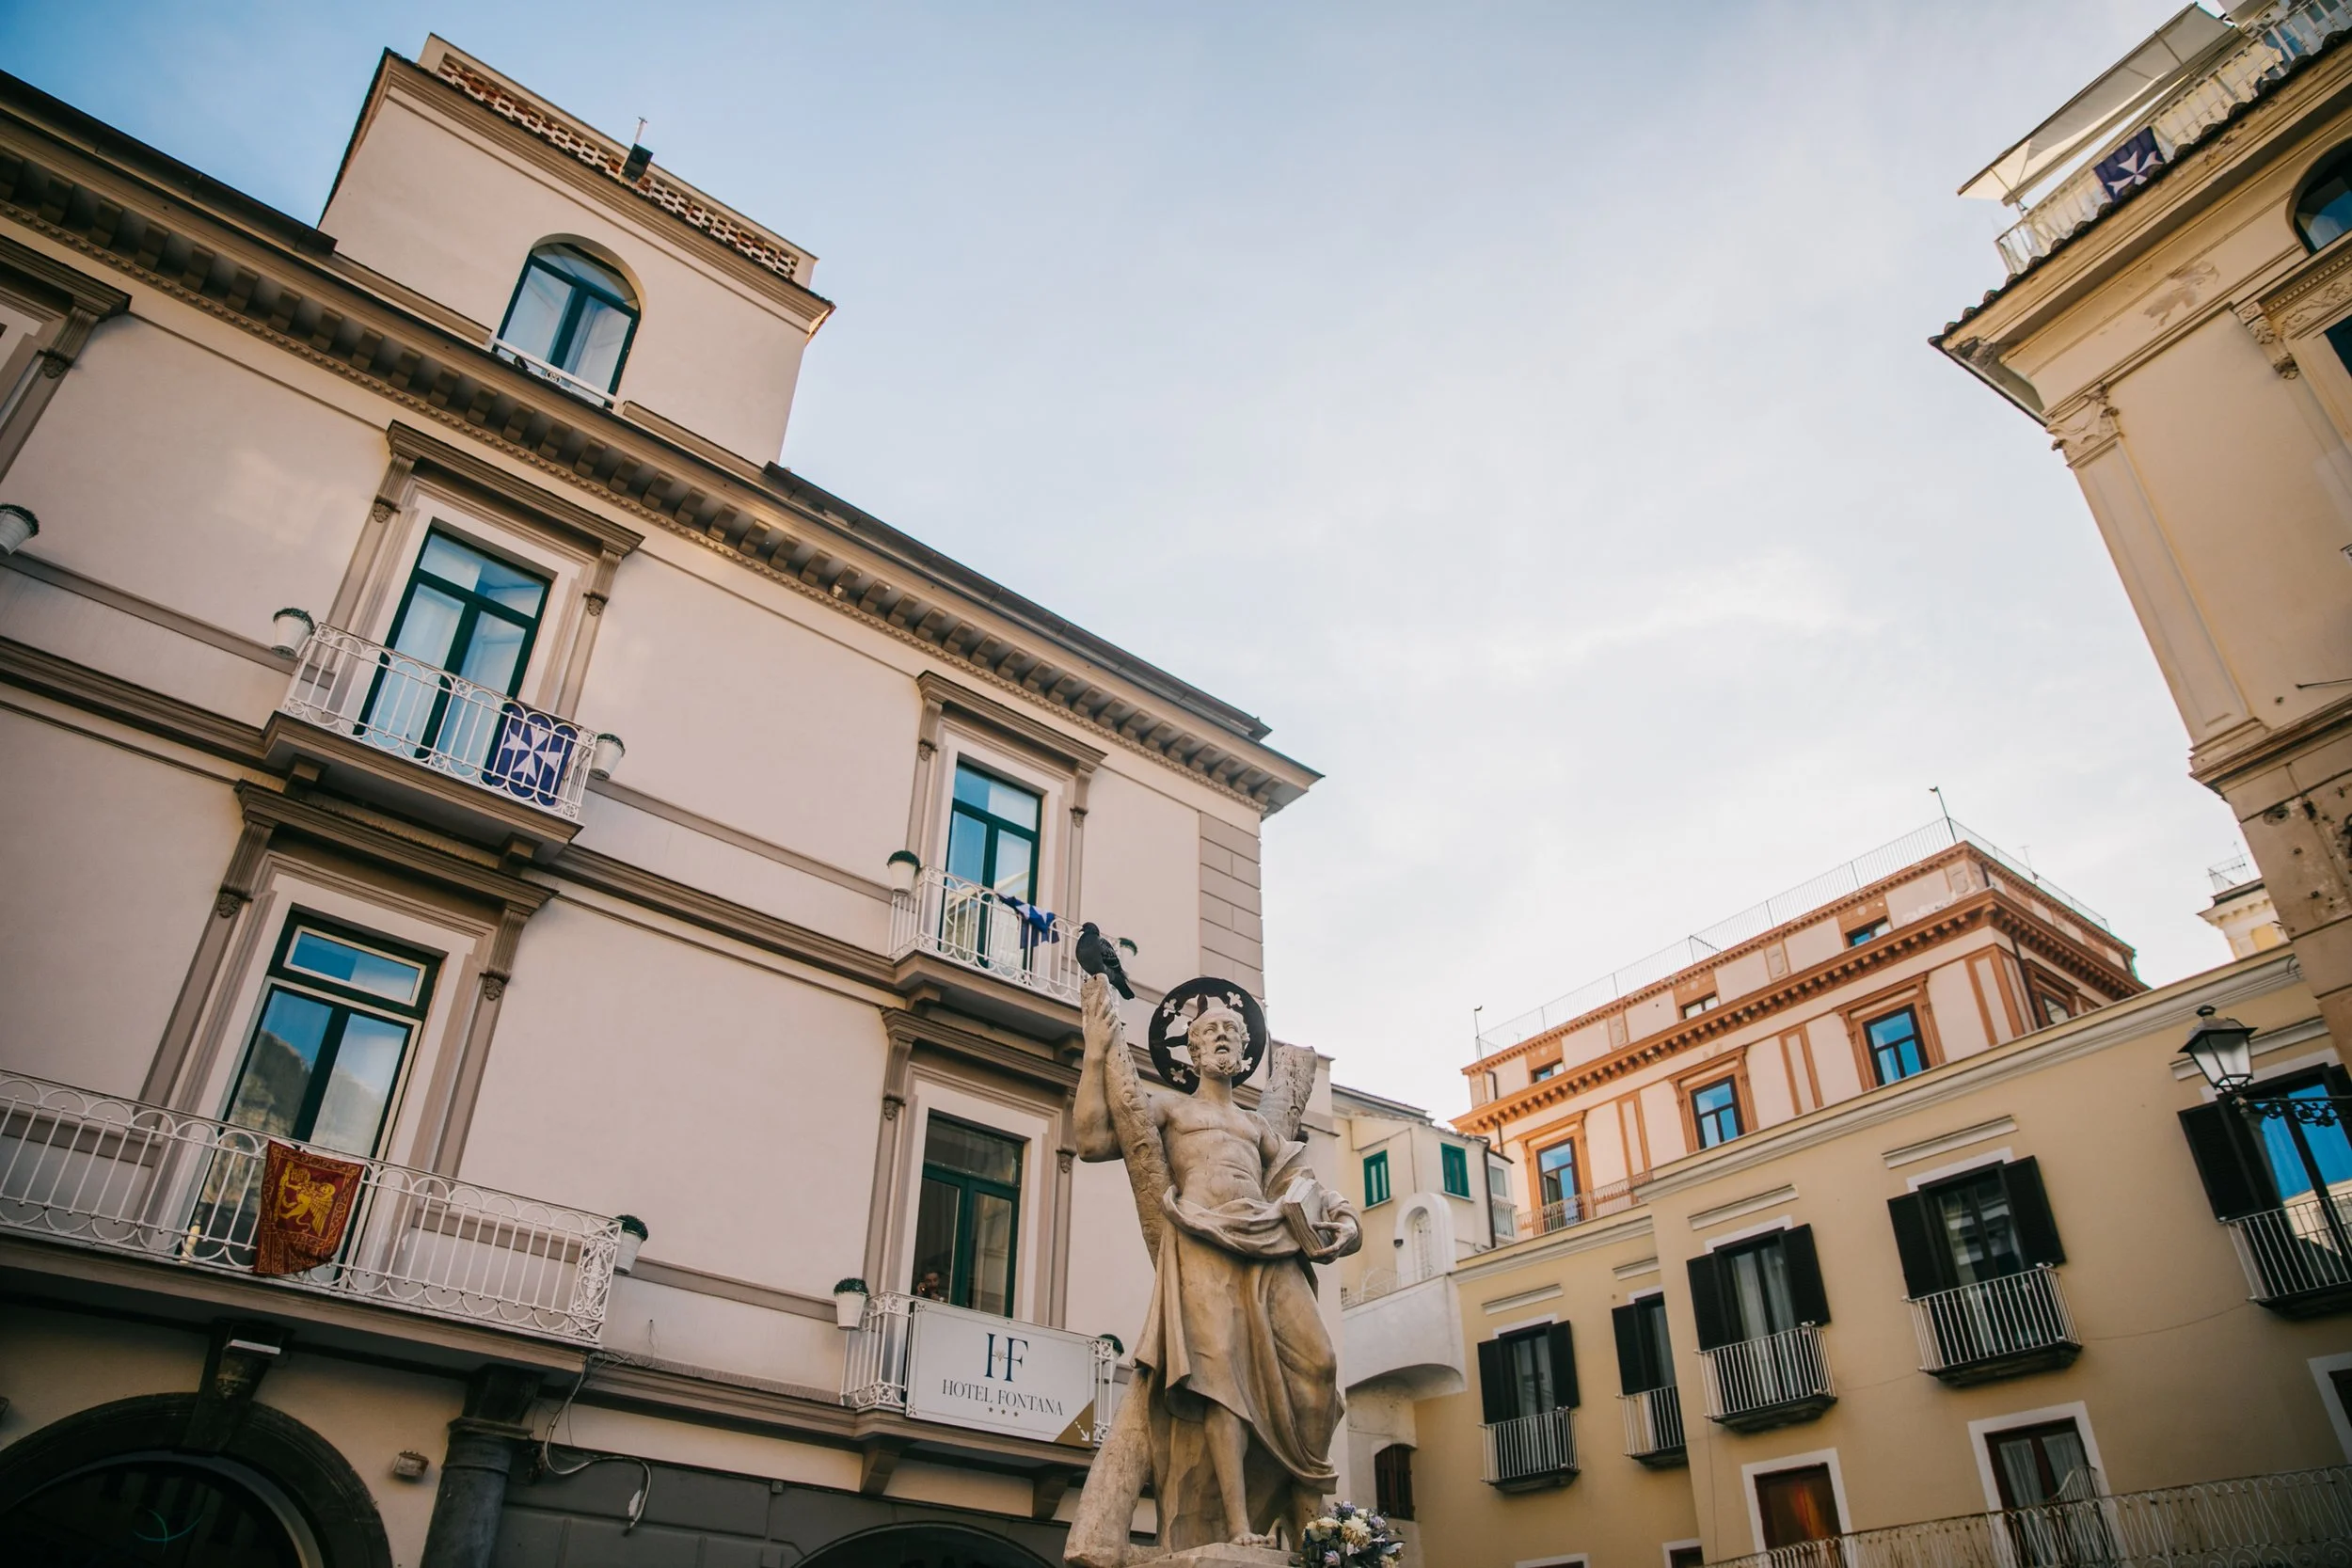
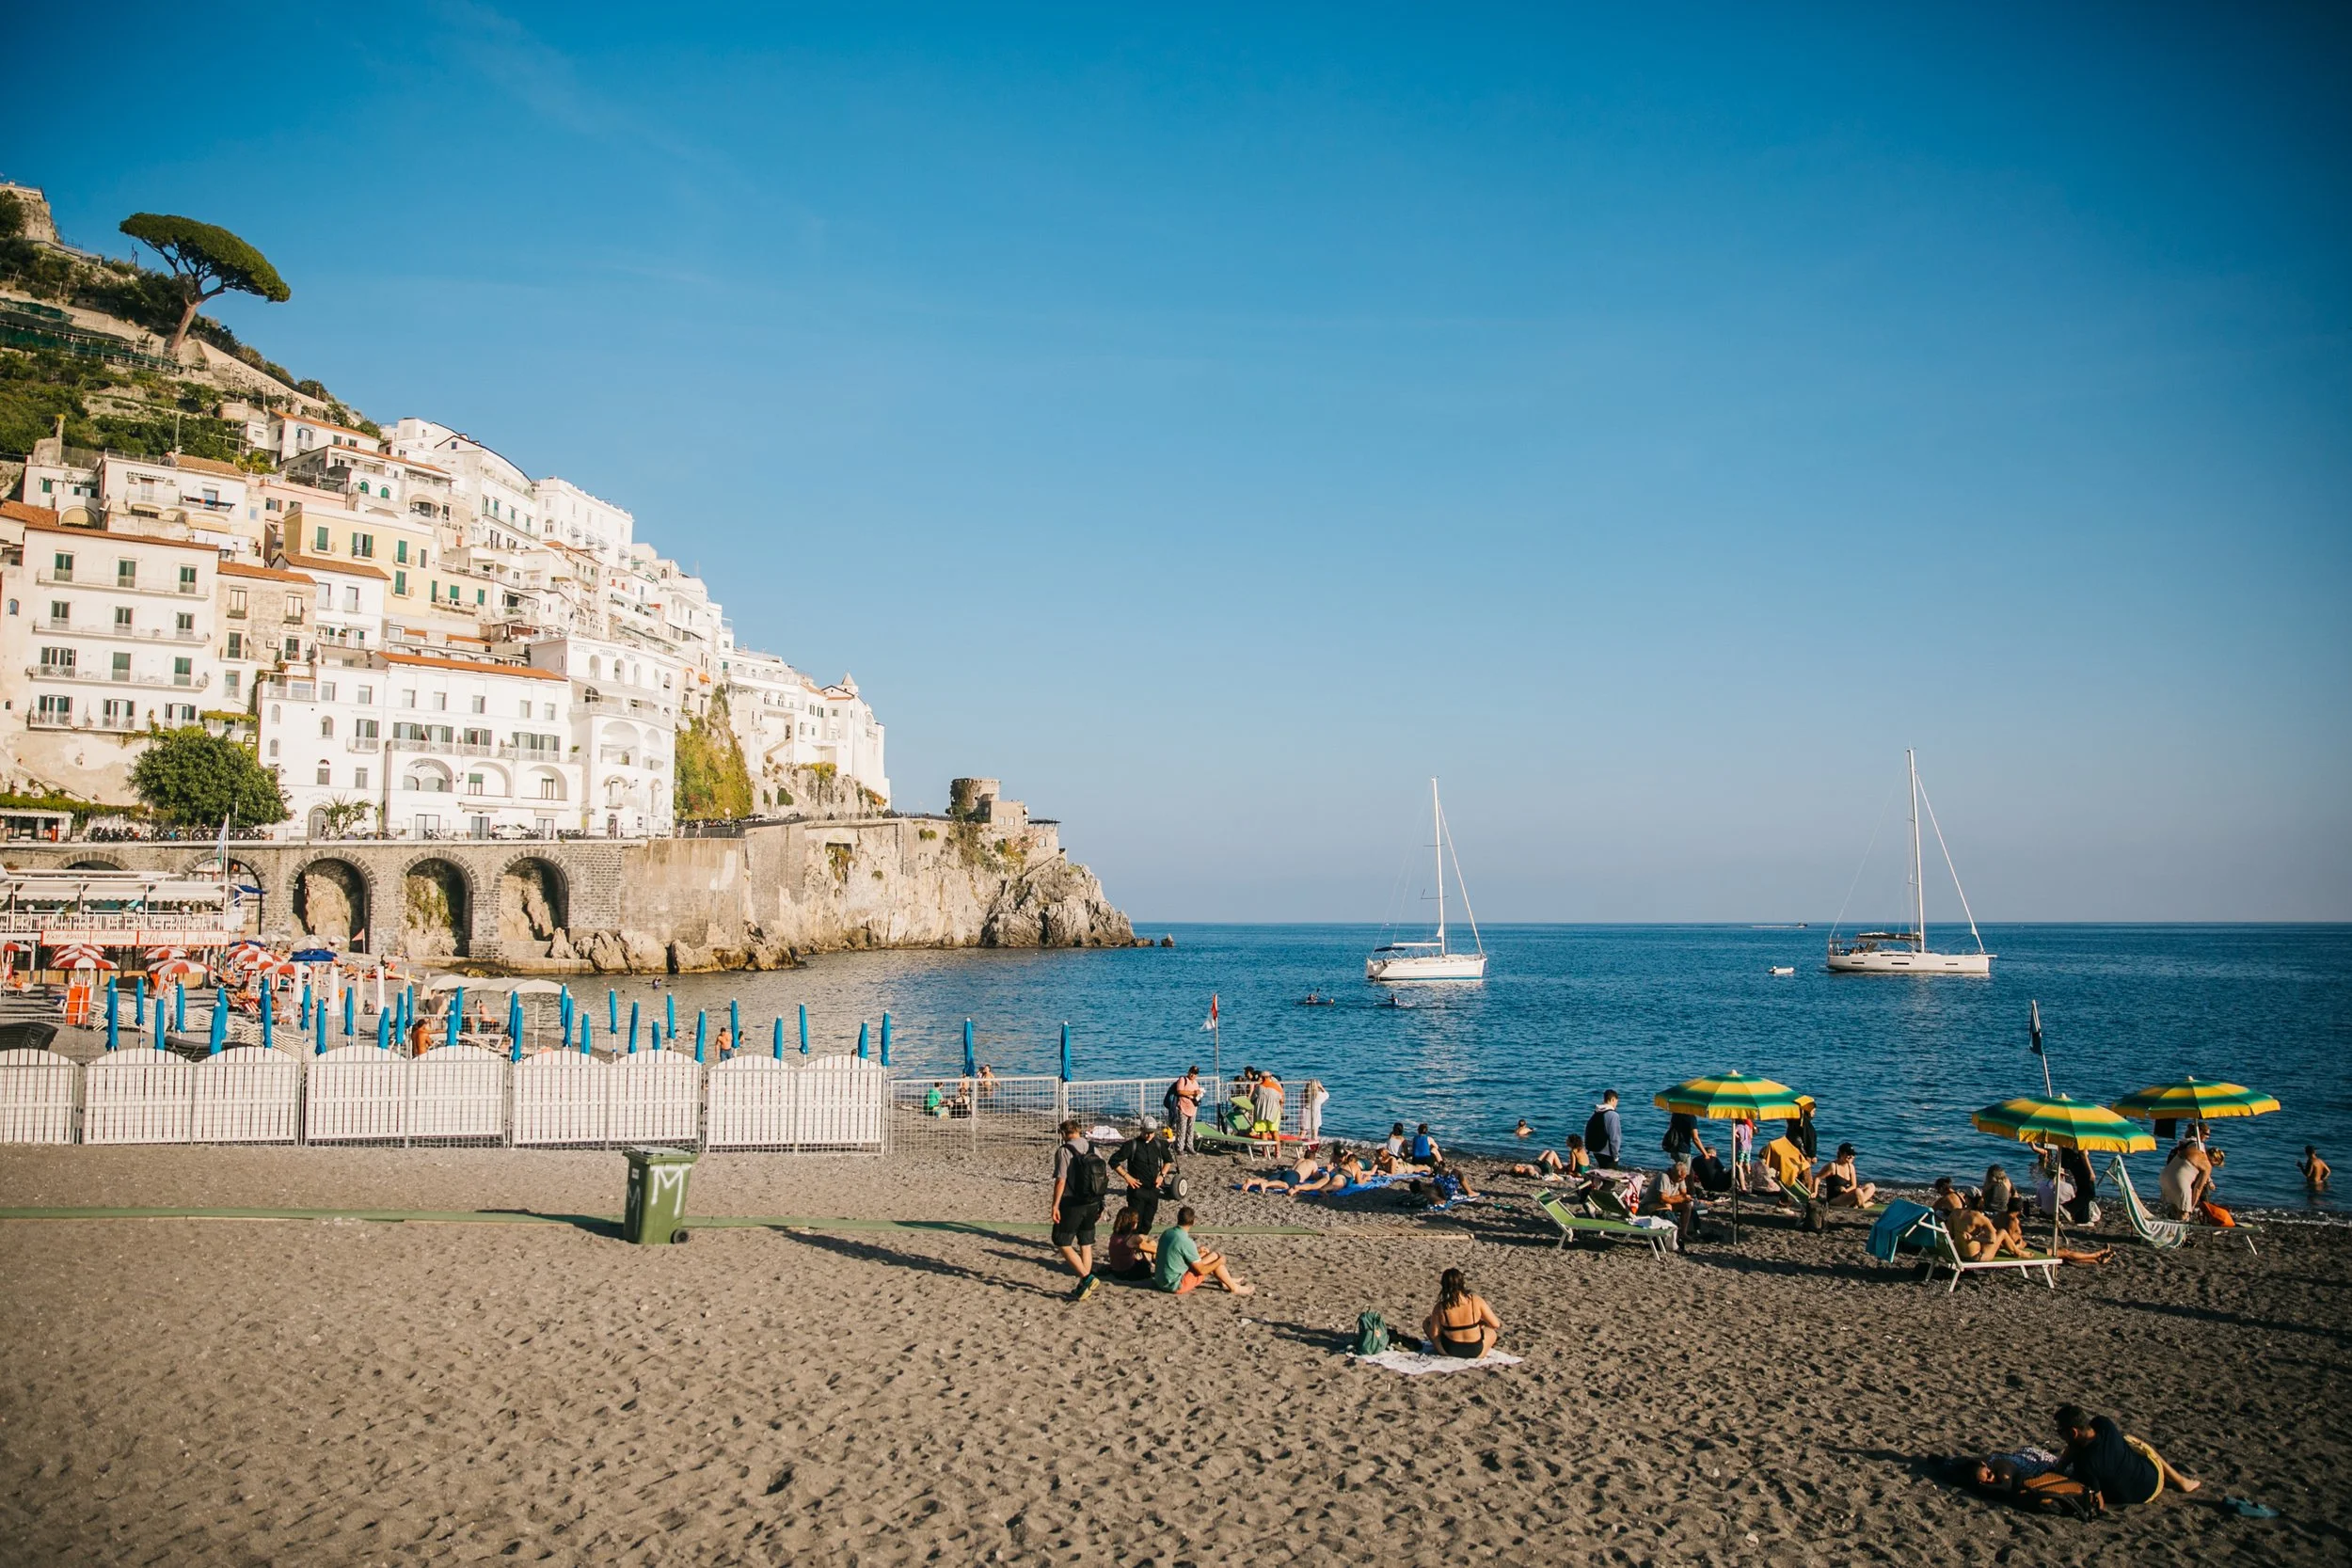
I’ve spent over a decade getting along just fine with an f/2.8 aperture. It allowed me to capture images decently late into the evening at a wedding, but as the sun went down, I’d slowly make my way into using my Canon EF 50mm f/1.2 L USM lens to finish up the evening until I’d eventually switch to using an on-camera flash. This set up worked great for years and years. But in post-editing, I’d have to touch up some of the noise and grain that made it’s way into those evening photos as I bumped up the ISO on my camera. I always prefer natural lighting over flash, so it’s super important to me to be able to take as many photos as possible until I absolutely have to switch to a flash. I knew with 100% certainty that the better low-light performance of this lens would come in handy for me. I just photographed my first wedding with it and it honestly removed some of the stress that I’d face as the sun went down. I was able to use this lens up until the late-night dancing began. The images are truly stunning. This is also my first RF lens, and I’ve been dreaming of trying one out for years. It’s true that the RF lenses have a beautiful, natural sharpness that is just more expensive-looking than the EF lenses.

3. A Prime Lens in a Zoom Body

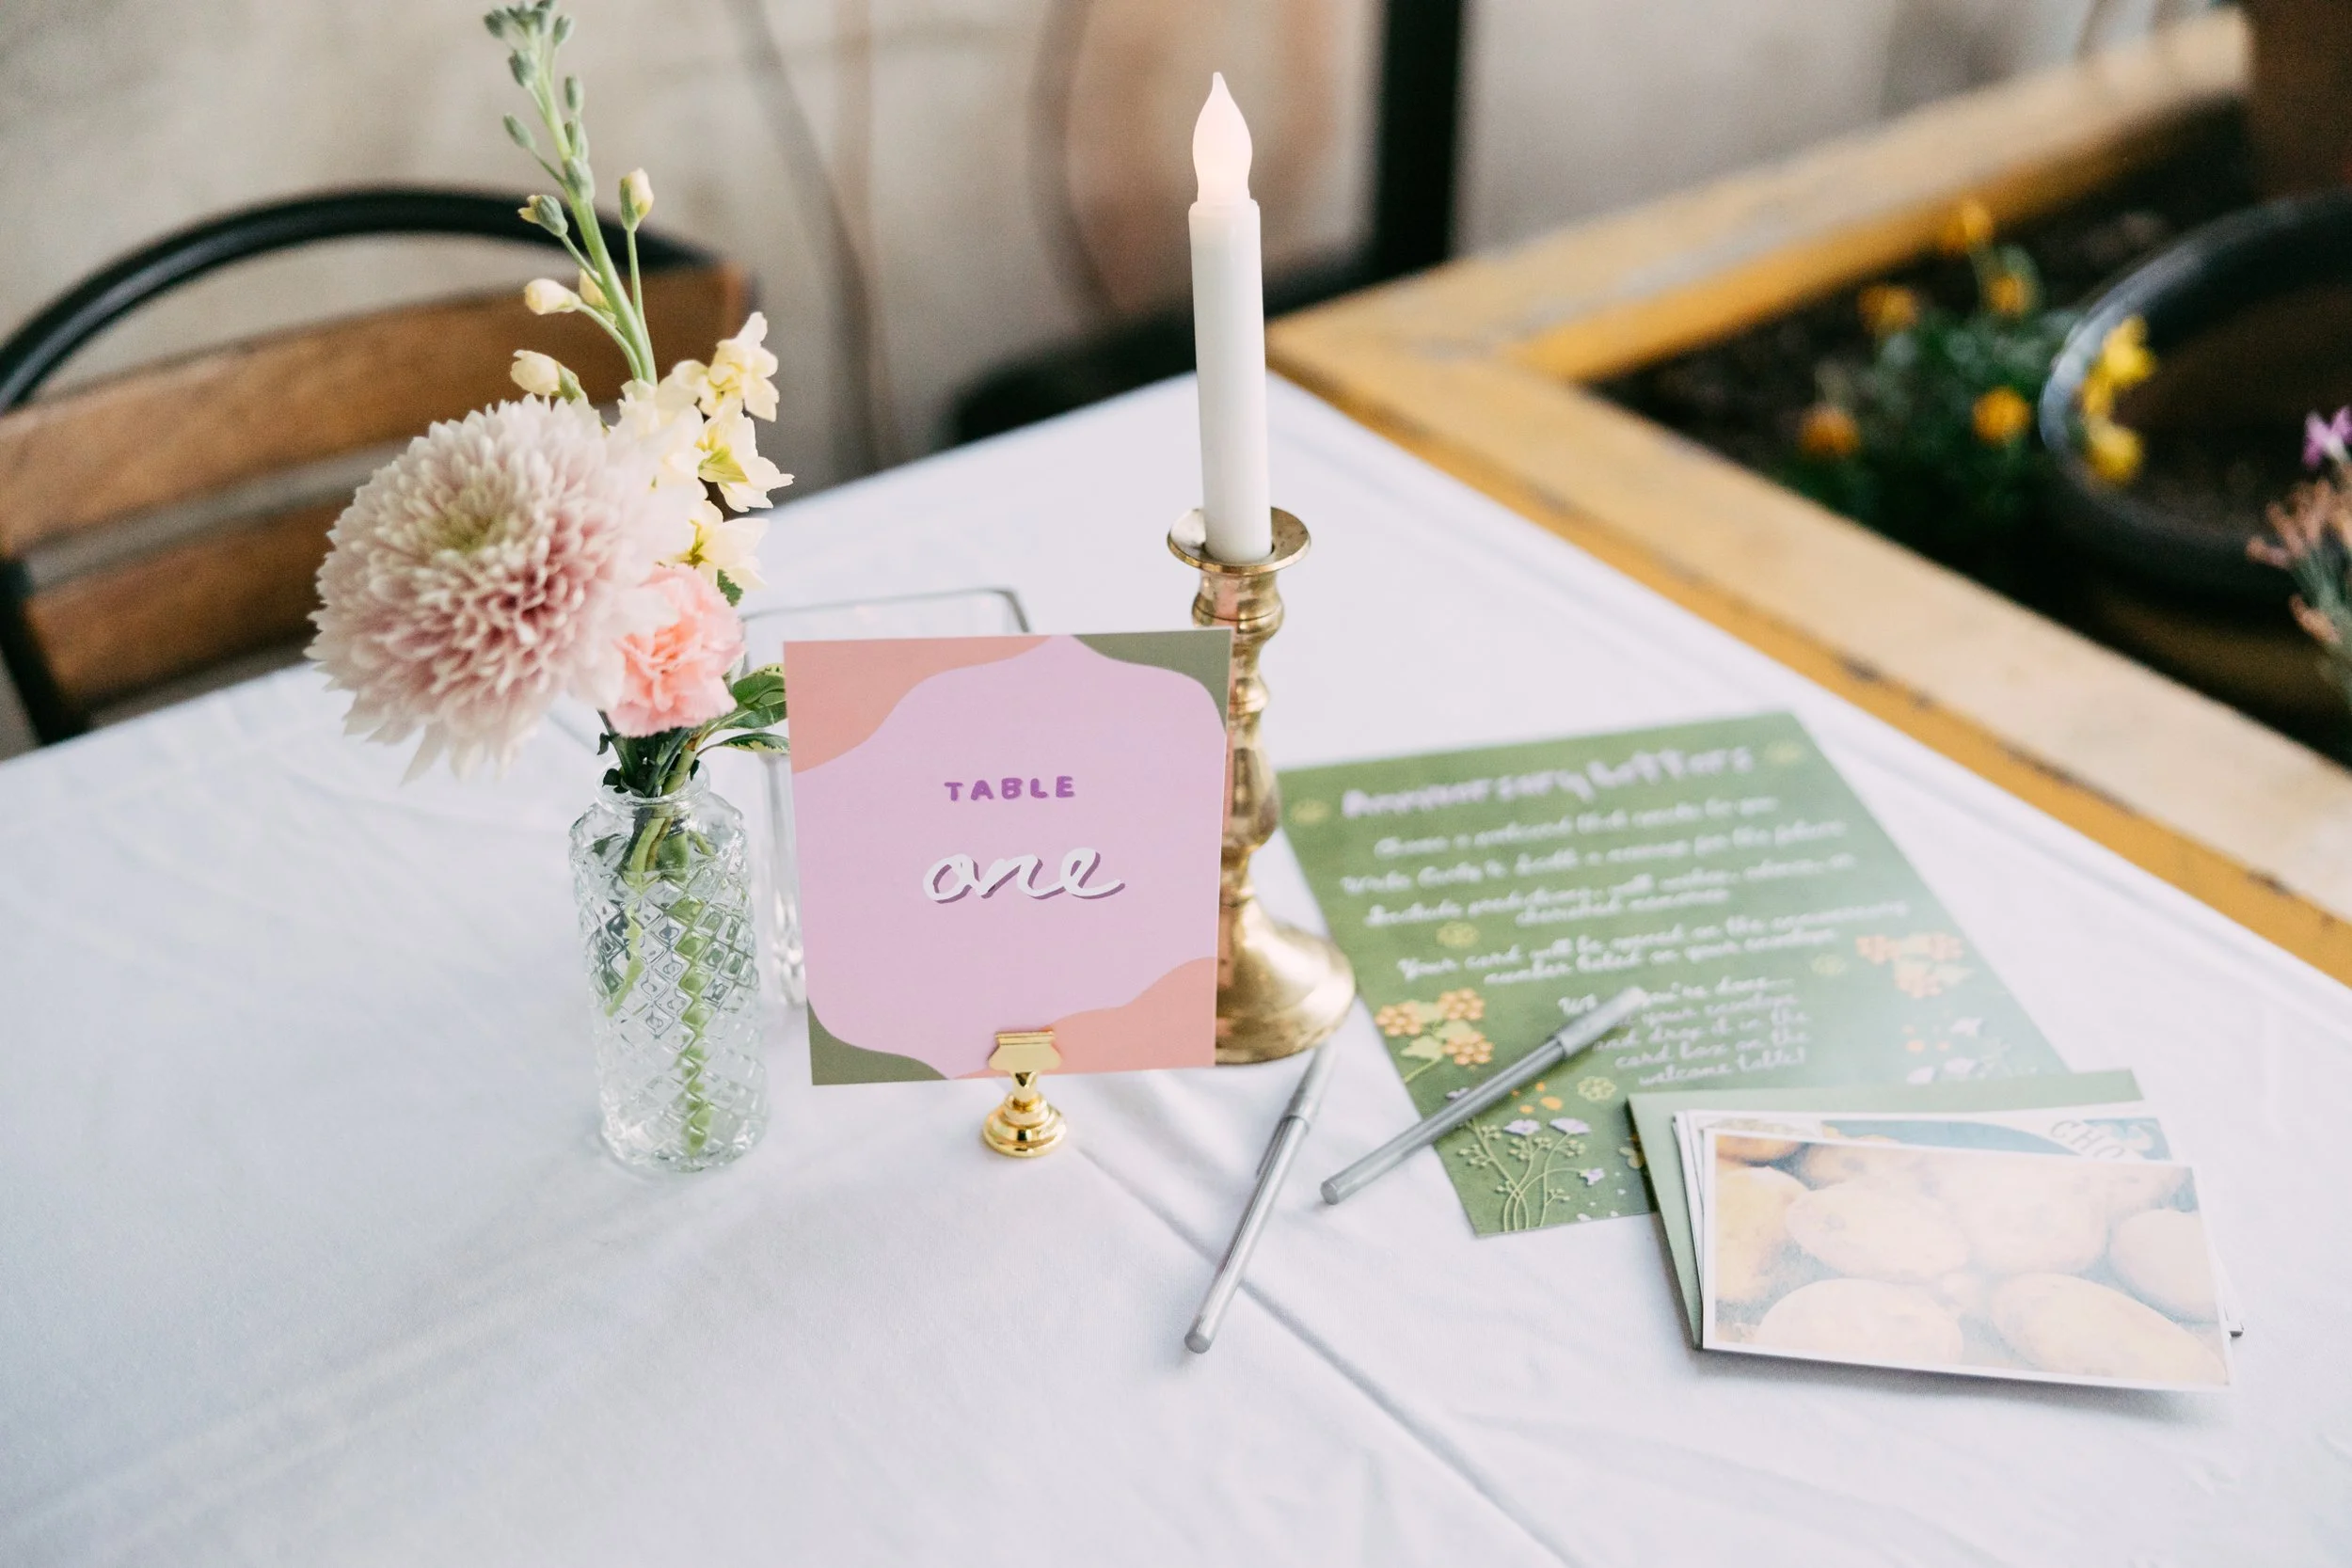
This one was hard to deny. Who wouldn’t want the features of a prime lens in a zoom lens body?! The magic of zoom lenses is that they are versatile and can speed up your photography in a setting like a wedding where you’re capturing intimate, candid moments. You can use them for food photography, detail shots, events, portraits, fashion, everything. And I did. I used my Canon EF 24-70mm f/2.8 II L lens for everything. But if I was photographing headshots, or intimate wedding portraits, or wanting images that were more surreal, cinematic, and unique, I’d bring out one of my prime lenses like the Canon EF 50 mm f/1.2 L or the Canon EF 85 mm f/1.2 II L lens. It just made people look more beautiful, it made flowers look more magical, it made moments seem more special. But prime lenses can be limiting. You’re stuck with a single focal length and often have to work around your circumstances to create the image you’re looking for. It can be exhausting. It can slow you down. It can limit your ability to create a variety of images quickly. Once I understood the reasoning behind this lens, that Canon’s goal WAS to create a prime lens with zoom lens functionality, it pretty much sealed the deal for me. And what’s funny is that after shooting my first wedding with this lens, I realized I hardly touched my 50 mm f/1,2 lens at the wedding. This means that the lens was fulfilling two functions for me, a zoom lens AND a prime lens. It really is both of those things in one!

A FEW THINGS TO CONSIDER

While this lens is incredible, I wanted to share a few of the things that almost turned me away from this lens. First of all, it’s HUGE. It’s HEAVY. It looks a little ridiculous on my tiny Canon EOS R body. If you think about prime lenses and how chunky they are, it is exactly like that, but with a zoom barrel added. It’s a CHUNK-MEISTER (the same nickname I’ve given to my new French bulldog puppy…). Weight is a huge factor to me when adding cameras and equipment to my collection. My camera was already so heavy and I’m not a large human so these professional DSLRs and giant lenses feel supersized on me. I compared the weights between the two lenses I was considering - 3.15 lb / 1430 g for the Canon RF 28-70mm f/2 L USM Lens and 2.9 lb / 1.3 kg for the Canon RF 24-105mm f/2.8 L IS USM Z Lens. Not a huge difference, but it was a factor in my consideration. After discussing with my husband though, we realized that with my history of bumping into walls and hitting my zoom lenses on corners constantly as they are hanging on my side, that the extra length of the 24-105mm lens might lead me to some issues. The 28-70mm lens is a bit more compact length-wise, so I knew that could mean a matter of life and death when it came to the lens and it’s lifespan with me. The 24-105mm lens has a length 7.8" while the 28-70mm lens is only 5.5". I’m often carrying two (or more!) cameras on me at any given time and I tend to get tangled. The extra length on the zoom lens would eventually start to bother me, and I knew that.

The other major thing to consider is that, because the 28-70mm lens is essentially a prime lens, it does NOT have image stabilization. My husband tried to argue this point with me for a while, because he’ll occasionally use my lenses for video. I know for some people this will be a deal-breaker. For me though, I’ve already been using my 24-70mm f/2.8 lens for over a decade without image stabilization and I’ve been able to create images that are beautiful and perfectly sharp. It’s really a matter of understanding when to bump up the ISO, when to speed up the shutter, and when to open up the aperture. Over the years, I’ve learned how to work around it, so I knew I wouldn’t miss what I’ve never had. However, I’m currently using the 28-70mm lens with my Canon EOS R, which is the very first mirrorless camera that Canon ever produced. It’s somewhat outdated and does not feature built-in image stabilization. My plan is to upgrade my EOS R next year to the Canon EOS R5 or R6 Mark II. My hope is that the built-in stabilization of those cameras will benefit me and my images, even if it’s just a tiny bit.

I was also a little bit bummed that I was losing 4mm of focal length by changing from the 24-70mm to 28-70mm. I love shooting super wide angle photos, especially at weddings where I’m trying to capture a full interior space. I use the full 24mm more often than I’d like to admit. My husband looked it up and it actually only accounts for about a foot of distance. So, hypothetically, if I just take one step back, I could account for the loss of focal length. However, at a wedding or in a tight space, I sometimes find myself up against the wall, unable to back up anymore, even with the 24mm lens. I’m still a little sad about it, but I don’t miss it when I’m outside or with plenty of space to back up. It’s only in those tight spaces that it would come in handy, and I don’t think it will happen as often as I think. In most situations, I will likely be able to take a step back.

And yes, obviously, it is expensive. It was a punch in the gut to purchase it. BUT! Here’s how I justified it. I used my Canon 24-70mm f/2.8 II L lens for about 12 years as my main lens (you can read my full review of this lens on my blog here). It carried my business. It represented me and my work for YEARS. My husband and I did some quick math and determined that the cost of the lens was less than 1% of the entire amount of money it made me over 12 years. You can’t argue with that!

SO, WAS IT THE RIGHT CHOICE?

Ok, so I’m known for being one of the most indecisive people in the world. I’ll made a decision and then spend weeks convincing myself that it was the wrong one. But I’m being 100% honest when I say, I know with full certainty that I made the right choice for me. After trying this lens out for a few photo shoots and a wedding, I came away from the shoots inspired, excited, and surprised by the next level that this lens has brought my images to. I’ve spent the past few years feeling a little burnt out, and it’s amazing what new gear can do for a photographer. I can hardly even wait for my next photo shoot! The limitations I used to experience with my 24-70mm lens aren’t there anymore. I can now get that dreamy background blur that I’m always looking for, and that beautiful low-light sharpness and low grain that is so important for weddings and indoor event photography. And I don’t miss or wish for that extra zoom that the 24-105mm would have given me, simply because I just wouldn’t have used it that often. It didn’t make sense to have that extra zoom if I’d only use it for a handful of images every year. So, YES! For me, this was the right choice. I hope that this post has helped you in your journey to make a decision.

And of course, there were a few lower budget lenses that I was considering while hunting for a new lens. The Canon RF 24-70mm f/2.8 L IS USM Lens was also a major contender, as was the Canon RF 24-105mm f/4 L IS USM Lens. The problem with these was that I didn’t feel that they would greatly enhance my work, just because I was already using an f/2.8 zoom lens for so long. But they are both great options, and would save you some dough! And at the end of the day, the RF 24-105mm f/2.8 Z lens is going to make more sense for a lot of people, especially if you shoot a LOT of weddings, because that extra zoom length and image stabilization is hard to turn down. Even when I was purchasing my lens, the store associate said the Z lens was extremely popular. It wasn’t even in stock when I ordered the 28-70mm! You can find it on B&H Photo here though, if you’re on the hunt for one!

WHERE TO BUY THE CANON RF 28-70MM F/2 L USM LENS

B&H Photo
Amazon

WHERE TO BUY THE CANON RF 24-105mm f/2.8L IS USM Z LENS

B&H Photo
KEH Camera (used)

MORE AFFORDABLE OPTIONS

Canon RF 24-70mm f/2.8 L IS USM Lens

B&H Photo

Amazon

Canon RF 24-105mm f/4 L IS USM Lens

B&H Photo

Amazon

If you found this post helpful or inspiring, I’d love it if you considered signing up for my Patreon! For as little as $1 a month, you’ll get early access to all of my YouTube videos, plus tons of photos that I don’t post anywhere else. Depending on which tier you choose, you could also receive seasonal prints and/or discounts! I always use all of the proceeds towards cameras, film & processing.

If you have any questions, I’m always happy to help! You can contact me here, or leave a comment below! Thanks so much for stopping by! You can also check out my B&H Photo storefront & Amazon Storefront for more camera/film recommendations. :) Have a magical day!

<3 Myles Katherine

(This post contains affiliate links and I will be compensated if you make a purchase after clicking through my links.)


Kodak Portra 400 Film Review | Is it Worth the Price?

(By using the affiliate links and/or codes in this blog post it supports Myles Katherine Photography. We may get a small kick back by you doing so.)

The beloved Kodak 400 Film - is it worth it? There are so many different film stocks out there but this is probably the one you’ve heard the most about. It’s coveted amongst film photographers and is one of the first color film stocks I ever heard about when starting my photography career. I’ve been using this film for YEARS and have spent far too much money loading my fridge with boxes of it. But I’ve also tried out tons of other film stocks at this point, so I feel I can give a true and honest opinion. In the grand scheme of it all, if someone were to ask me if they should try out Kodak Portra 400, my answer will always be yes, but here are three reasons why:

  1. The Color & Skin Tones are Highly Accurate

    Particularly for beginner photographers, I like to recommend this film because it takes out some of the guesswork and post-editing that you might have to do with other film stocks. This film is very forgiving and just naturally looks beautiful. The colors aren’t overly saturated but it still has a gorgeous vibrance that mimics reality. If I could exclusively shoot with Kodak Portra 400, I would. Unfortunately, it’s just a bit too expensive to shoot with consistently. But if you’re just starting out with photography, especially if you’re learning how to shoot 120 film with a Holga or Diana F+, this is the first film I’d recommend. I do find Kodak Portra film to have the prettiest skin tones of all of the film stocks out there. When I’m shooting a wedding and I’m digging through my fridge for film to load my cameras with, if I have a Kodak Portra in there, I’m going for that first. It automatically adds professionality to my photographs and I can always count on it to accurately capture my clients.

  2. It’s Super Sharp

    I have to say, out of all of the film stocks I’ve ever tried, I do find Kodak (especially Kodak Portra) to be the sharpest of all of them. The grain is extremely fine for a 400 speed film. If you follow my work, you know I love to shoot with the Holga 120 toy camera pretty consistently, and Kodak Portra always surprises me with the crispness I can get out of my images. While Kodak Portra also comes in ISO 160 and ISO 800, I find the 400 ISO Portra to perfectly balance sharpness with low-light versatility. If I know it’s going to be a dark and overcast day or I’m going to be in shadows or inside while shooting, sometimes I’ll go for Kodak Portra 800. However, the 800 ISO version is even more expensive, so I find Portra 400 to really balance all my needs when shooting.

  3. It’s Reliable and Versatile

    I always know what I’m going to get with Kodak Portra 400. Sometimes, I’ll shoot with a roll that’s been in my fridge for years and it still looks like a brand new roll, with beautiful natural saturation and low grain. Sometimes I’ll only shoot half a roll at a wedding or event and end up shooting the rest of the roll at the beach or while traveling and Portra never falters. It’s also incredible for landscapes and nature. With a lot of film stocks, I’m unhappy with the way it captures greens, especially with grass or mountains, but Portra is always on point. Like I said, I’d shoot Portra every day if I could! Kodak Portra comes in both 35 mm and 120 formats, so just make sure you’re getting the right one for your camera.

FINAL THOUGHTS

So… is Kodak Portra 400 worth the price? Yes, in so many ways. And while it would be nice to have an endless stock of Kodak Portra on hand, it’s also fun to try out other films to keep things interesting. Overall though, this film probably takes the #1 spot in my book, of all of the films out there. I realize this is a pretty strong stance to take, but there aren’t really any other films out there that are as natural, consistent, versatile, sharp and balanced as Kodak Portra 400. Just try it out for yourself and see what you think! When I’m on a budget though, Lomography Color Negative 400 is usually my backup. While it’s a bit more saturated, the bright colors bring a fun positivity to my images. Kodak Gold 200 is next on my list. It has that sharpness that I love about Kodak films but it does have a bit of a gold tint to it, which is great for shooting at the beach, but not always what you might want with your photos. It’s extremely affordable though, which surprises me, honestly. I feel like Kodak could charge more for Kodak Gold 200, so make sure to grab some of it here before they change their minds!

I’ve included a ton of sample photos below using Kodak Portra 400 with my Contax 645 (a fancy camera) and my Holga (a not-so-fancy camera). While I love using Kodak Portra with my Holga, it’s also absolutely outstanding with my Contax 645. There’s really no other combo that I love more. My Contax 645 is incredibly sharp, and when pairing it with Kodak Portra 400, it’s really just a film photographer’s dream.

WHERE TO BUY KODAK PORTRA 400 35 MM FILM

Amazon

B&H Photo

KODAK PORTRA 400 120 FILM

B&H Photo

Amazon

WHERE TO BUY A HOLGA 120 GCFN

Amazon

B&H Photo

Read more about the Holga 120 Camera on my blog here!

WHERE TO BUY A CONTAX 645

KEH Camera (if you’re lucky, they’ll have one in stock!)

eBay

Read more about the Contax 645 on my blog here!

Review of the Amalfi Coast and Pompeii from Rome in a Full Day Tour with TripAdvisor | Rome, Italy Travel Tips

(By using the affiliate links and/or codes in this blog post it supports Myles Katherine Photography. We may get a small kick back by you doing so.)

I’m about to head off to Europe again soon and planning our trip has brought back so many memories from our trip to Italy. We spent time in Tuscany, Montepulciano, Pienza, Florence, Rome, and of course, the Amalfi Coast. Is it even a vacation if you don’t get to spend time on a beach at some point?!

Where do I even begin when it comes to the Amalfi Coast and Pompeii from Rome in a Full Day Tour… This was, by far, one of the most beautiful, memorable, and efficient tours I’ve ever been on. We saw so much in one day. We spent a few hours touring the stunning ruins of Pompeii with a view of Mount Vesuvius in the background, stopped for lunch in the adorable town of Positano (where we actually met up with my sister!), and ended with a stroll through the gorgeous coastal town of Amalfi and a limoncello tasting! This doesn’t include all of the stops for photo ops and the cute pit stops for snacks and coffee. It was an incredible, jam-packed day. I dragged my parents along for the ride too, and by the end of the day, my dad was best friends with both our bus driver and our tour guide (this is not an exaggeration…). I’m pretty sure they even exchanged phone numbers. There is so much to share from our day, but I’ll start with how we ended up on this specific tour in the first place! Oh, and if you’d prefer to watch, rather than read, you can check out my YouTube video about our day on the Amalfi coast here! Or you can read more about my international adventures on my travel blog that I host with my sister, here!

Before we even started booking our trip to Italy, as a photographer, I knew I needed to plan a day trip to the Amalfi Coast. However, I was traveling with my brother, father, and husband who are all huge history buffs and maybe not so into seeing “gorgeous views”. When I saw that there was a tour that included a guided experience at Pompeii and a visit to the Amalfi Coast, it seemed like the best of both worlds. Then I saw that this tour also included a stop in the town of Positano, where my sister and her now-husband were honey-mooning! It seemed like fate. We had all just spent a week in Tuscany for their wedding at the beautiful Borgo Tre Rose Hotel (you can check out the whole wedding week on my YouTube channel here!), and then we all parted ways after a group day in Florence. My sister and her husband headed off on their honeymoon while we went on to Rome to visit the Colosseum and eat lots more pasta. We took an amazing tour of the Colosseum and Roman Forum too, but I’ll save that story for another day. :) I definitely recommend taking a walking tour like this one while you're in Rome, though. There is so much history and so much to see. Plus, it’s nice being in a tour group and not having to worry about waiting in line for entry tickets at all of the various sites. The tour groups are let right in so you can start your tour right away. Trust me, this makes a difference when traveling with stressed out family members! You can read more about the tour we took in Rome here.

Okay, back to our day tour on the coast of Italy! We started the day bright and early at 7:00 am, but it was nice because this specific tour included hotel pick-ups and drop-offs, so we didn’t have to worry about getting lost at 7 in the morning trying to find the meeting point. I’m not going to lie though, we were all exhausted after spending a week celebrating my sister’s wedding in Tuscany (you can watch her whole wedding day here). As soon as we stopped for an espresso at a small convenience store, we all started perking up, and before you knew it, we were chattering all about the wedding to the bus driver, tour guide, and the other guest on the tour. We specifically booked this tour also because it was for a small group. There was only one person on the tour who was not in my family, but she was adorable and we were all one big, happy family by the end of the day. She even joined us in our family photo in Positano! It was also nice that we were in a smaller minivan instead of a huge bus. It felt more intimate and allowed for easier conversation with the tour guide. We learned so much about Italian culture and they were extremely informative about the sites we were visiting.

POMPEII

Our first stop was Pompeii. Our tour guide handled the entry tickets and we were in right away. We were introduced to another tour guide for this portion of the day, just because they worked directly for Pompeii. They took us throughout the ruins, explaining the history behind each of the buildings and locations we walked through. It was crazy to see 2,000 year old structures still standing in such pristine condition after being buried in a volcanic eruption. Even though the history of Pompeii is mind-blowing, I snuck away from the tour group after a while to take a few photos because the sites were truly visually inspiring. After a couple of hours, I was grateful when we had to head back to the van because the sun had started beating down on us. I’m so glad we went to Pompeii in the morning before it got too hot, because there wasn’t a whole lot of shade on the pathways through Pompeii. Plus, I was ready to see the coast!

We stopped for a few panoramic views before heading into the town of Positano. We were lucky to have a clear day and plenty of sunshine. I took so many photos, it was incredibly difficult deciding which ones to use for this post!

POSITANO

Once we got to Positano, It was a bit of a walk from the top of the hill to get down to the beach. This is just because there are no direct roads to the bottom of the hill so our driver had to park in a lot at the top of the town. If someone in your group has trouble walking, this part of the day might not be ideal for them, because you have to trek back up the hill when it’s time to leave. But there were so many adorable shops selling souvenirs, gelato, clothing, and snacks along the way that you can enjoy if you don’t want to walk all the way to the bottom. It was hard not to get distracted because we only had about two hours before we needed to head on to the next stop. We found my sister and her husband, and all enjoyed a deliciously light lunch at Ristorante La Pergola. We had plenty of time leftover to snap a bunch of photos together on the beach, capturing the picturesque cliffs and pastel-colored houses in the background. Ugh, it was so stunning. I was so sad when we had to leave! I told myself that my next trip to Italy will have to include a few quiet days on the coast.

AMALFI

Our next stop was the town of Amalfi. The sun was starting to set so the town looked particularly beautiful in the golden lighting. I couldn’t believe our day was already ending, but we had about an hour to wander the town, pop into a few shops, take a shot of limoncello together, and enjoy watching the boats go by from the marina. You definitely need to catch a glimpse of the Cathedral of Sant’Andrea while you’re there and wander some of the side alleys for photo ops. It’s a super small town though, mainly focused around the main square, the Piazza del Duomo, so an hour is plenty of time to see everything.

After Amalfi, we hopped back in the van for our trip back to Rome! But of course, we stopped along the coast for some stunning sunset views before heading home.

The only downside to the day was that there was quite a bit of driving involved, but I wouldn’t change a thing because we got to see so much. I can’t imagine trying to do all of that in a day on our own. I love taking day trips with a tour guide because they push you along and make sure you see everything you need to see. If it were just me trying to push my family along, we would have never left the ruins of Pompeii! I have so many lovely memories from the day and I can still taste the freshness of the limoncello in Amalfi. It was an experience that everyone deserves and should enjoy. This tour is great for all ages, though I’d say it might be a bit much for someone who has trouble standing or walking for long periods of time. My parents are in their late 50s/early 60s and they were totally fine. Plus, it was probably good for them to get a little exercise. ;)

Would I take this tour again?

Absolutely!!! While there were a few moments of slight carsickness due to the twisty, winding roads along the coast, it was broken up by quite a few stops for photo ops and views. As someone who gets carsick pretty often, this tour wasn’t as bad as the Road to Hana or the winding roads in the highlands of Scotland. Those pit stops make all the difference in the world just getting out of the car for a few minutes. I would definitely recommend taking a Bonine in the morning before hopping in the van, just to be safe. I prefer Bonine over Dramamine because it makes me less drowsy and irritable. Just a tip!

I hope that this review has given you some insight into this tour! It was a long, full day but it was totally worth it. Even now, my family reminisces over the memories from this tour almost every time we get together. These are the moments in life that I live for.

If you’re interested in taking the same tour, you can find it here! Or you can check out some of the other tours I recommend in Italy here.

RECOMMENDED HOTELS IN ROME

Budget: Hotel Le Clarisse al Pantheon

Affordable Luxury: Pantheon Iconic Hotel

Airfare & Hotel deals with Expedia

Feel free to leave any questions/comments/thoughts below!

Have a magical day!
<3 Myles Katherine

(By using the links and/or codes in this blog post it supports Myles Katherine Photography. We may get a small kick back by you doing so.)