Updated June 27, 2026
(By using the affiliate links and/or codes in this blog post, you help support Myles Katherine Photography. I may earn a small commission at no additional cost to you if you make a purchase through these links. Thank you for your support!)
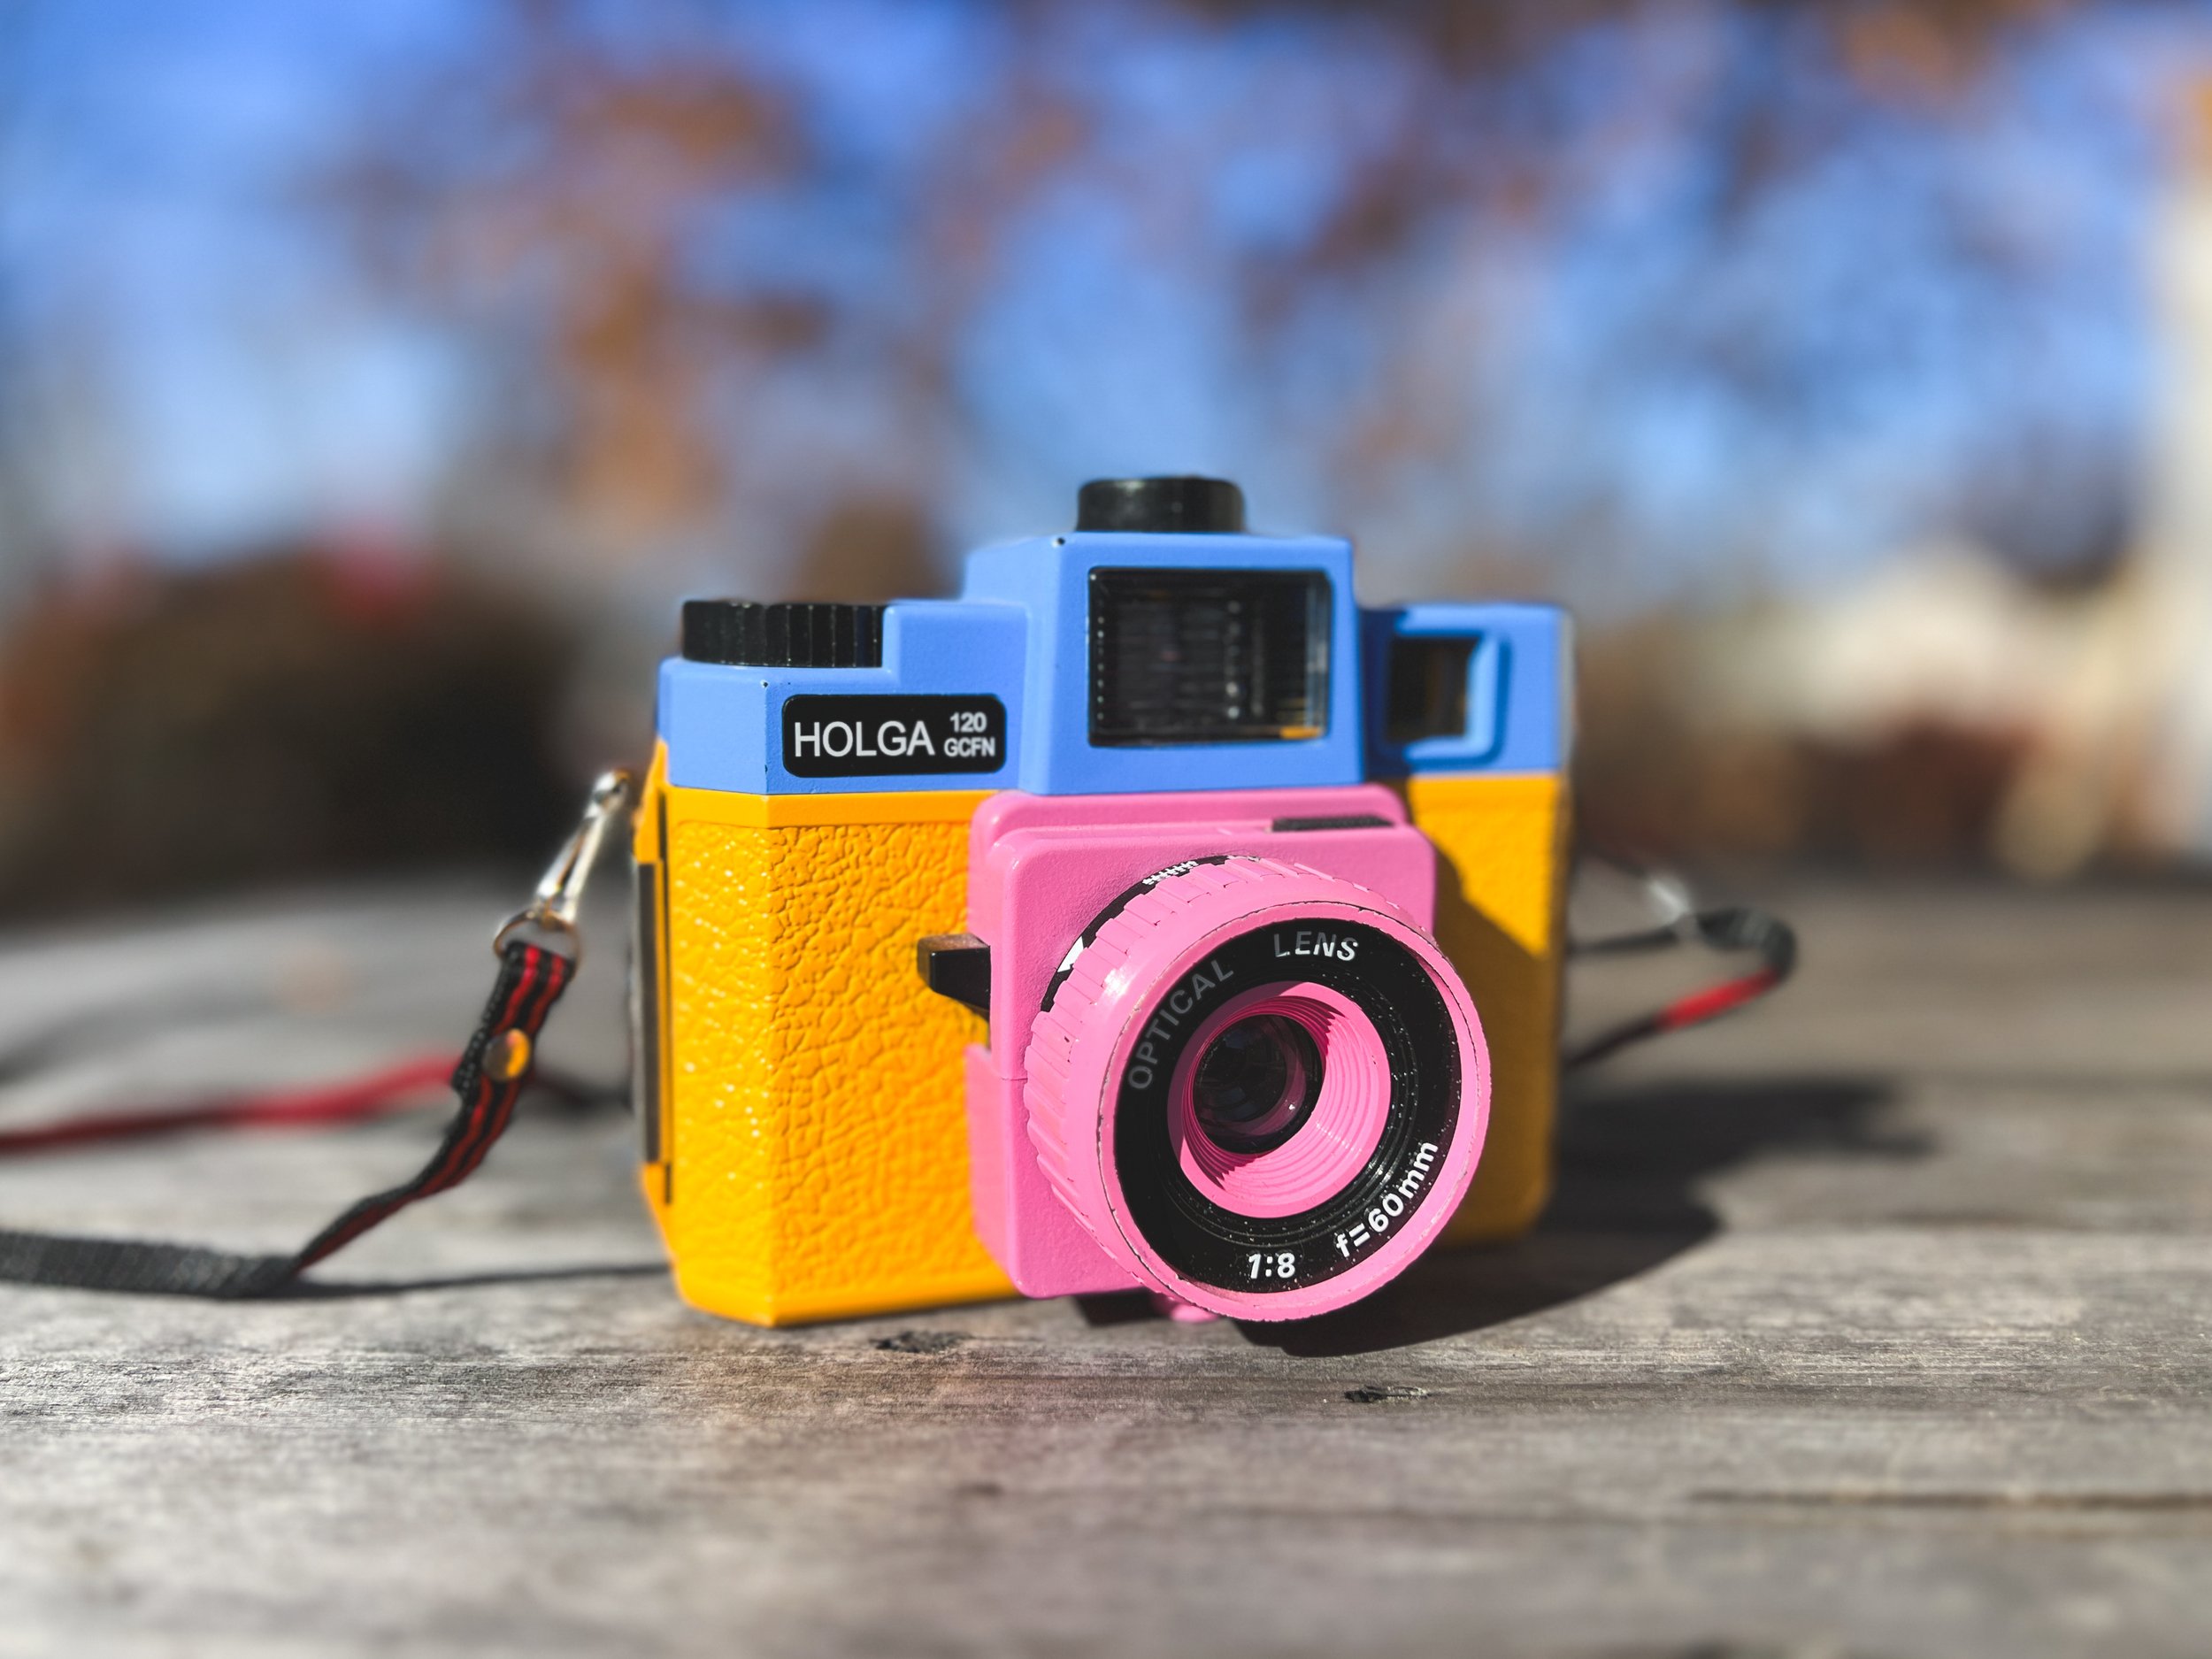
If you know me, you know I’m obsessed with the Holga camera. It goes everywhere I go and it’s a huge reason why I became a photographer in the first place. It takes the dreamiest images AND it’s super easy to use! For being considered a “toy camera”, it truly has unlimited potential. I wanted to share a few pros and cons of the Holga, and share a ton of images so you can decide if this camera is for you! I prefer the Holga GCFN model, but all of the versions are great and can create unique, beautiful photographs. The GCFN model has a glass lens (that’s what the ‘G’ stands for) so I find the images to be a bit sharper than the models with the plastic lens. It also has a flash with a color changing wheel, which gives it even more creative potential. The GCFN model is a medium format camera, meaning it takes 120 film. There is also a 35 mm version of the camera, the Holga 135BC. I have a full review and youtube video about that camera too, if 35 mm is more your thing. The Holga GCFN typically comes with a plastic frame that you place inside the camera, which allows you to either shoot square images or rectangular. With the square frame, you’ll get 12 photographs per film roll, and with the rectangular one you’ll get 16 images per roll. It’s totally up to you, but I have a love for square images so that’s what I always shoot with!
I also have a YouTube video about the Holga GCFN, where I share all of my favorite things about the camera as well as tips and tricks for how to get the best photos possible. If you want to see the camera in action, make sure to check out my adventure video from last month too, where I took the camera to Las Vegas with me!
Okay! Let’s get into it.
PROS OF THE HOLGA GCFN
AFFORDABLE
One of the best things about the Holga is that it’s super affordable, especially if you’re just getting into film photography. They range from about $40-100 depending on which model you’re purchasing or if you’re buying it new or used. You can find my favorite model, the Holga GCFN on Amazon or B&H Photo, or you can find used versions of the GCFN in various colors on eBay. They only make new Holga GCFNs in black at the moment, so any colorful ones you’ll find have been used or are not being sold new from the factory.
LIGHTWEIGHT & GREAT FOR TRAVEL
The Holga weighs practically nothing. They are made with a plastic body and are called “toy cameras” for a reason. They literally feel like a toy! The fact that they are so light make them great for travel. I’ve taken mine all over the world, from Japan to Portugal! They are also surprisingly sturdy. I even dropped mine in a river in Kyoto and it somehow kept working!
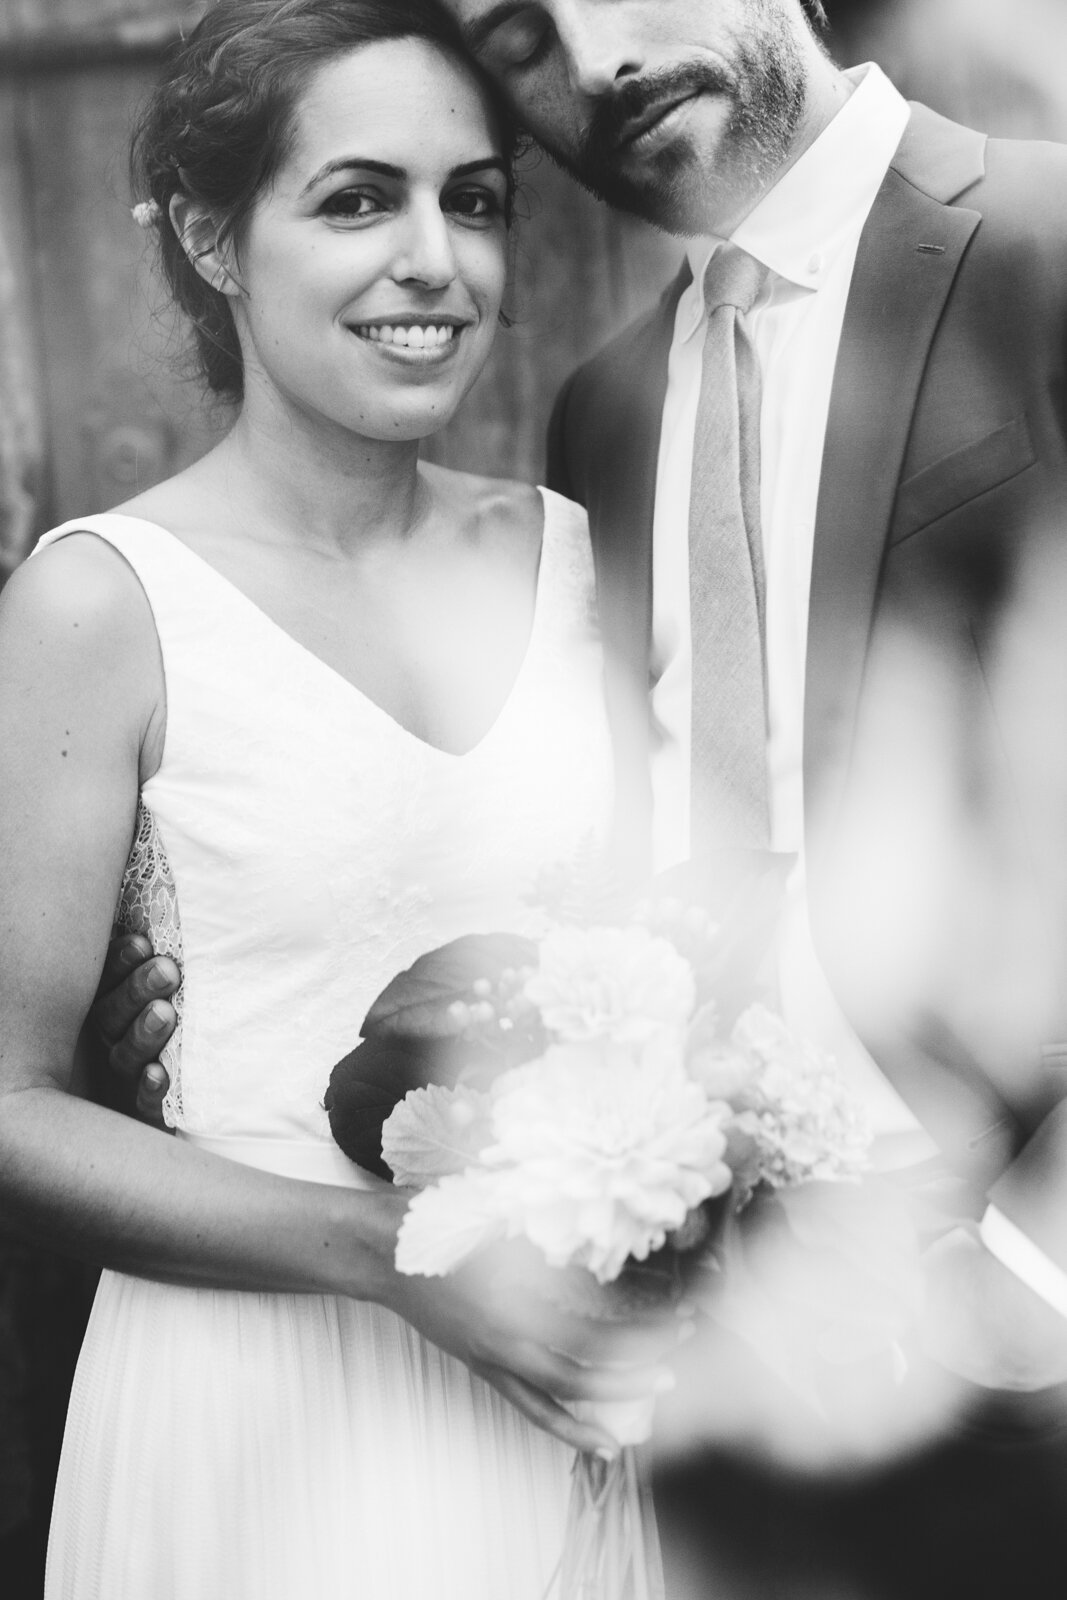
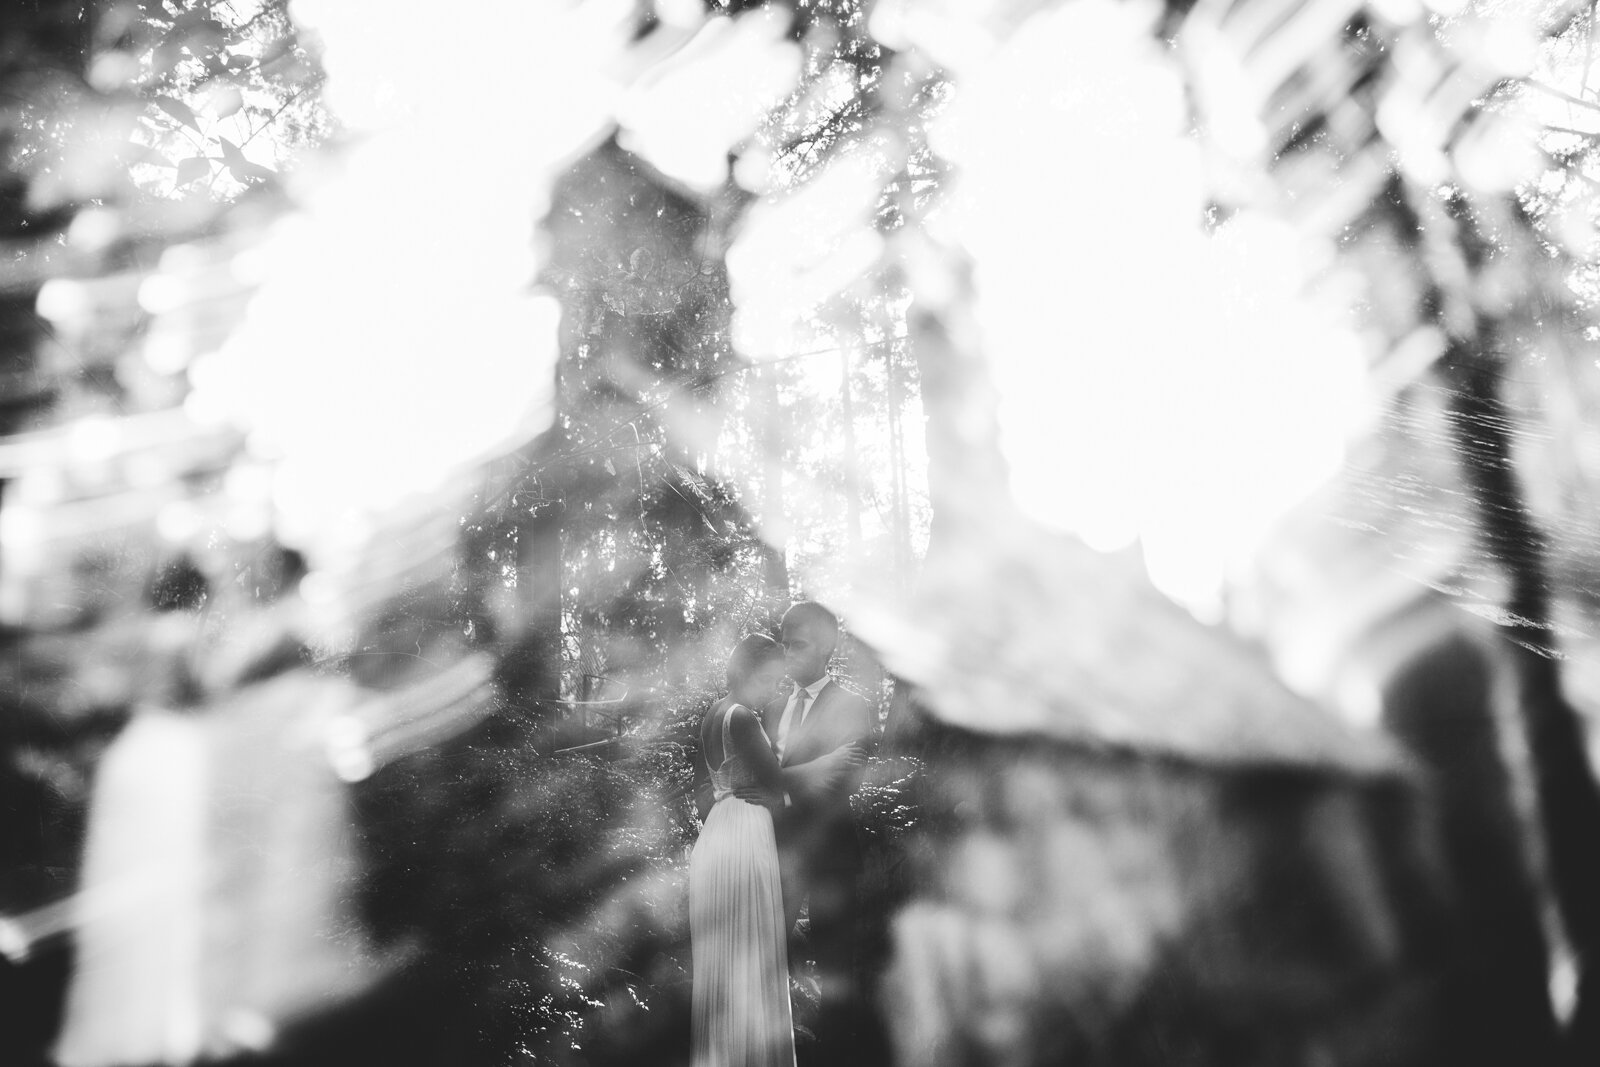
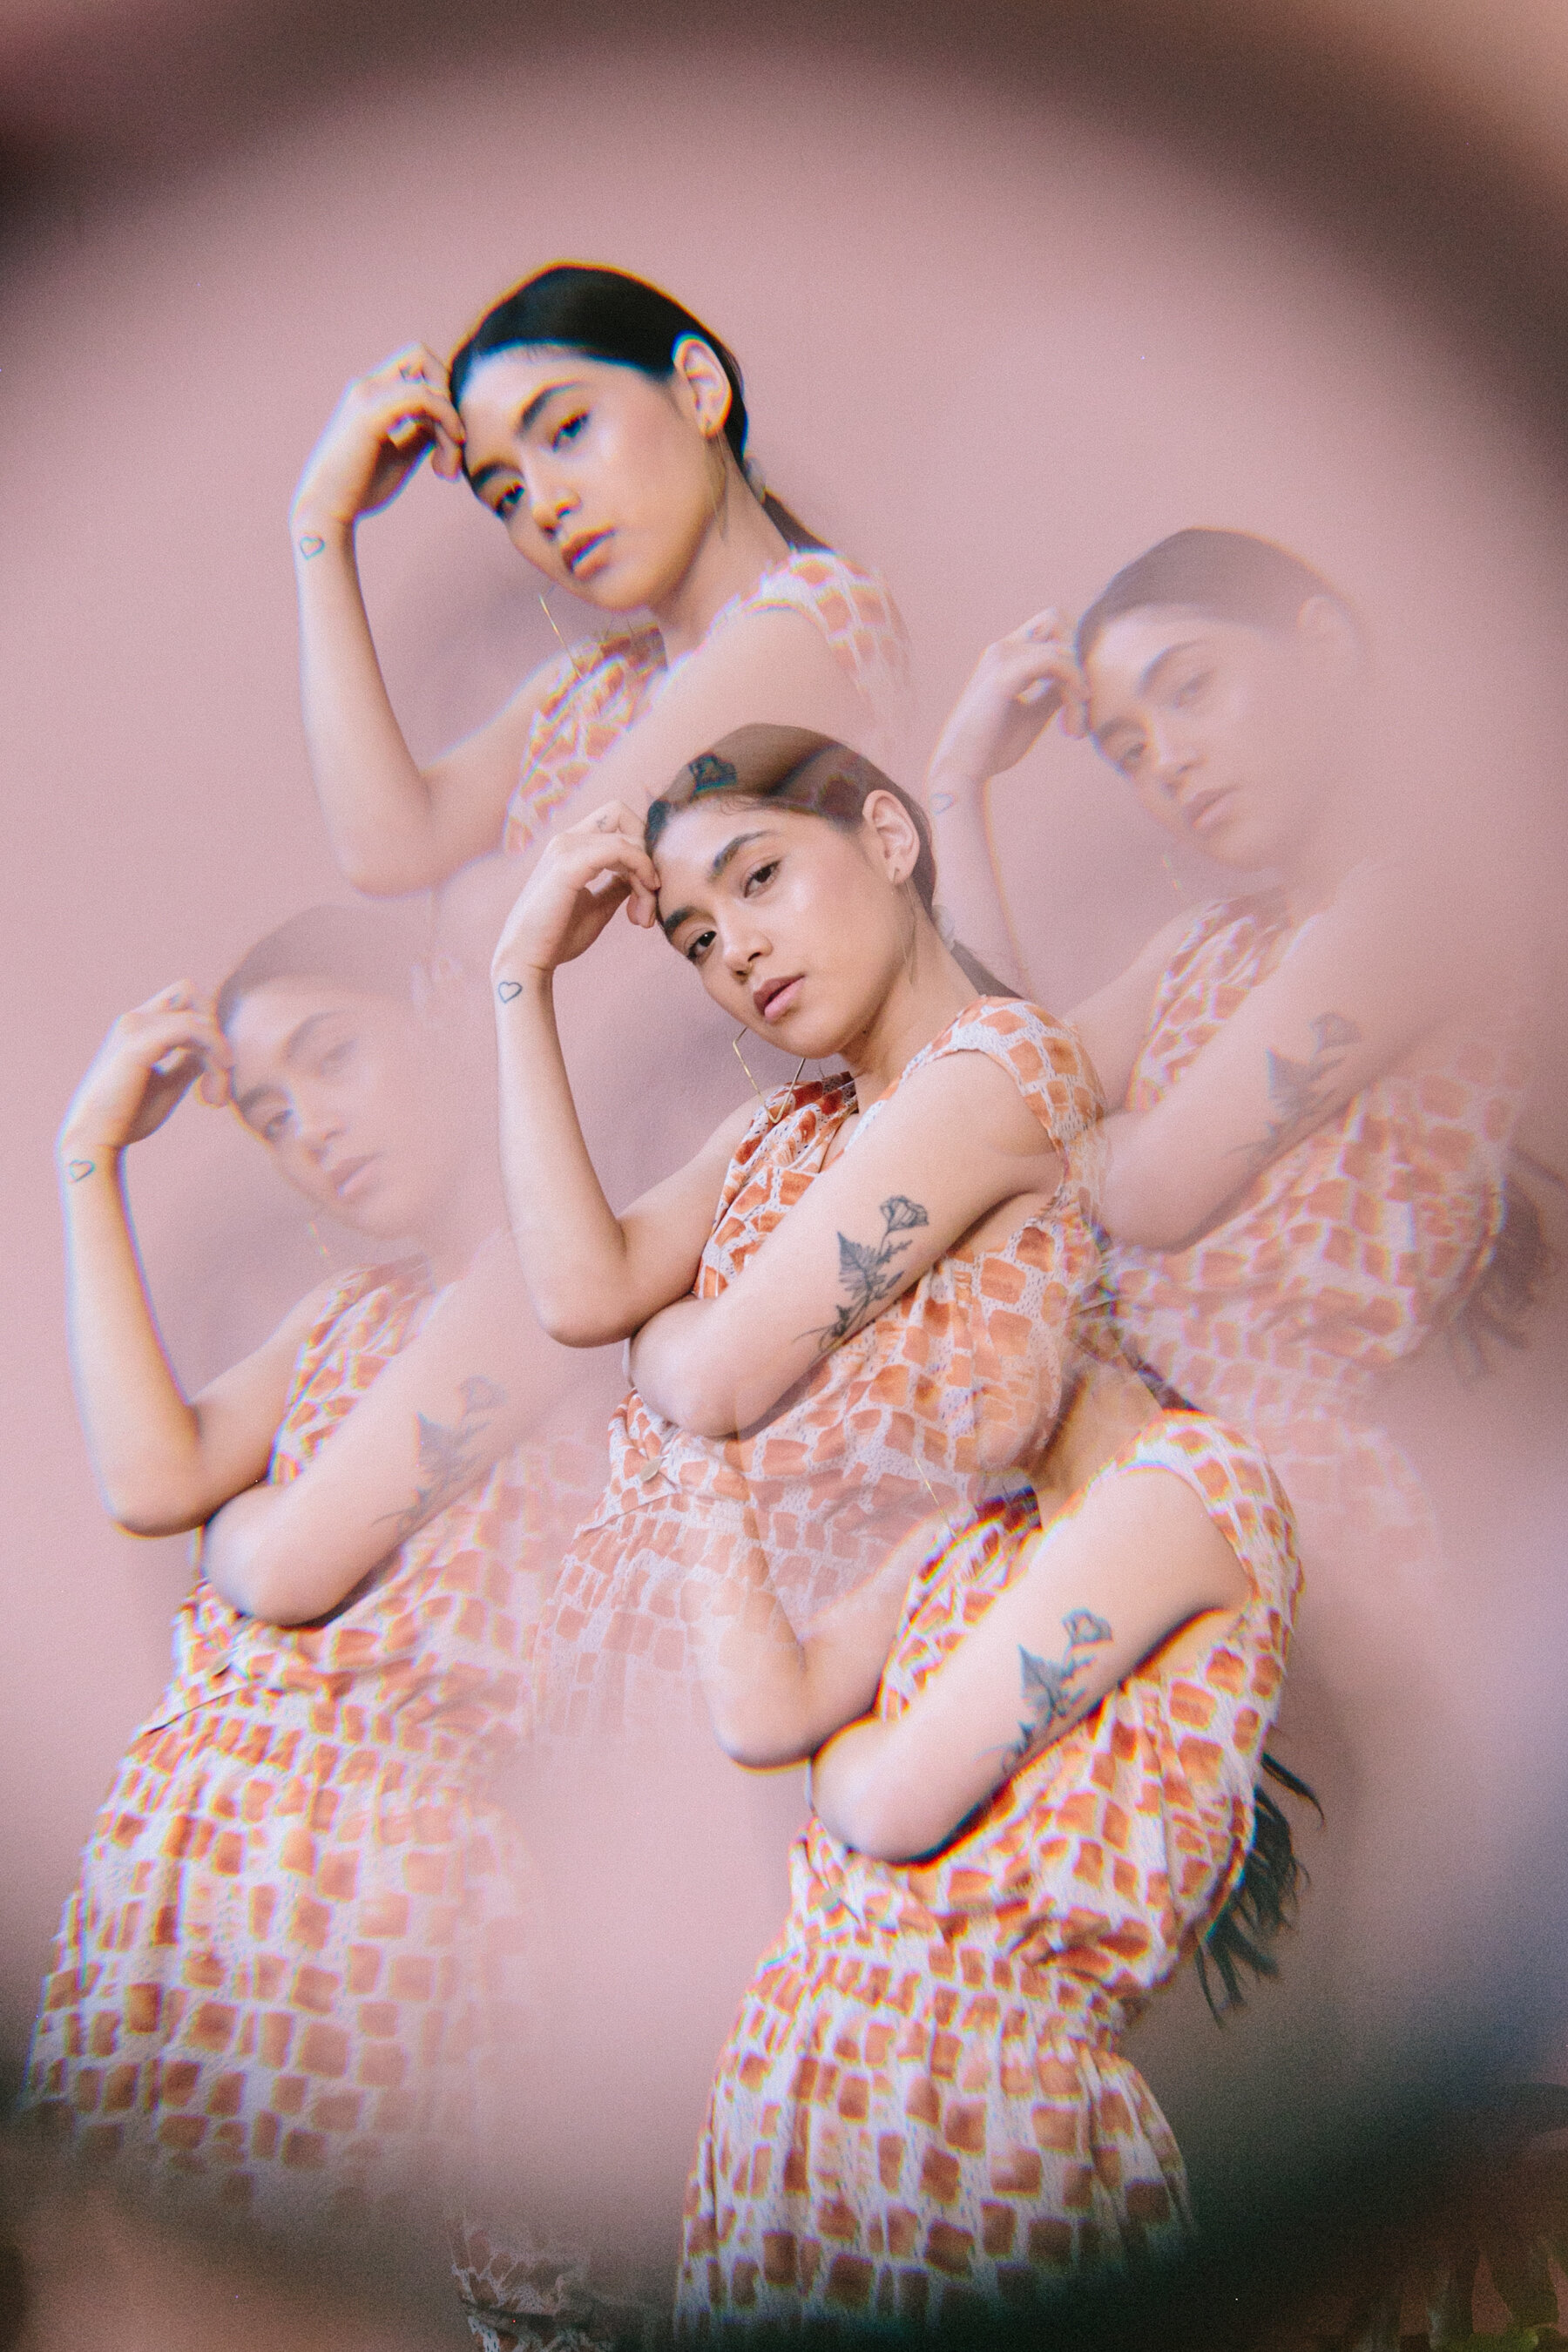
THE IMAGES ARE UNUSUAL & UNPREDICTABLE
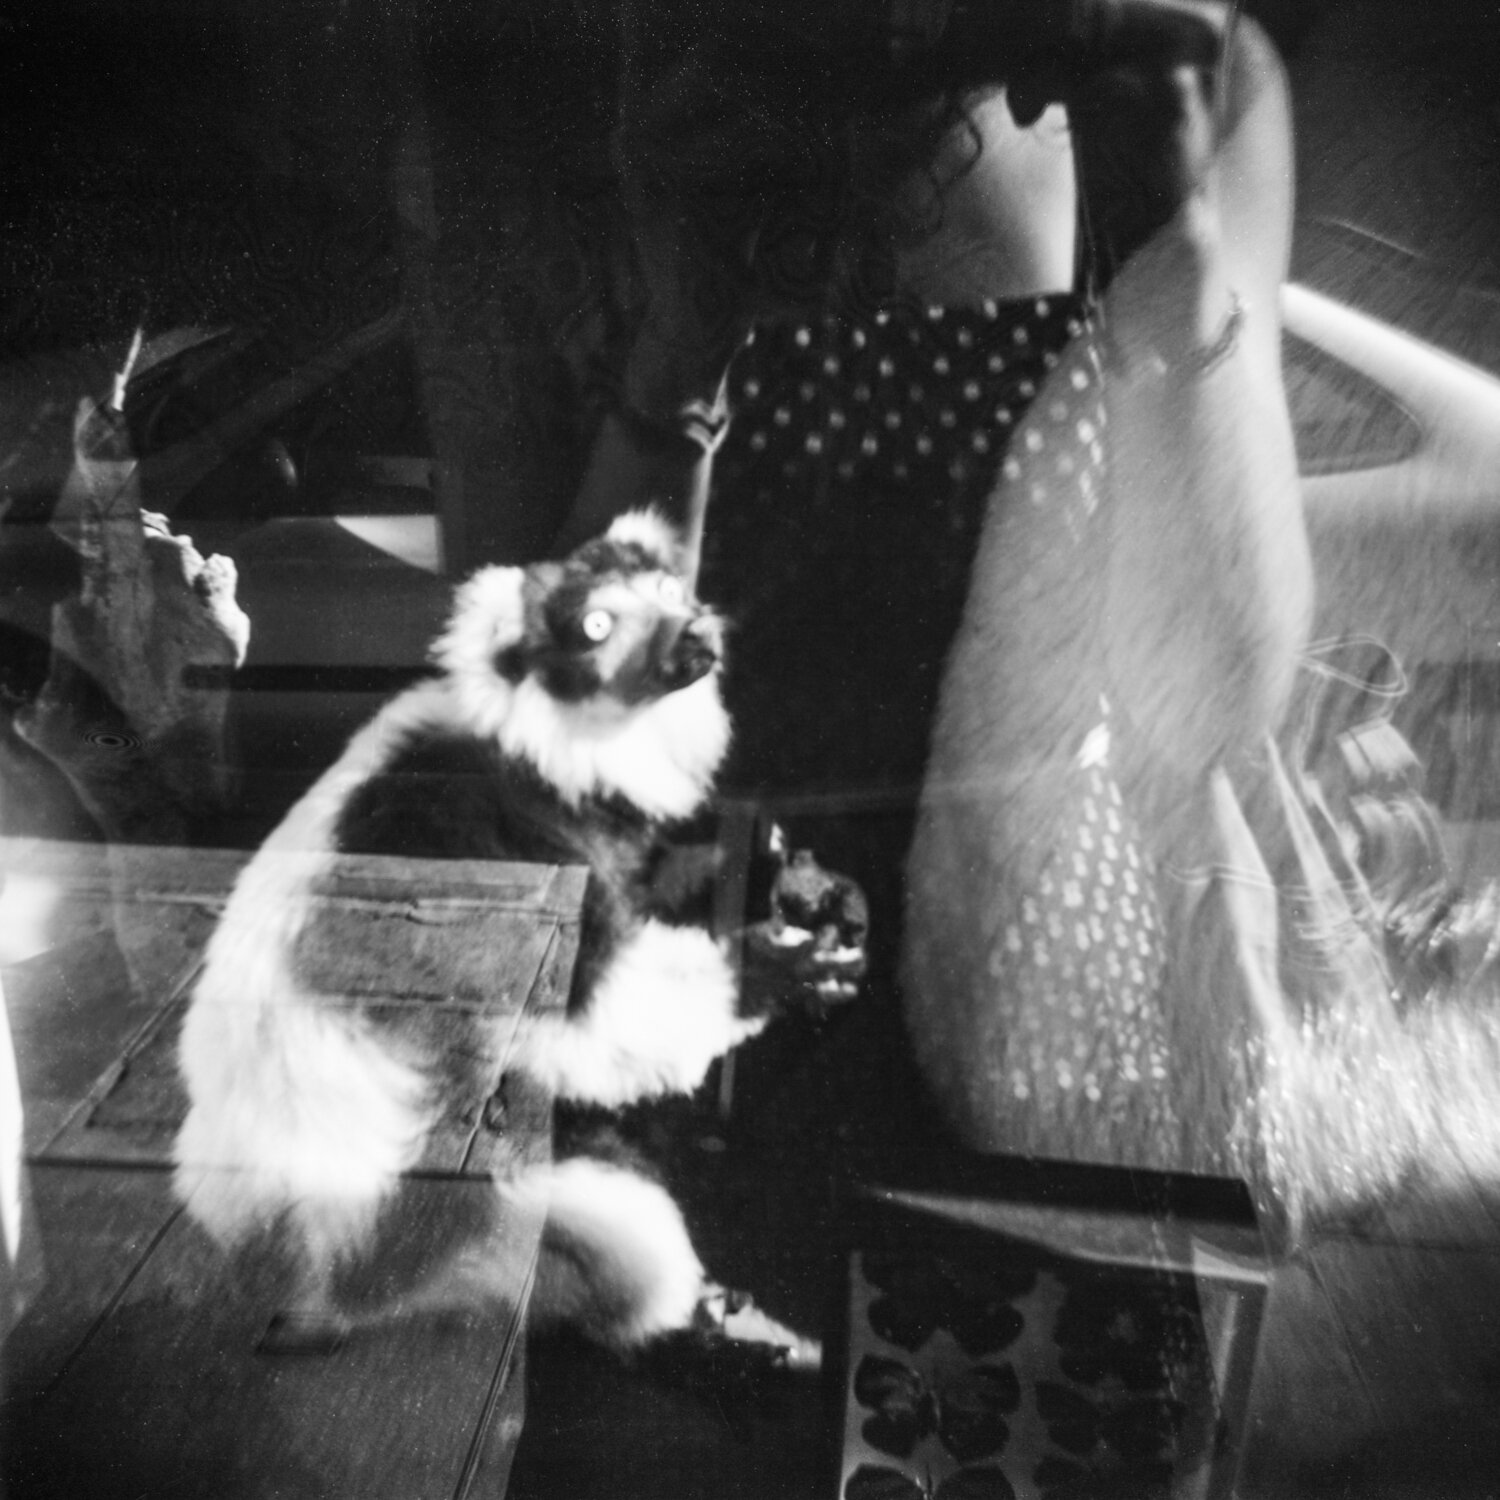
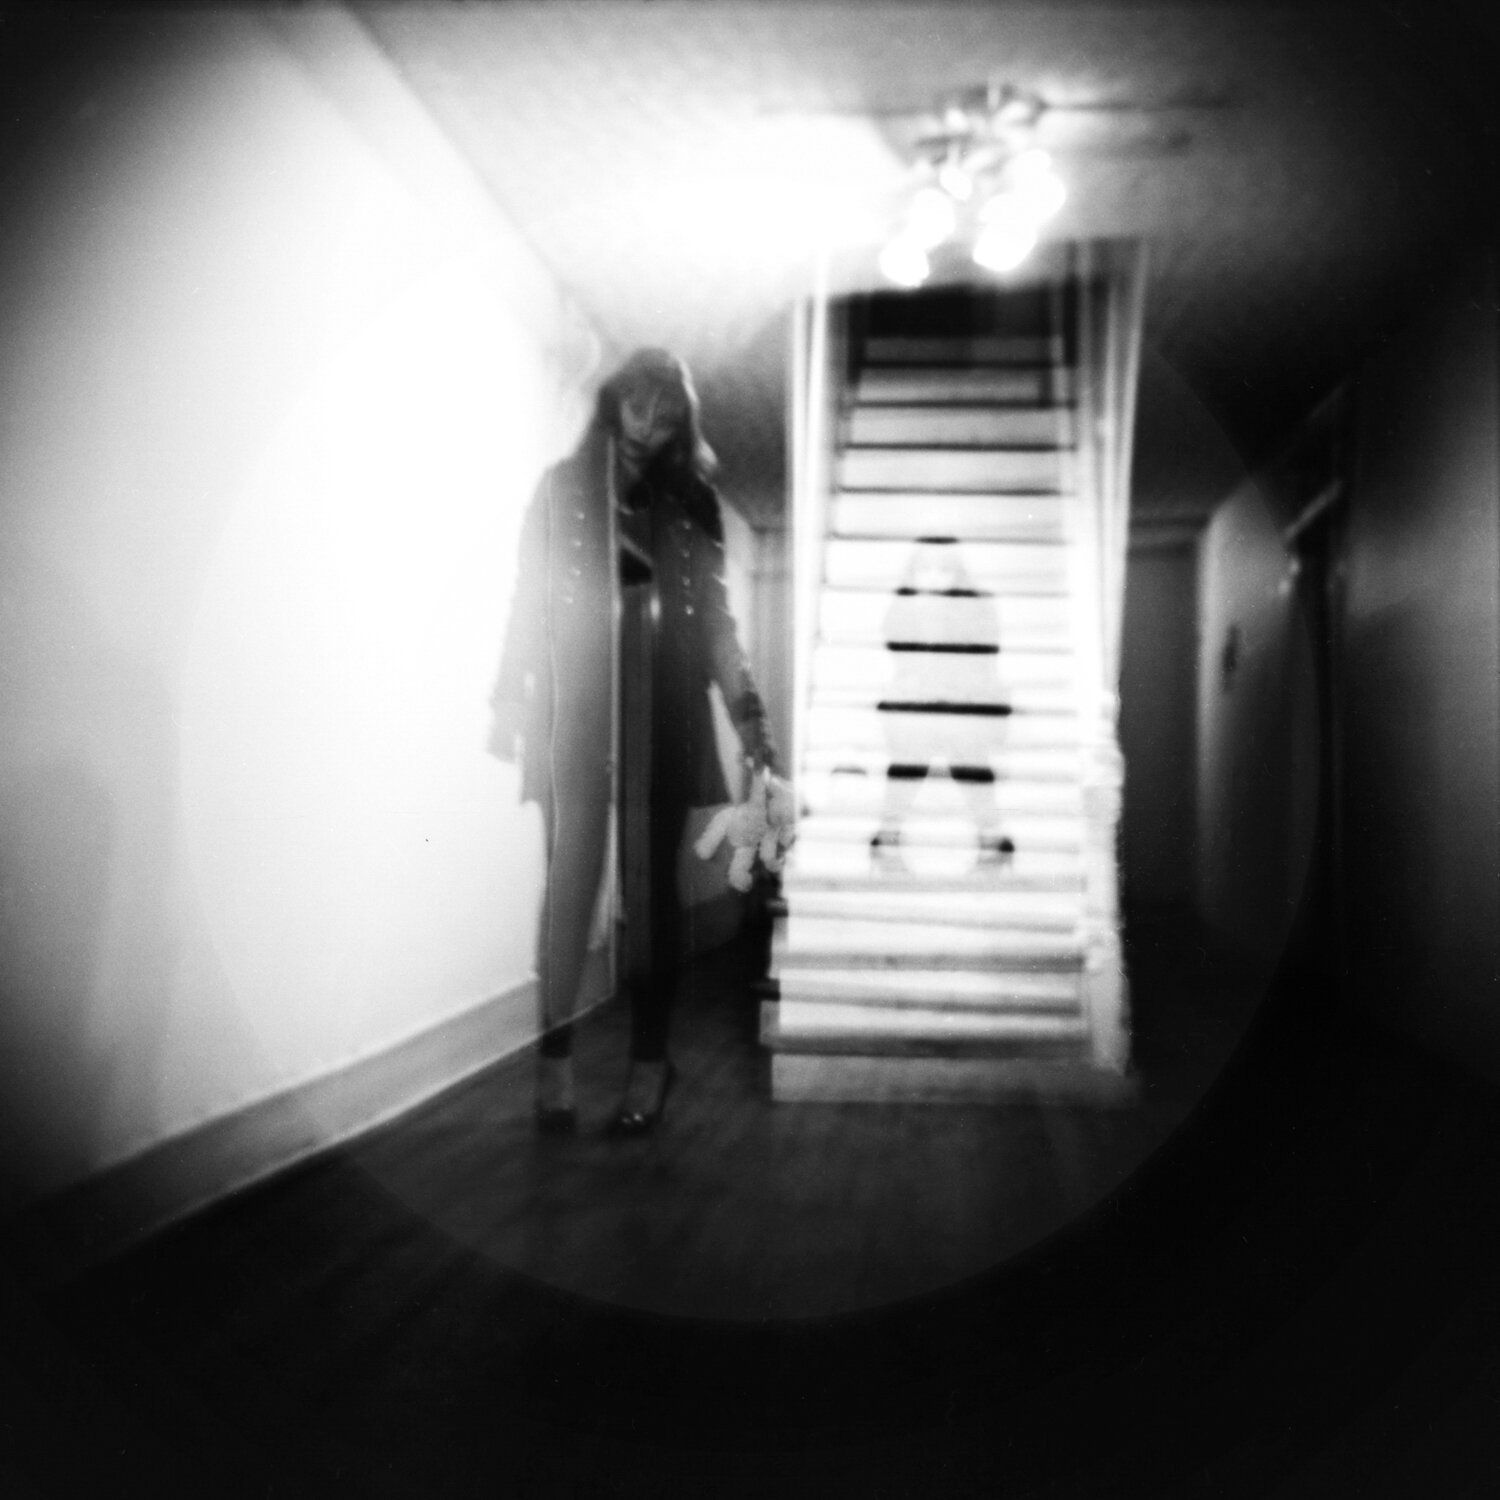
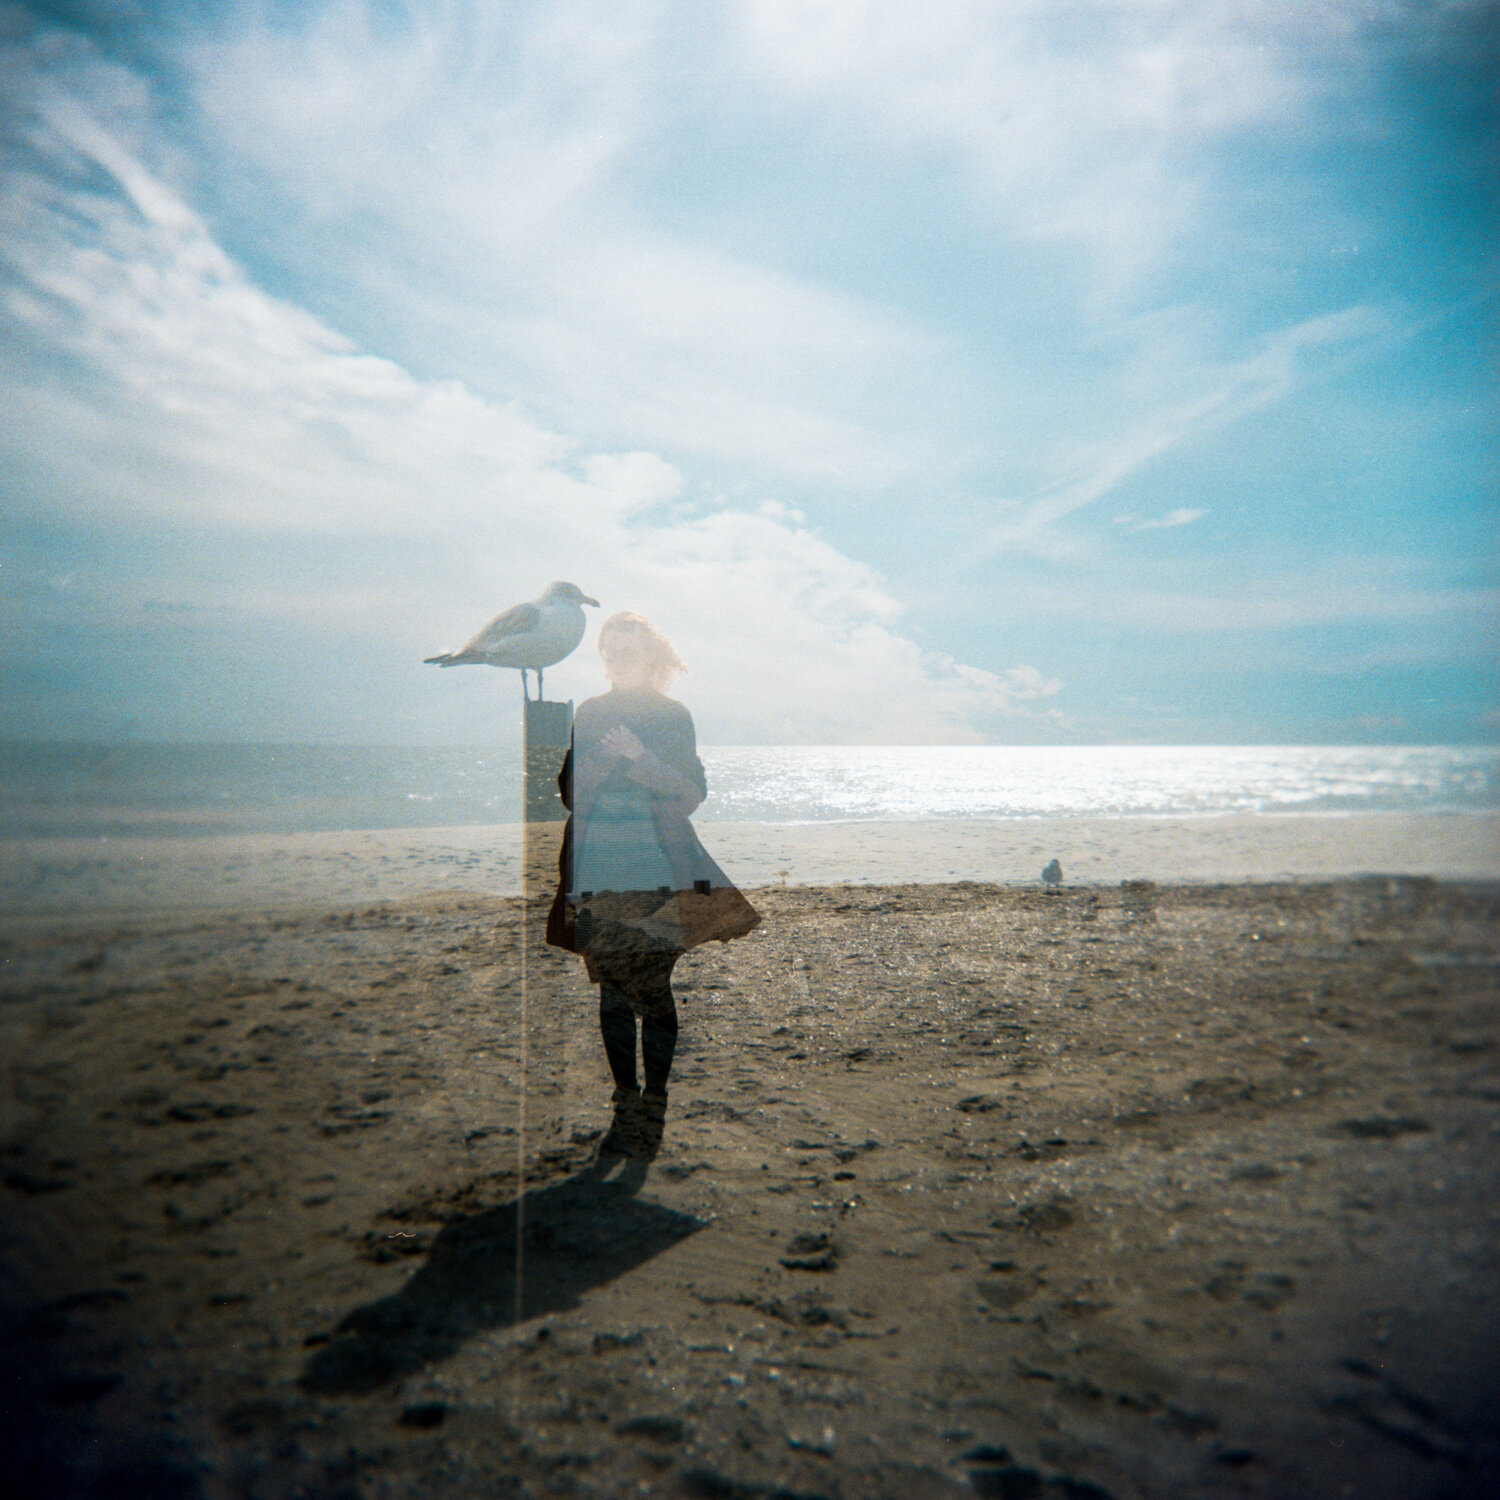
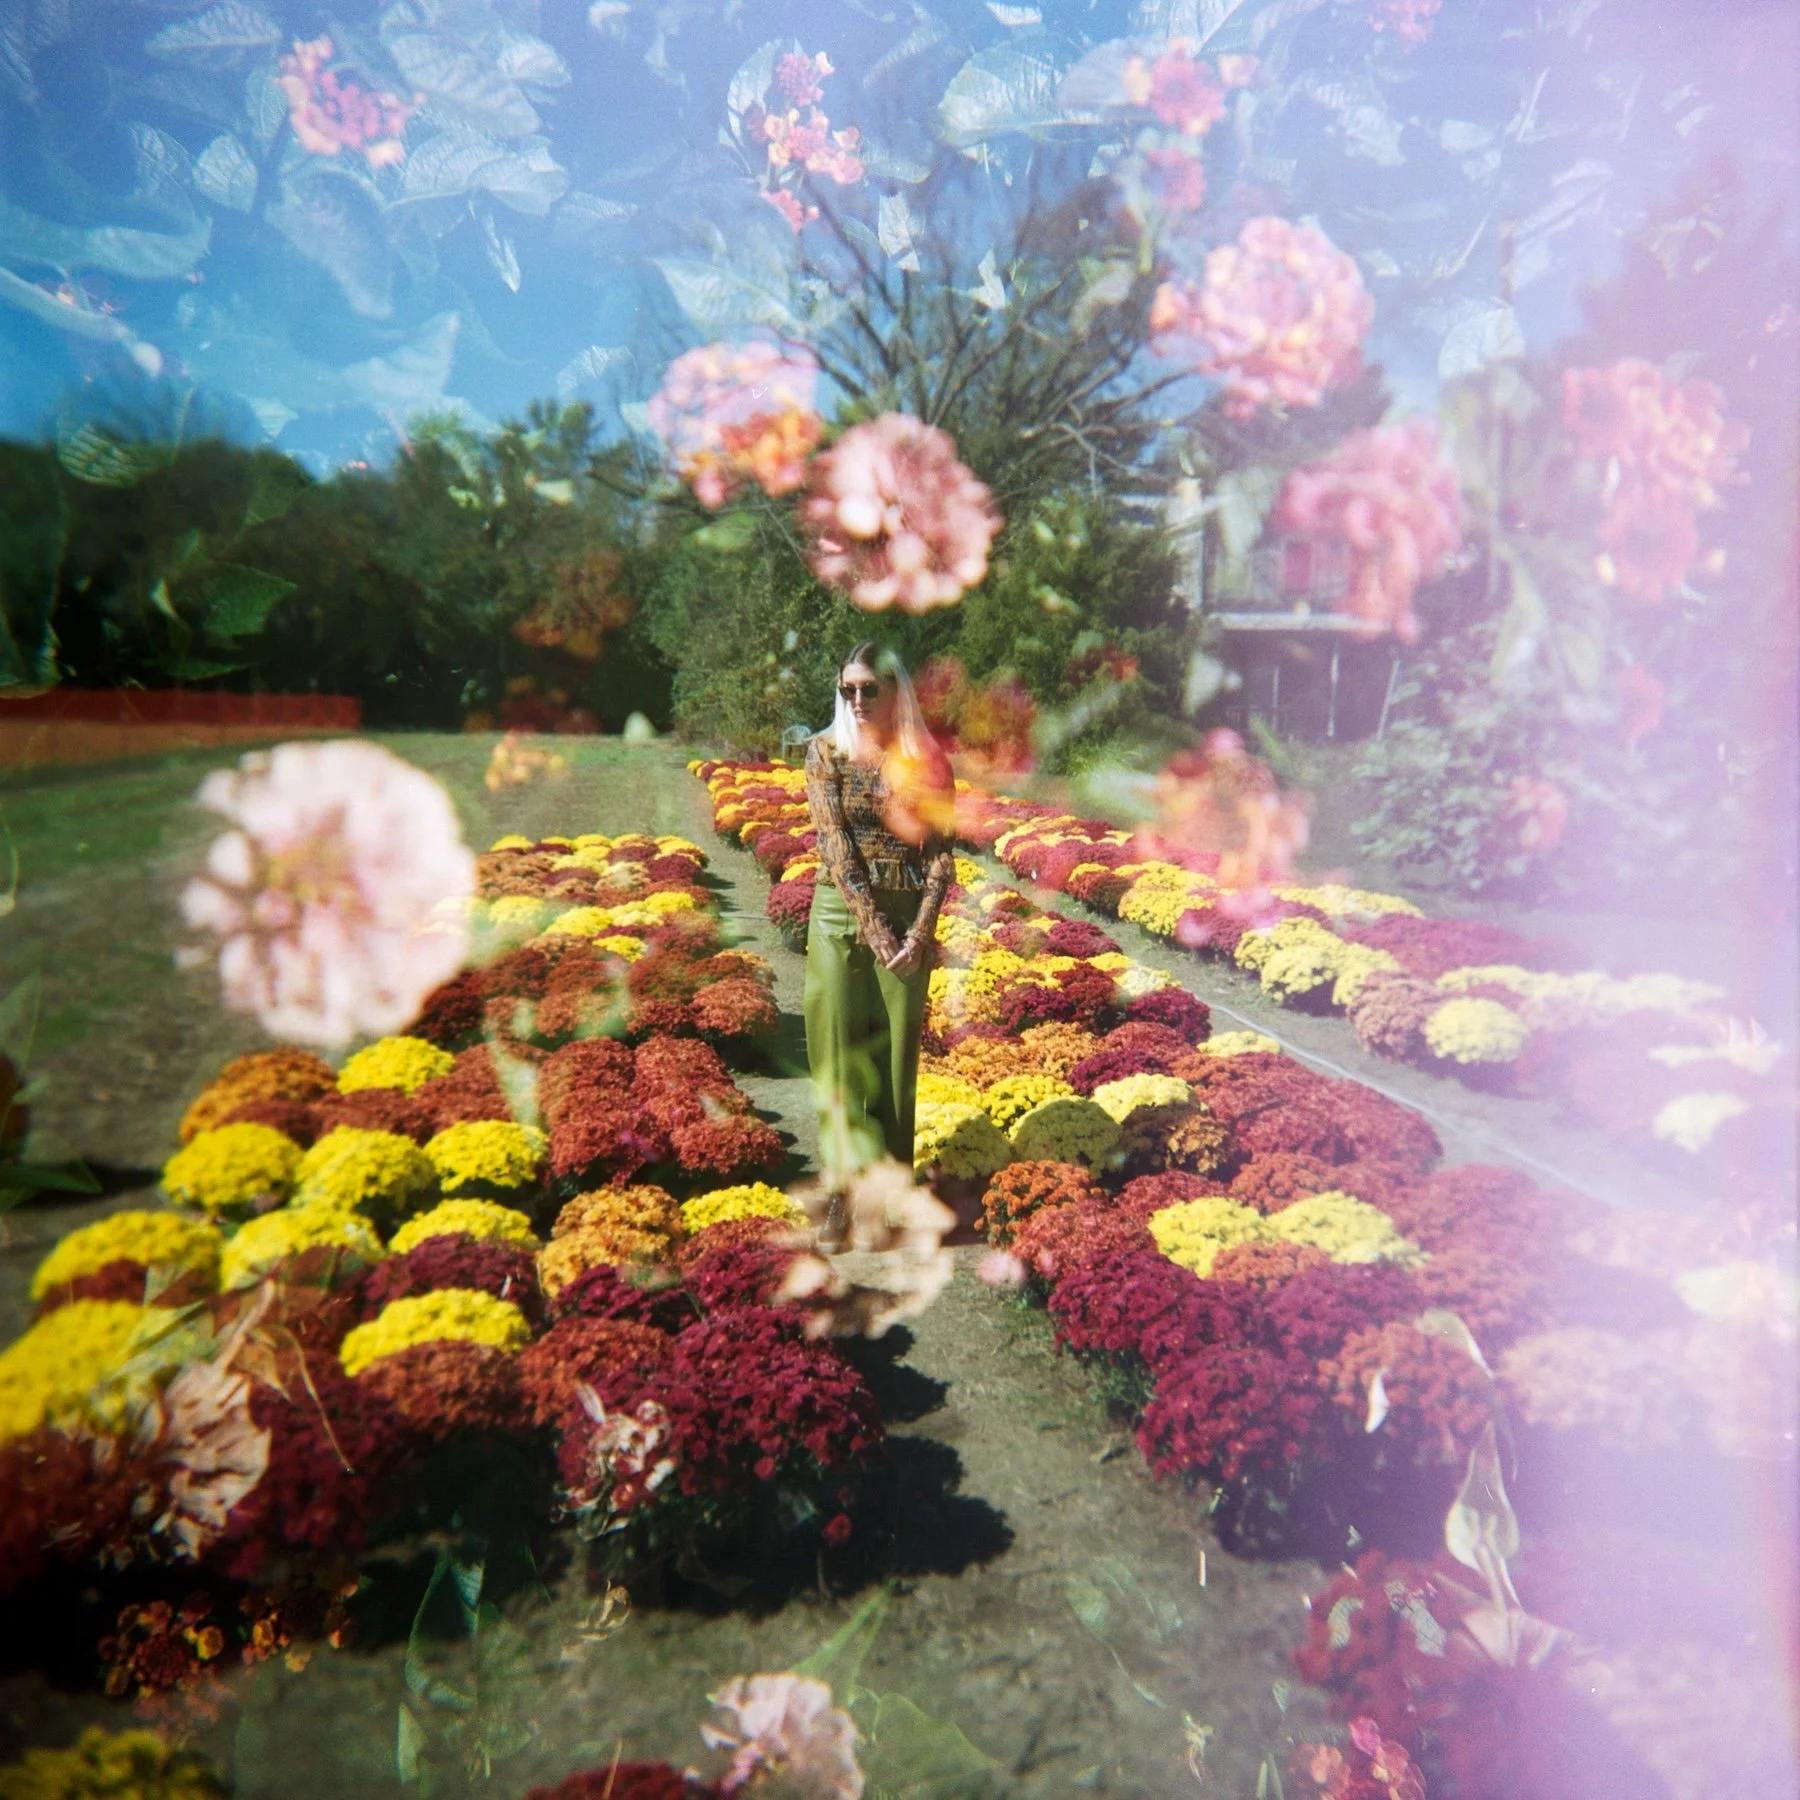
Part of the magic of shooting with a Holga camera is that they are entirely unpredictable. I’ll have an idea in my mind of what my images are going to look like, but every time I get my film back, I’m surprised! It’s easy to get light leaks or accidental multiple exposures, which is why I love this camera so much. I’ve been using the Holga since about 2010 so I’ve had years of experience with it at this point and have learned to love its quirks. My advice is to give it a few rolls before giving up. The first roll of film can sometimes be disheartening, but I promise you it’s worth it if you stick with it and learn from each roll of film you shoot.
IT’S BASIC AND EASY TO USE
While the Holga is intimidating in it’s own right, it is actually an incredibly basic camera. There are only three settings you need to worry about before taking each photo - distance, aperture, and flash. There is also a setting on the bottom of the camera that says “B” or “N”, which stands for “bulb” and “normal” and is in relation to shutter speed. I always leave mine taped to the N setting, because sometimes it will accidentally switch to the bulb setting on it’s own and I’ll end up with blurry images. The N (normal) setting is about 1/100th of a second and will result in much sharper images. It’s also important to make sure the distance setting you choose is accurate. I leave mine in the landscape or “mountain” setting the majority of the time. This leads to a better likelihood of getting a sharp image. You can mess with the other distance settings if your subject is a little closer to you, but just remember to switch it back later!
IT’S COLLECTIBLE & MEMORABLE
I get so many comments about my Holga cameras when I have them out and about with me. And I’ve also collected over a dozen of them at this point, in all sorts of colors and model numbers. They look cute up on a shelf and they are a conversation starter, for sure! At this point, i’ve gotten so many people hooked on the Holga and it’s actually super important to keep people shooting with the 120 version because, sadly, 120 film is slowly dying. Personally, I don’t understand why because it’s an absolutely stunning film format with huge, sharp negatives. Help keep 120 film alive and try out the Holga! Just remember, if you aren’t quite ready for 120 film, you can pick up a Holga 135BC on eBay first, the 35mm version of the Holga camera. You can read my full blog post about it here.
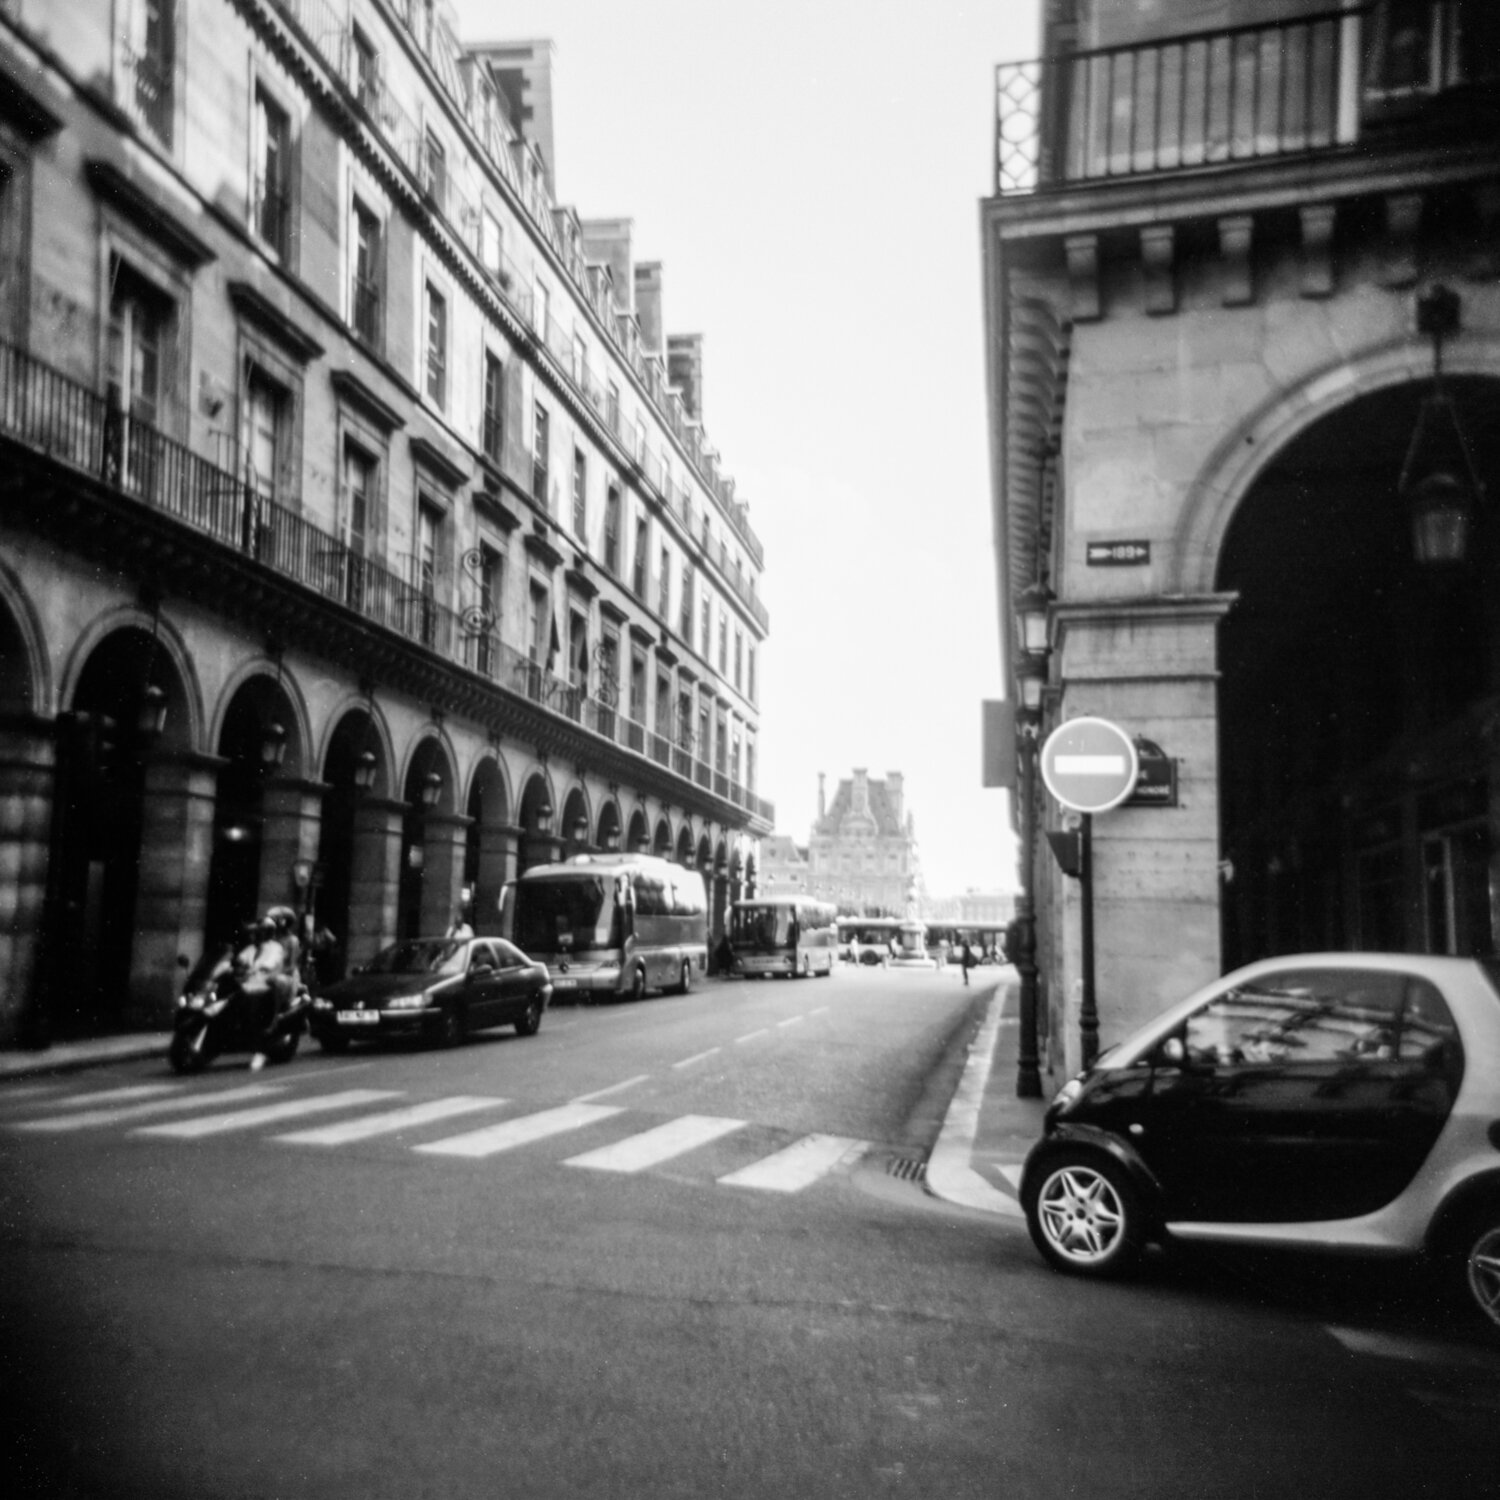
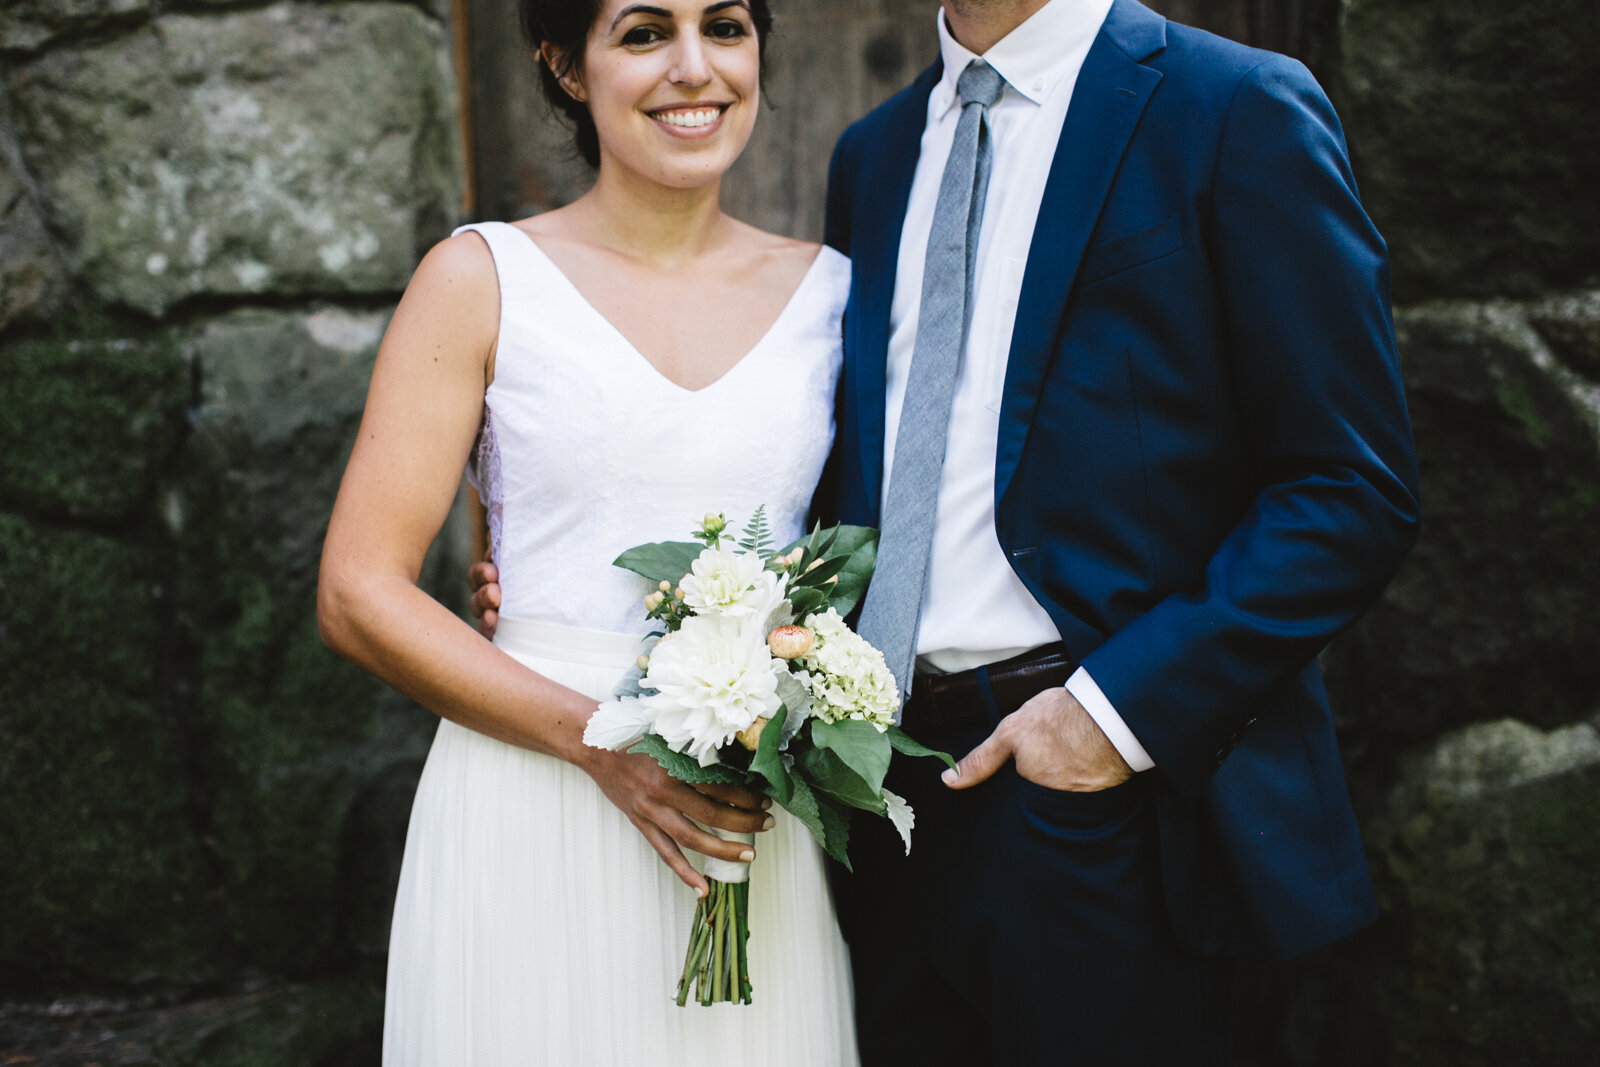
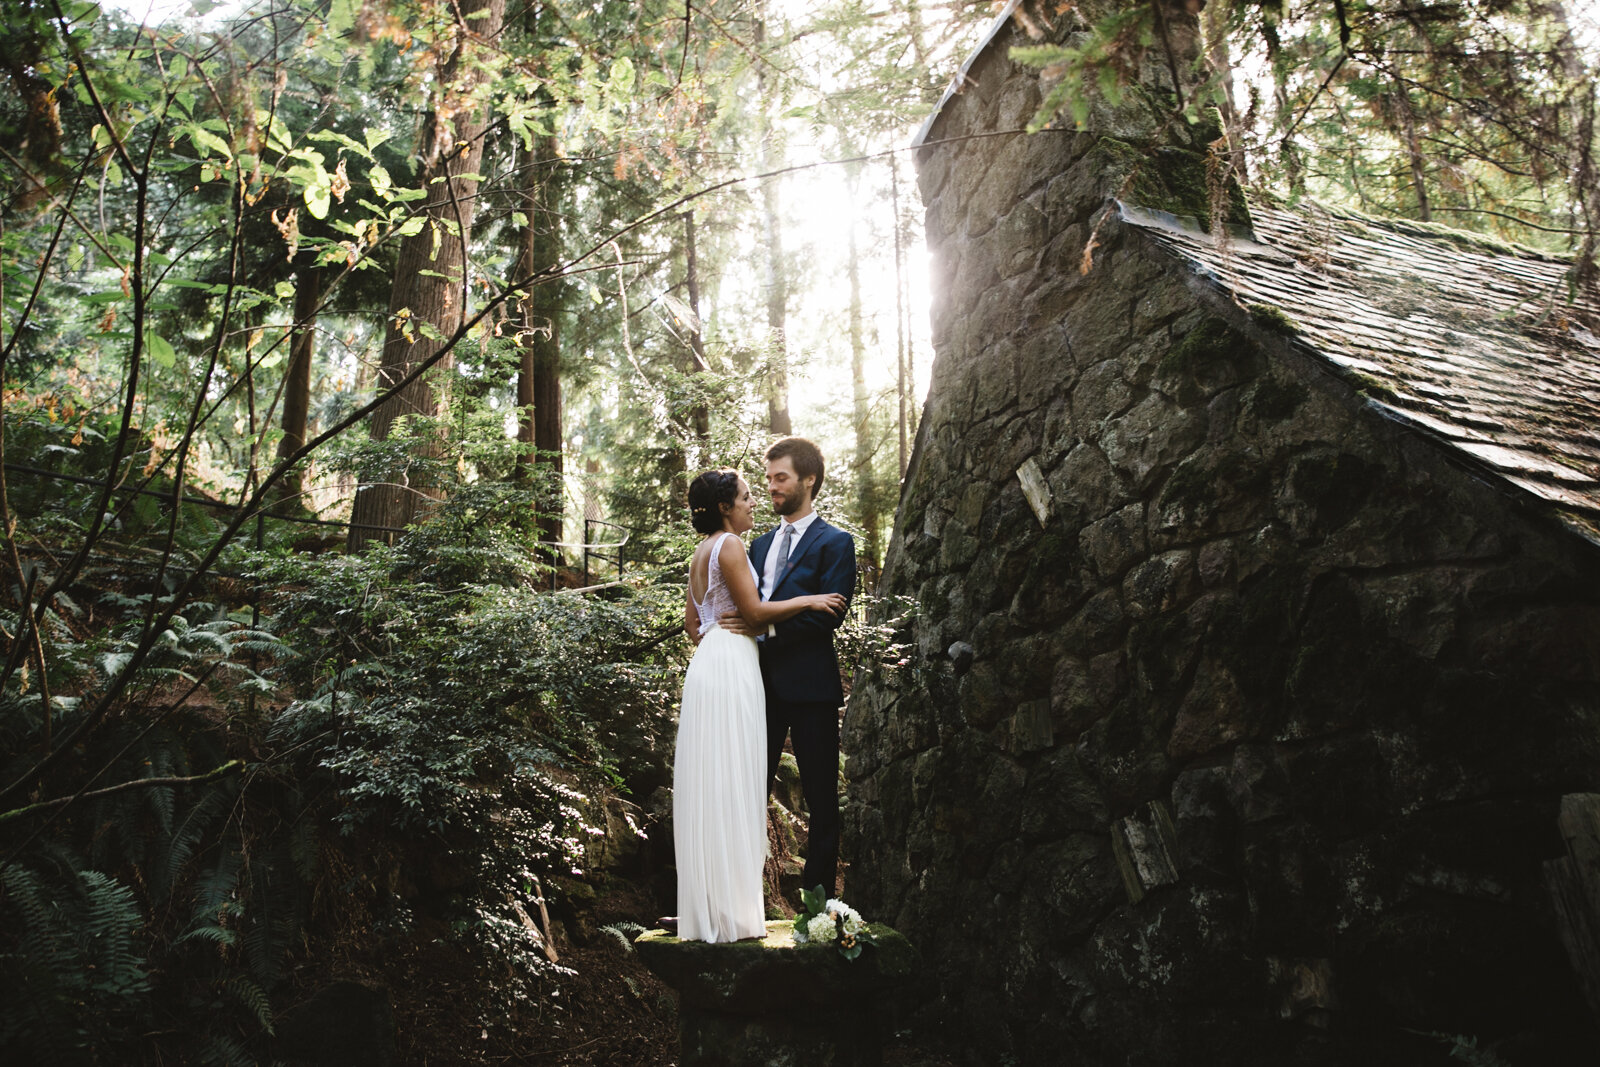
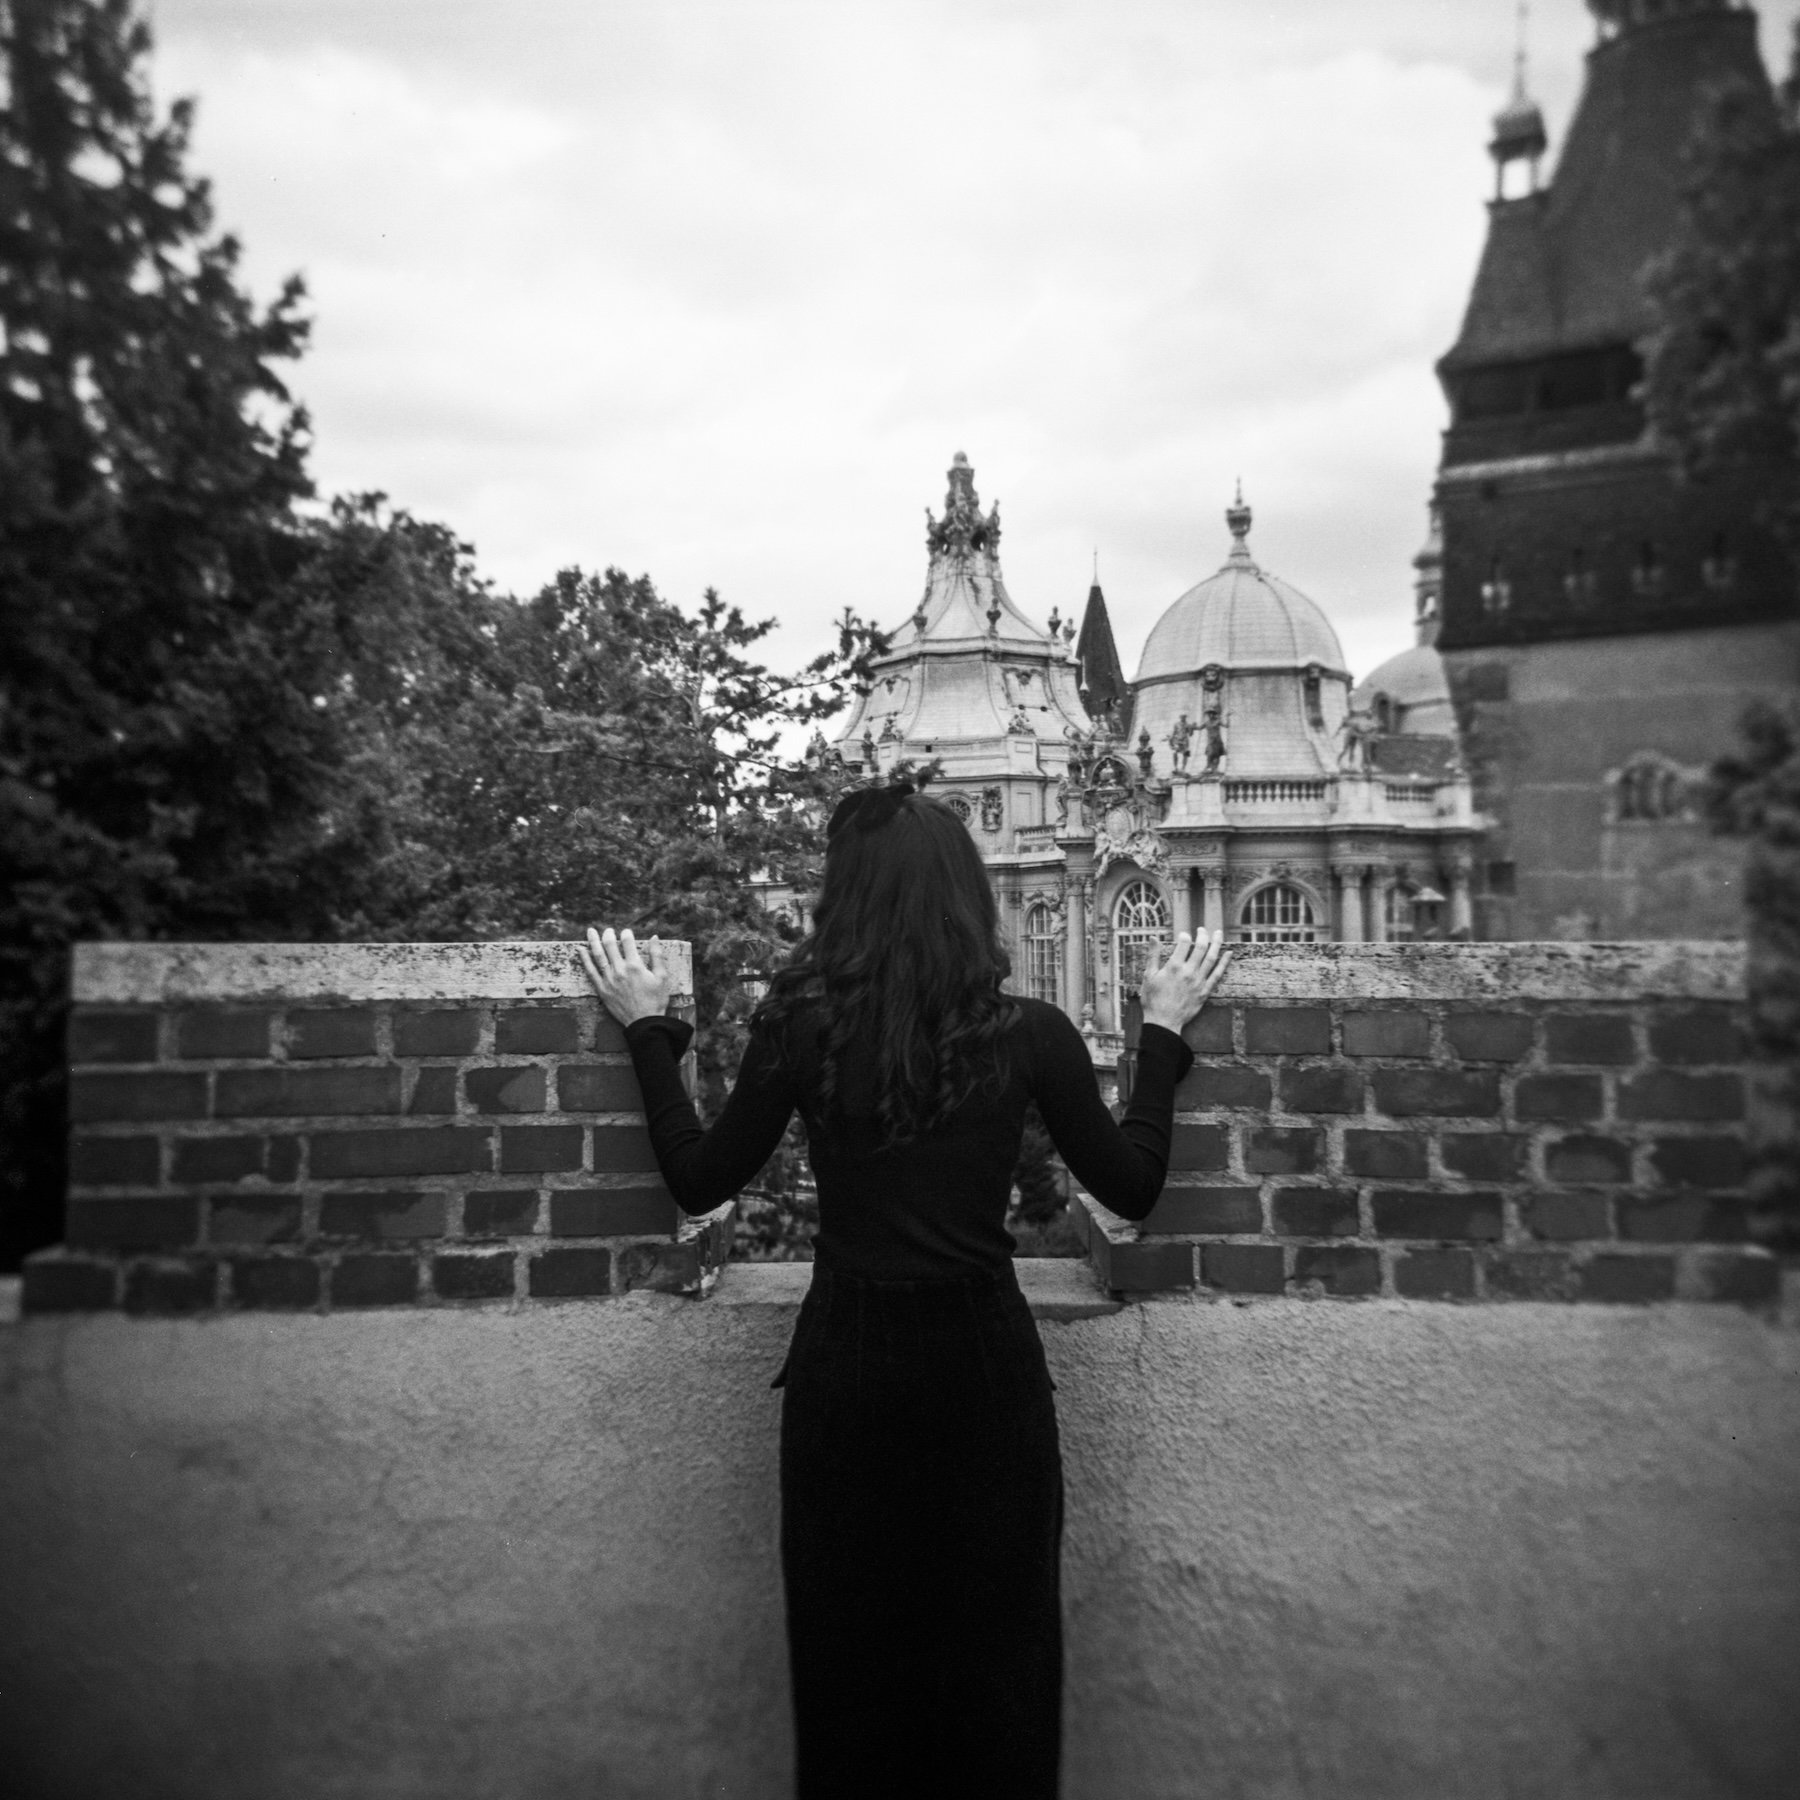
THE IMAGES ARE SURPRISINGLY SHARP
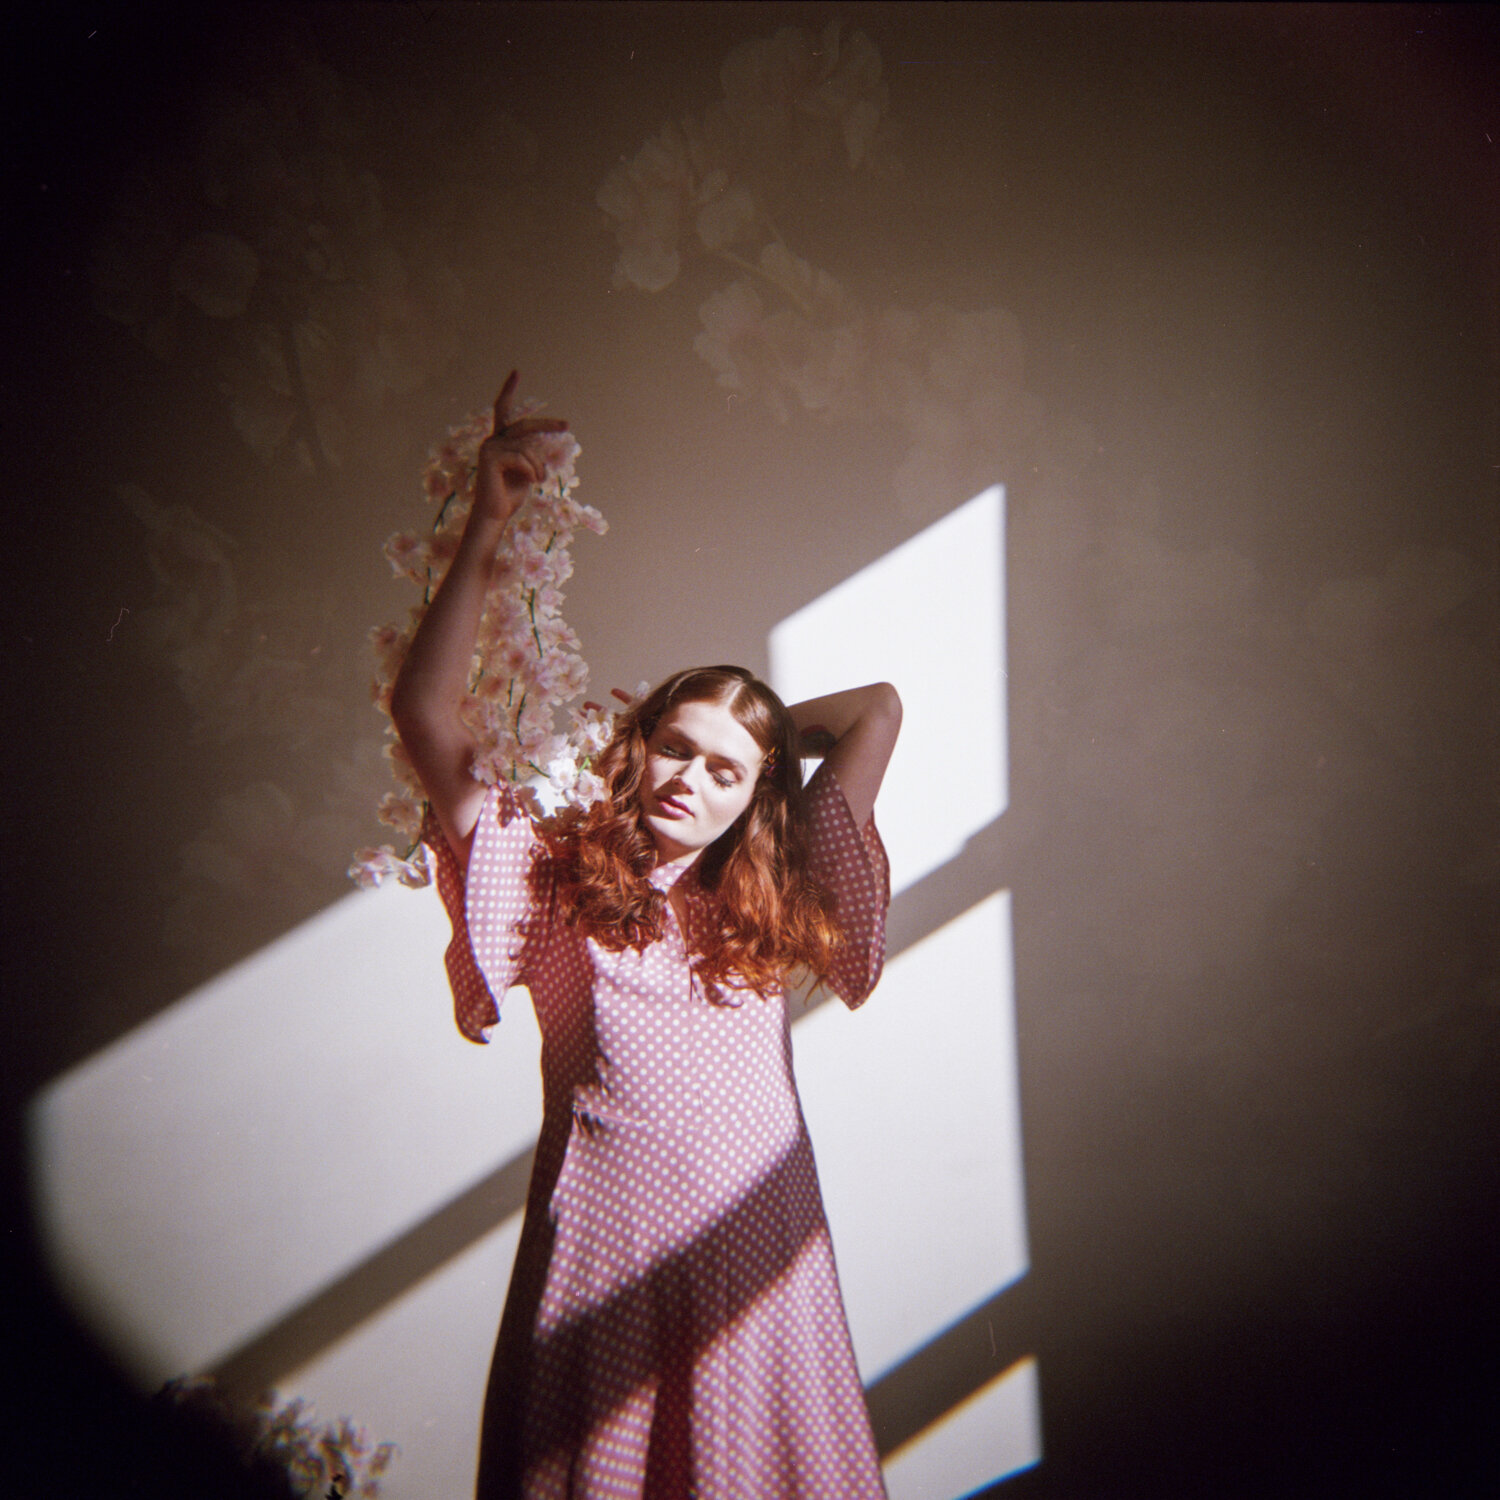
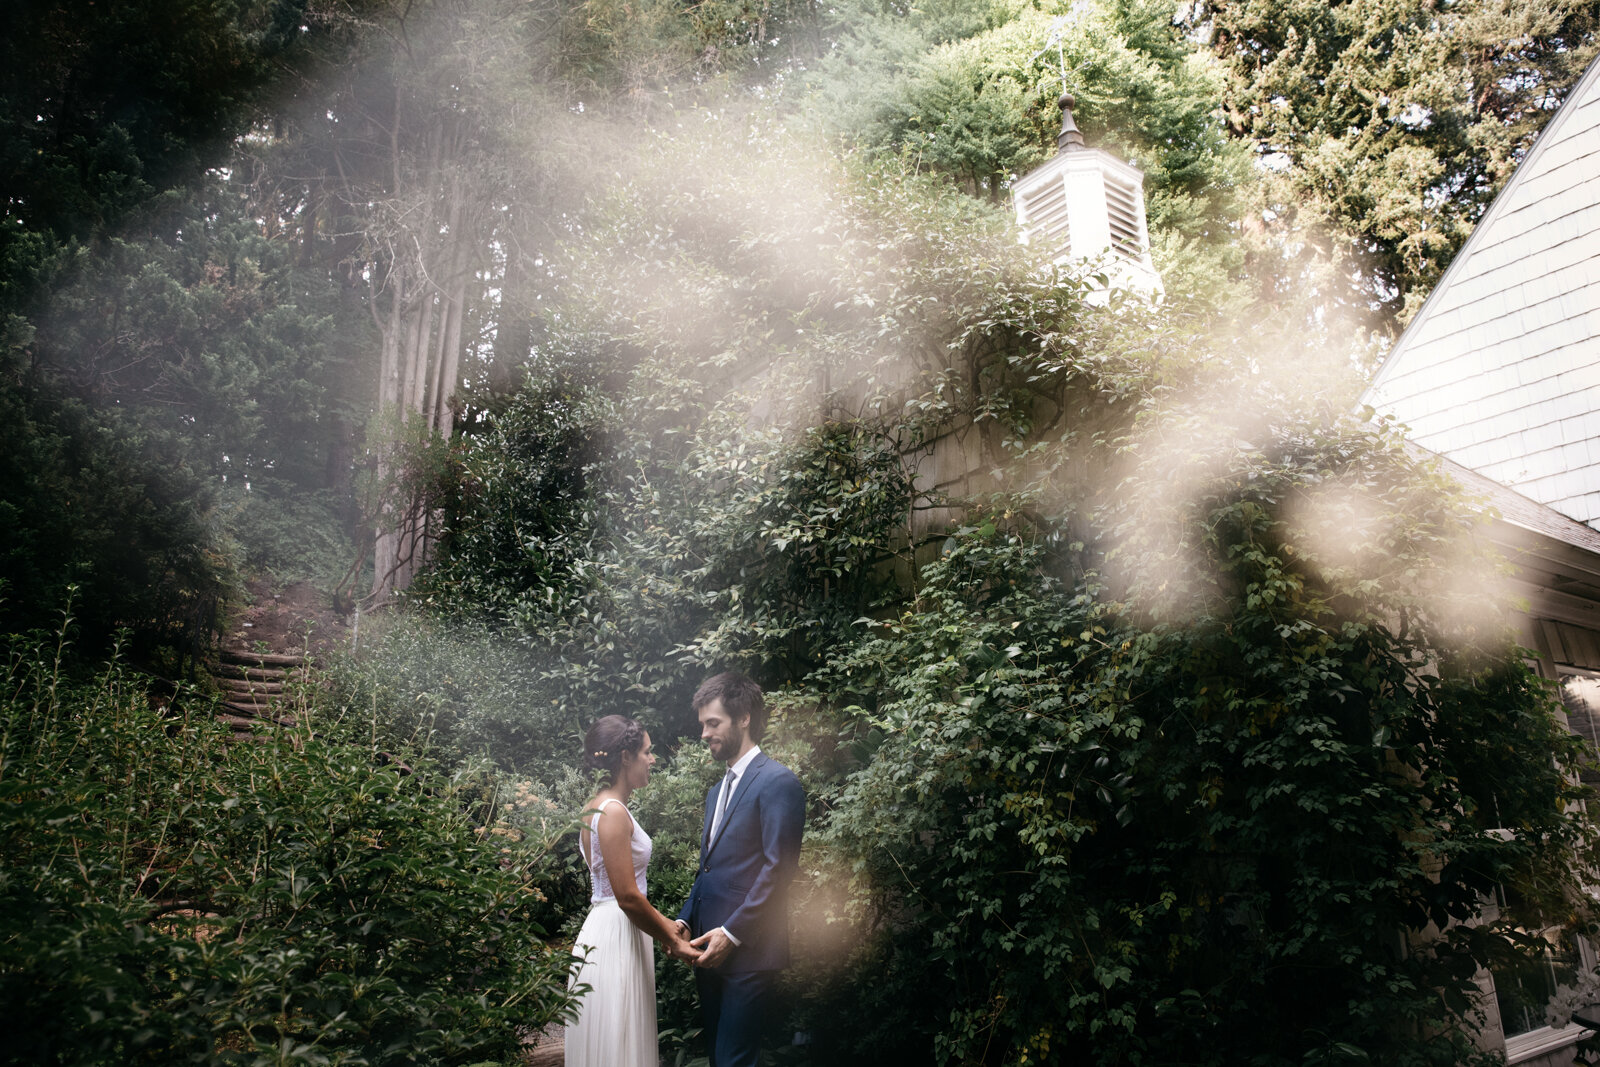
It takes a while to get to this point, but when you finally get an image with no motion blur or accidental movement, the Holga can take some incredibly sharp photos. This is also why I almost exclusively shoot with the Holga GCFN version, because it comes with a glass lens instead of a plastic lens. If you just so happen to get all of the settings right with the right film stock, the Holga will surprise you with its capabilities. If you’re having issues getting a sharp photo, I recommend taking a roll of Kodak Portra 400 120 film to the beach on a sunny day, make sure the camera is on the “N” (normal) setting and not the “B” (bulb) setting and see what you end up with! Just remind yourself to hold the camera as still as possible whenever you take a photo. It makes a huge difference just keeping that in mind when shooting.
CONS OF THE HOLGA GCFN
TAKES PATIENCE TO LEARN
I think the most difficult part about the Holga is putting in the time and effort to understand it. Your first few rolls of film will not be great, I’m warning you now. But just keep taking it along with you on adventures and I promise, one day, you’ll end up with a roll of film that you’re obsessed with. I also would tell anyone just starting out with any sort of film photography, do not expect perfection. Film photography is meant to be rough around the edges. Expect grain and light leaks and multiple exposures and wrong settings. But take what you’ve learned and apply it to the next roll of film. It’s a learning experience and it’s something you can continue to grow with every day. I shoot with new cameras constantly and I have mishaps all the time. It’s definitely a bummer when a roll of film doesn’t turn out because you had your camera on the wrong setting the whole time, but it also keeps you working towards something. Film photography is much more rewarding than digital photography, in my opinion!
DOESN’T WORK WELL IN LOW LIGHT
As with most cheap film cameras, they function best in bright, daylight conditions. If you’re shooting indoors, make sure to use the flash and stay within 8 feet of your subject for best results. You have to find a balance between ISO and sharpness when it comes to the Holga. And by that I mean, once you start getting over 400 ISO with your film, the images will become more grainy and less sharp. I always recommend 400 ISO film to anyone just starting out with the Holga because it’s nice and sharp but also works decently well in low light. If it’s a cloudy day and you’ll potentially be shooting in the shade or indoors, I’d recommend an 800 ISO film. If you’re going to be outside on the beach, I’d recommend a 100-200 speed film like Ektar 100, Kodak Portra 160, or Kodak Gold 200.The Holga, in general, requires a lot of light to perform well, so that built-in flash with the GCFN model can really make a difference.
YOUR IMAGES WILL BE WEIRD
Honestly, it’s hard for me to think of cons for this camera! And to me, “weird photos” are not a negative trait of the camera, but I know it is to some people. I always find it strange when people complain about the fact that their camera created a multiple exposure or when they don’t like the light leaks. i’m sorry, I just can’t relate. I’m obsessed with multiple exposures and light leaks. So…. take this trait with a grain of salt and decide for yourself!
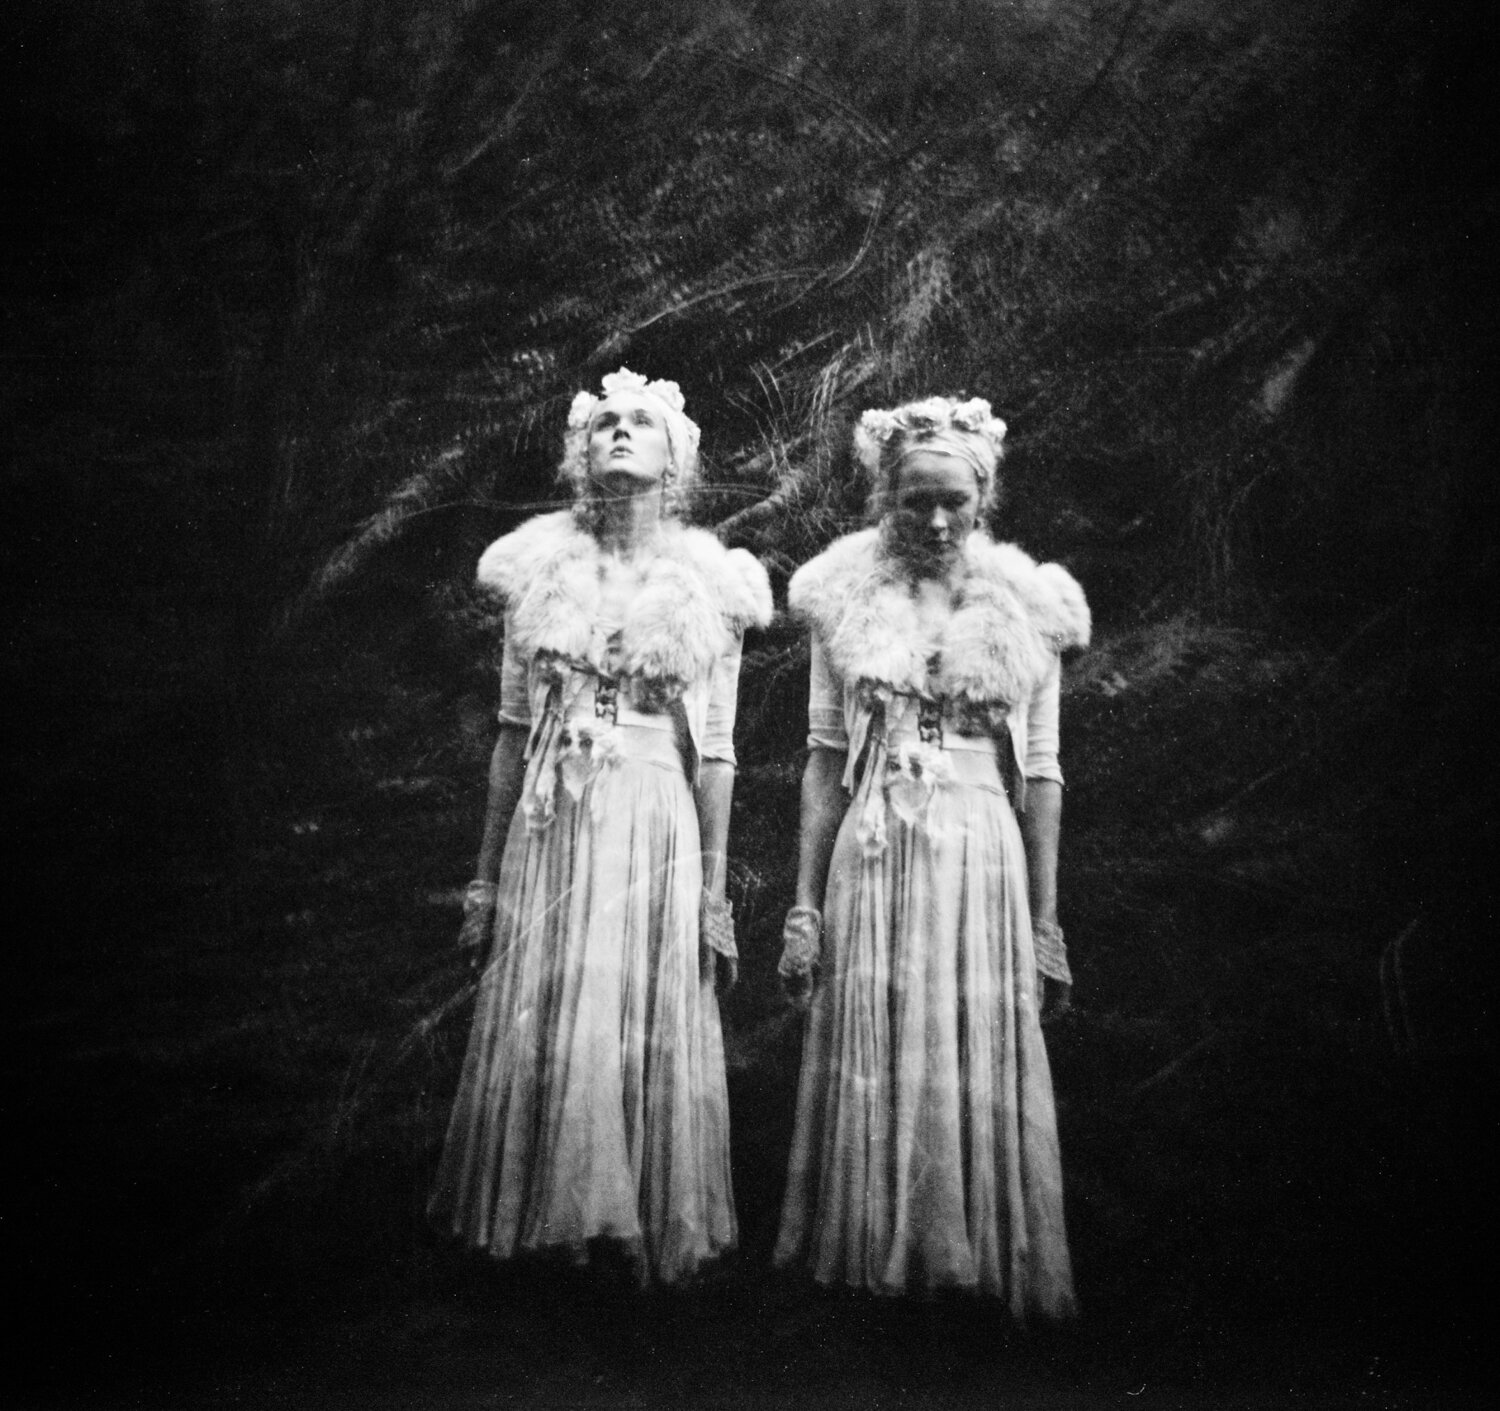
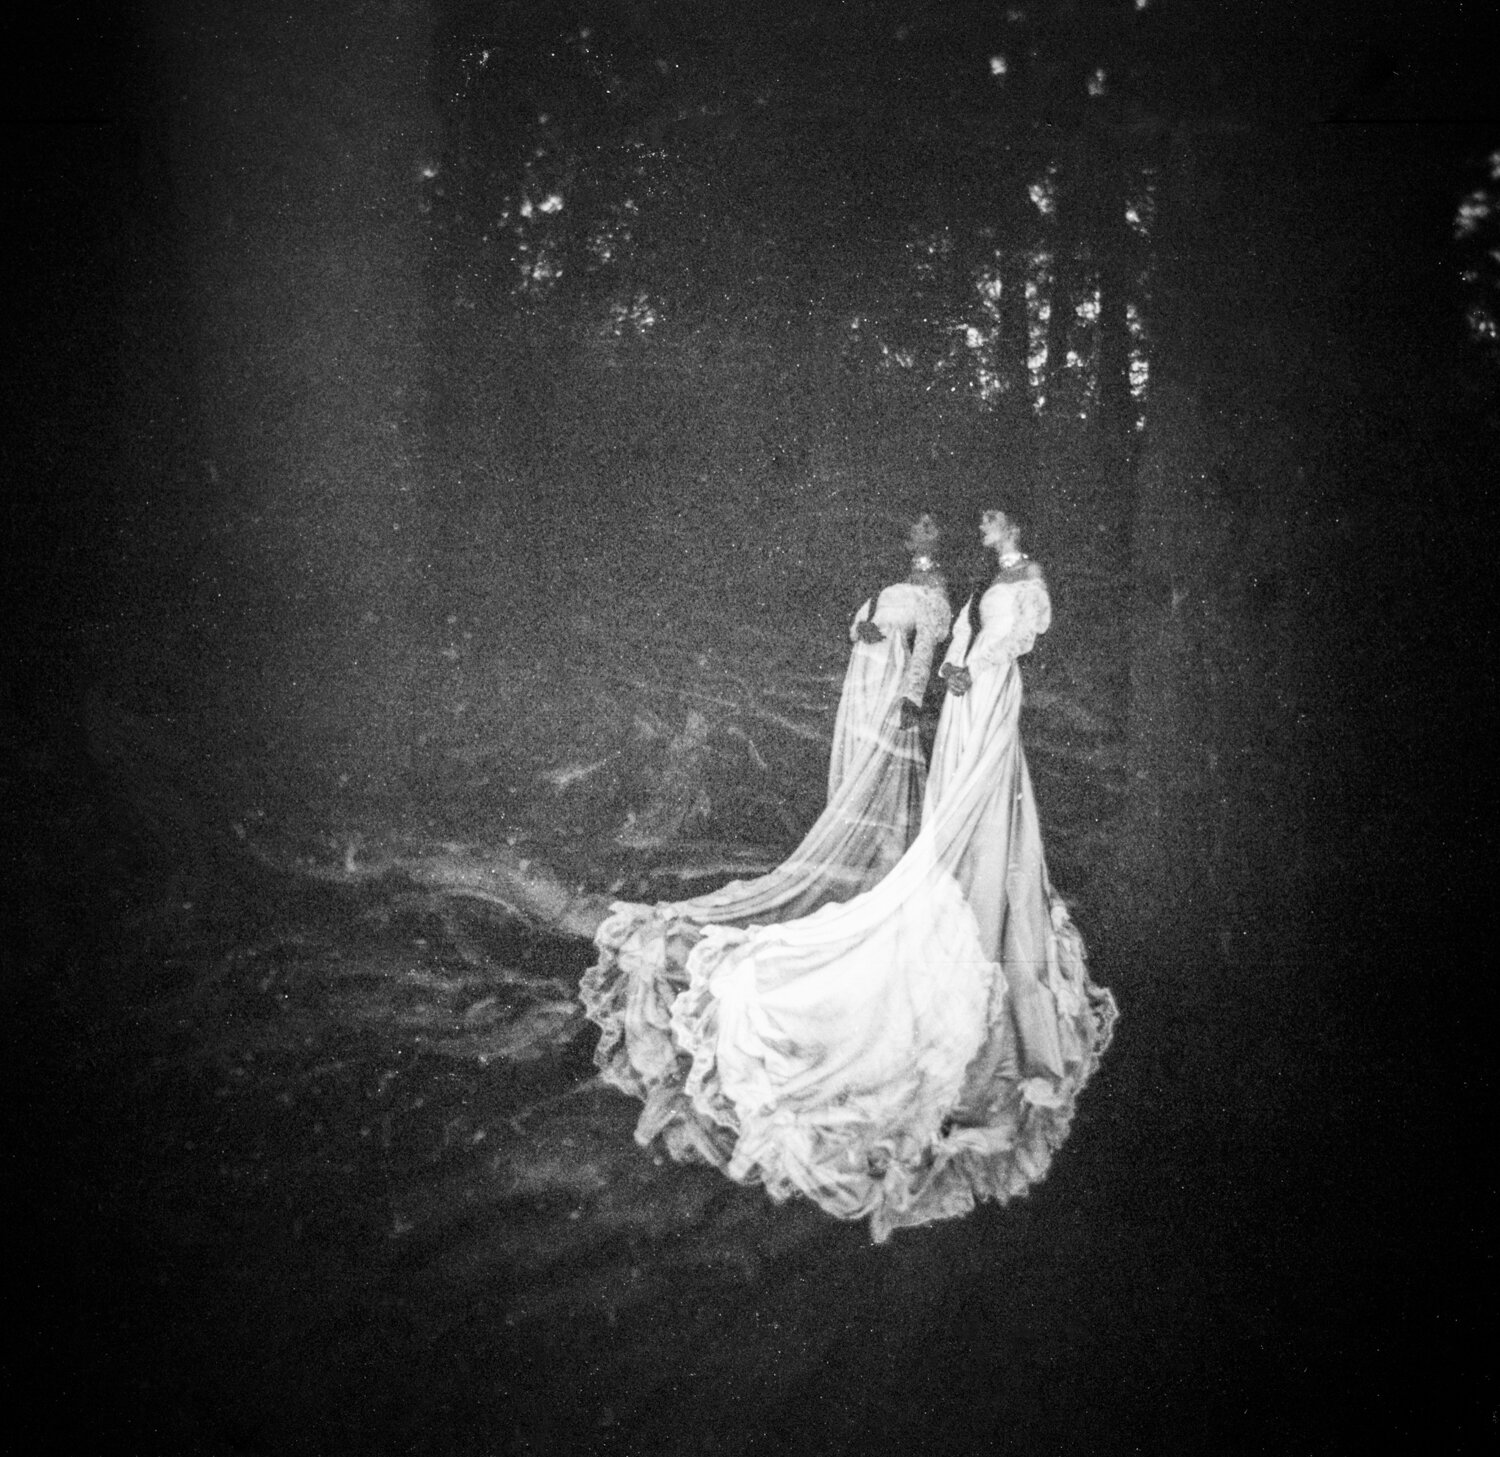
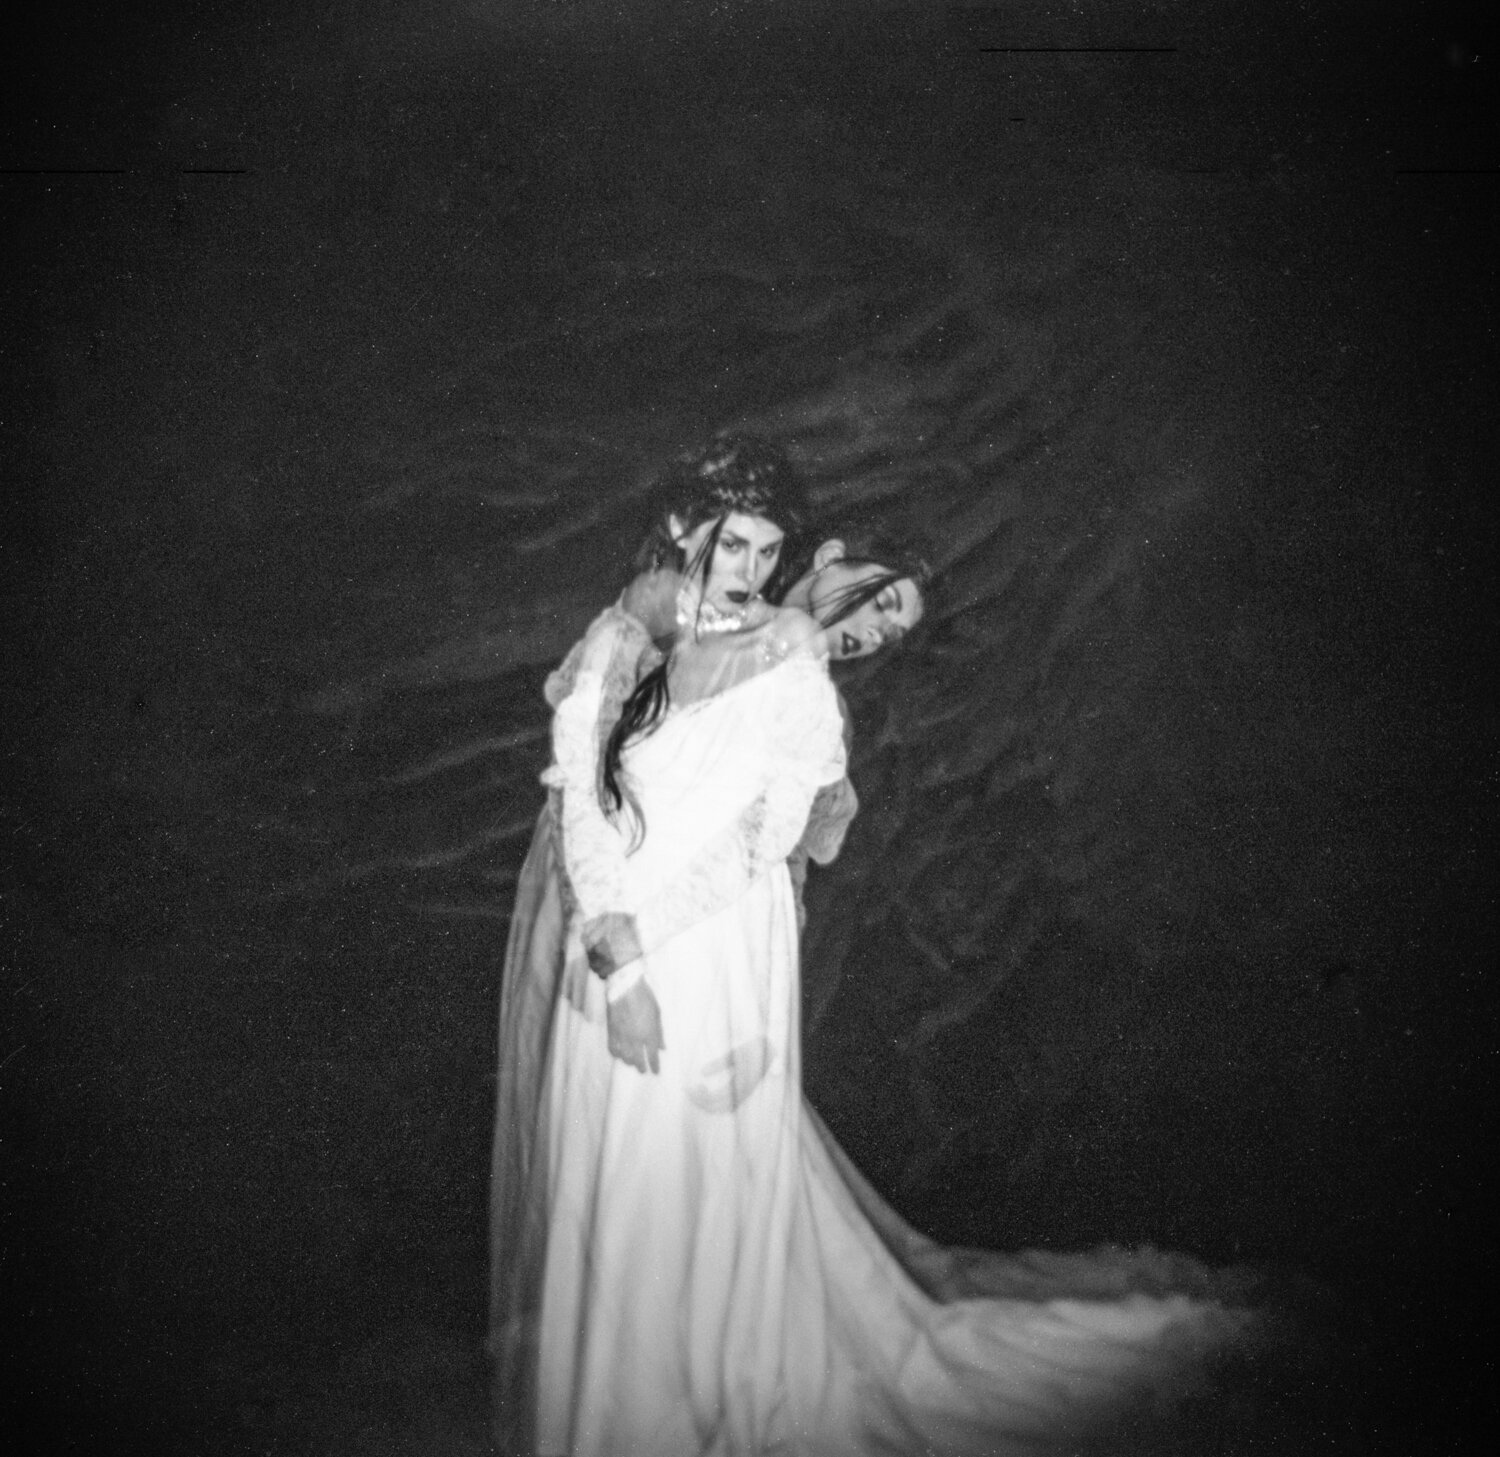
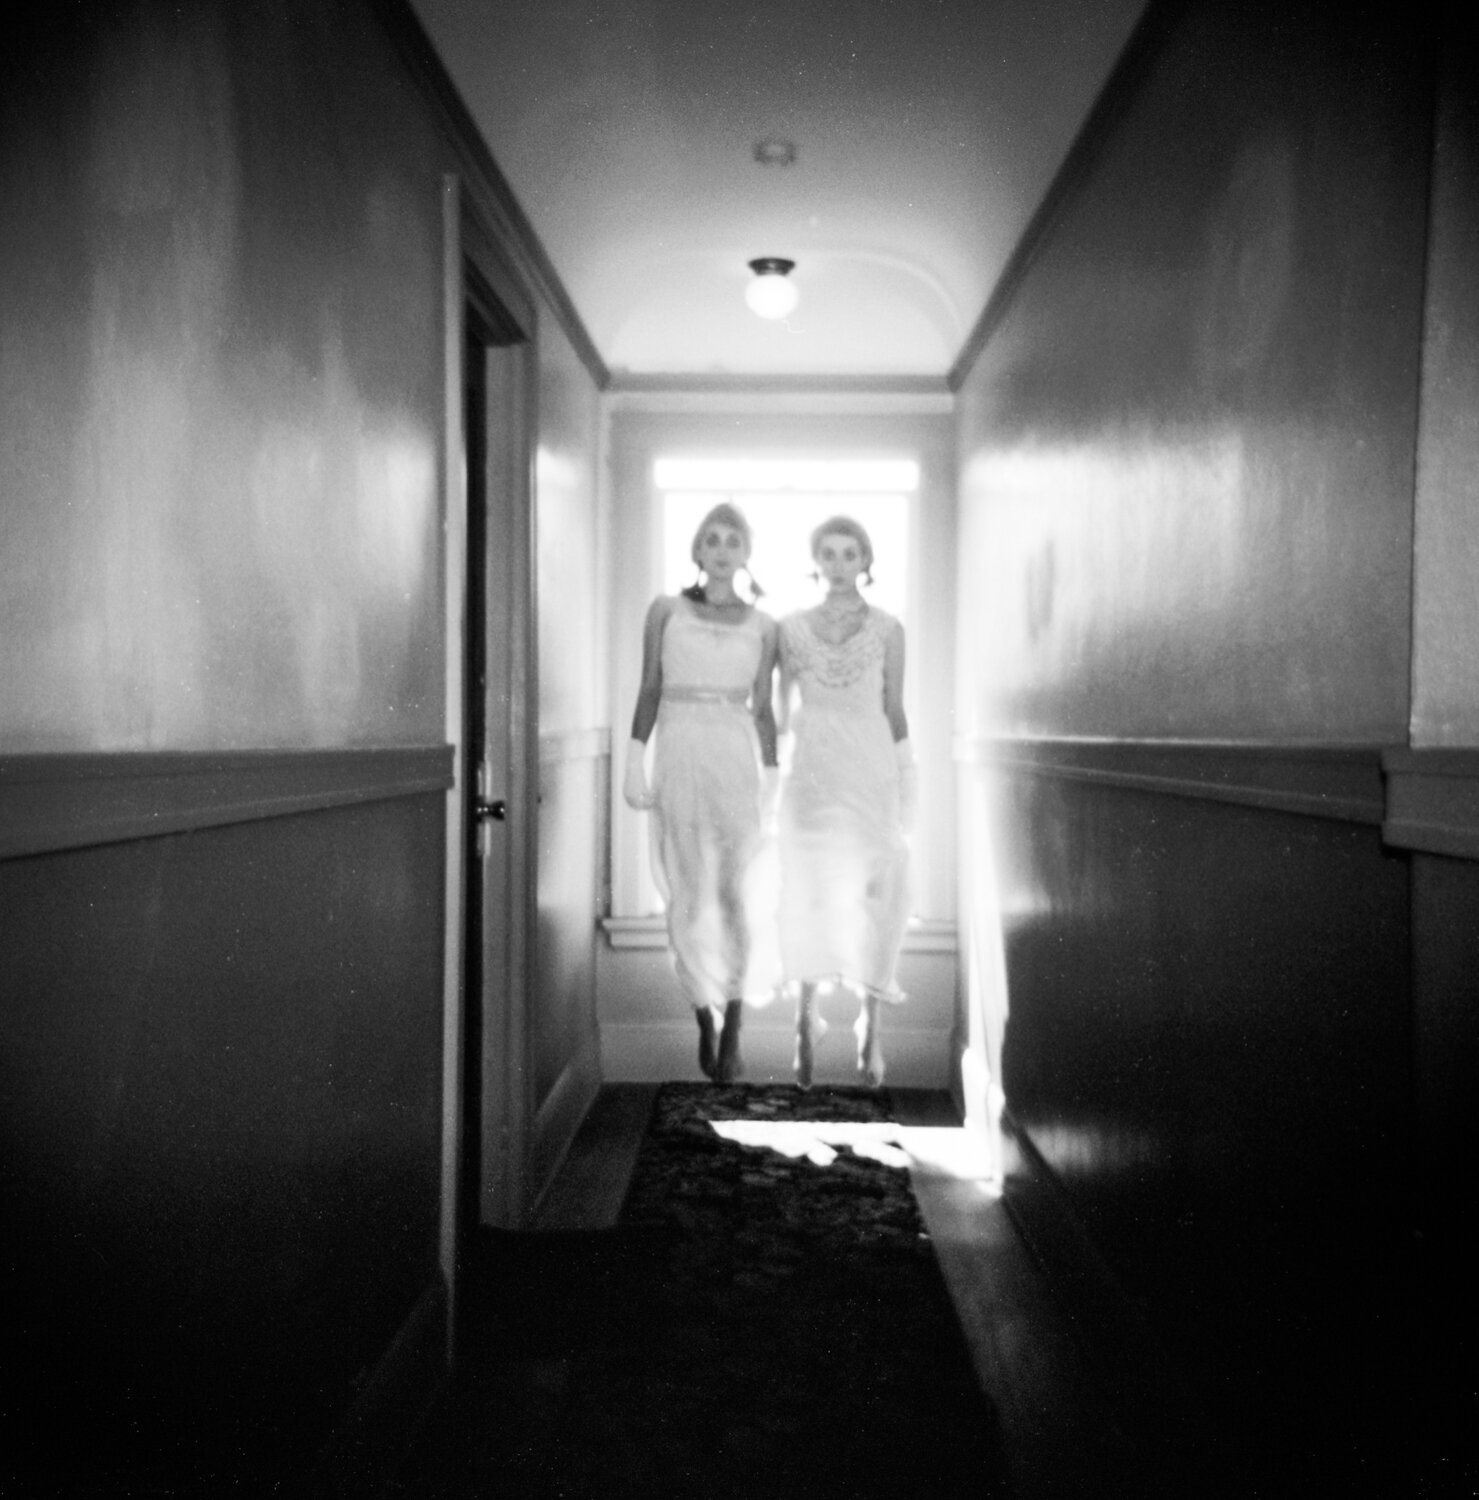
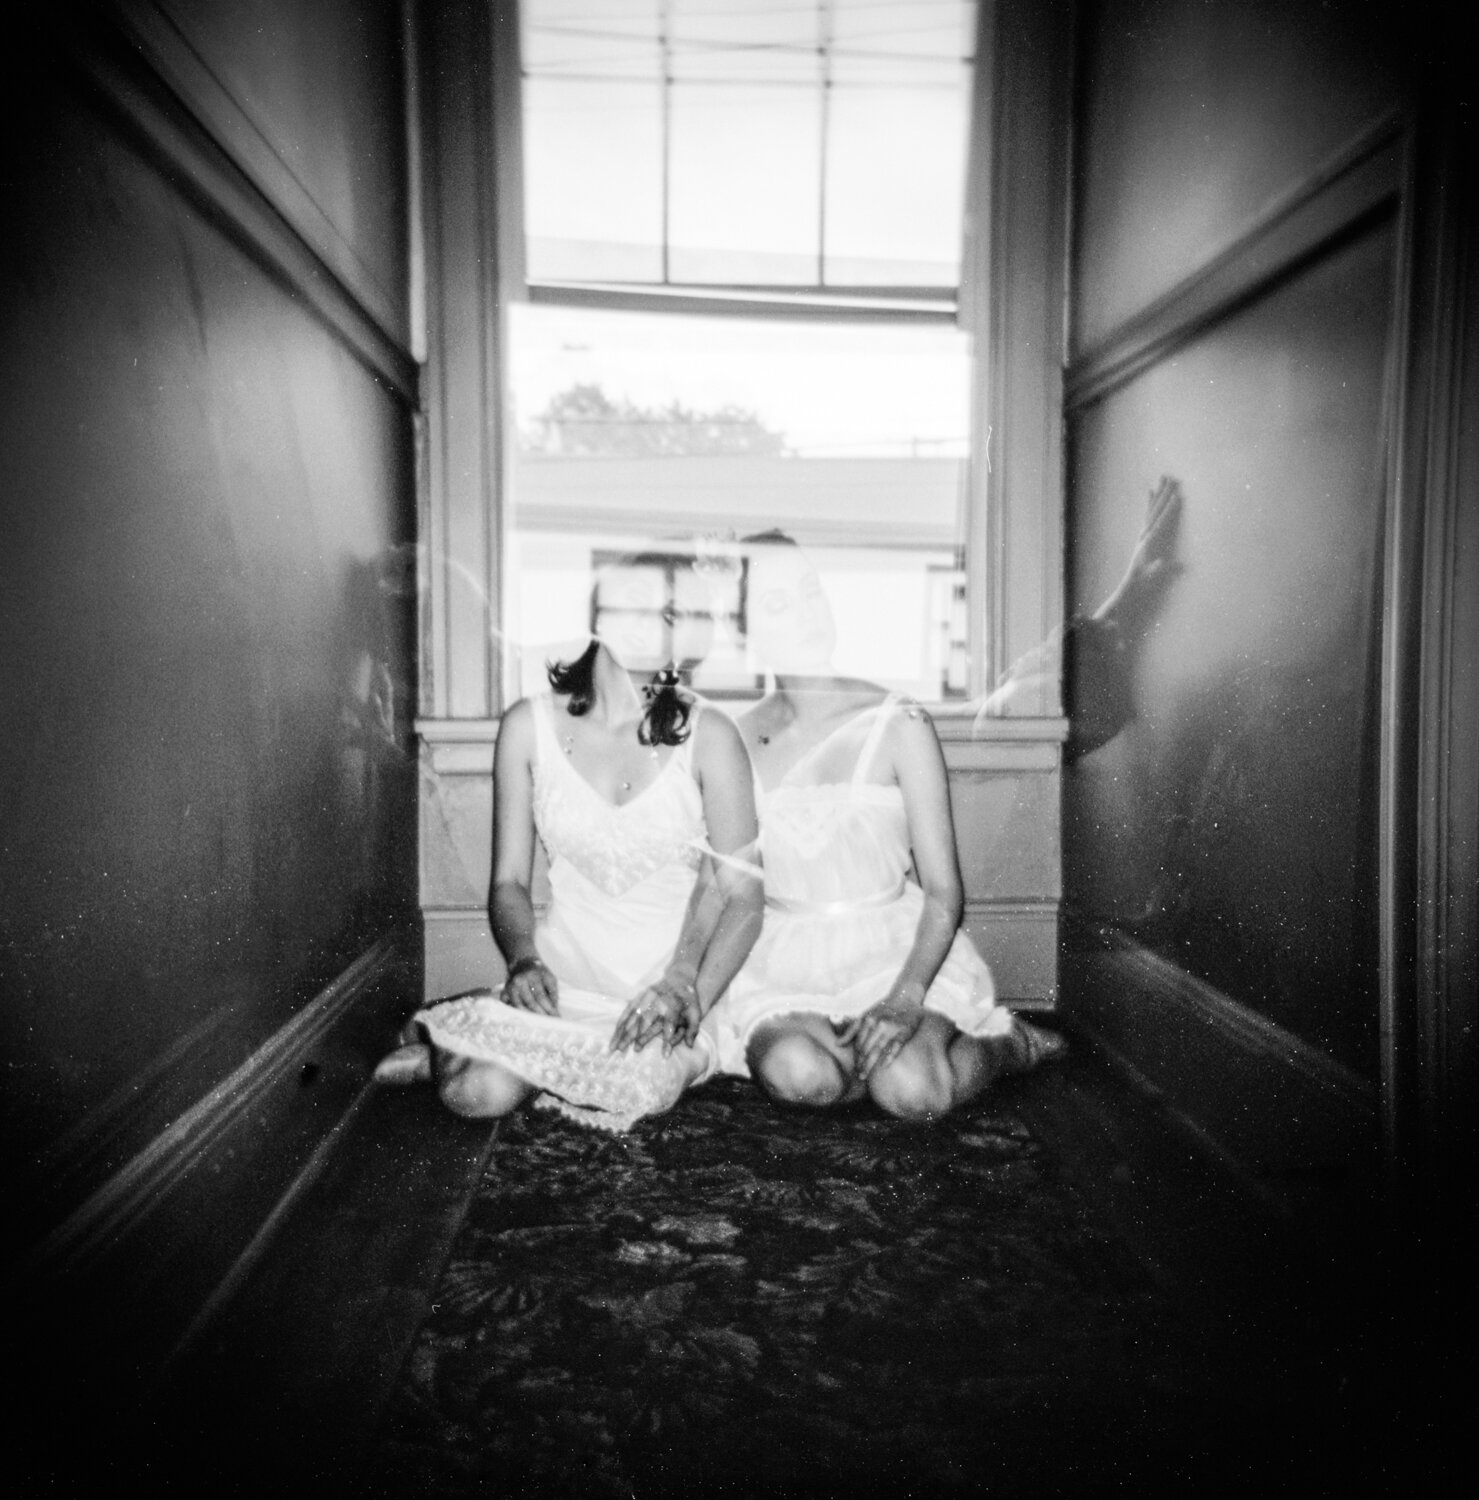
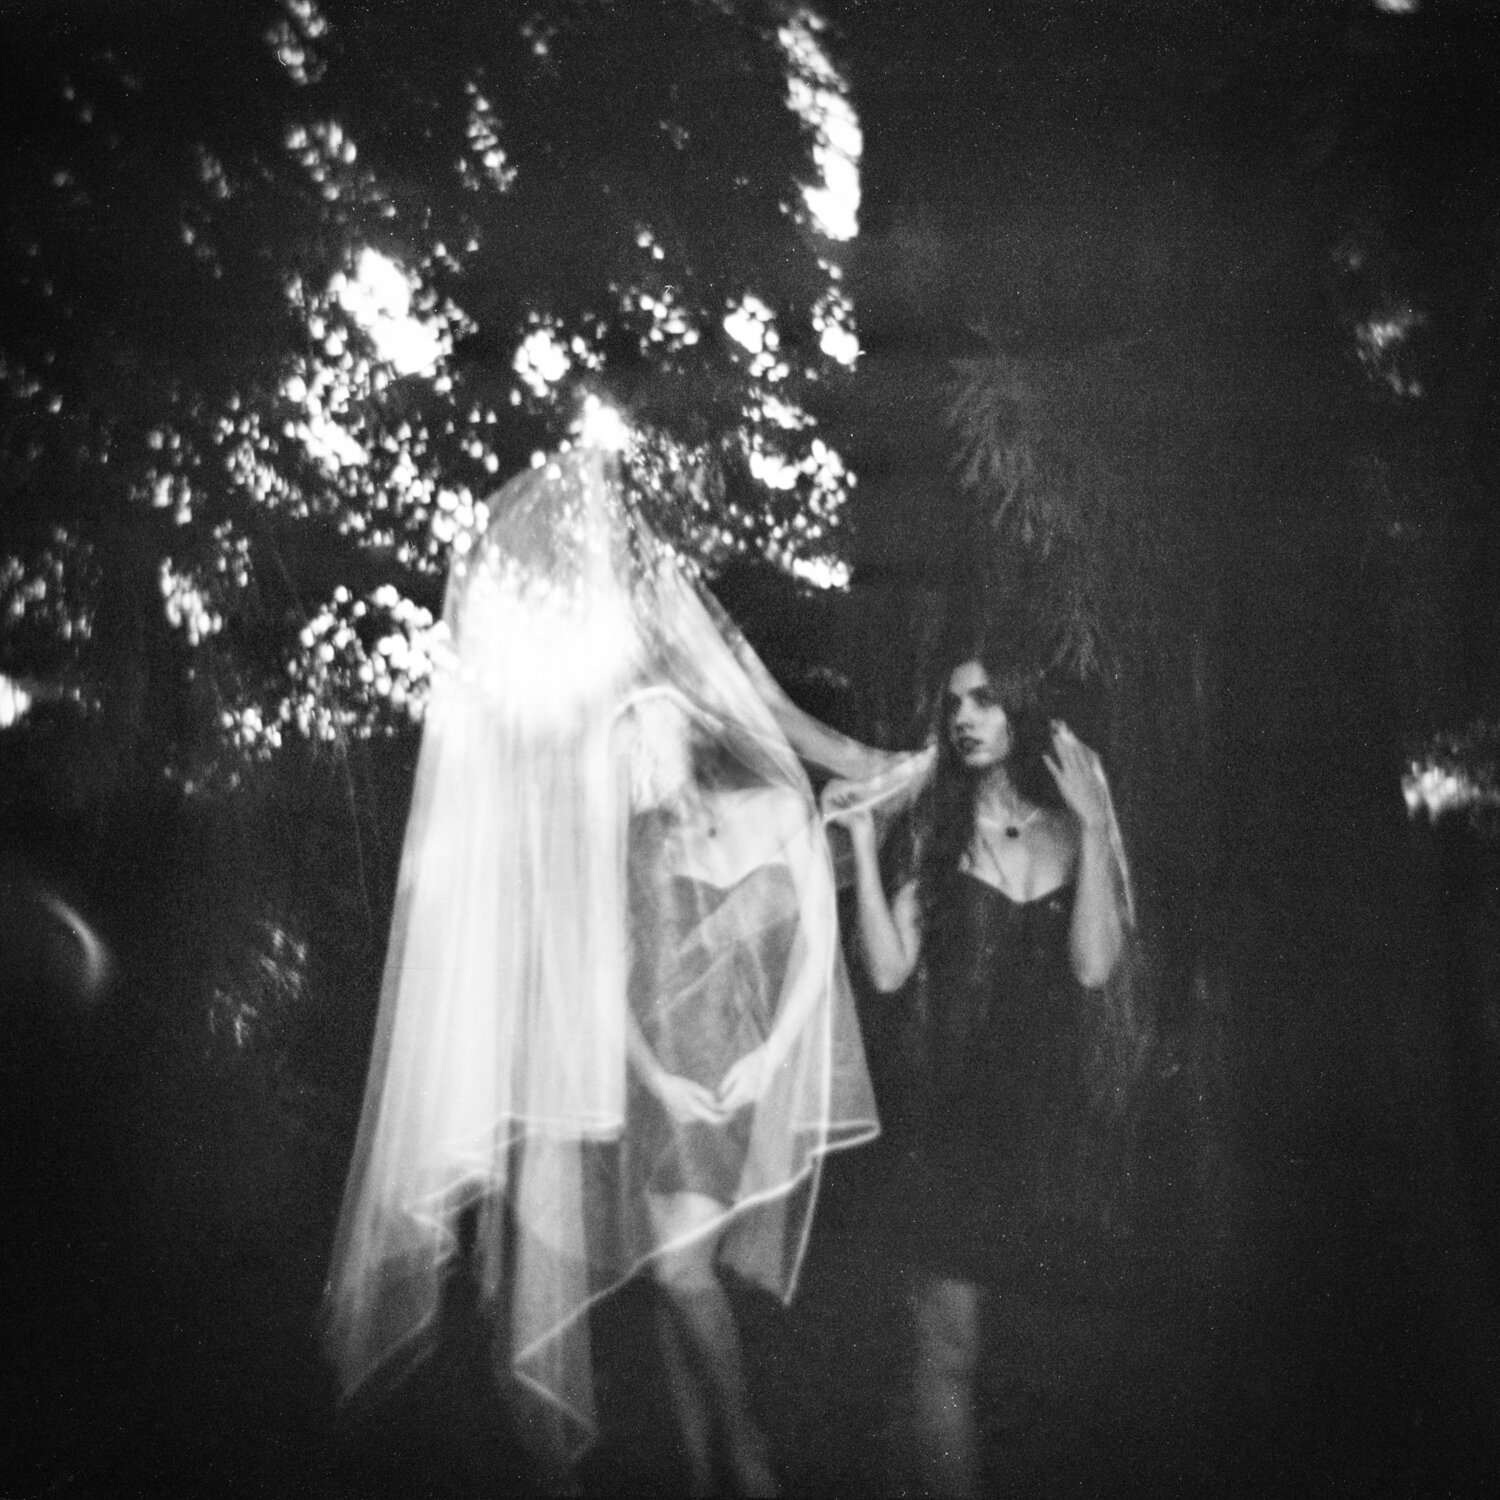
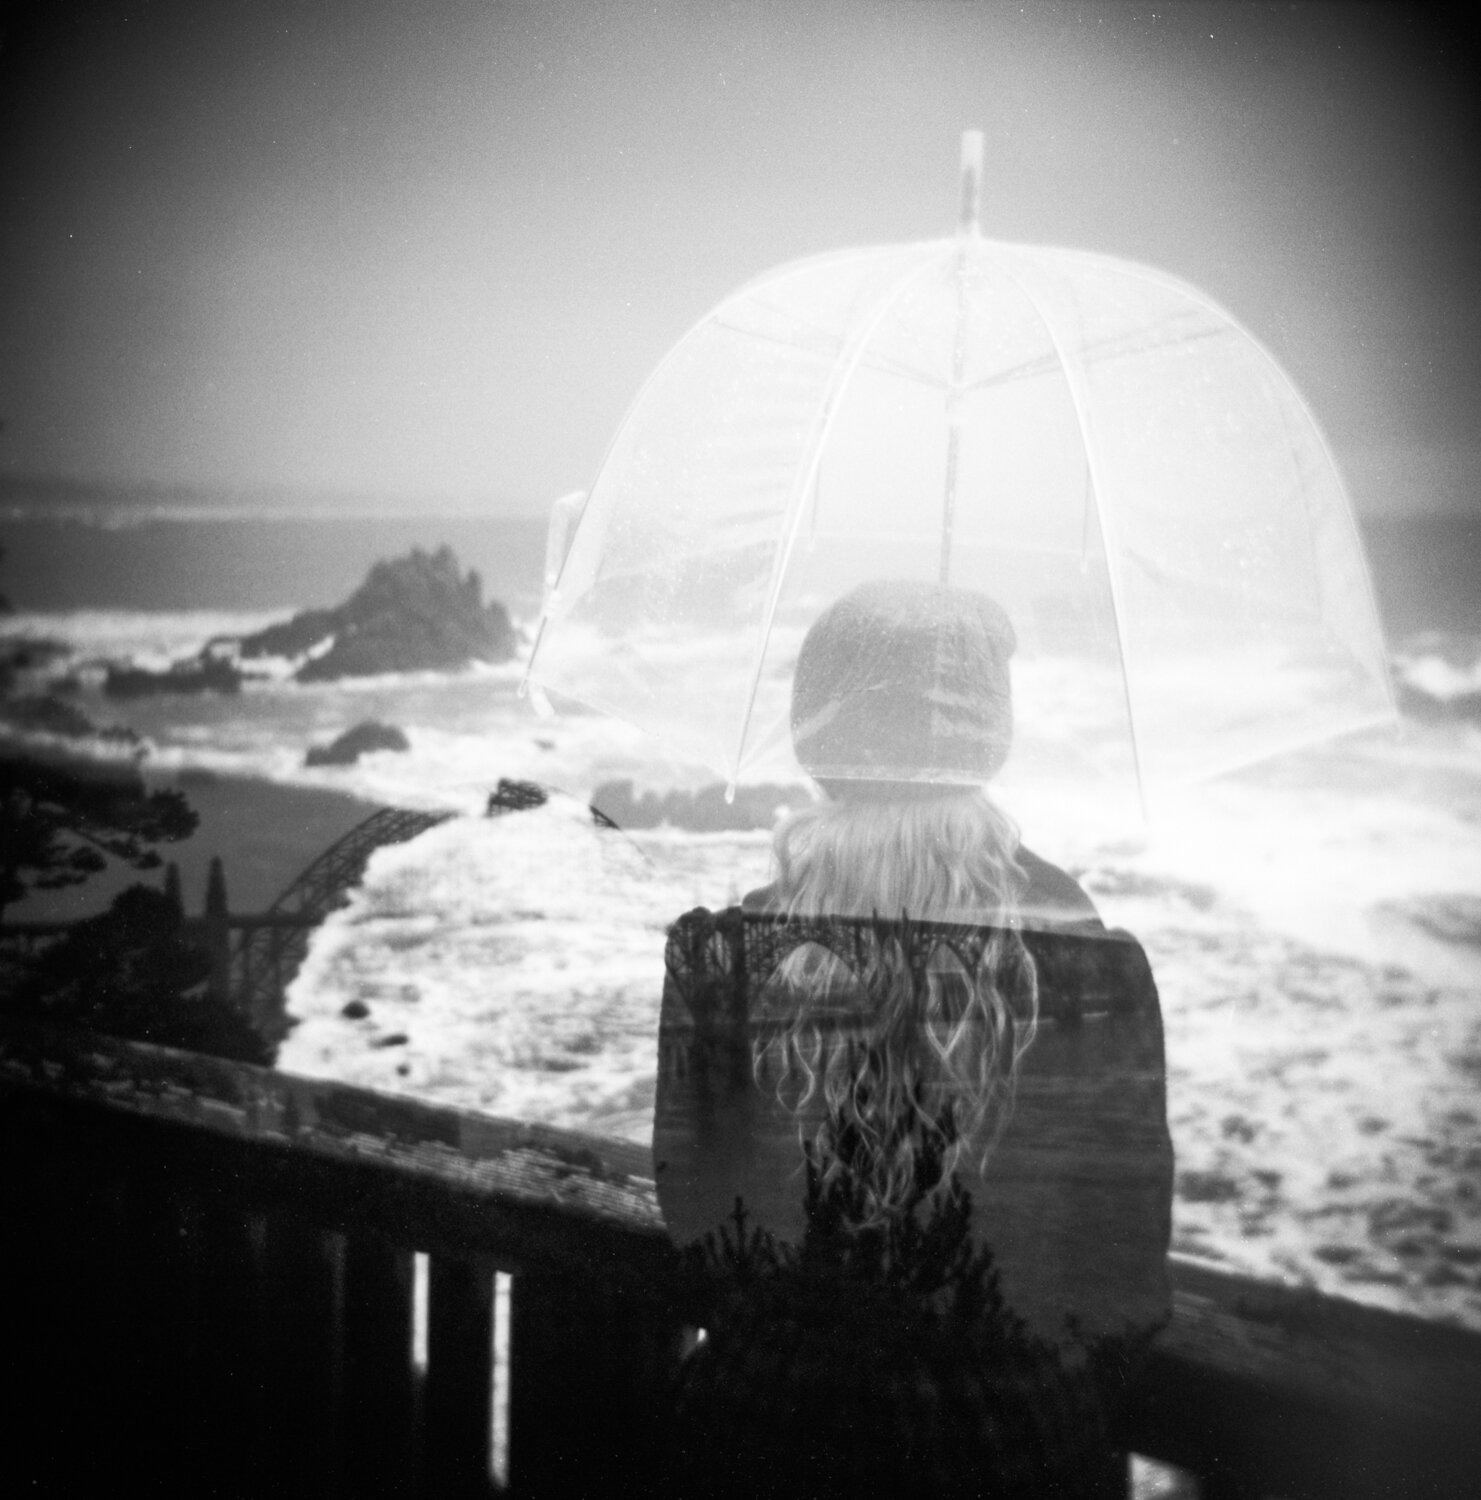
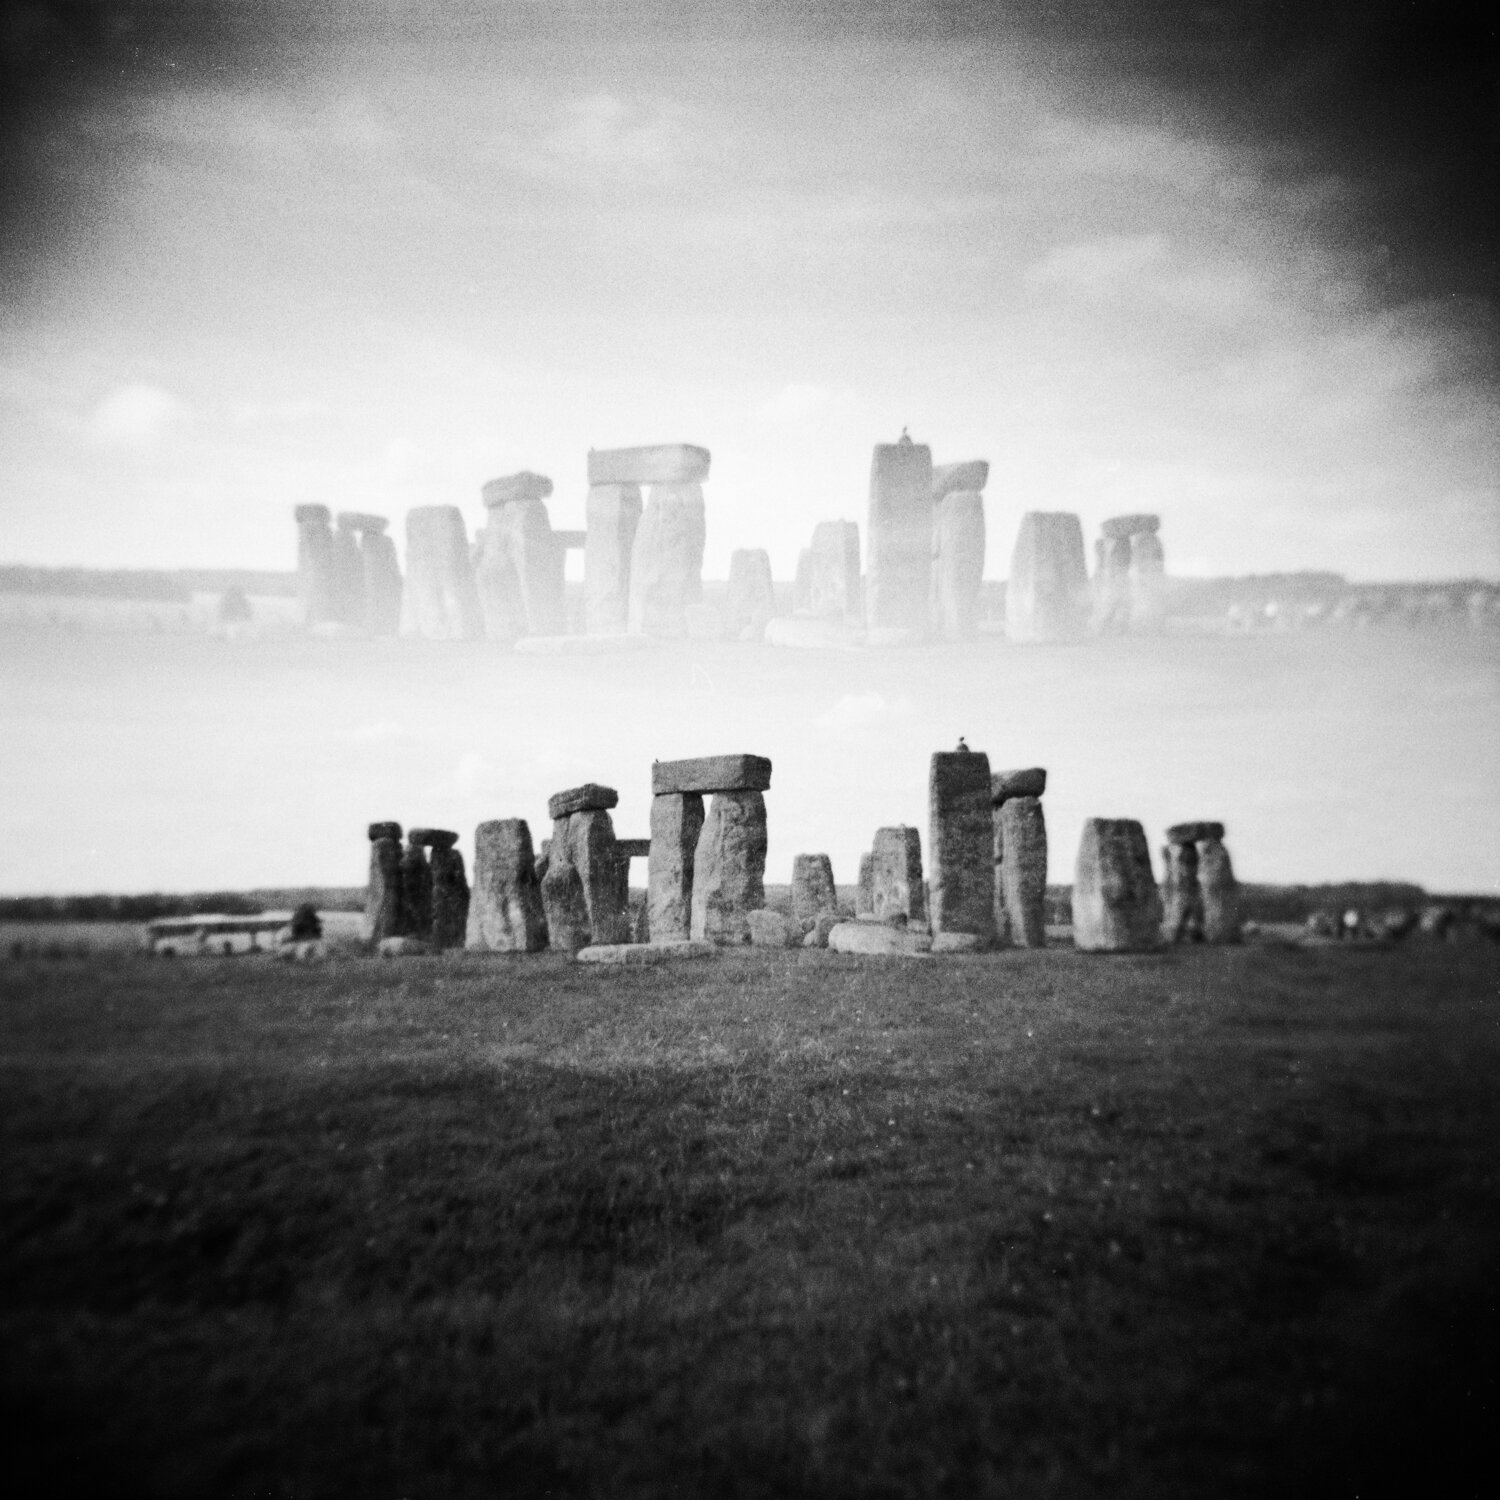
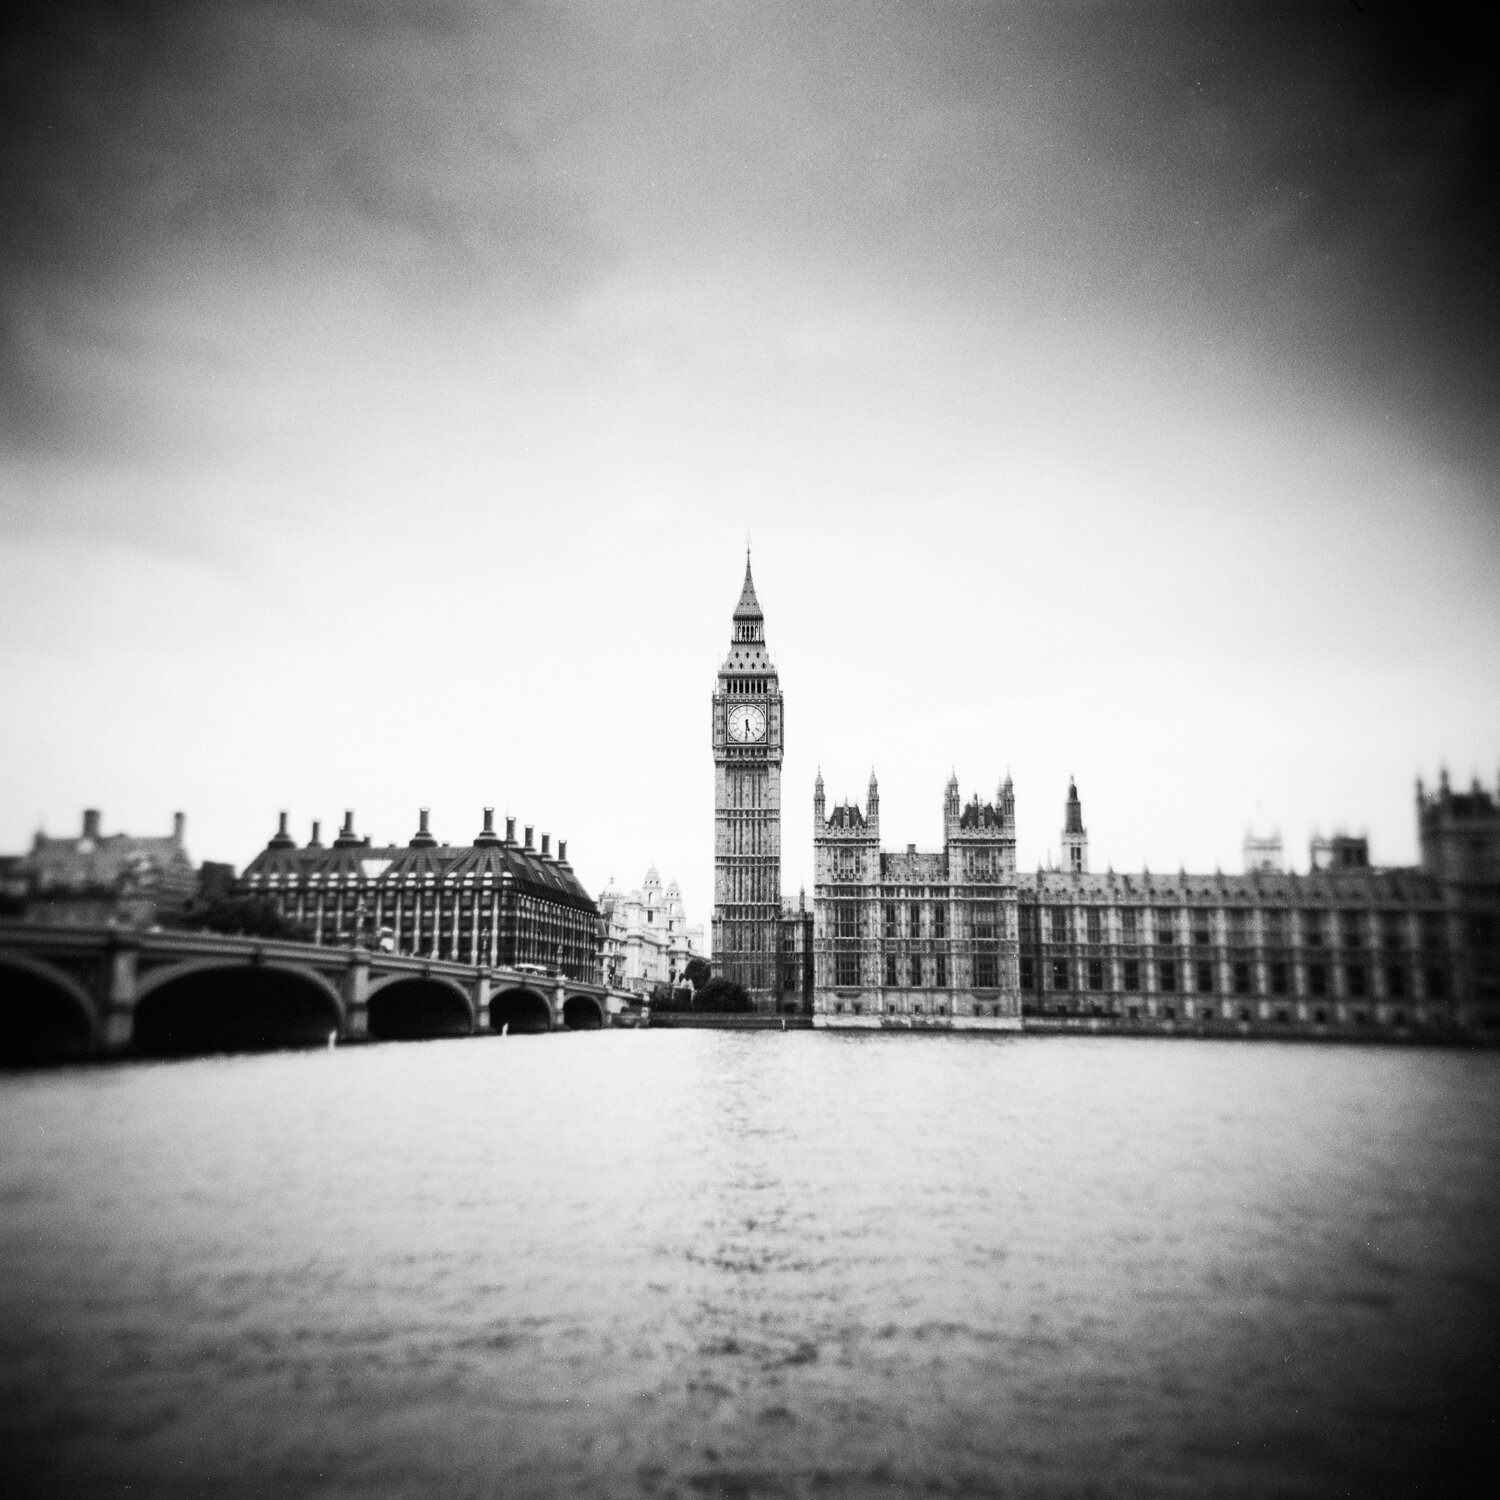
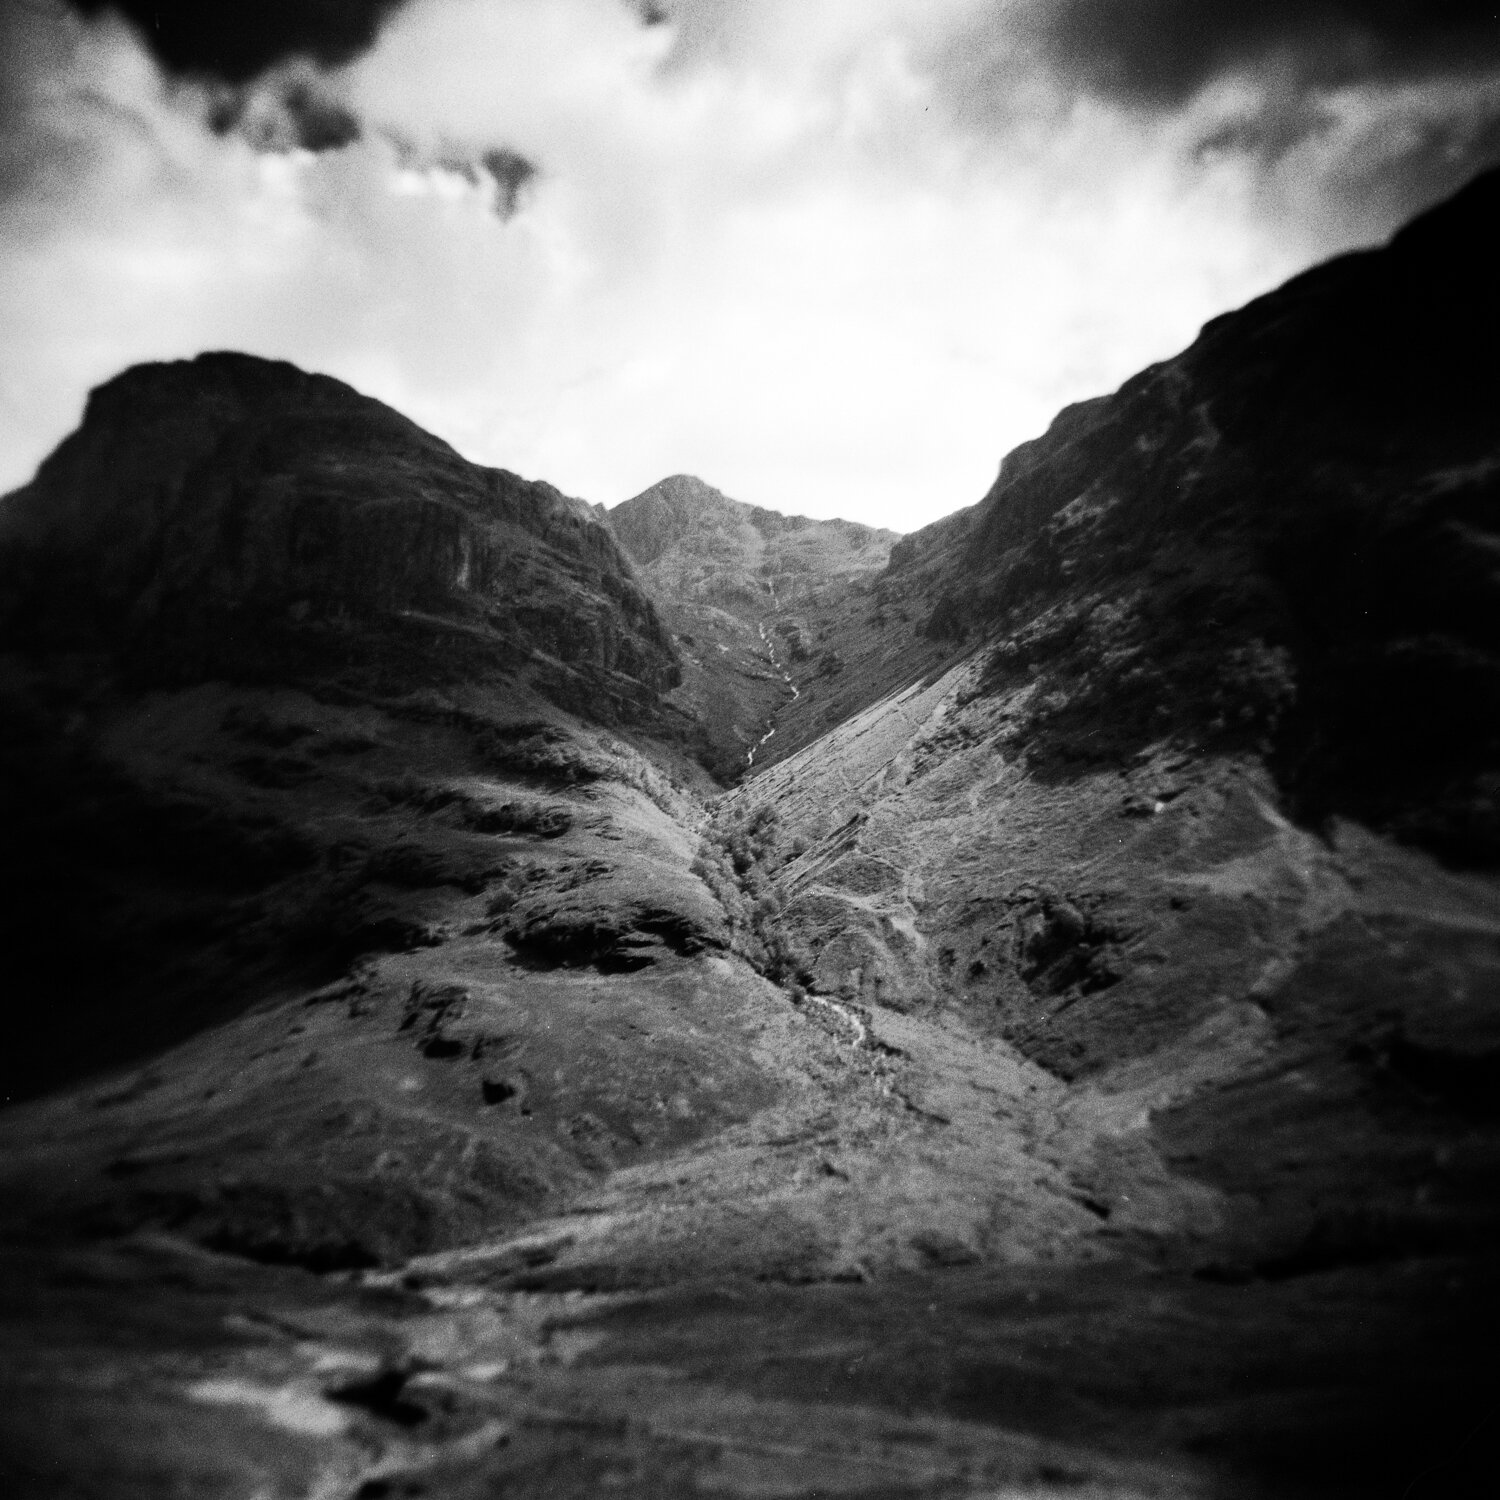
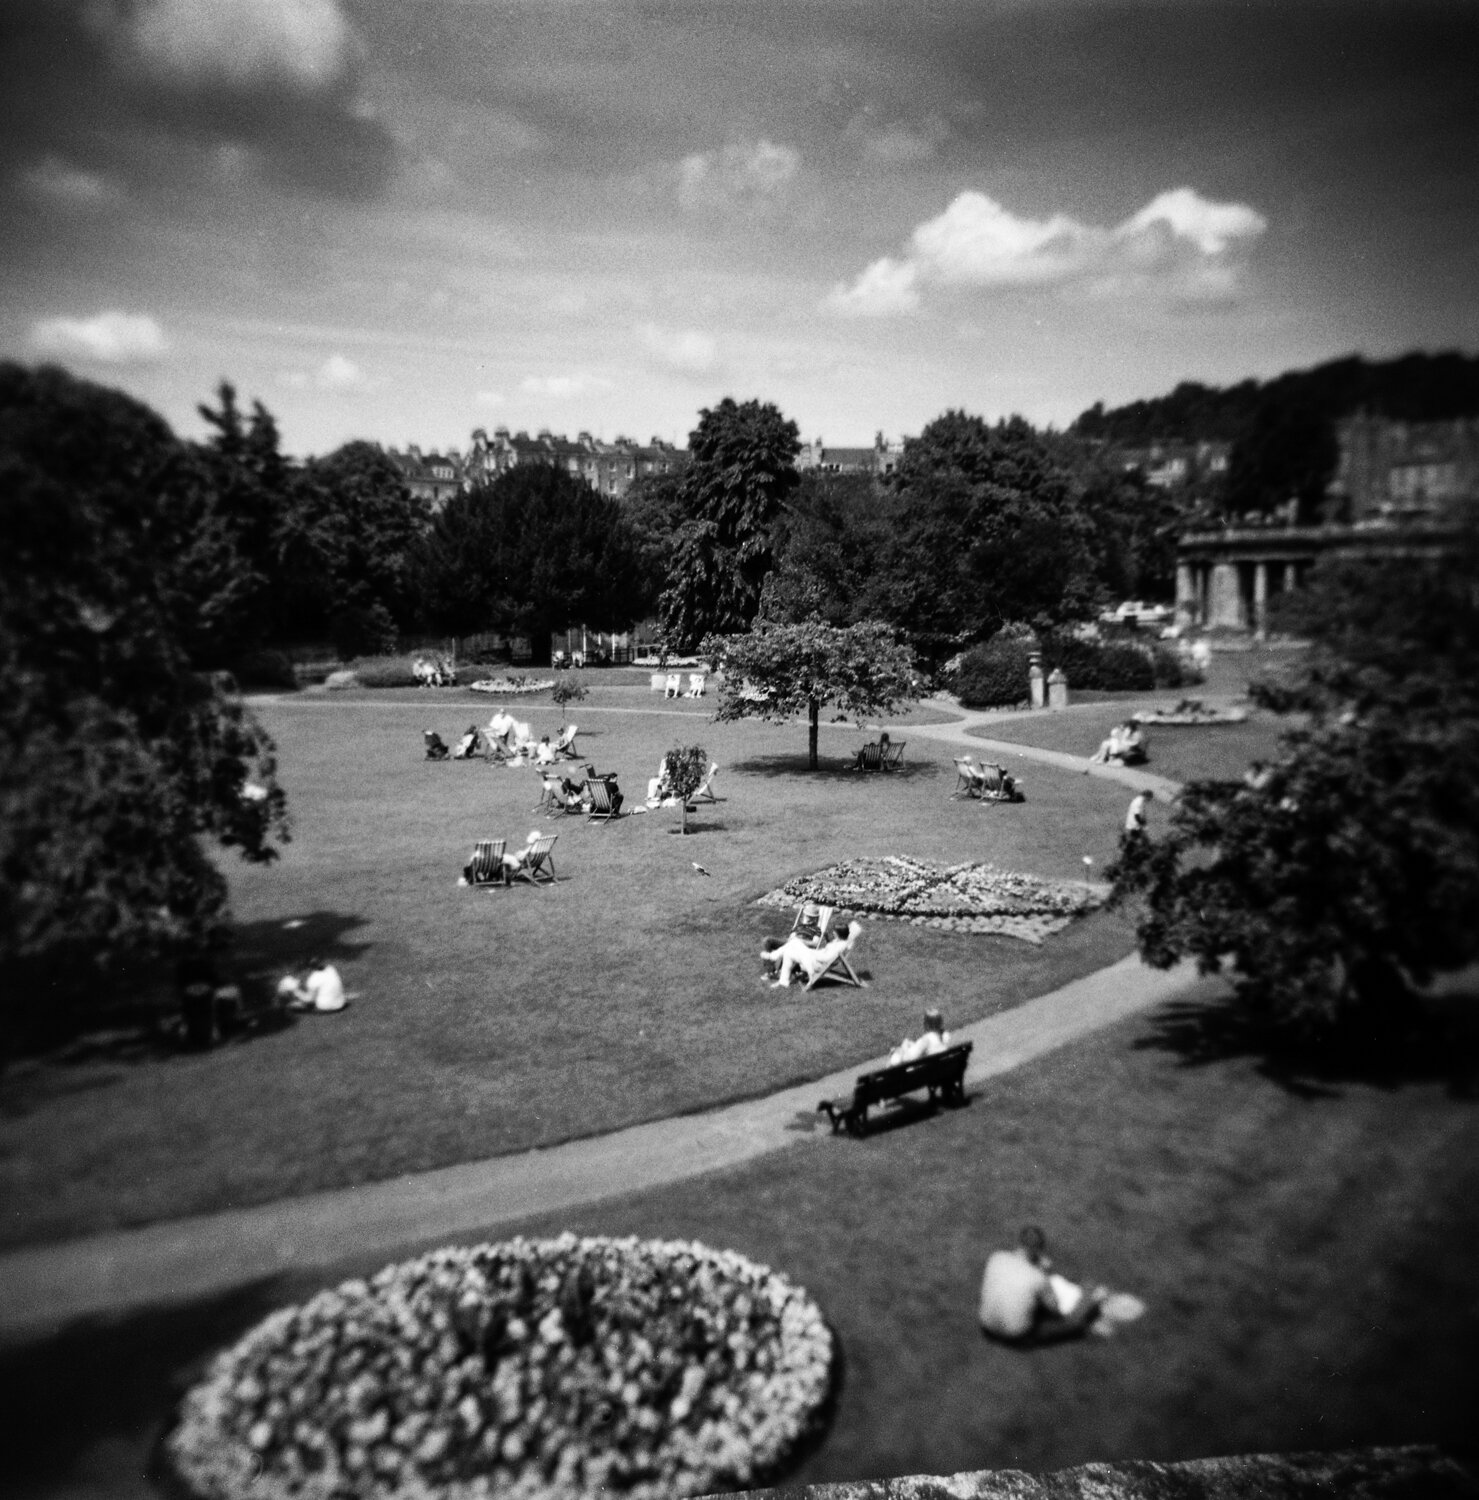
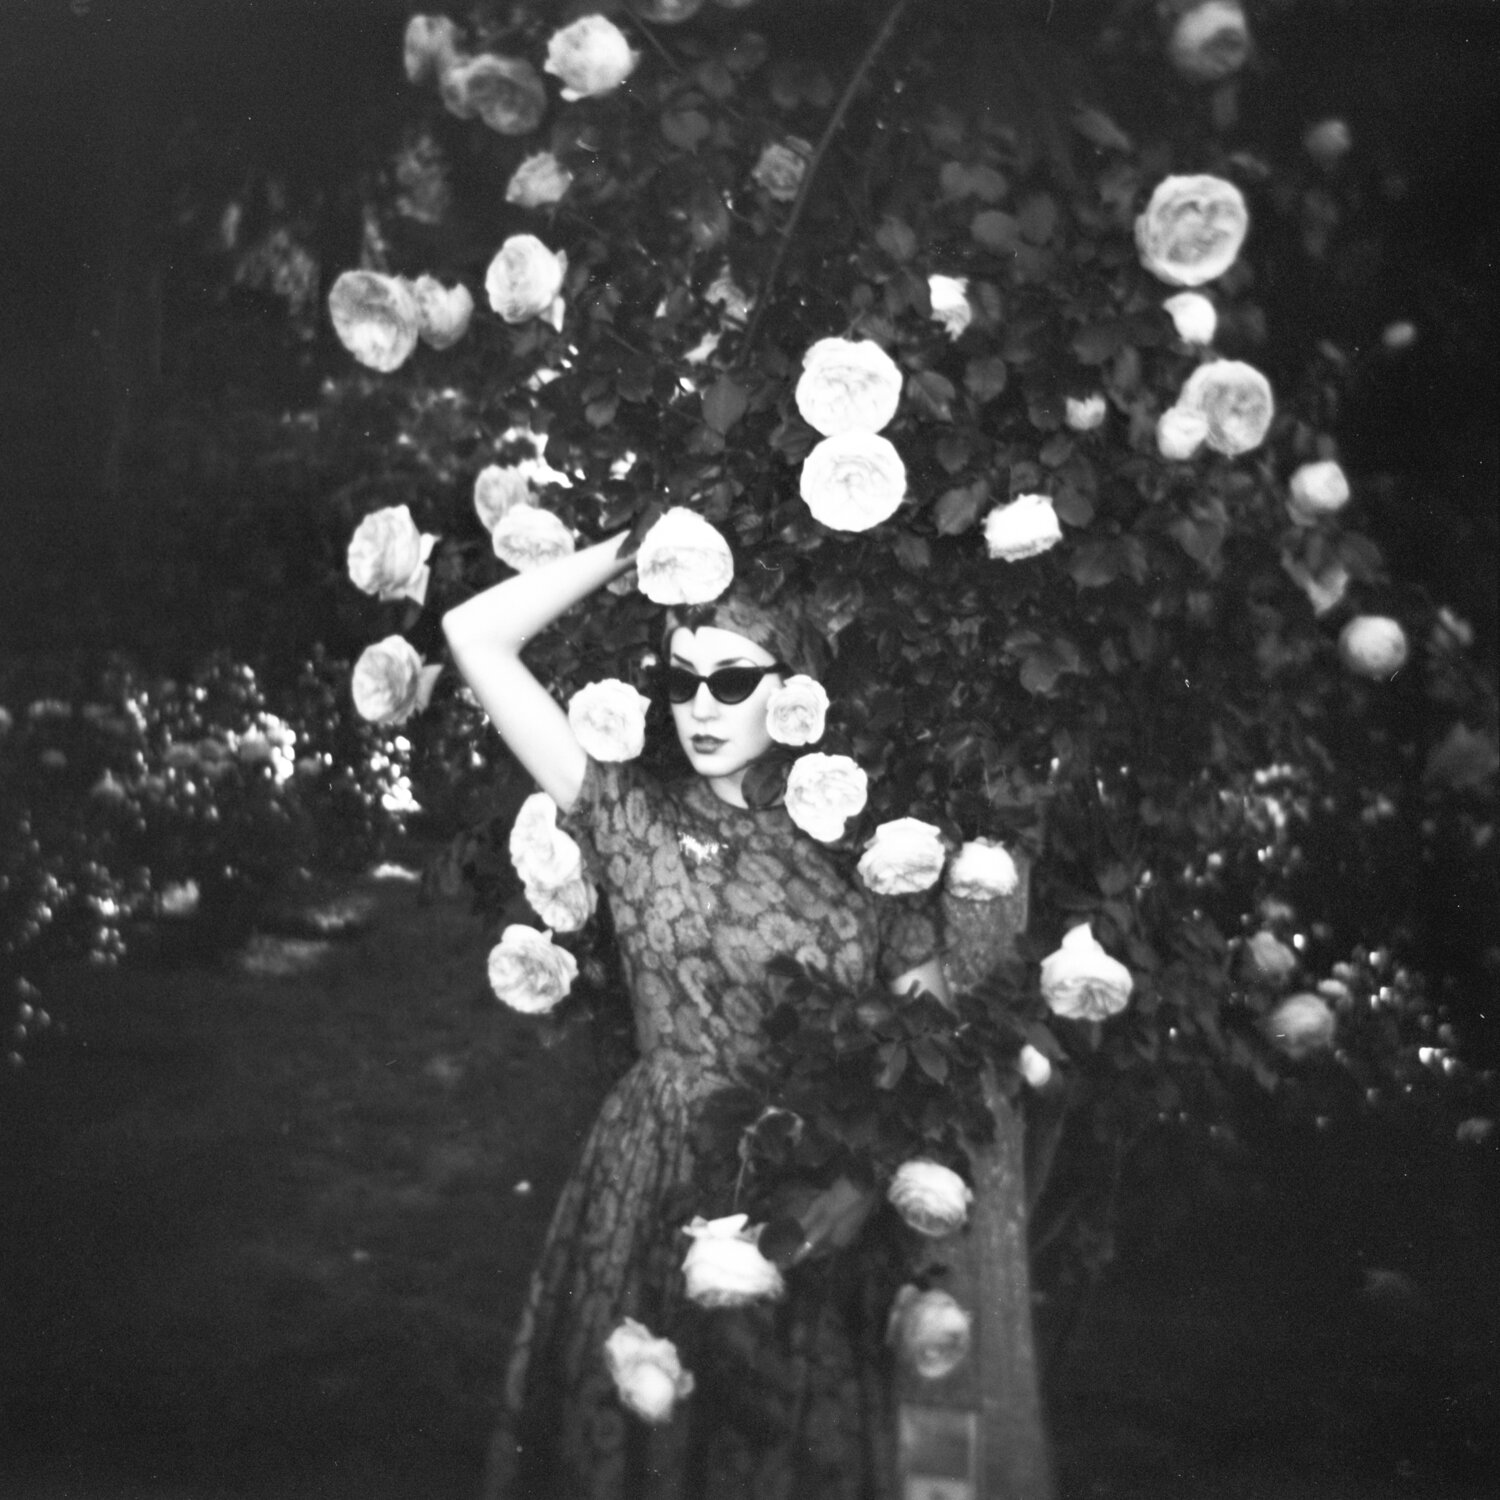
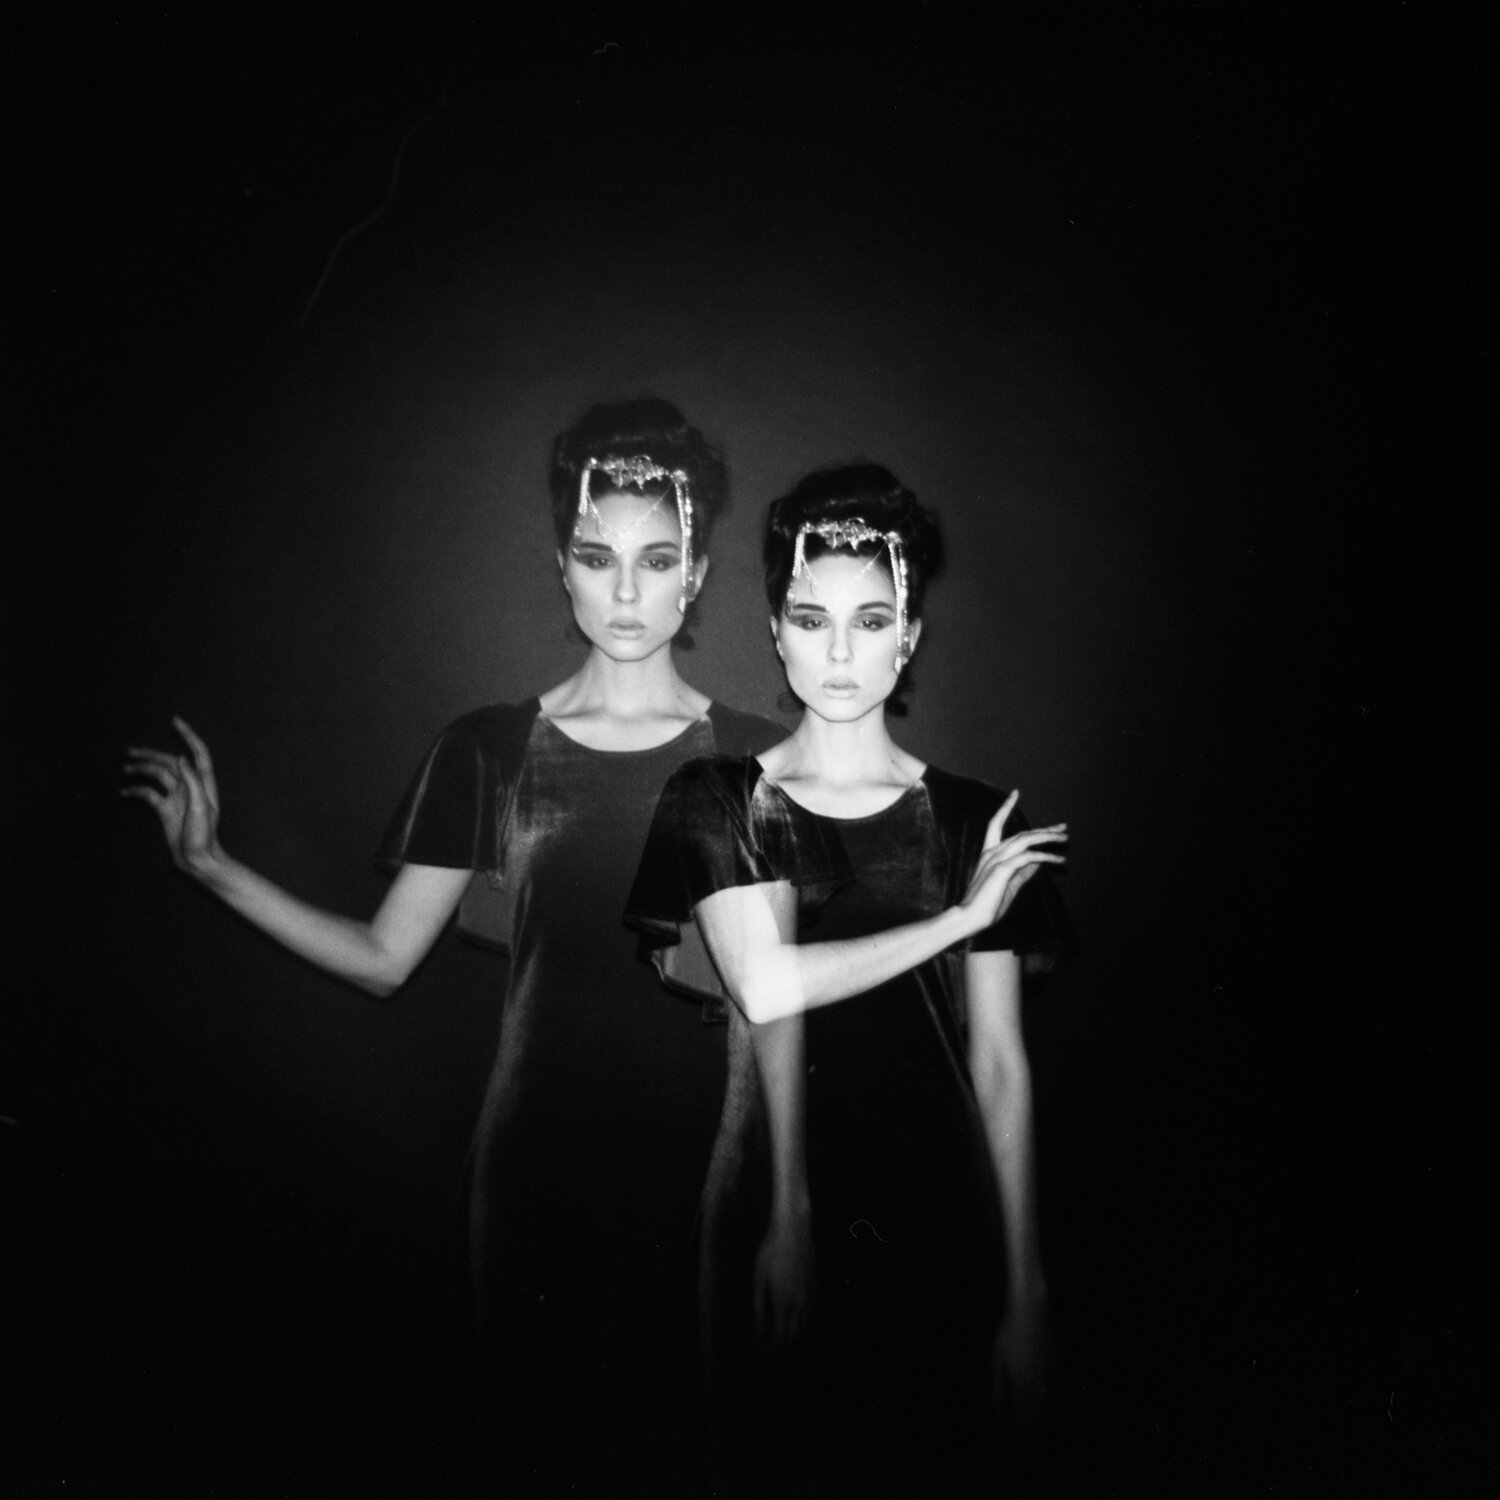
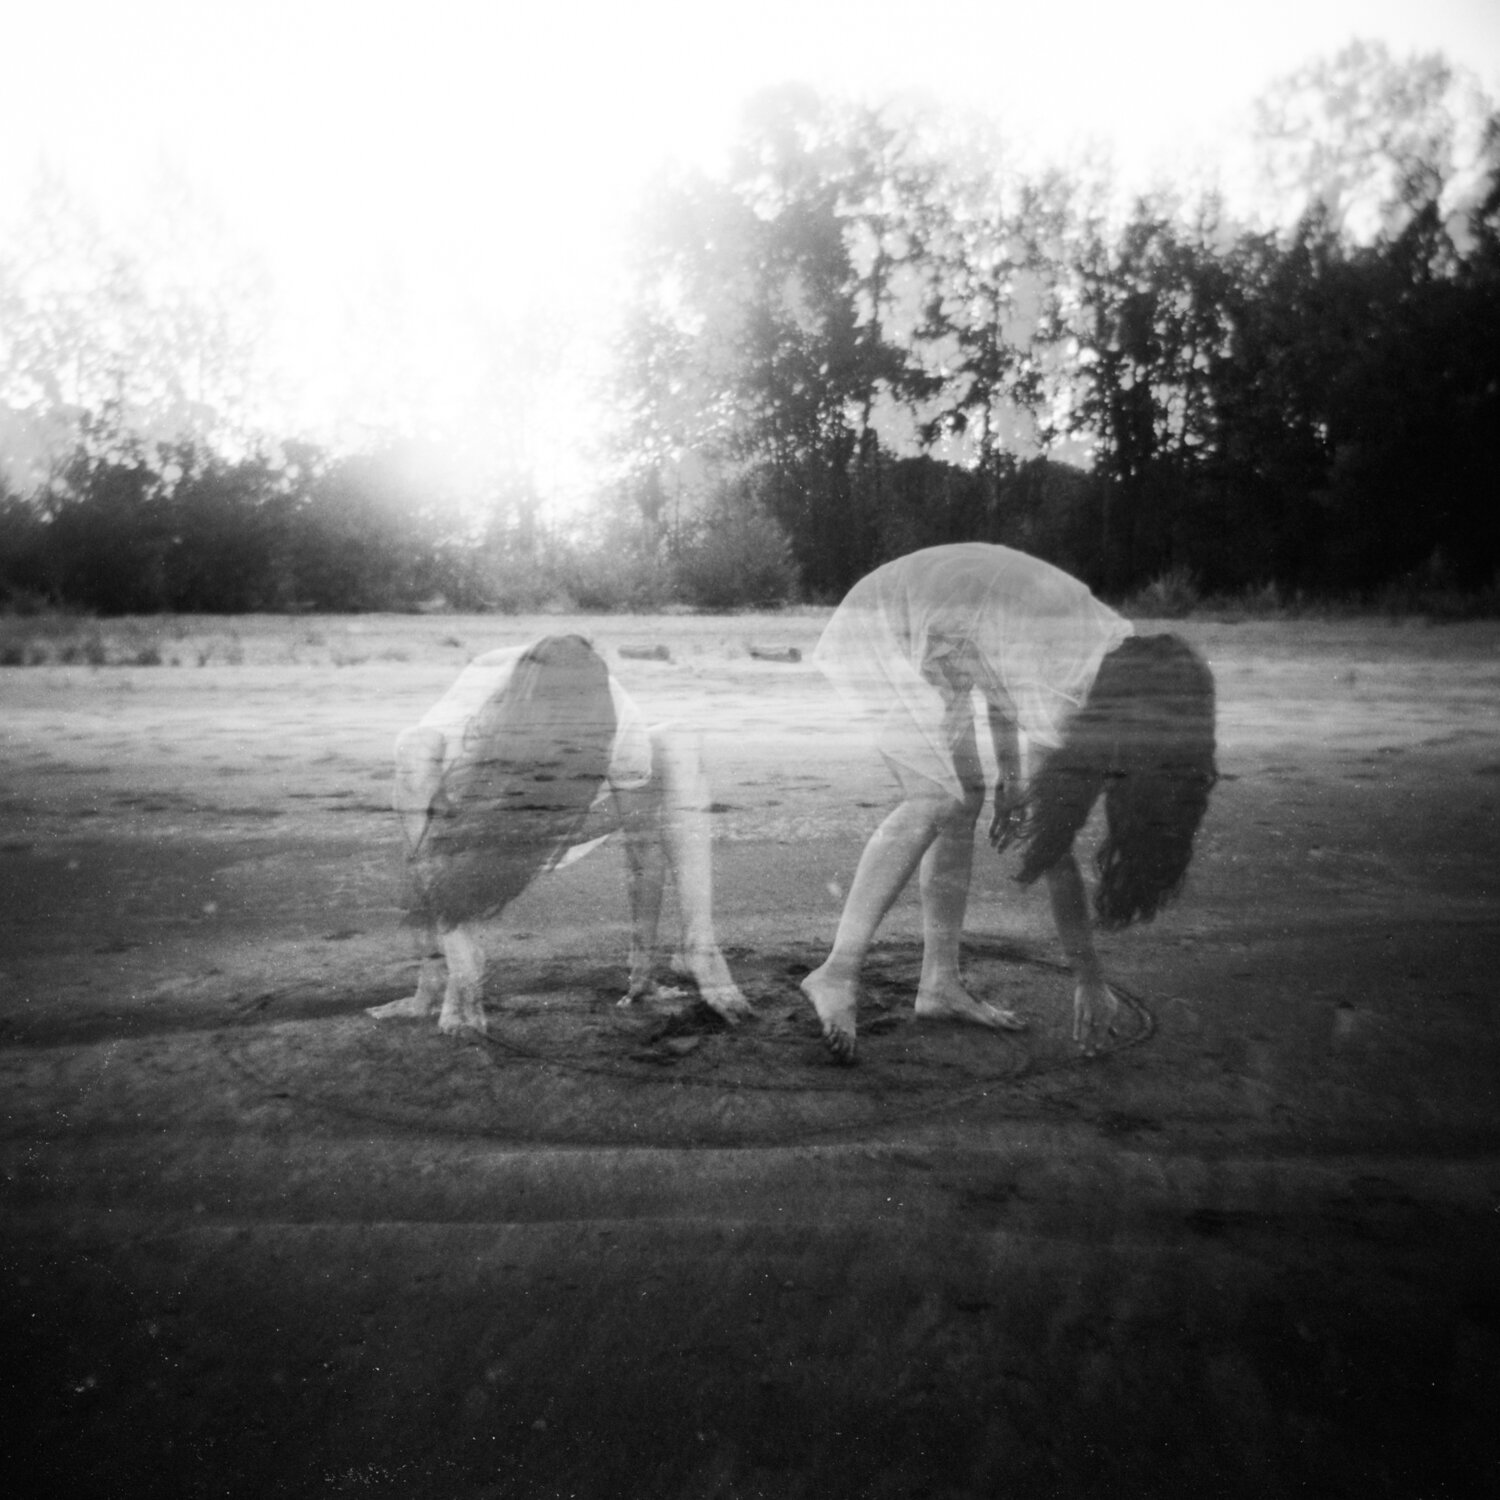
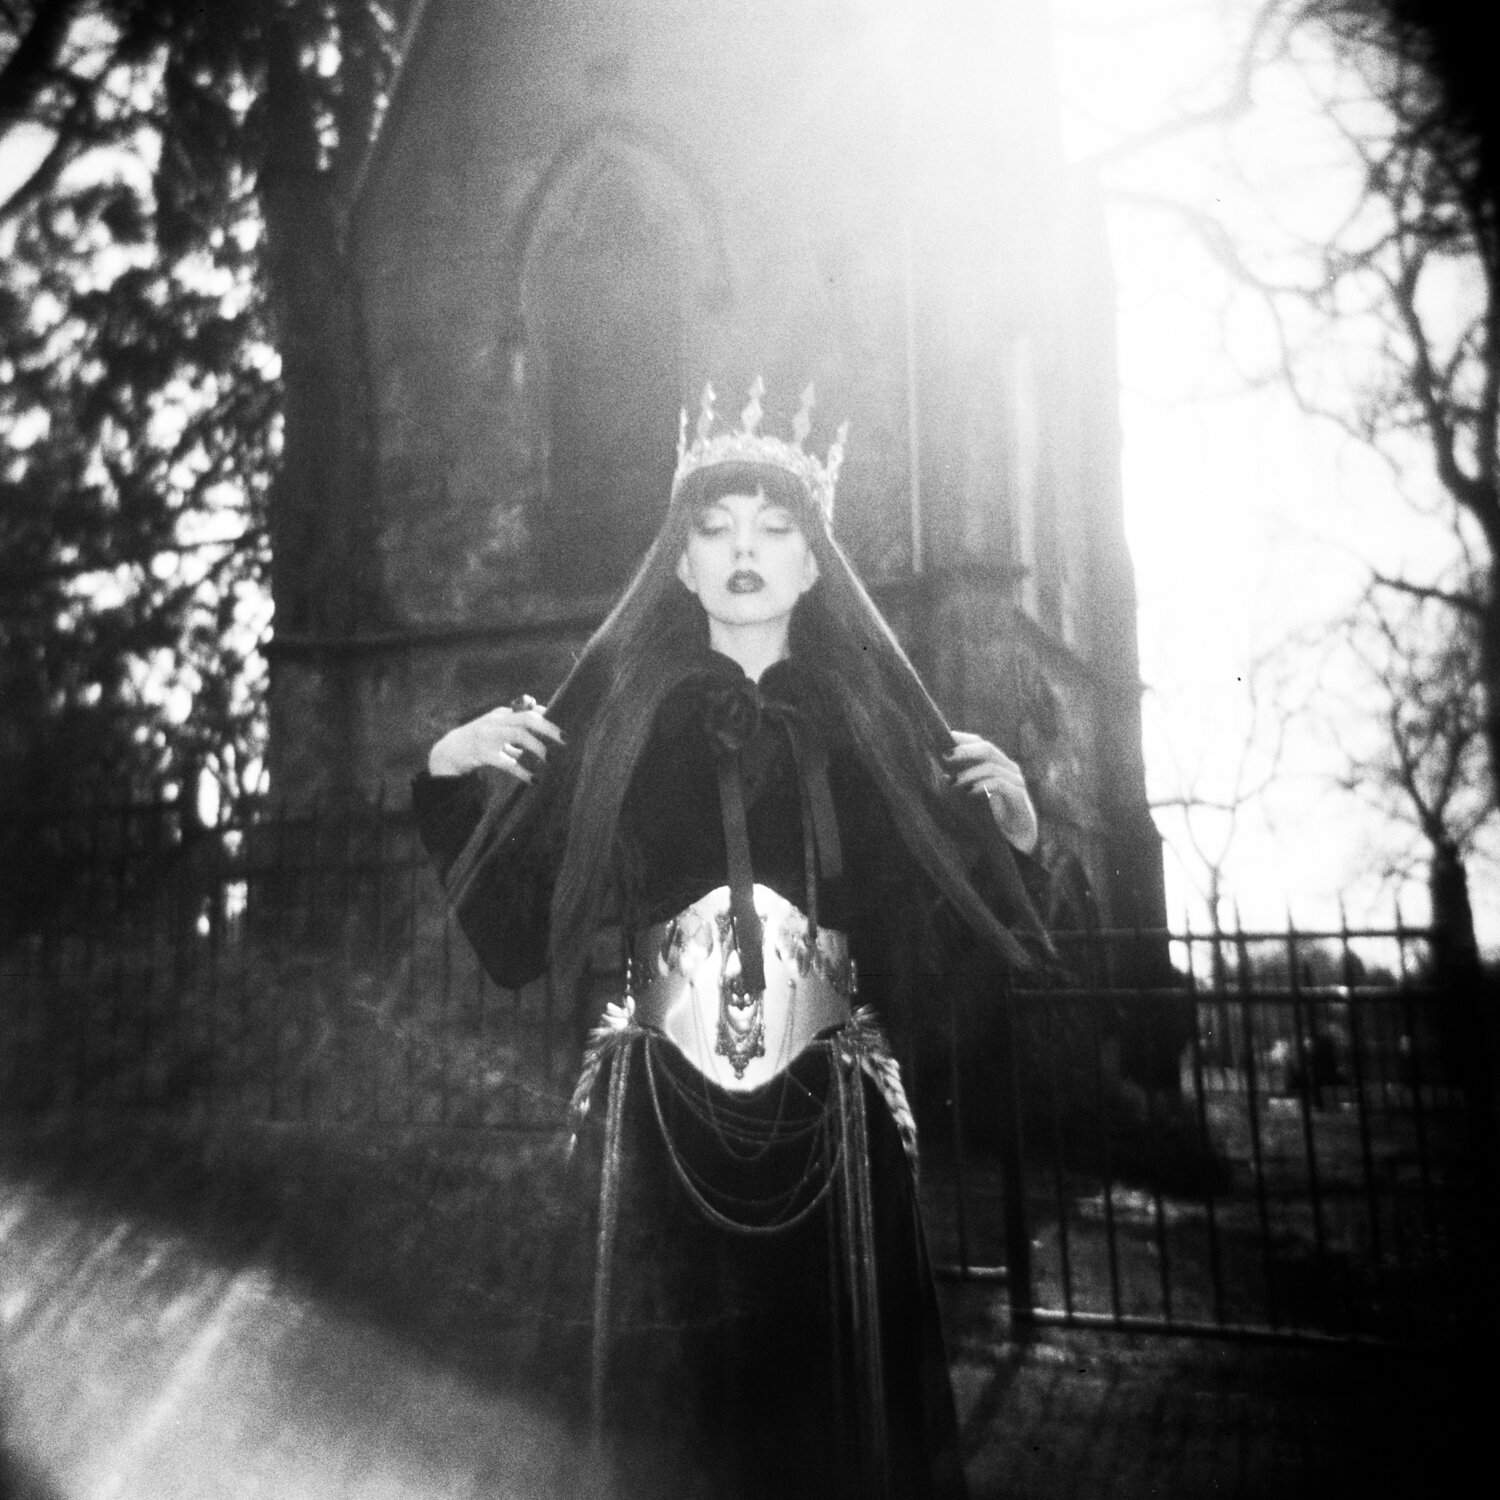
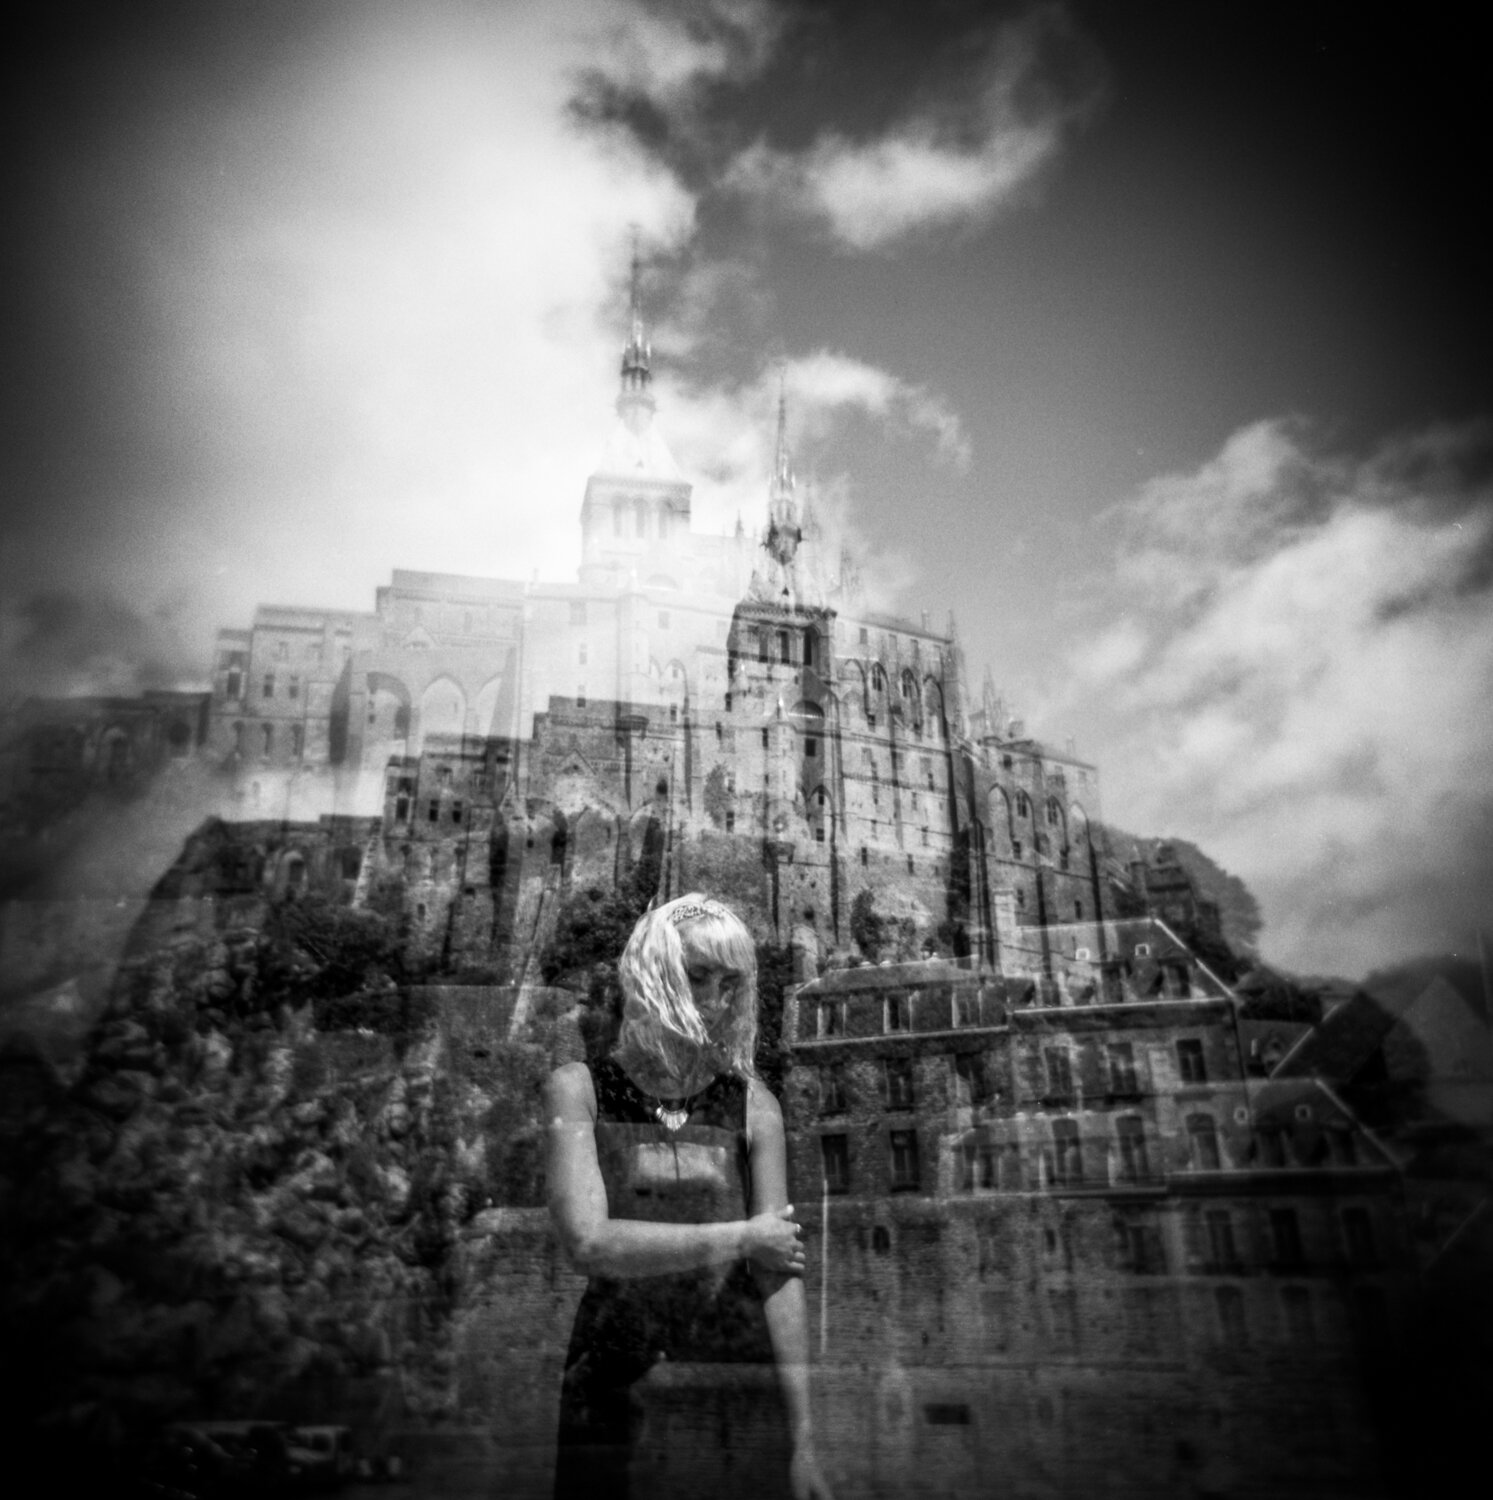
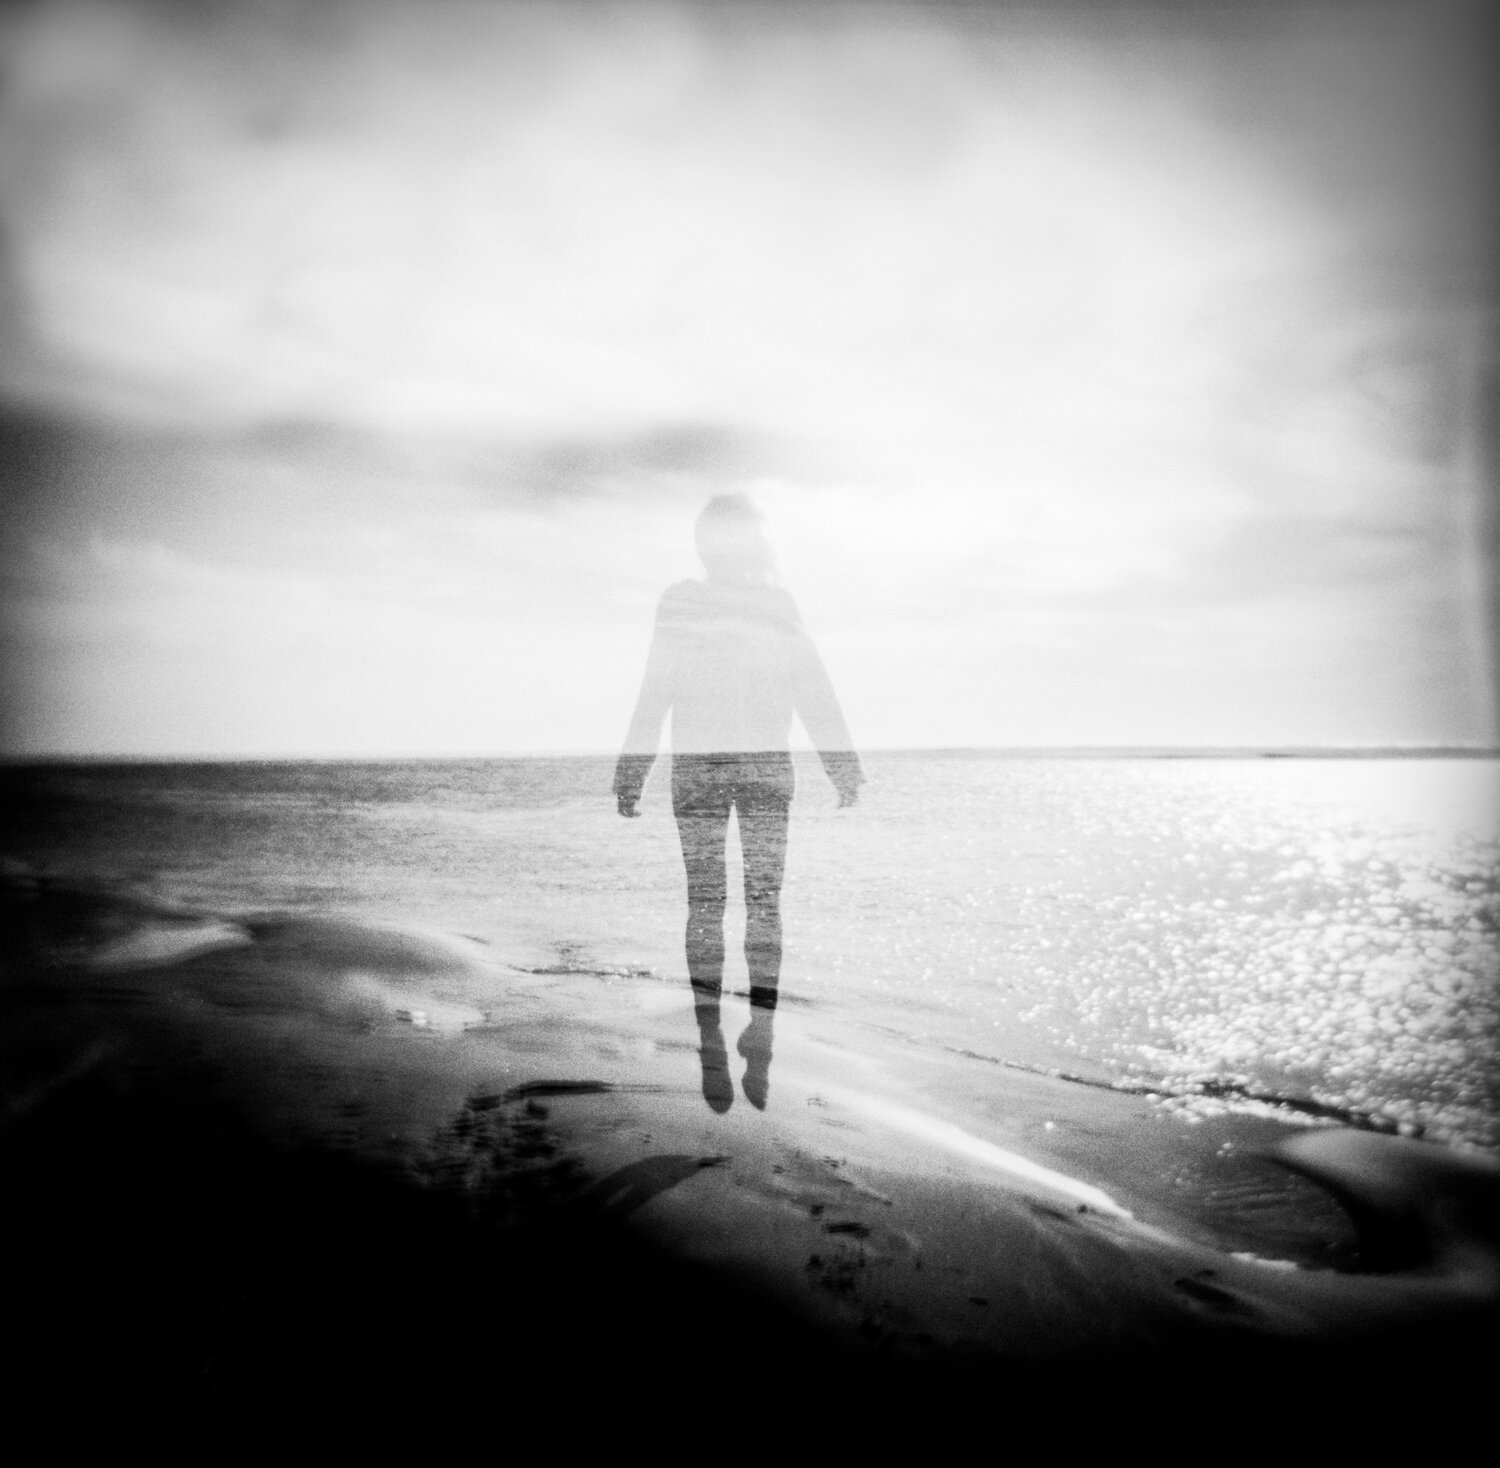
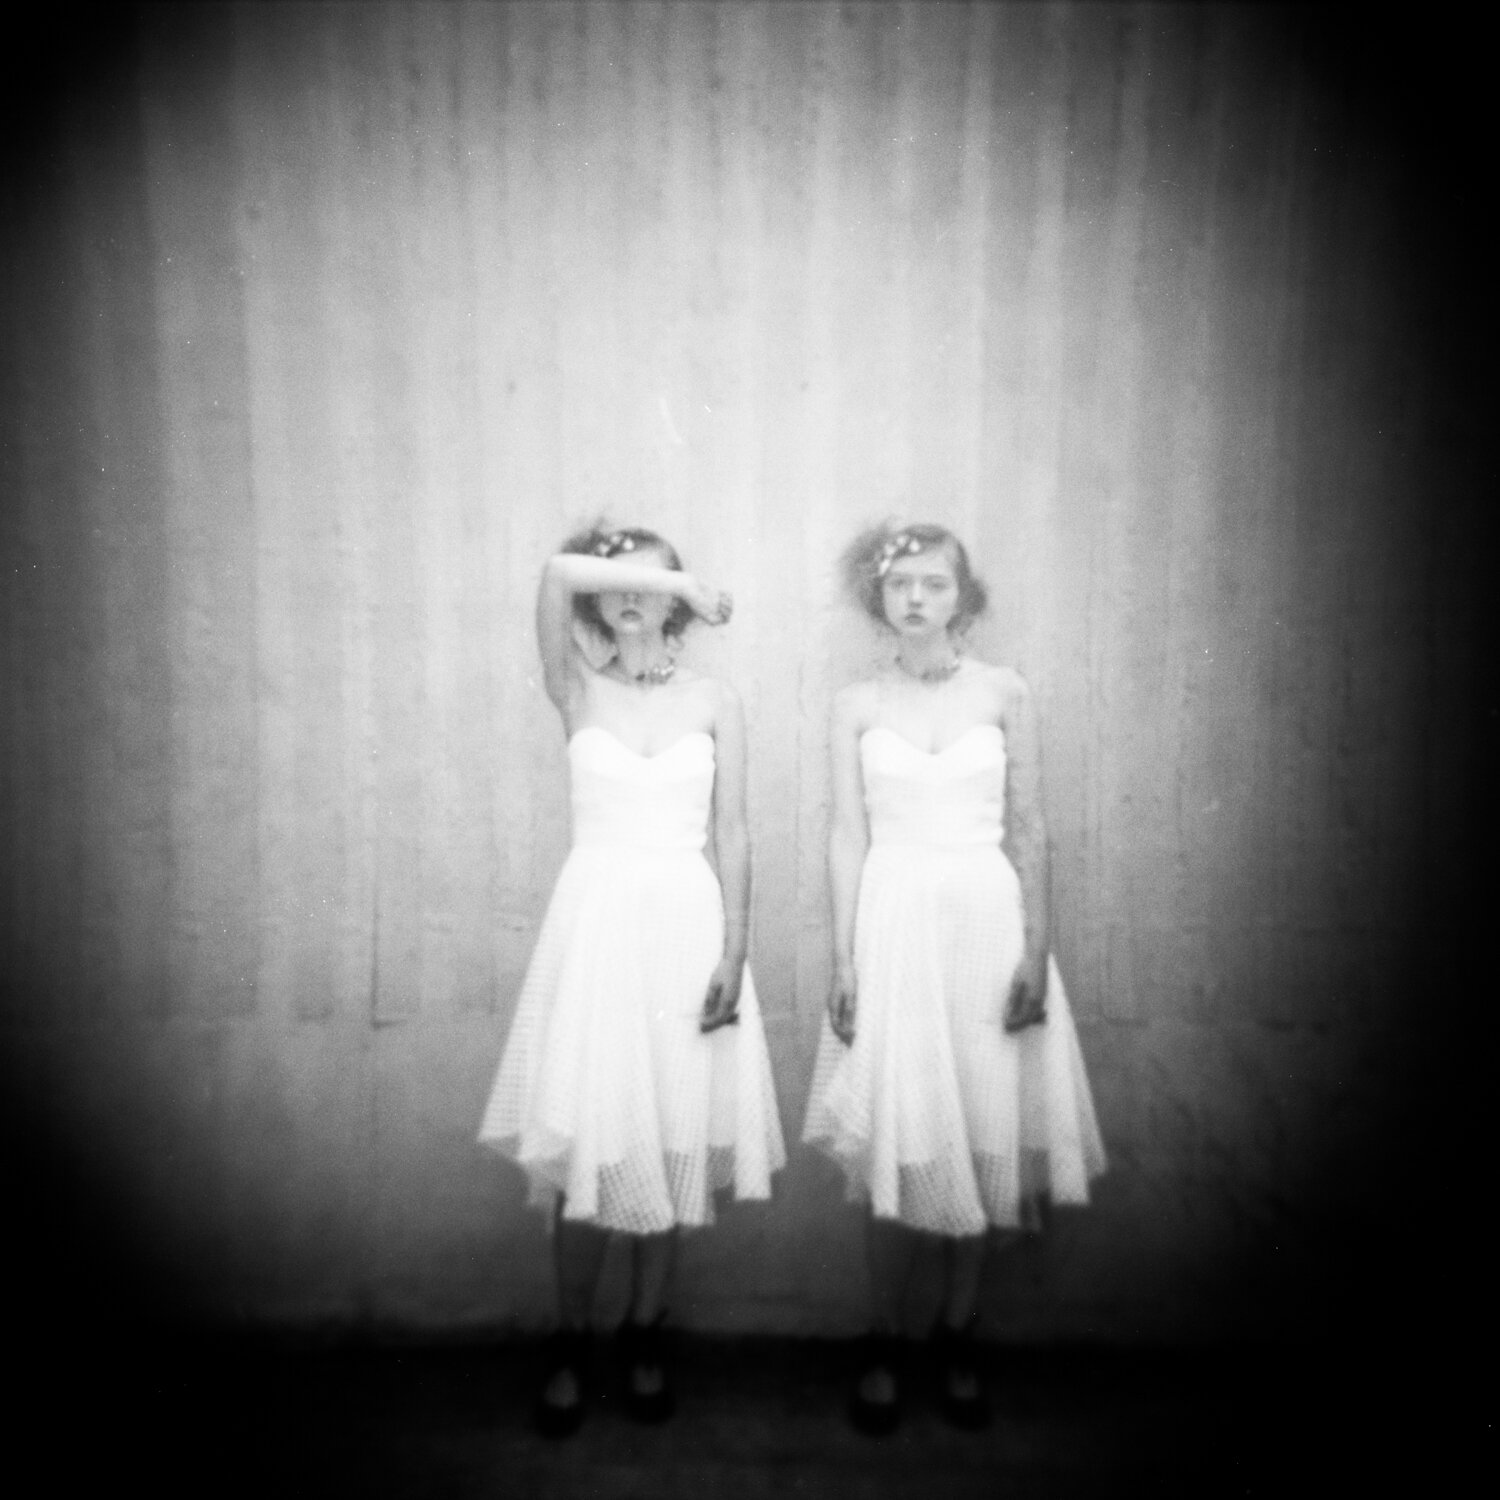
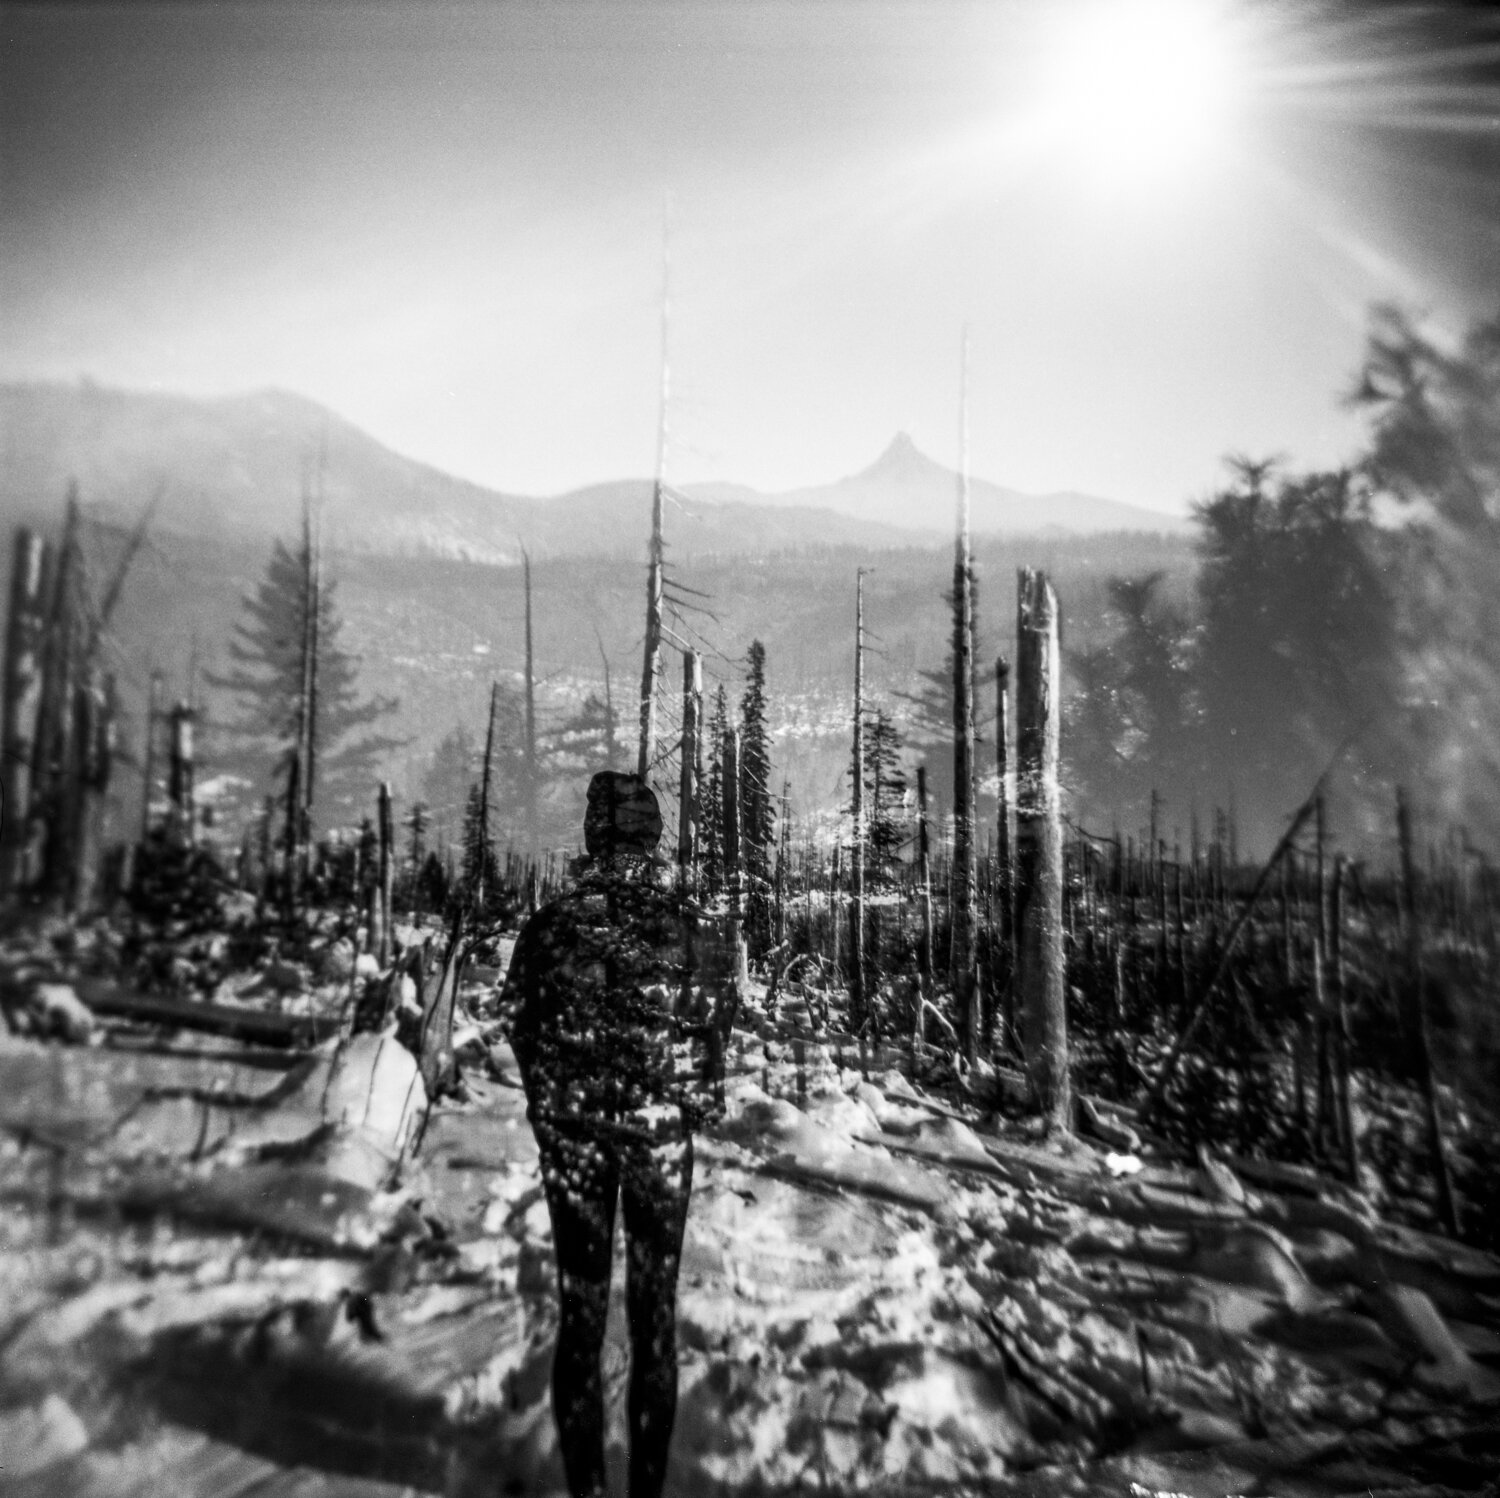
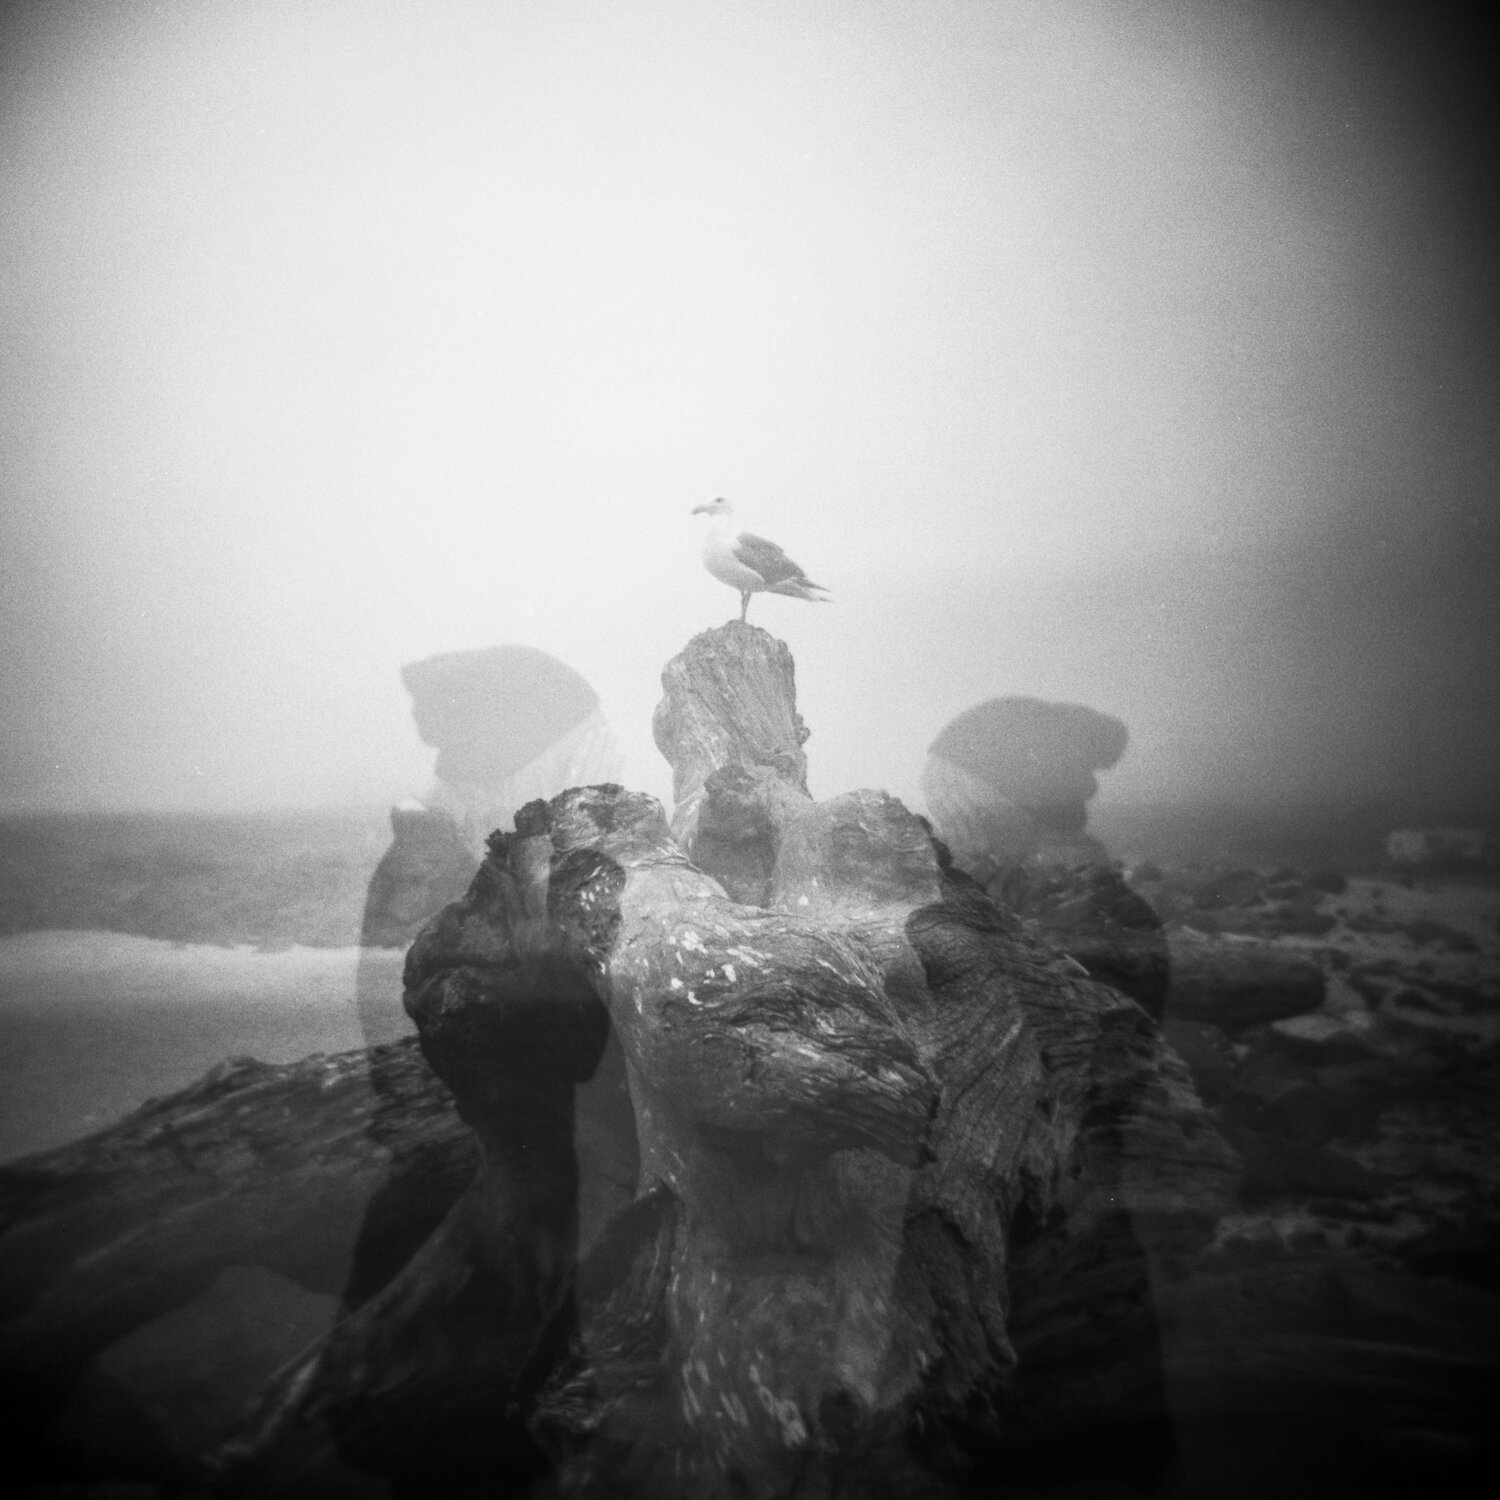
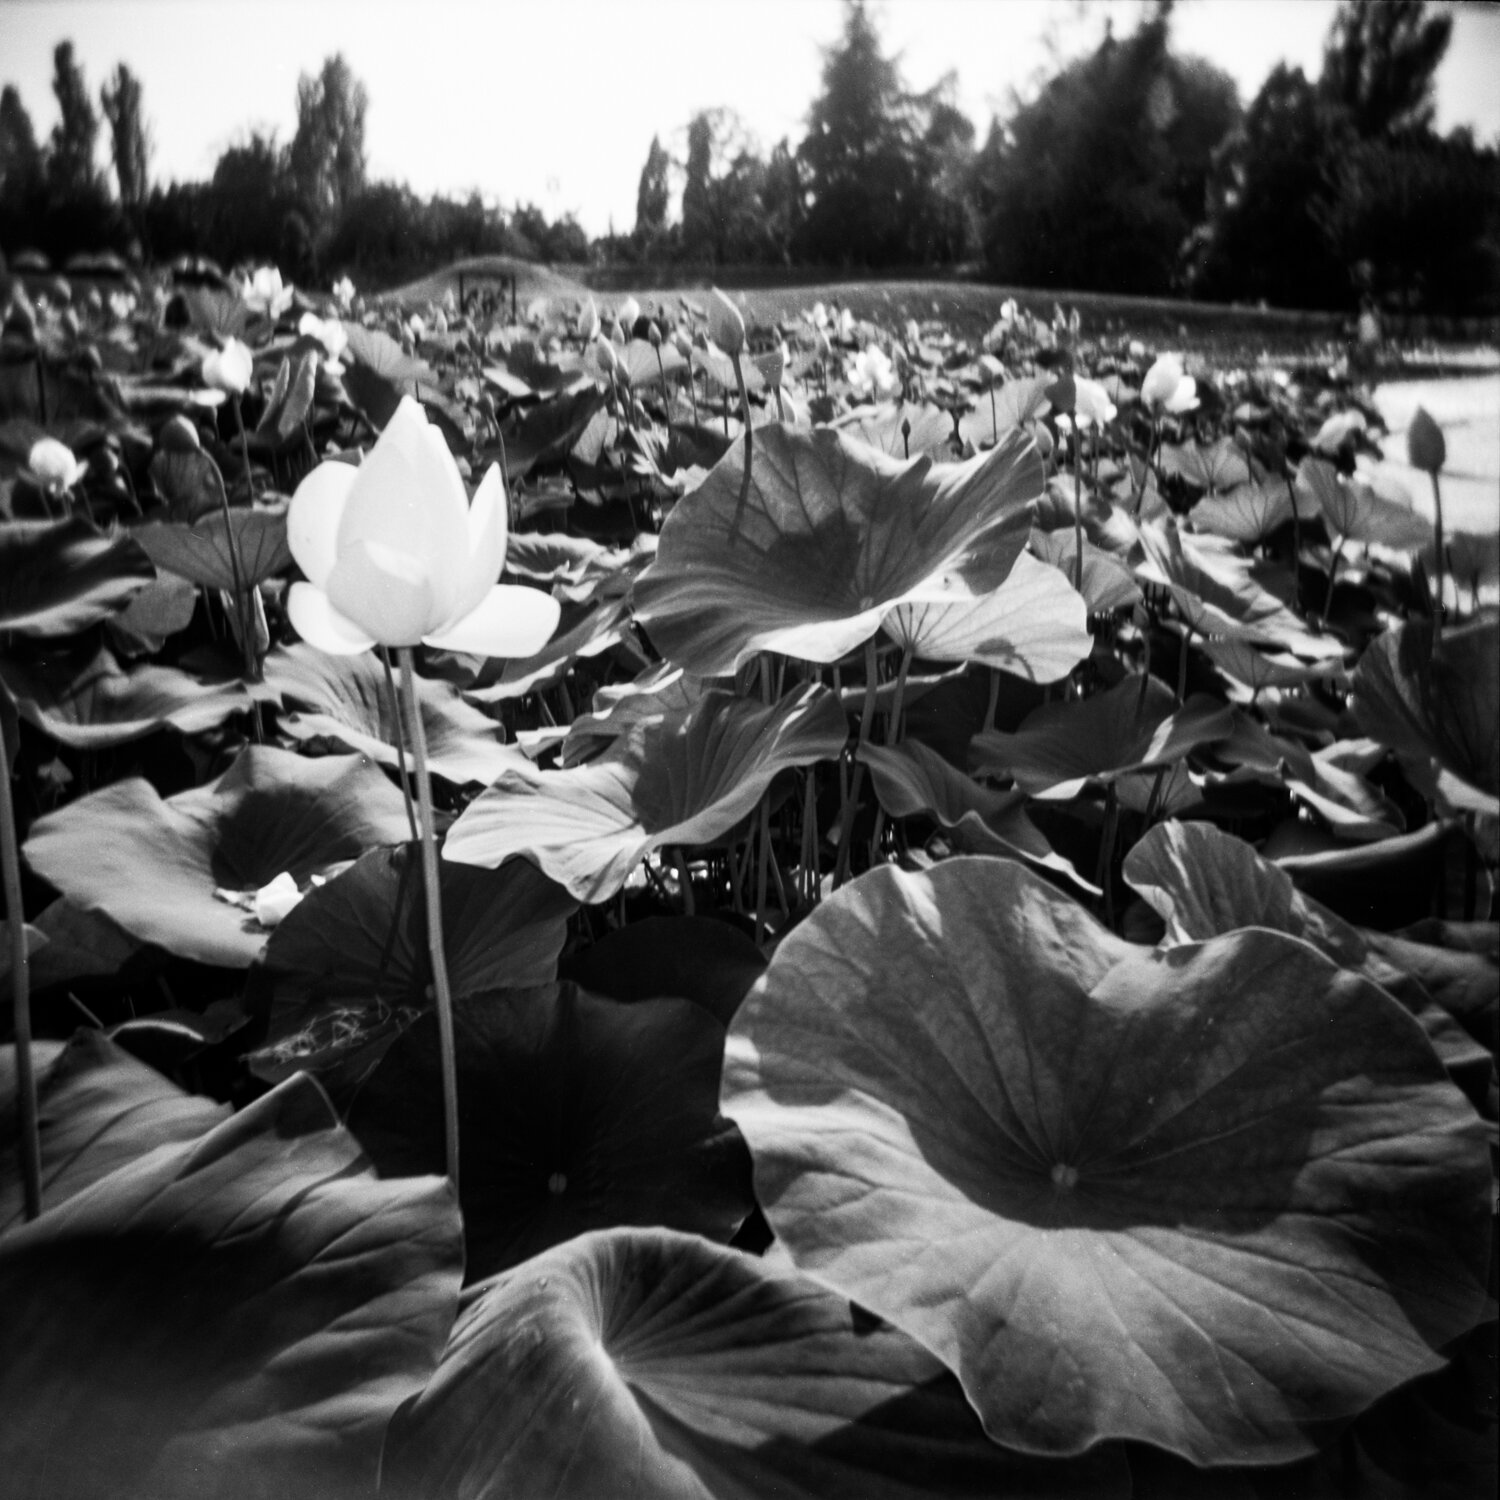
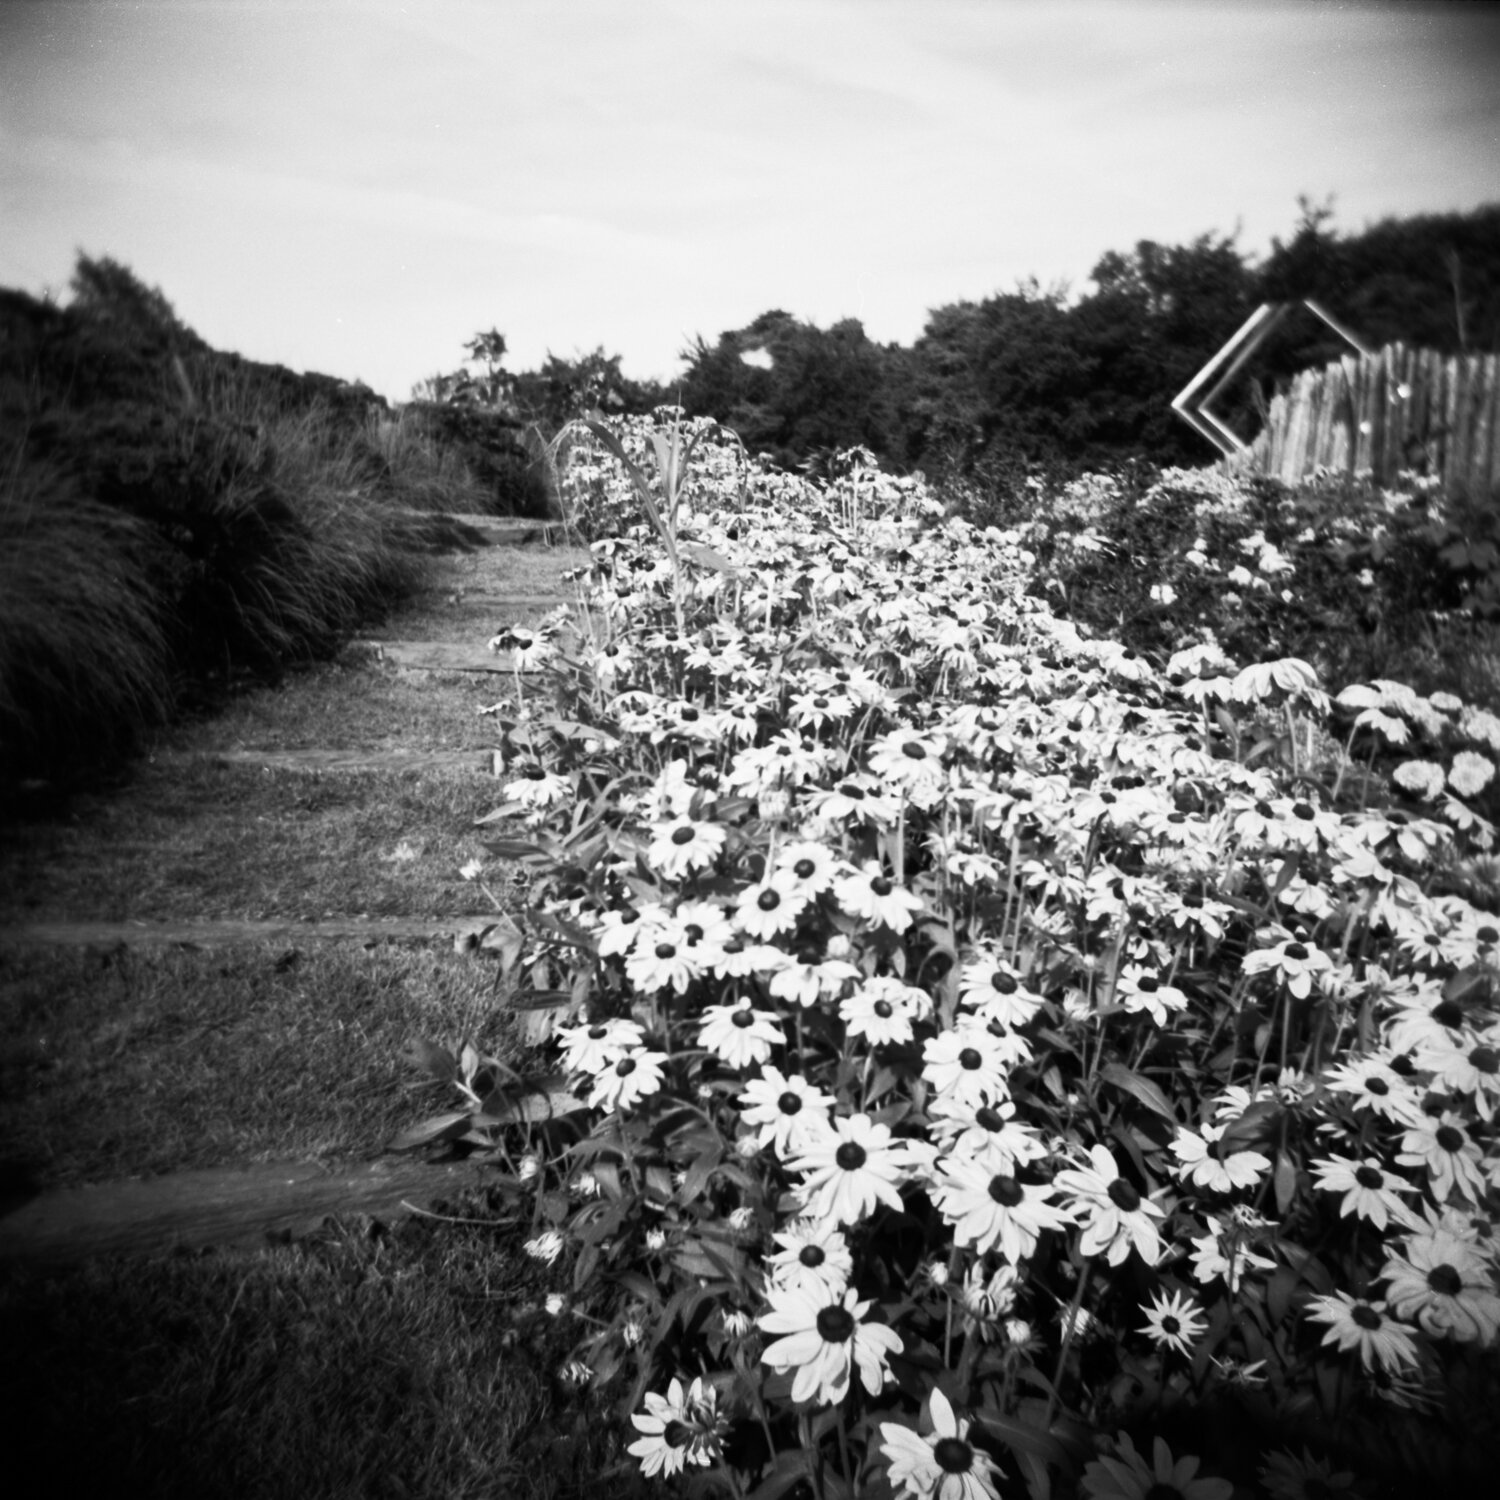
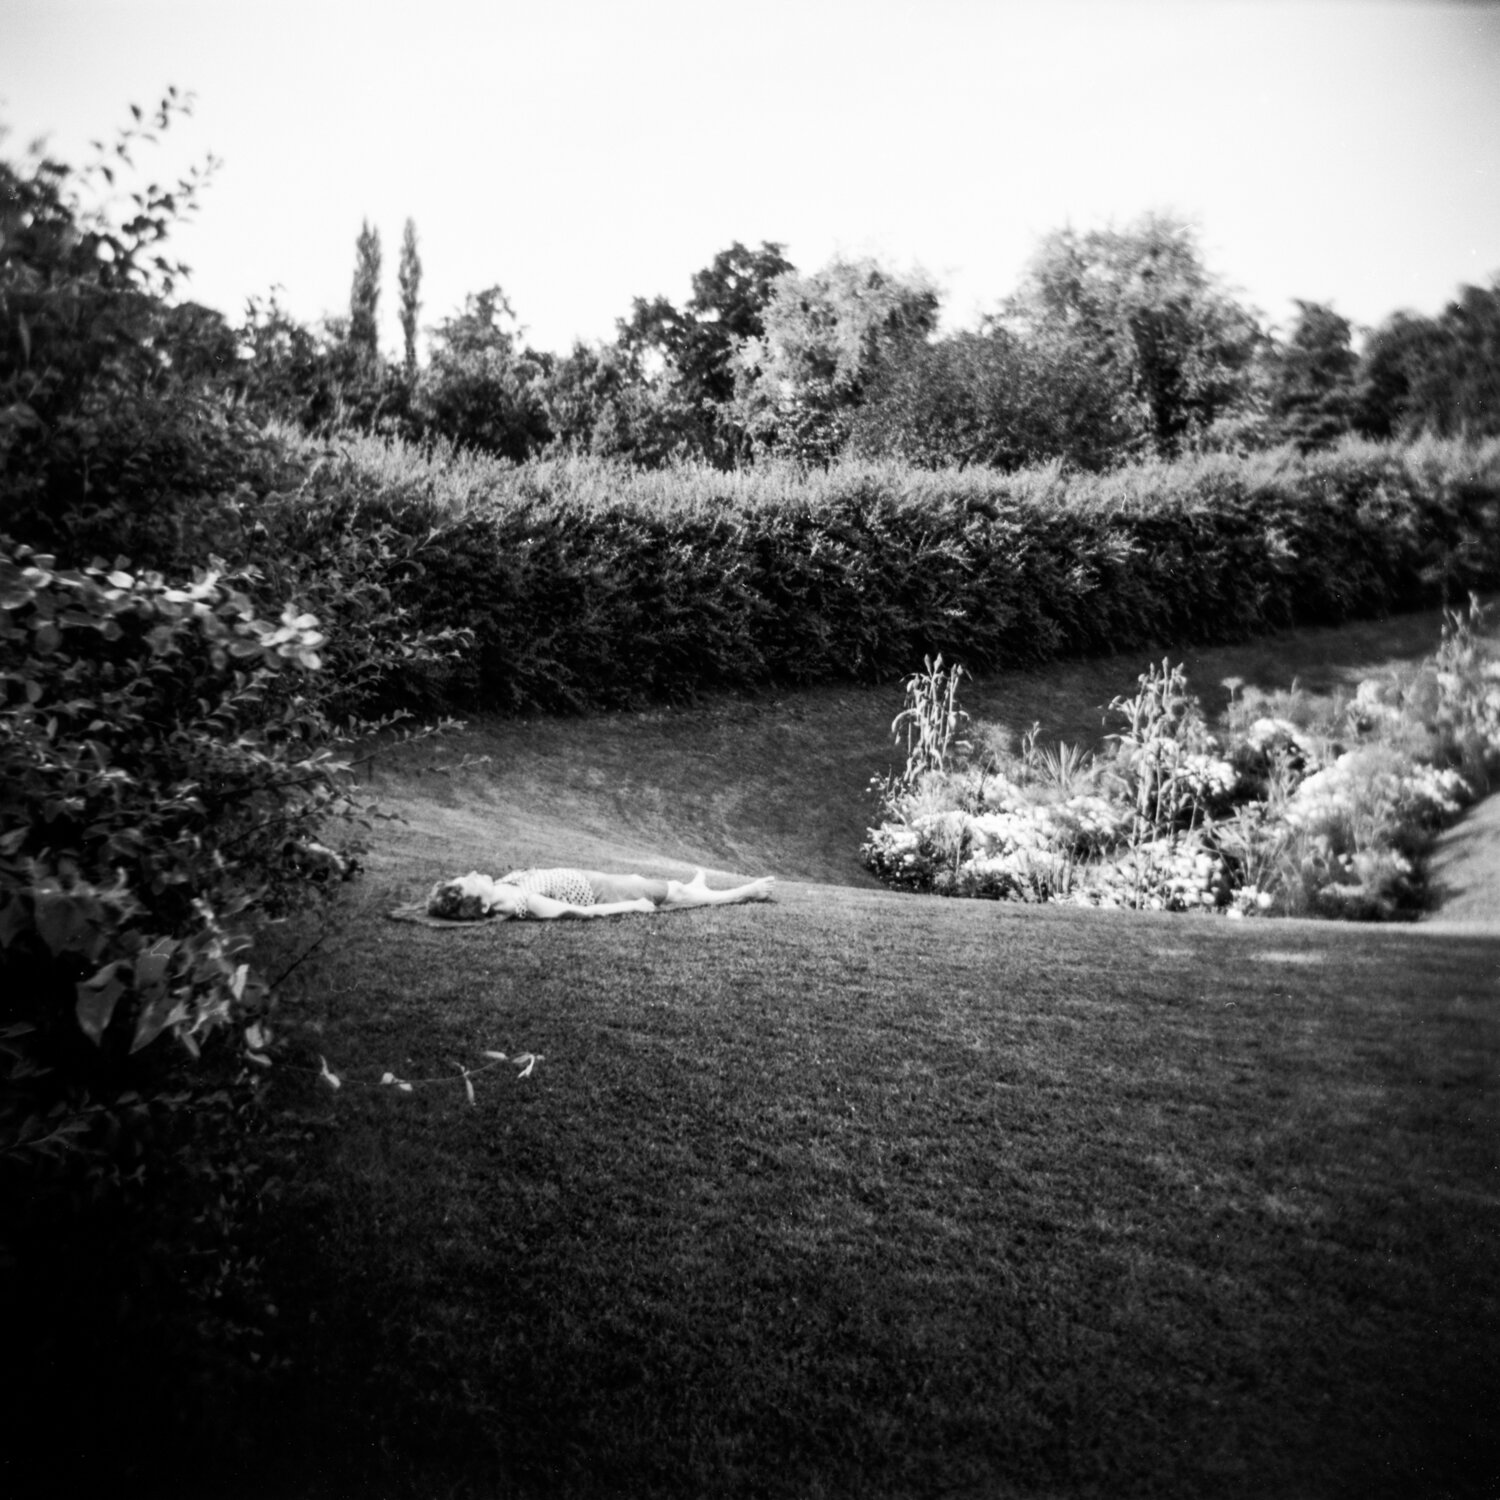
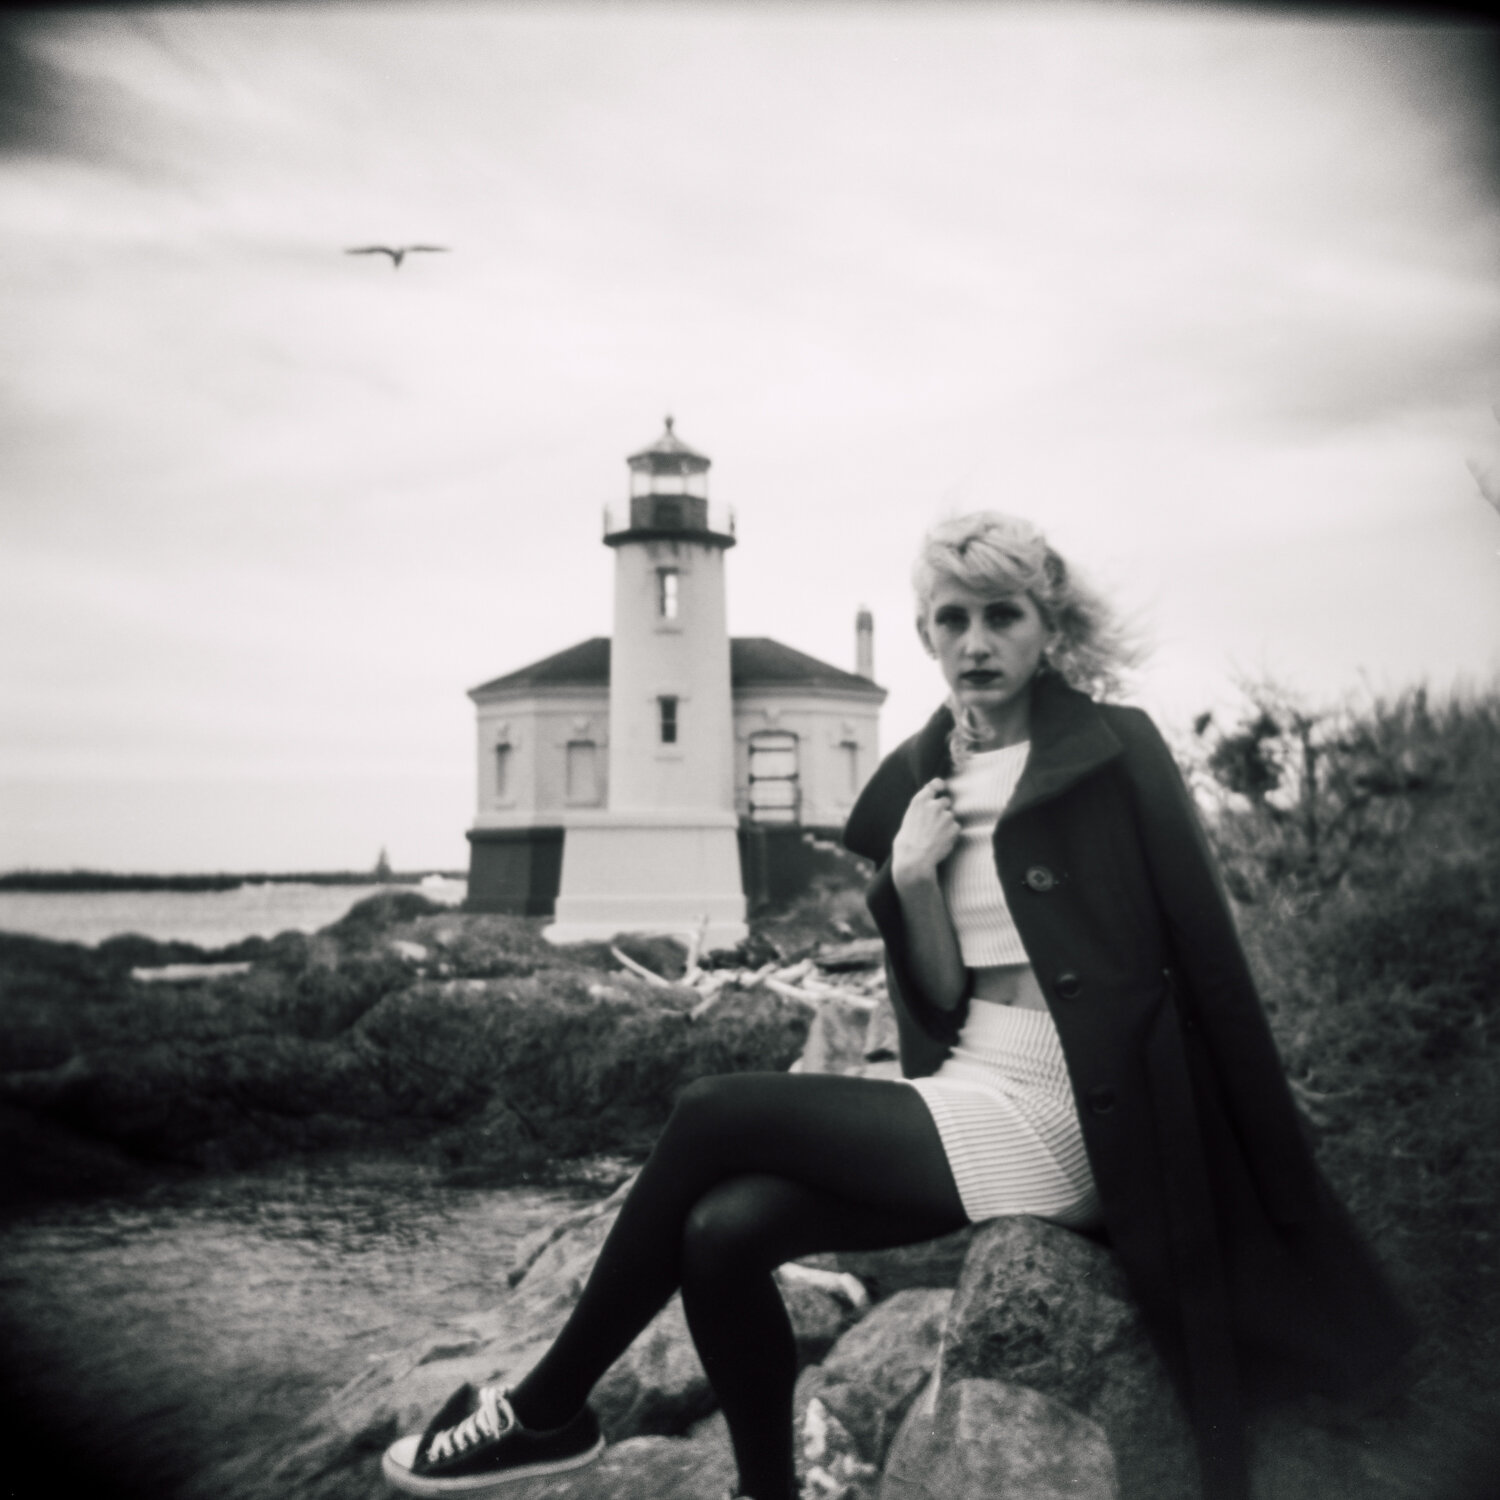
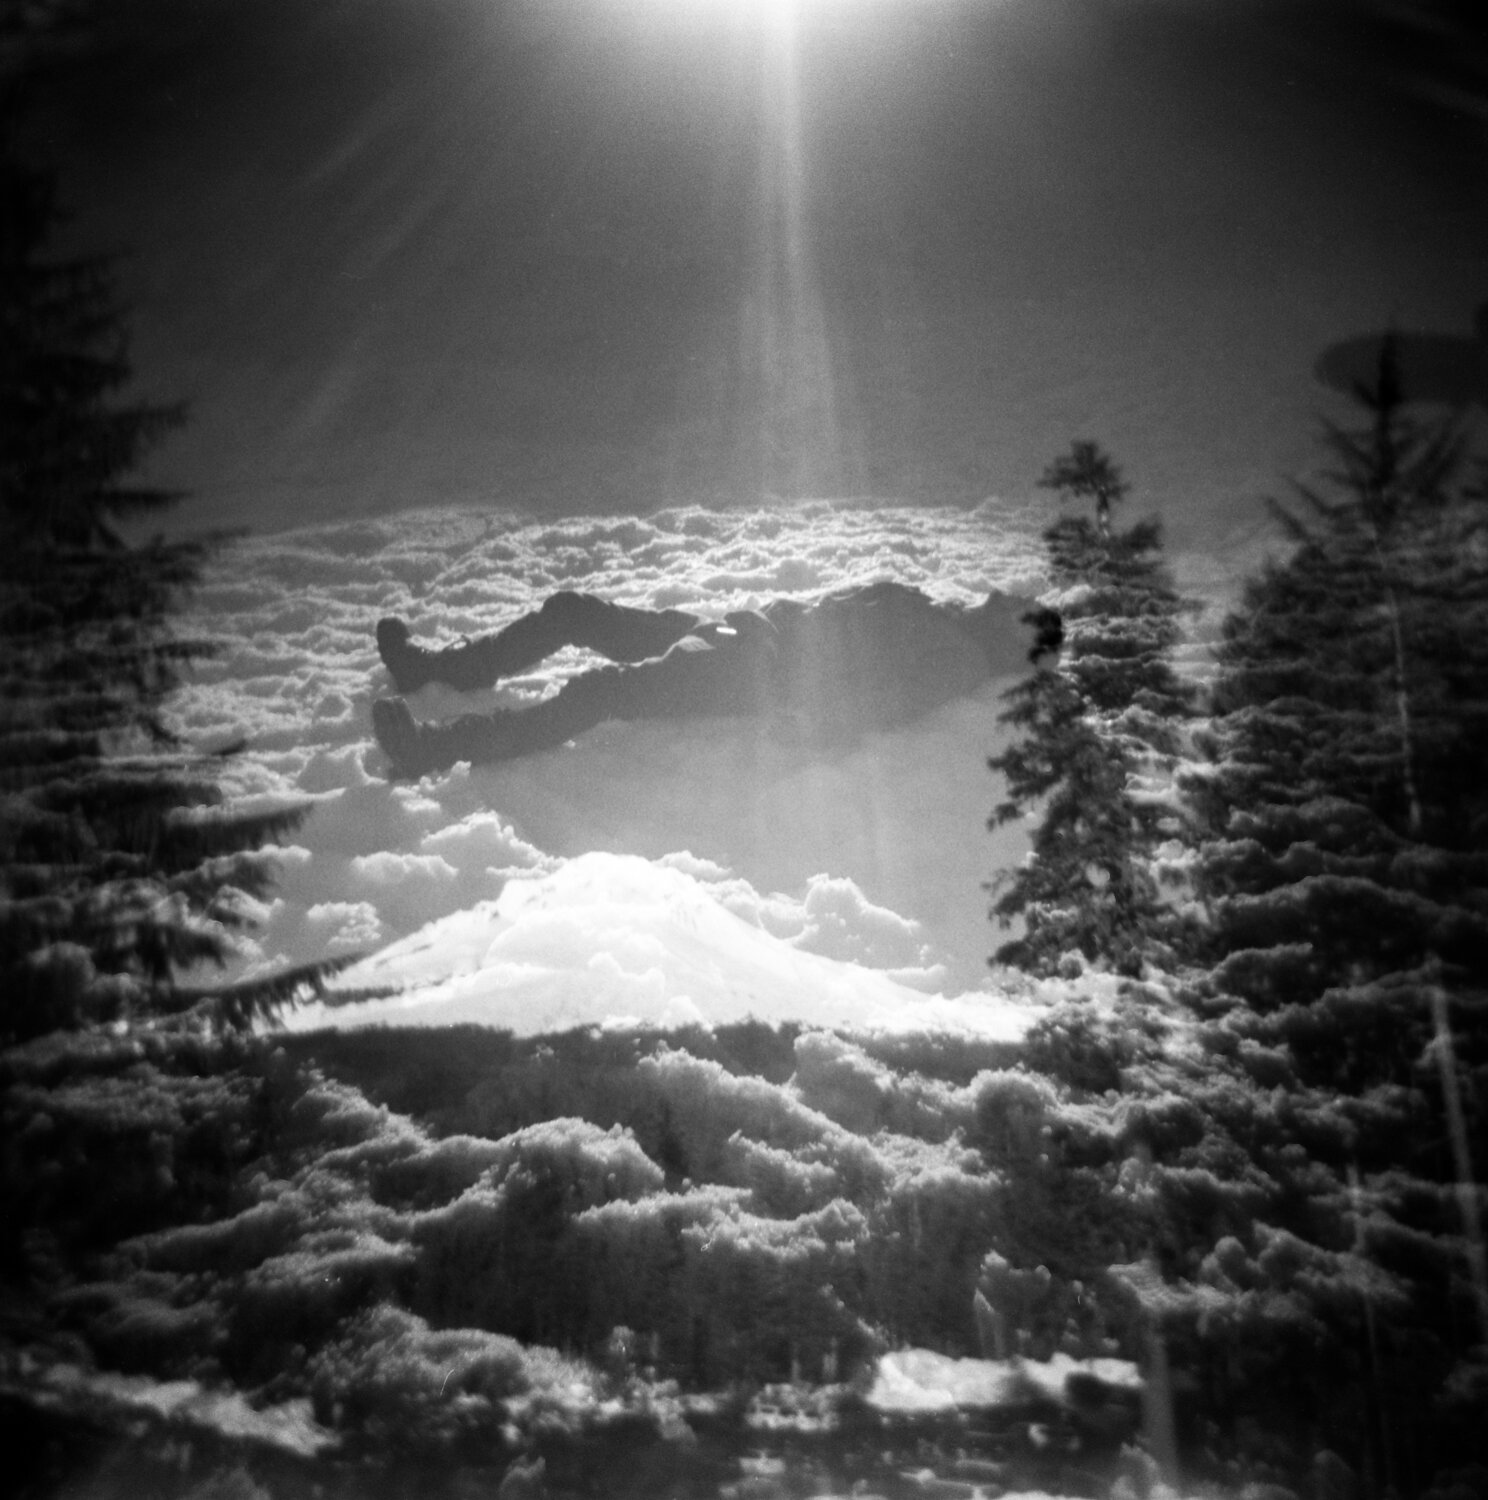
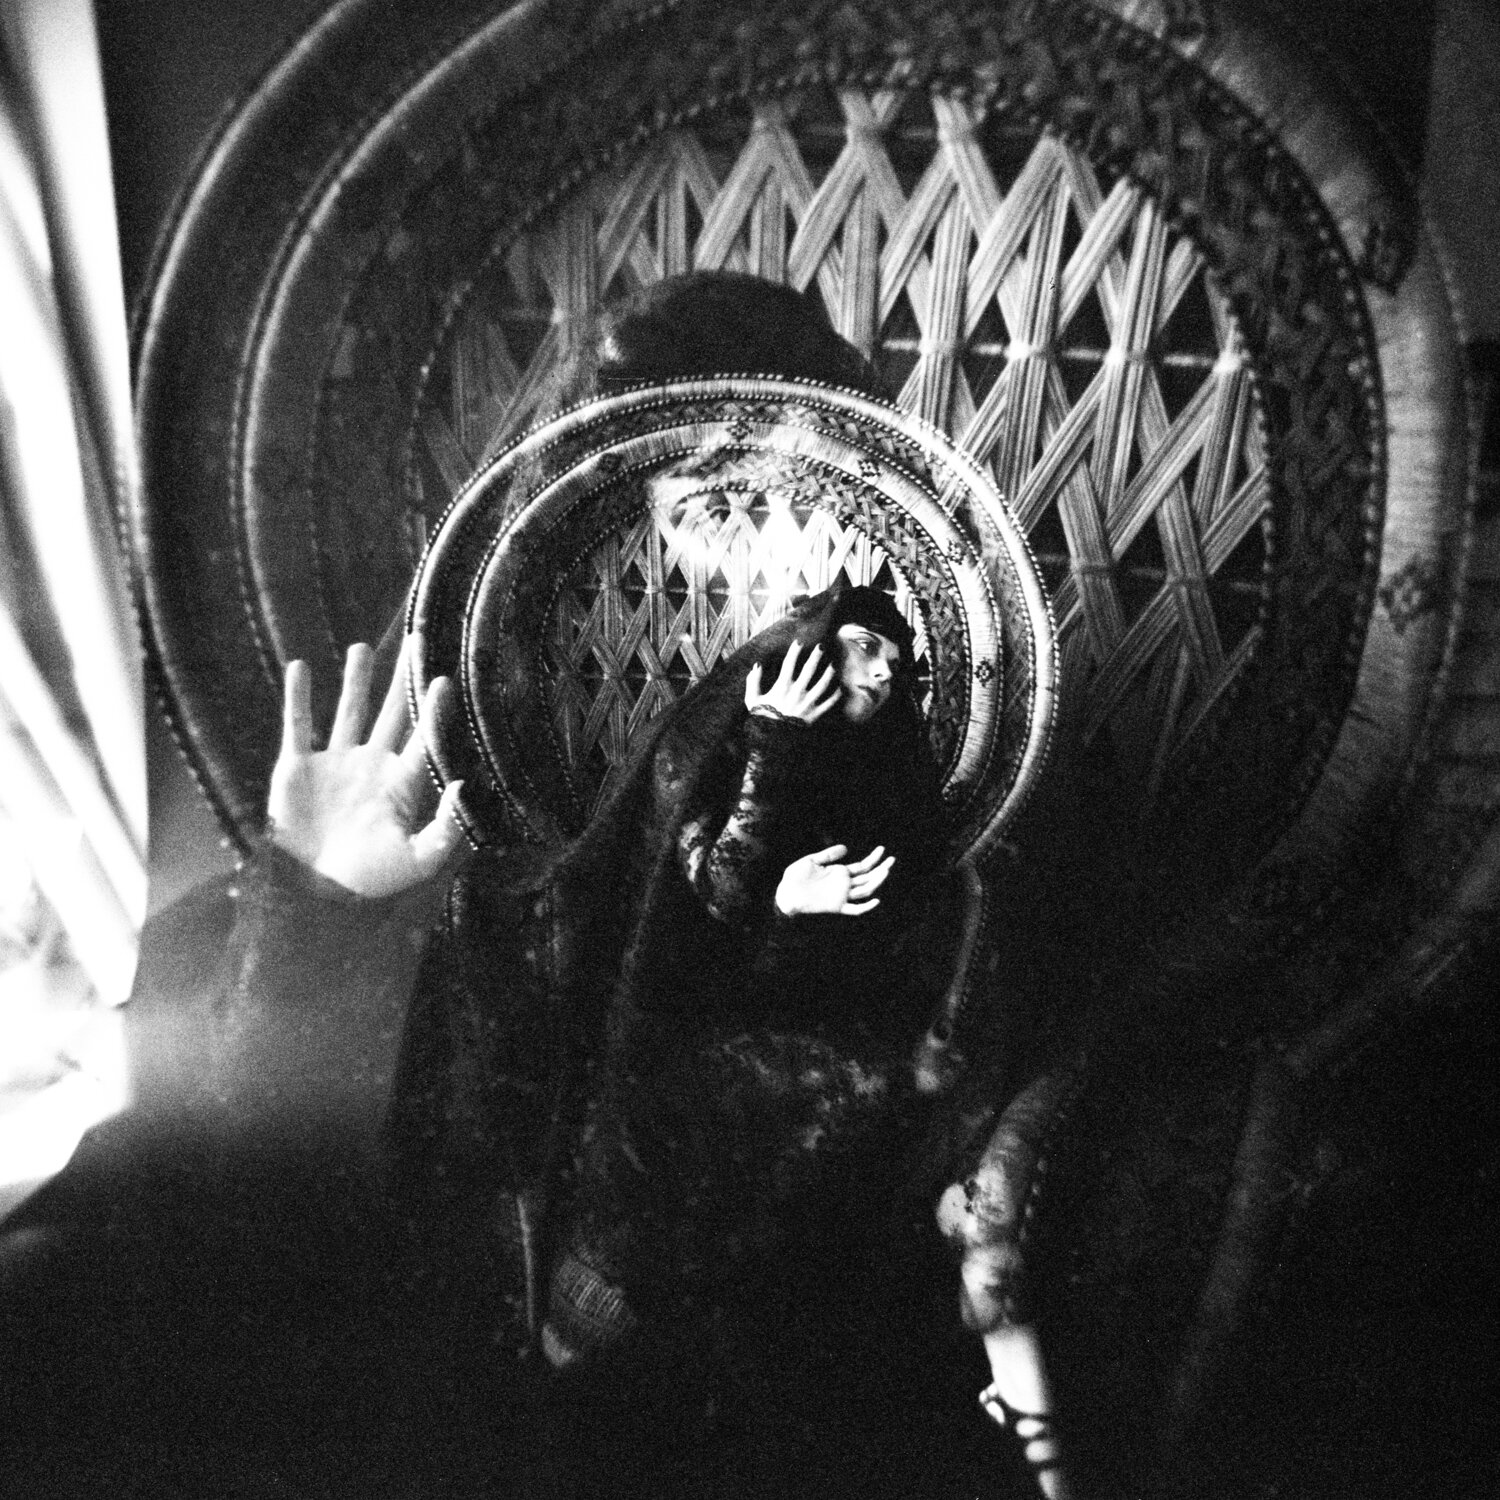
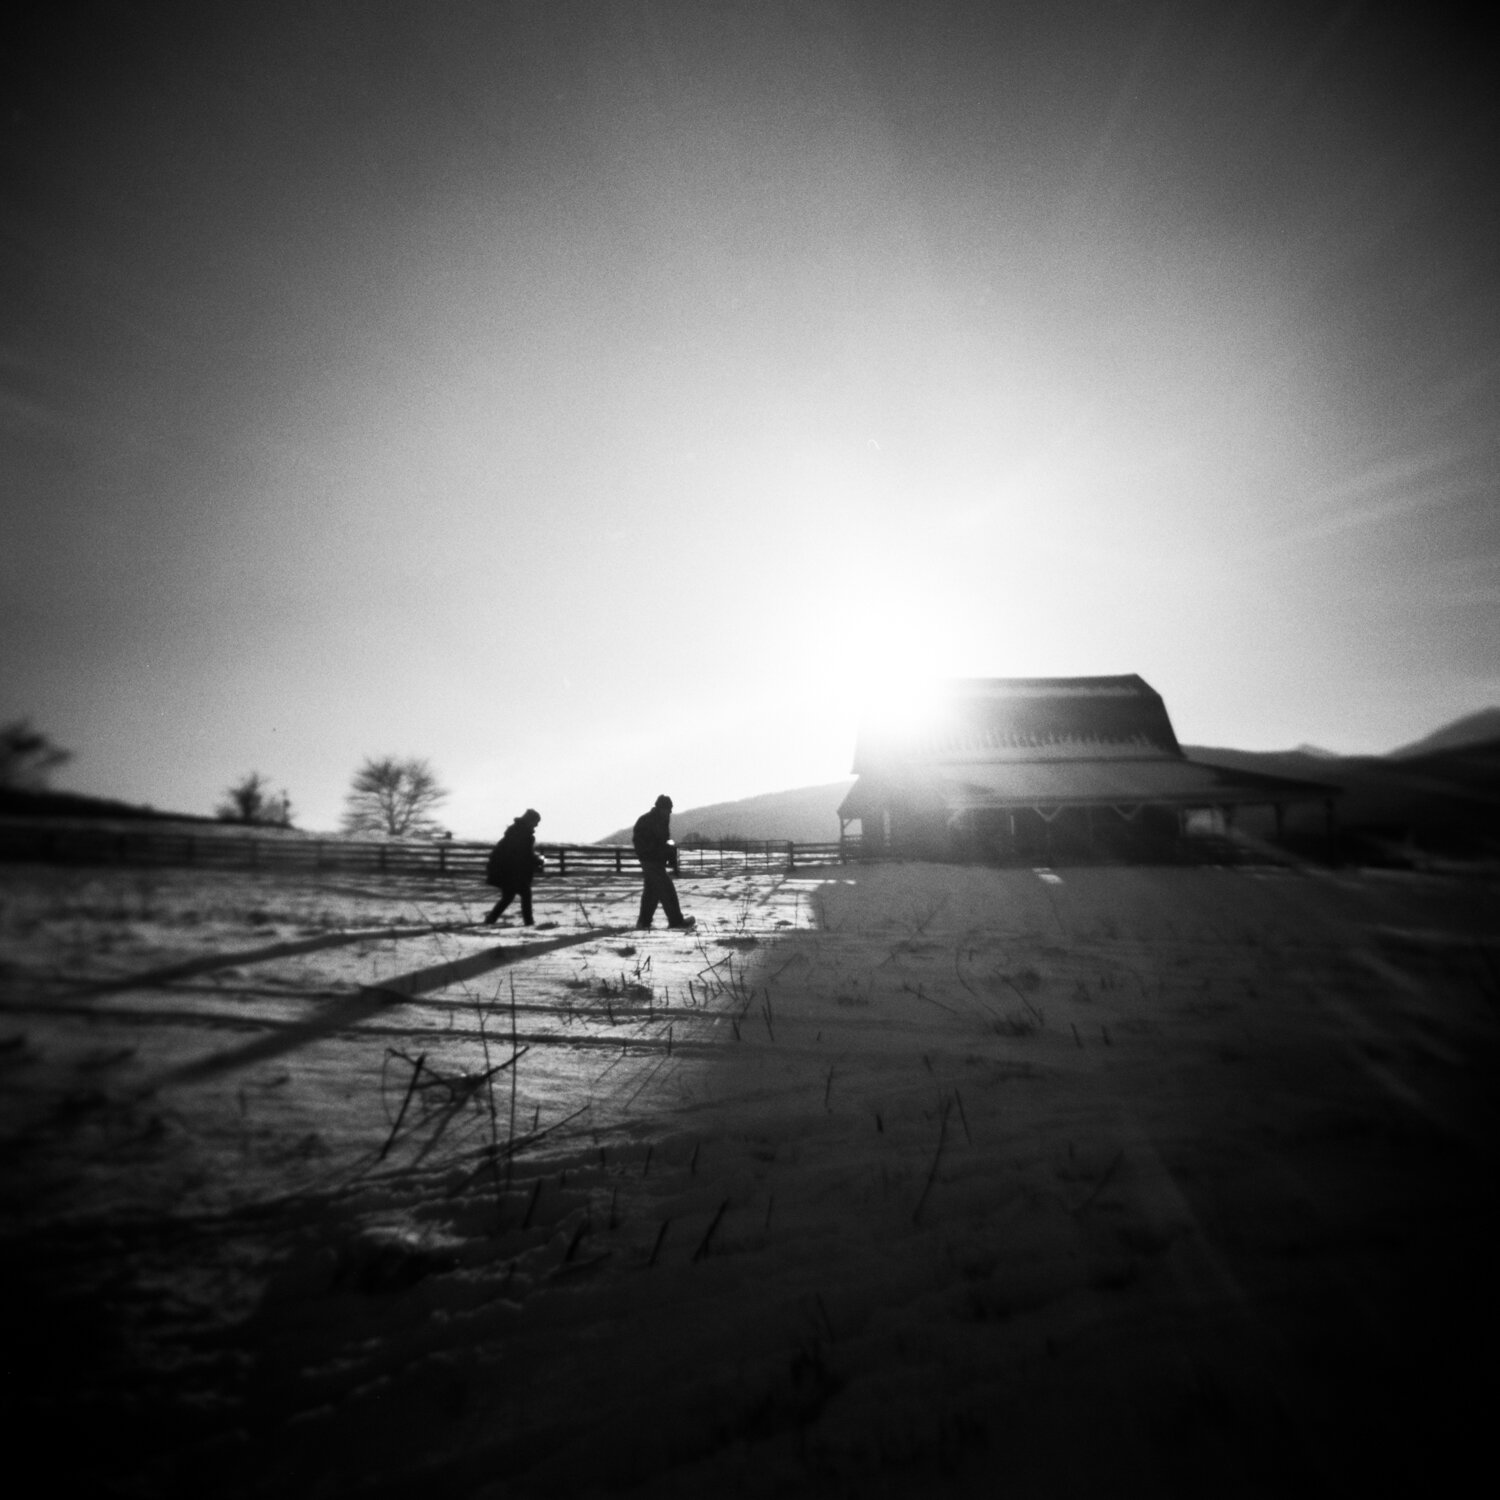
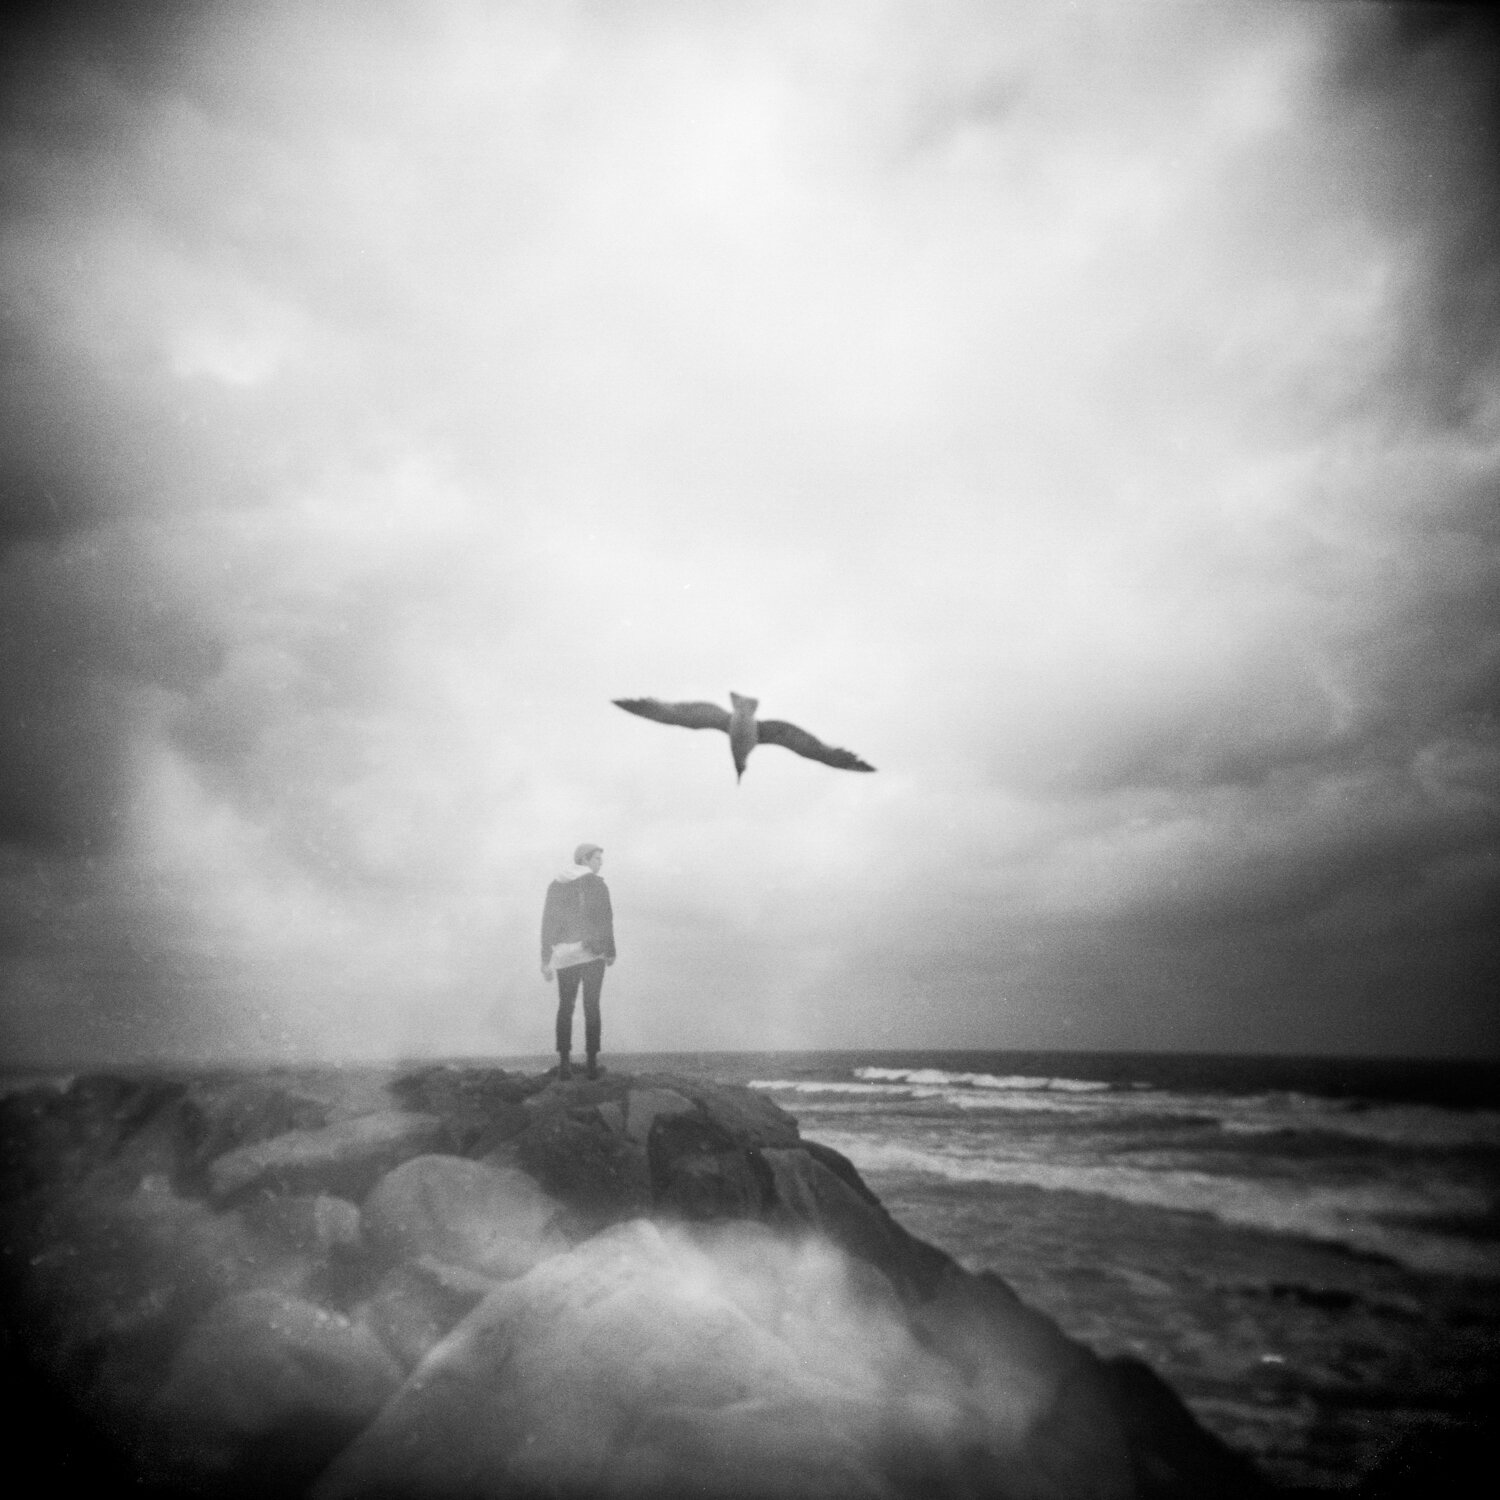
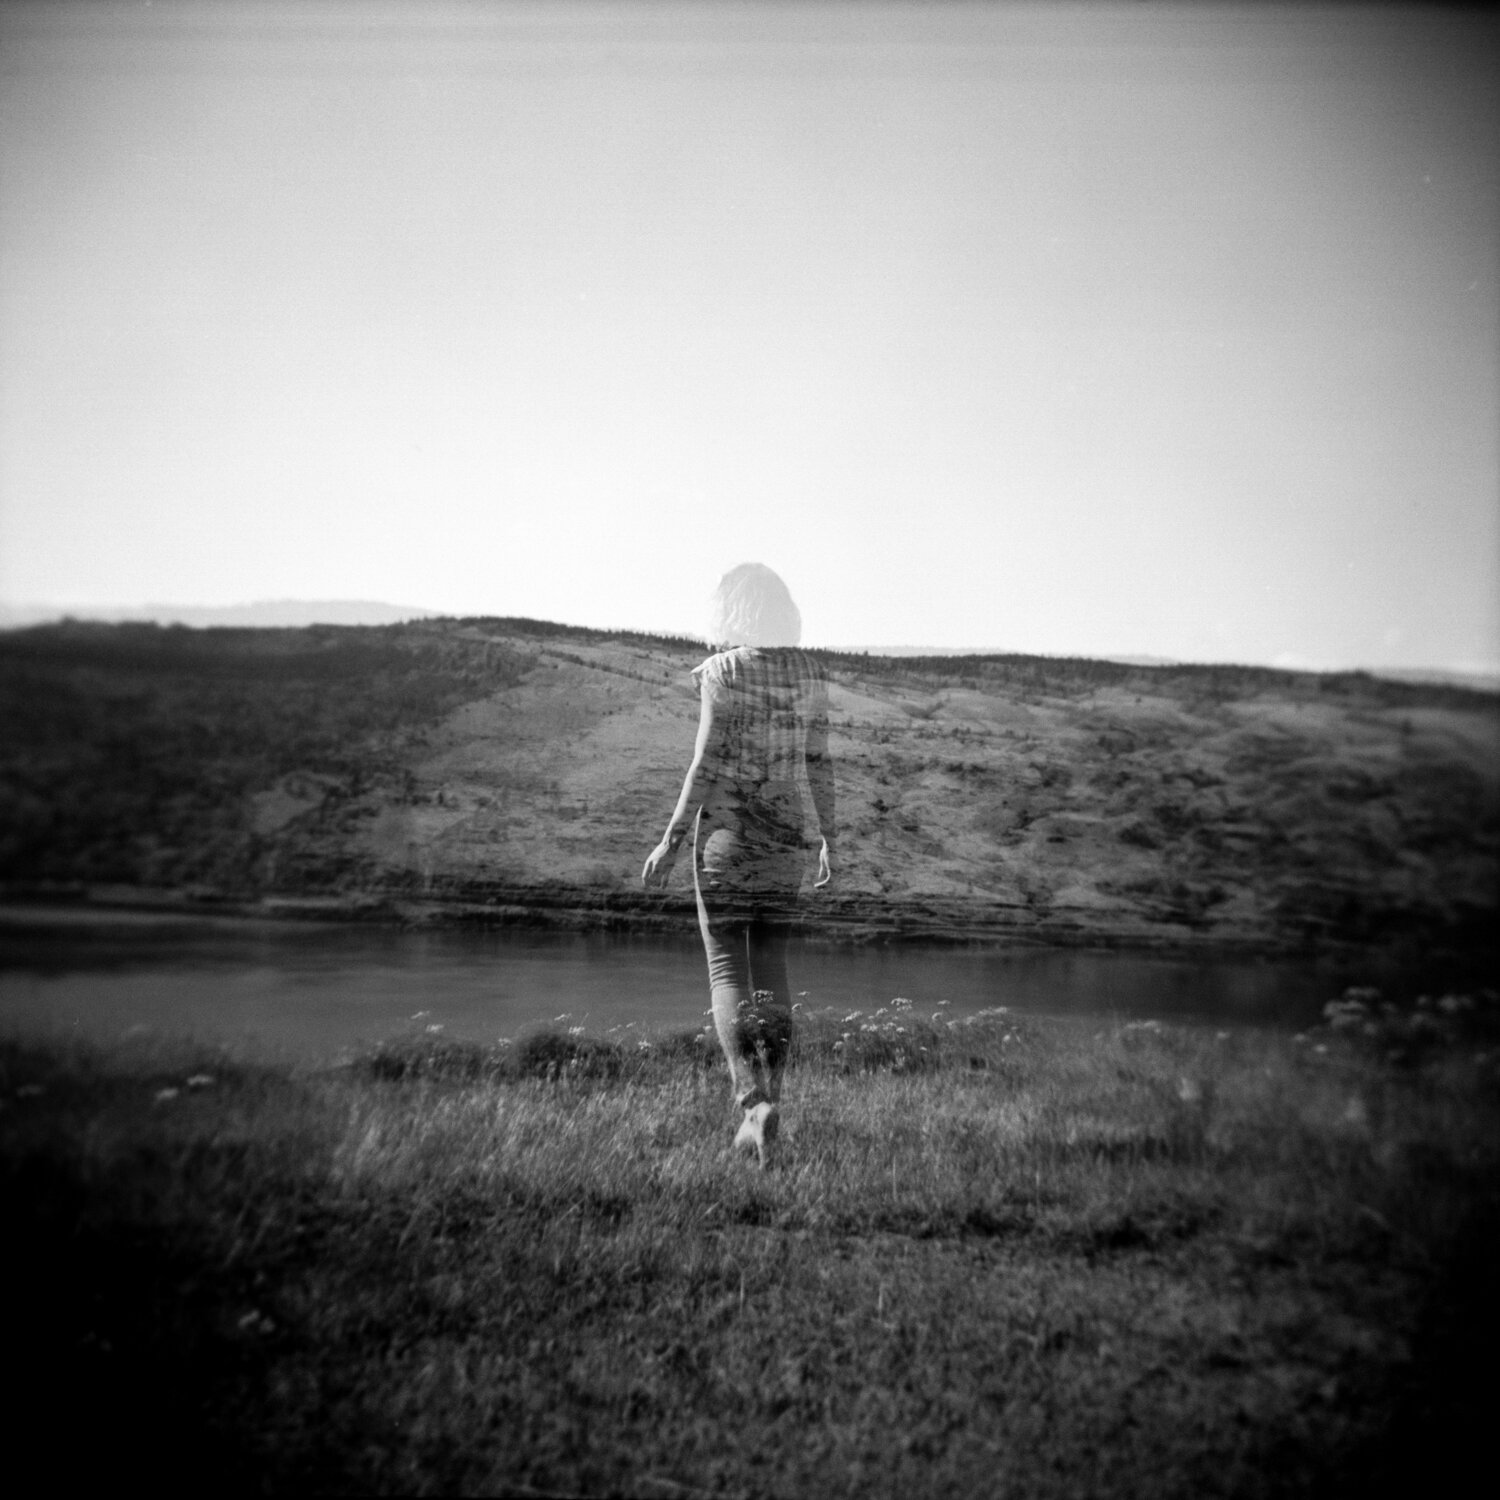
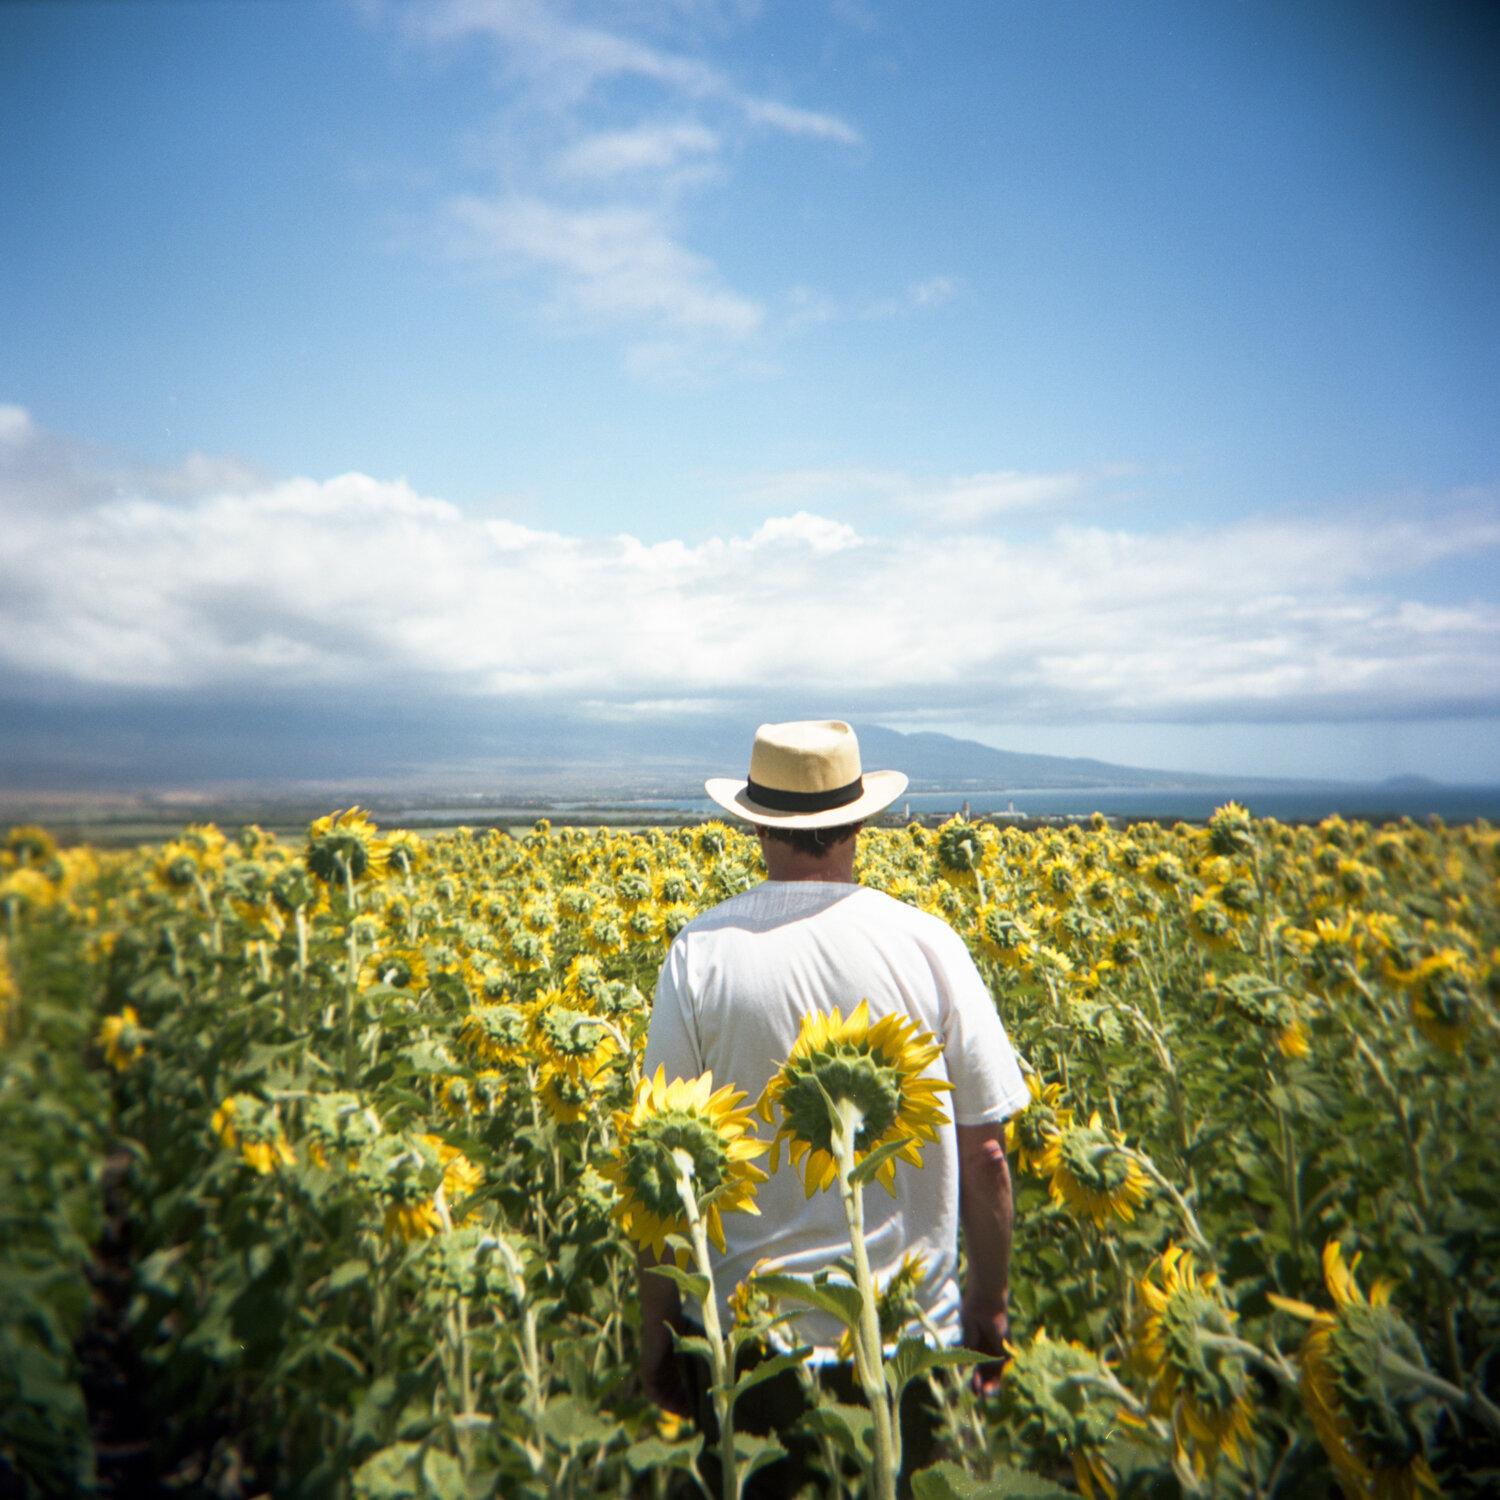
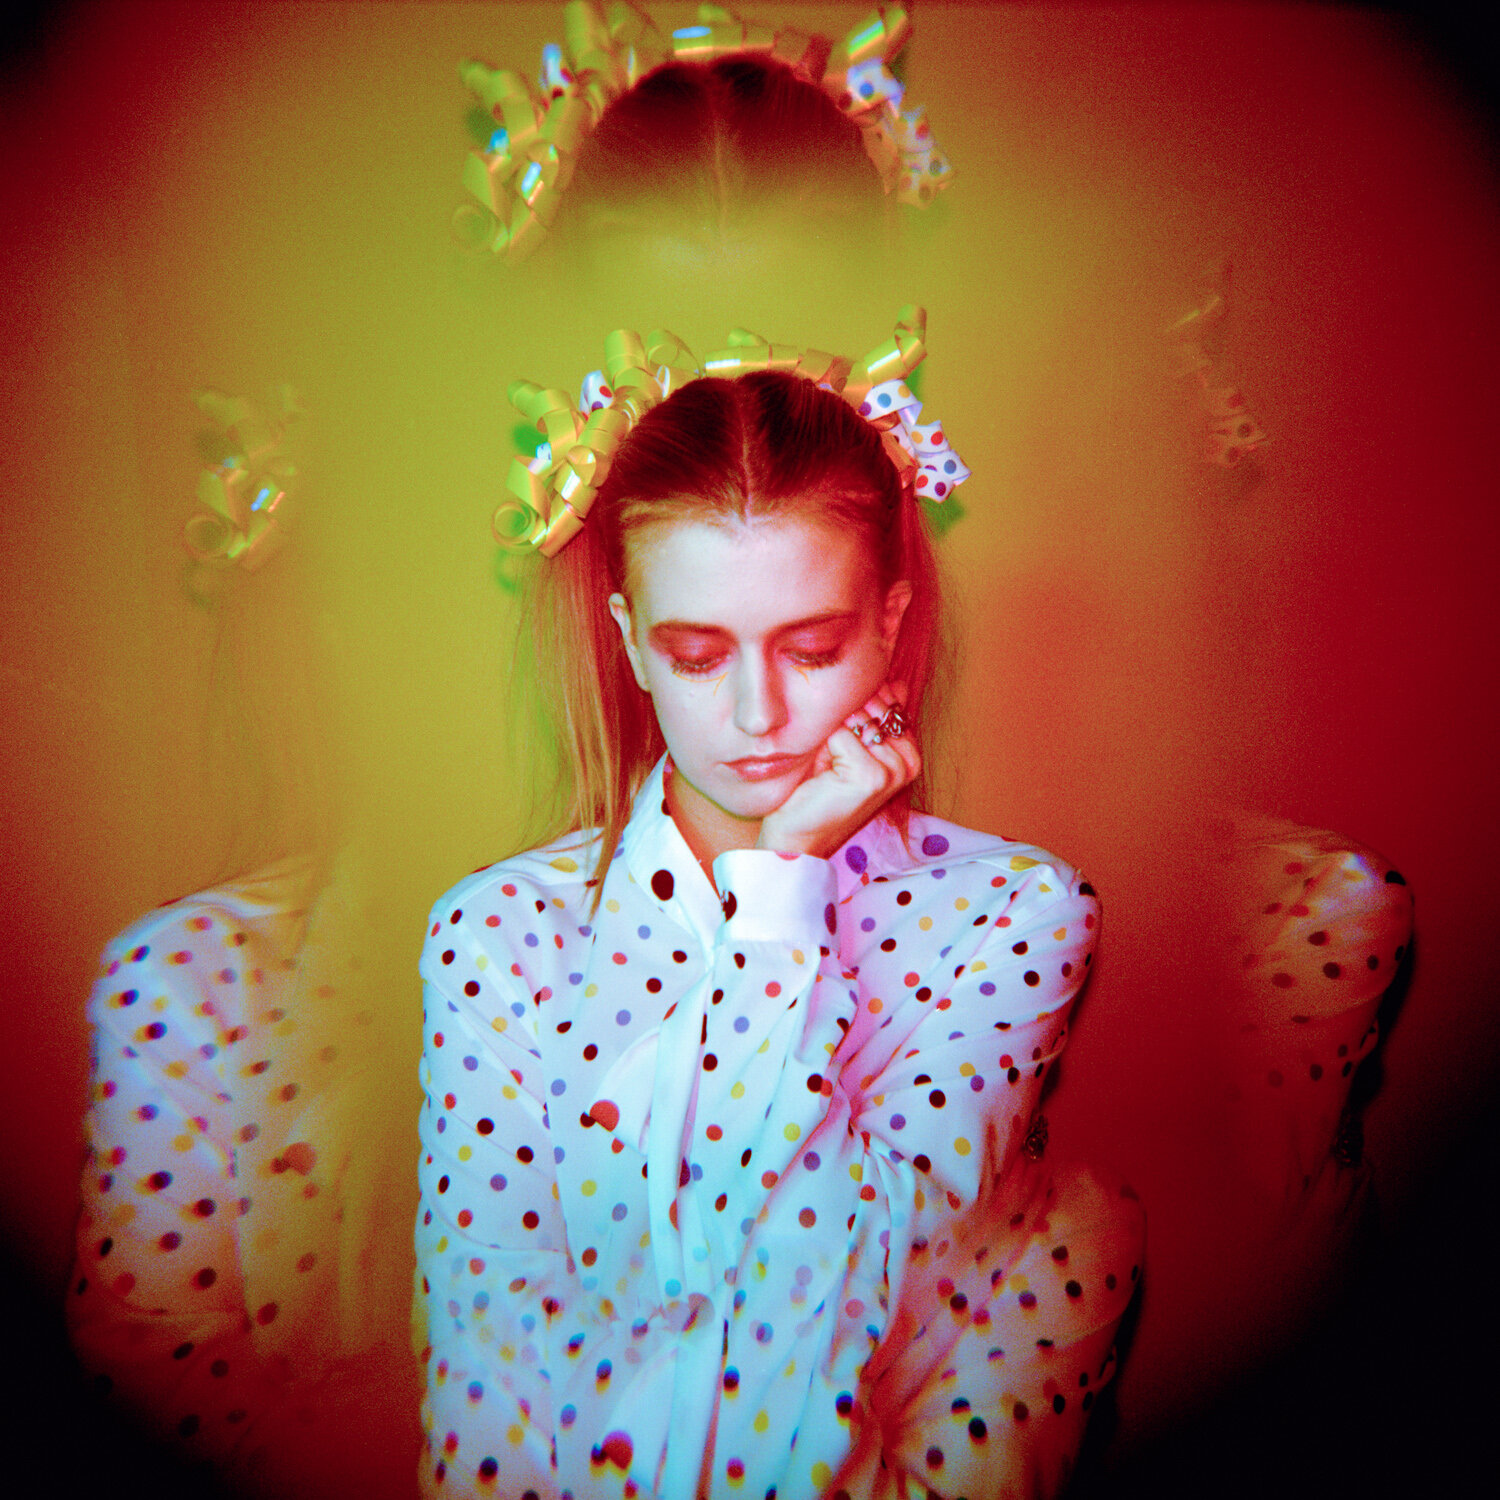
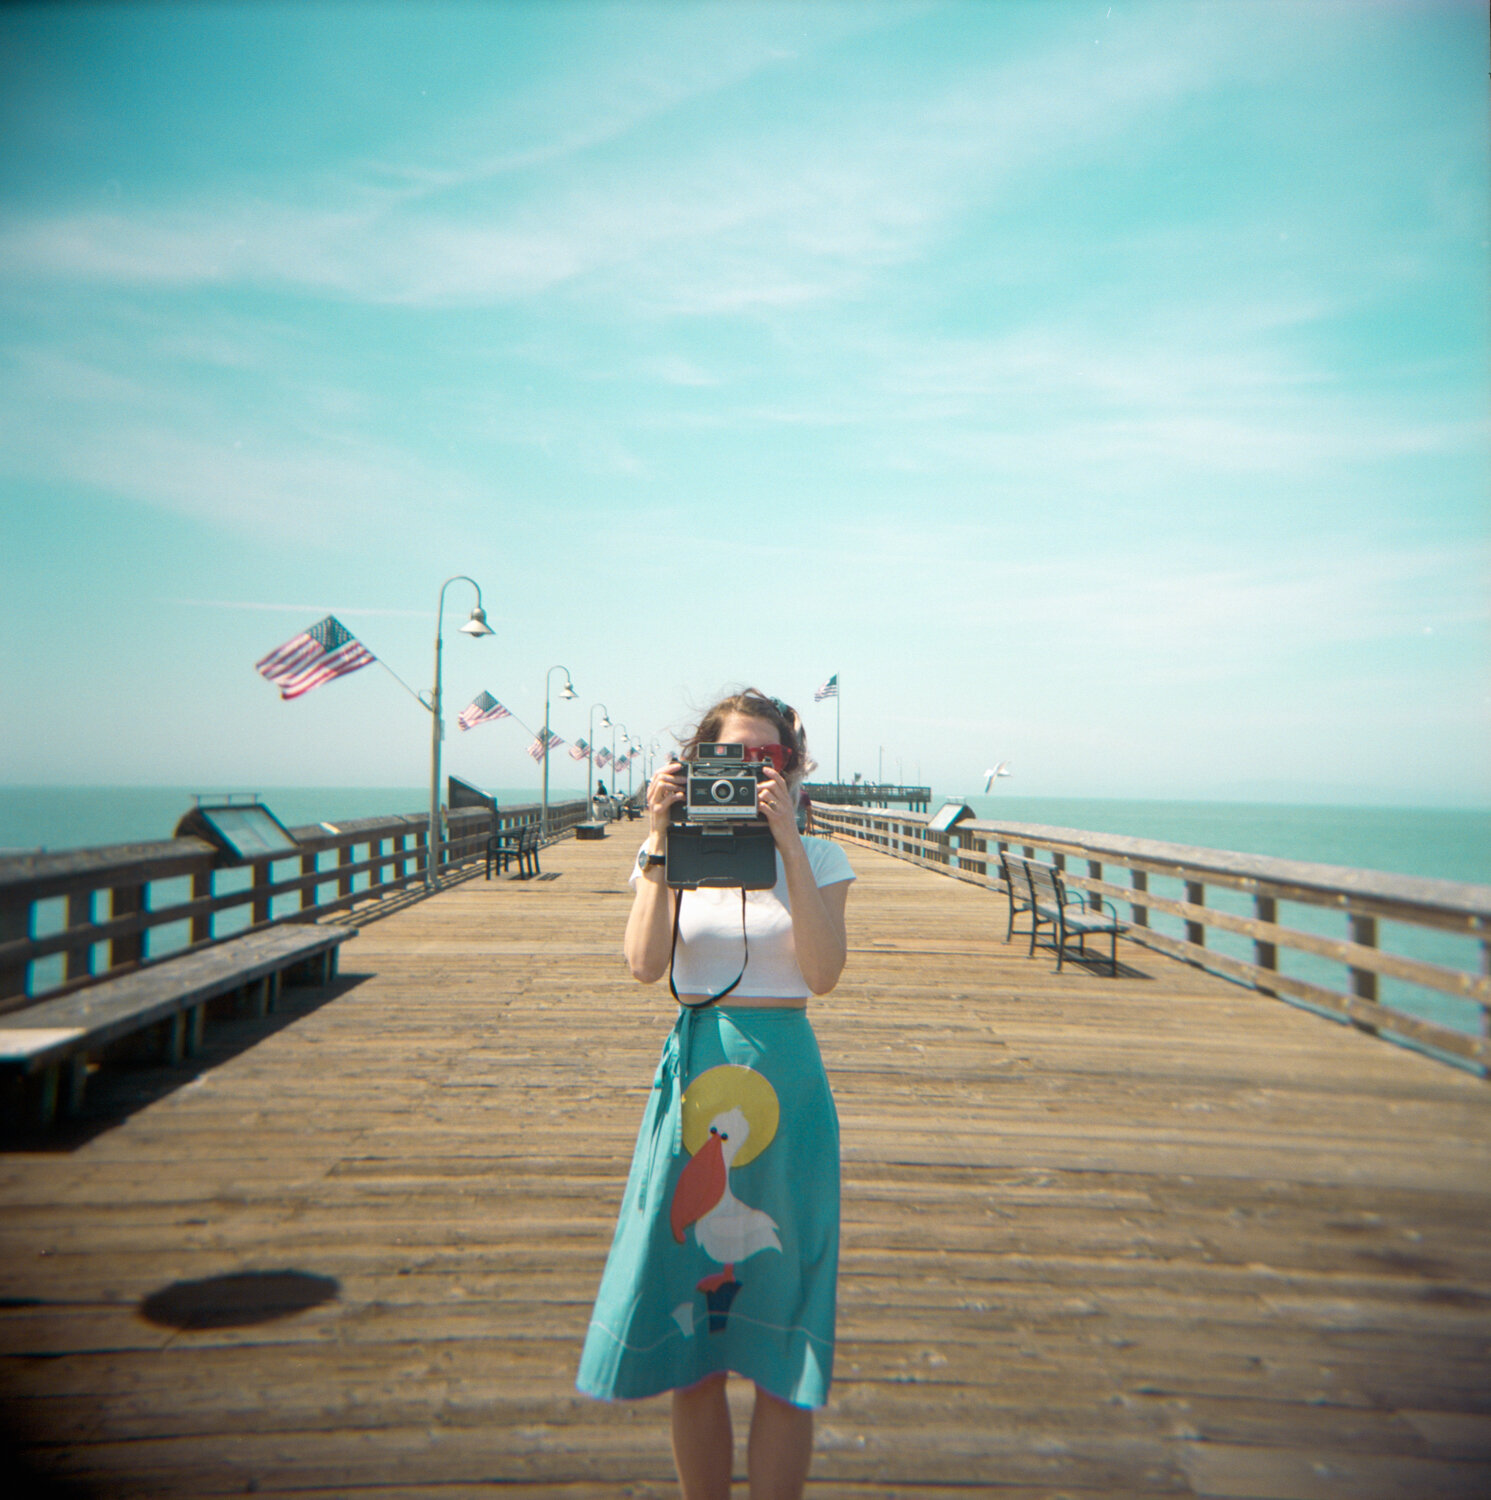
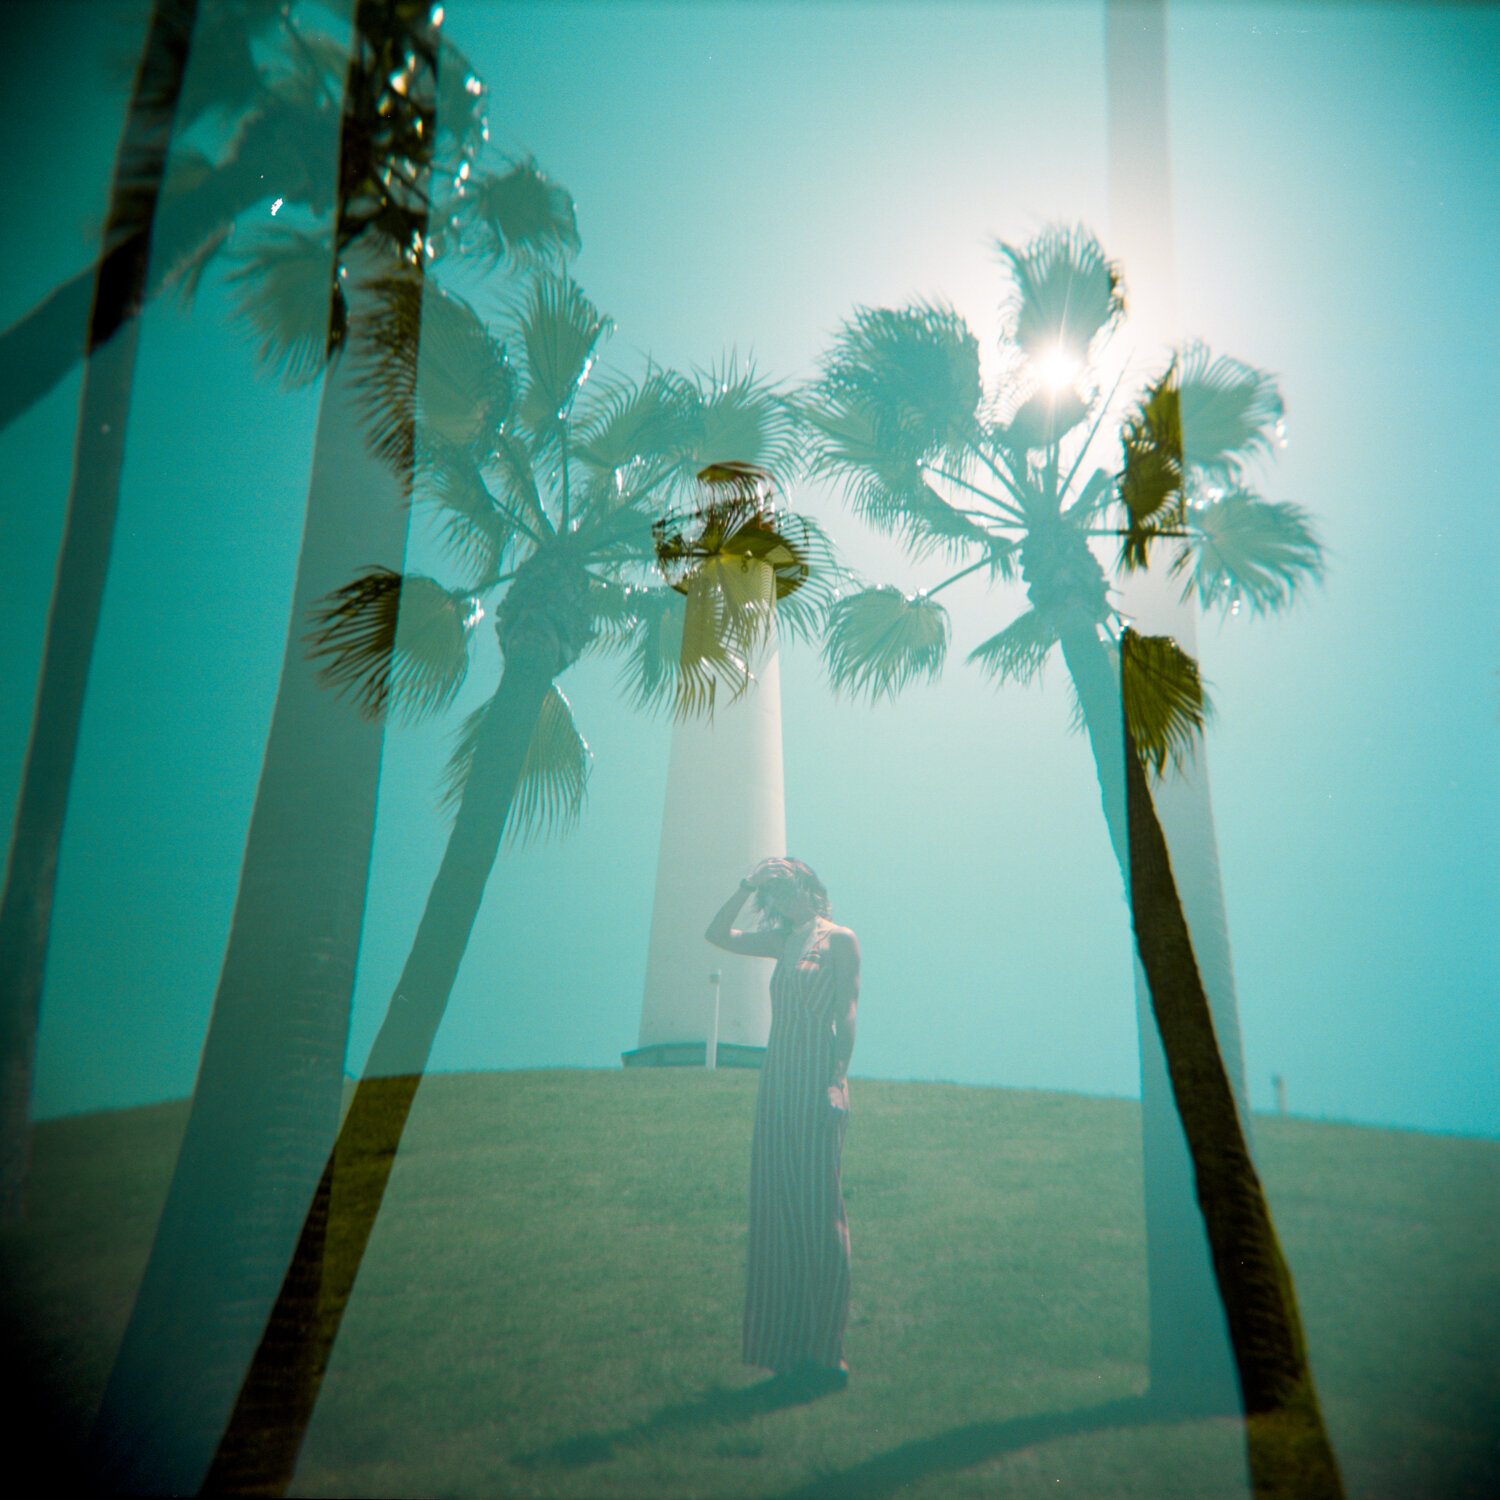
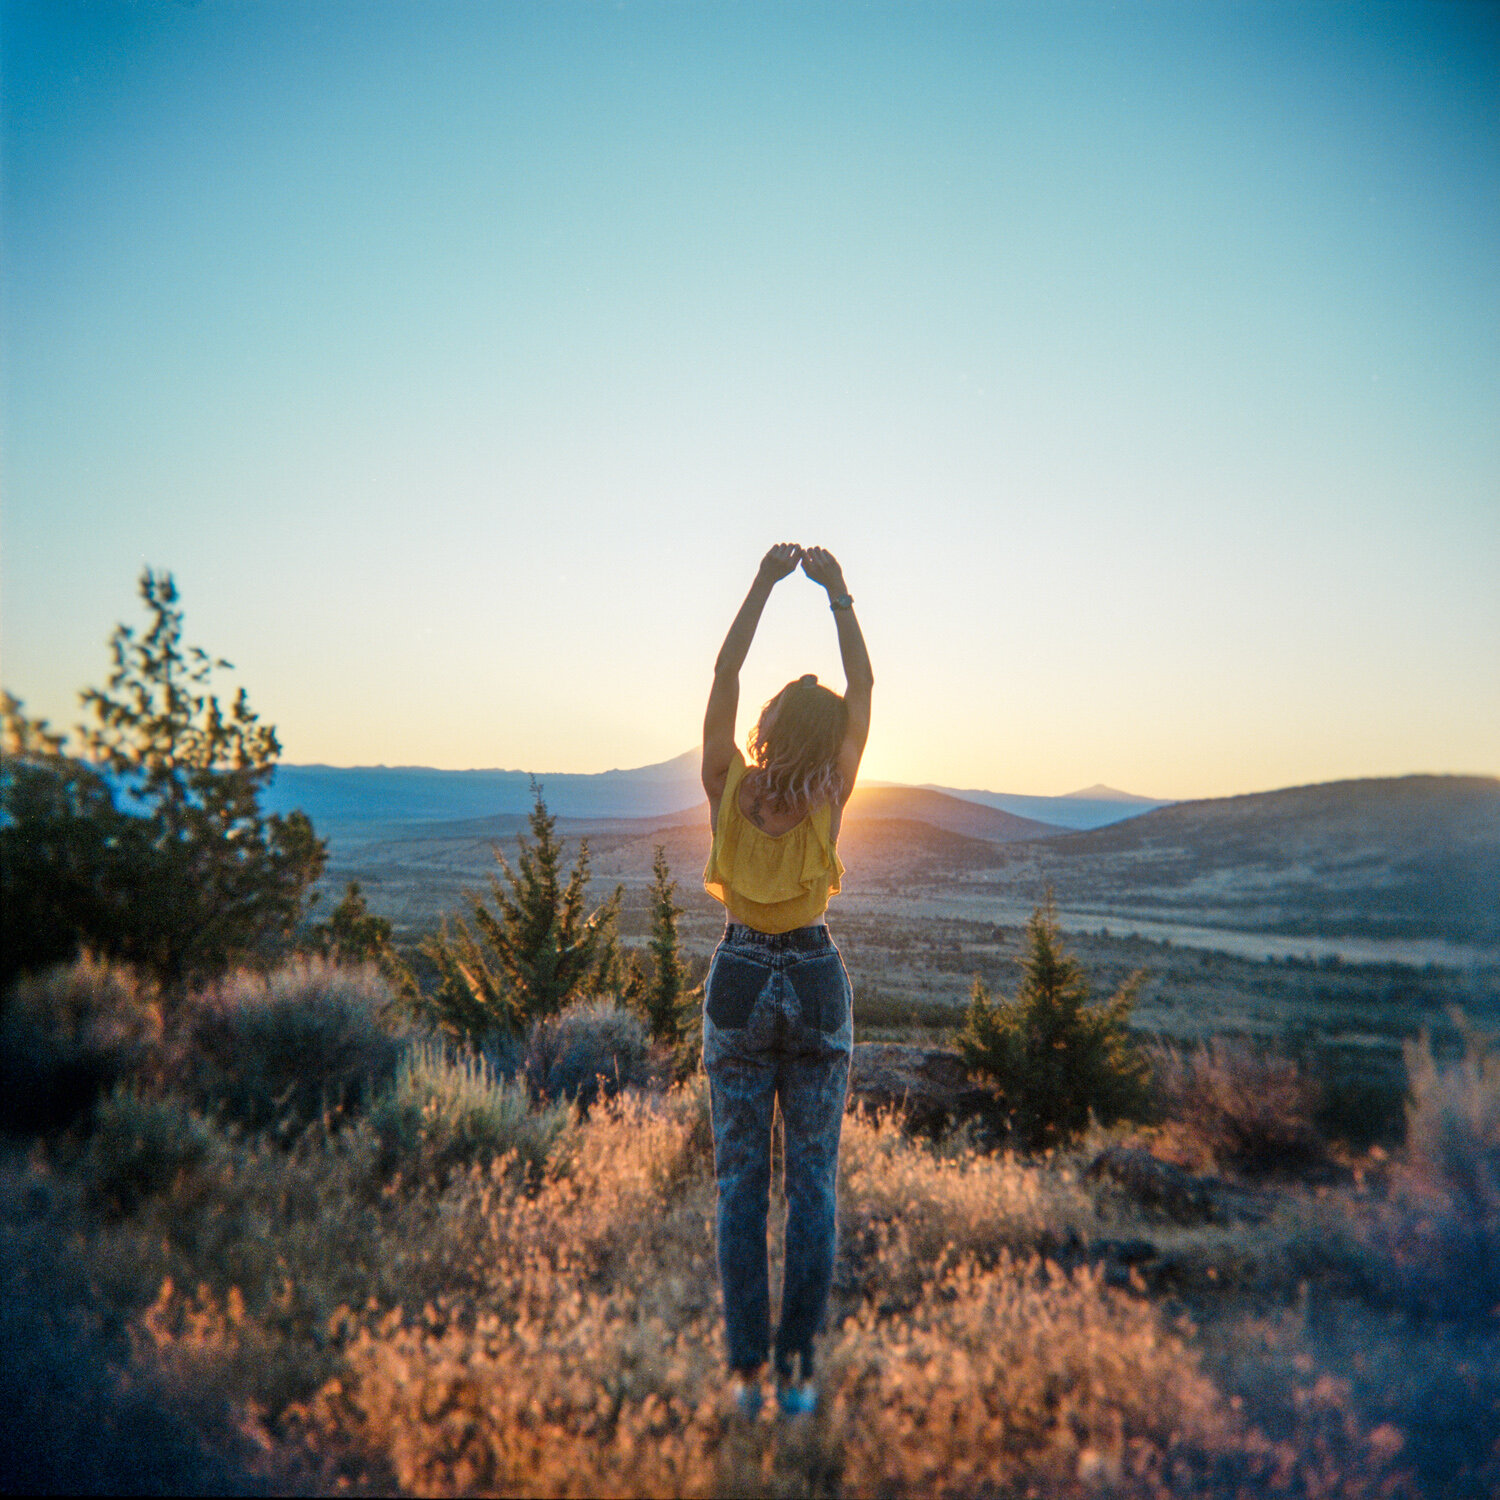
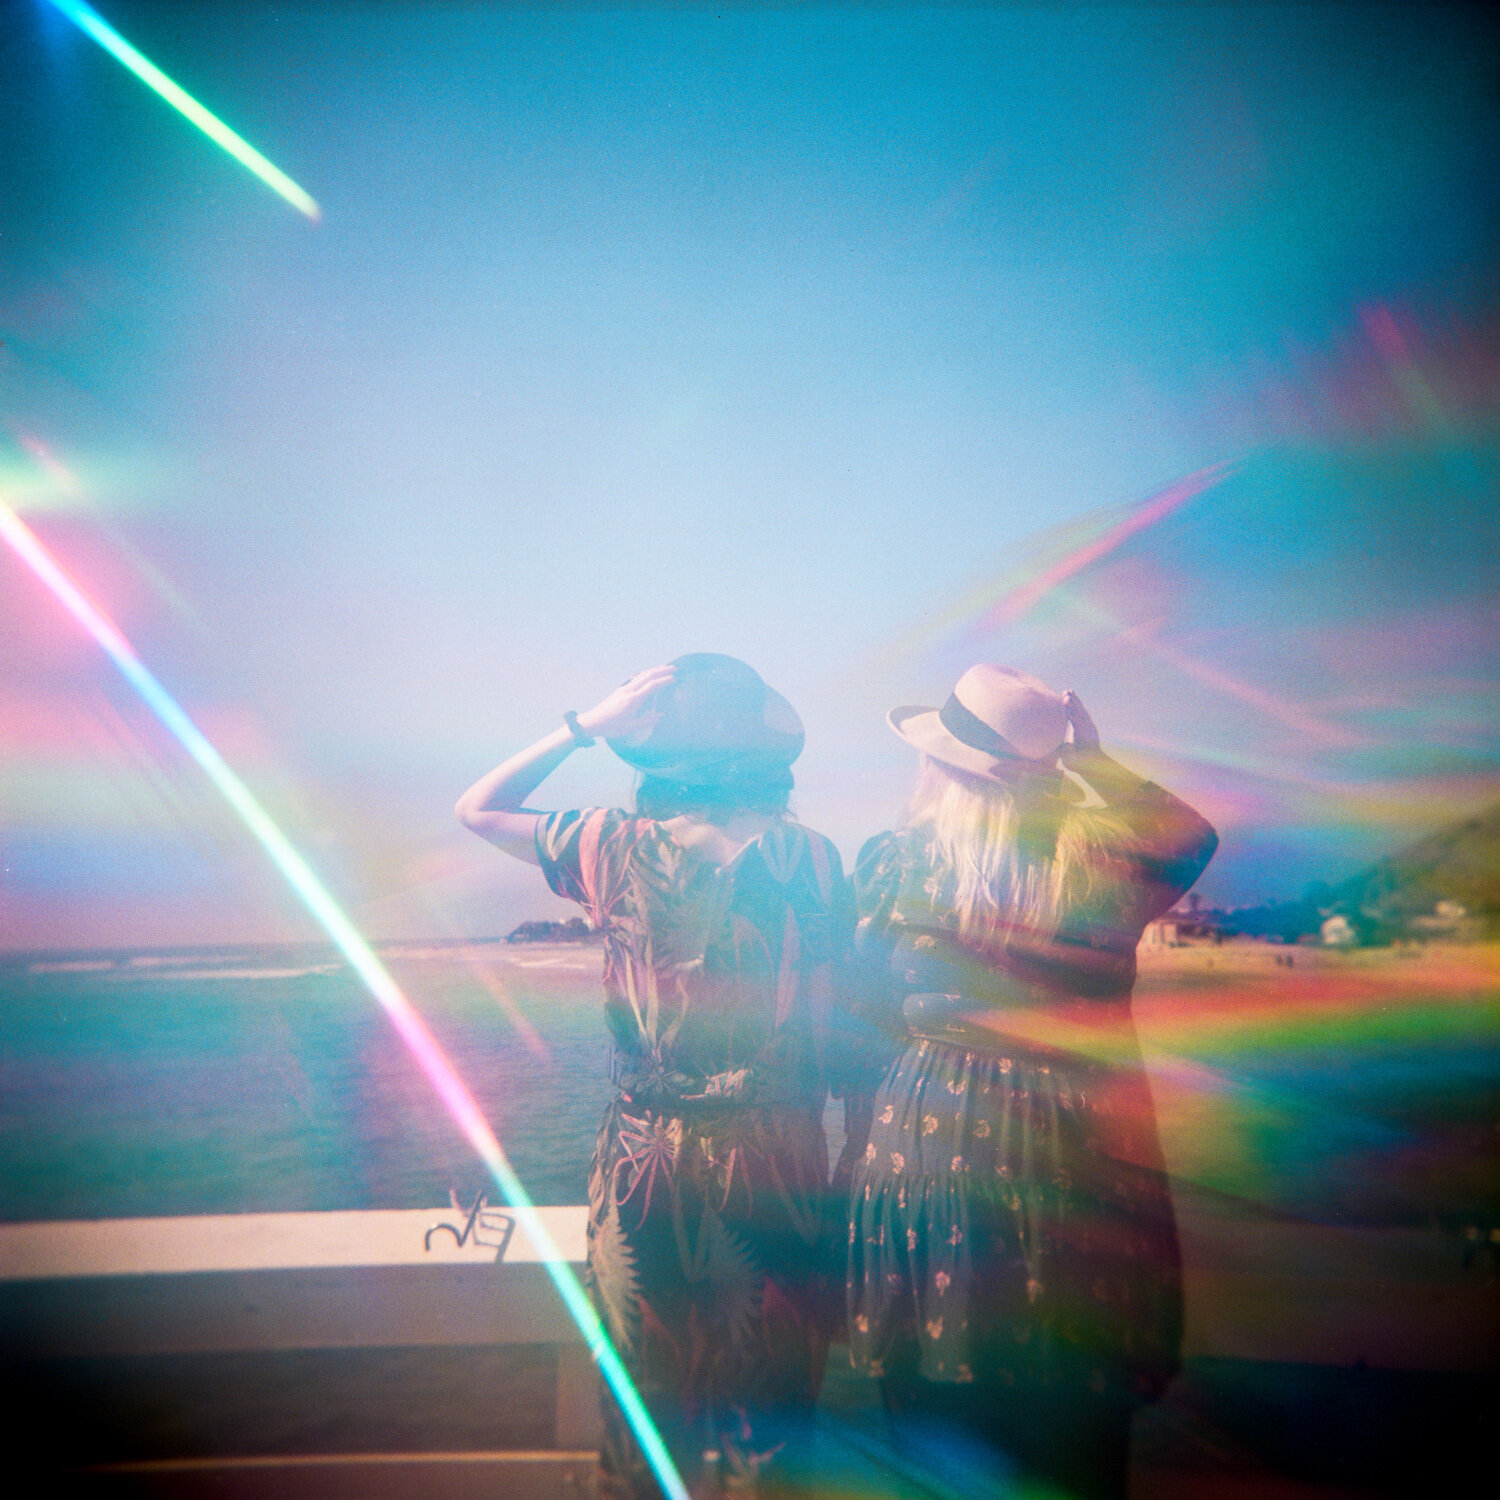
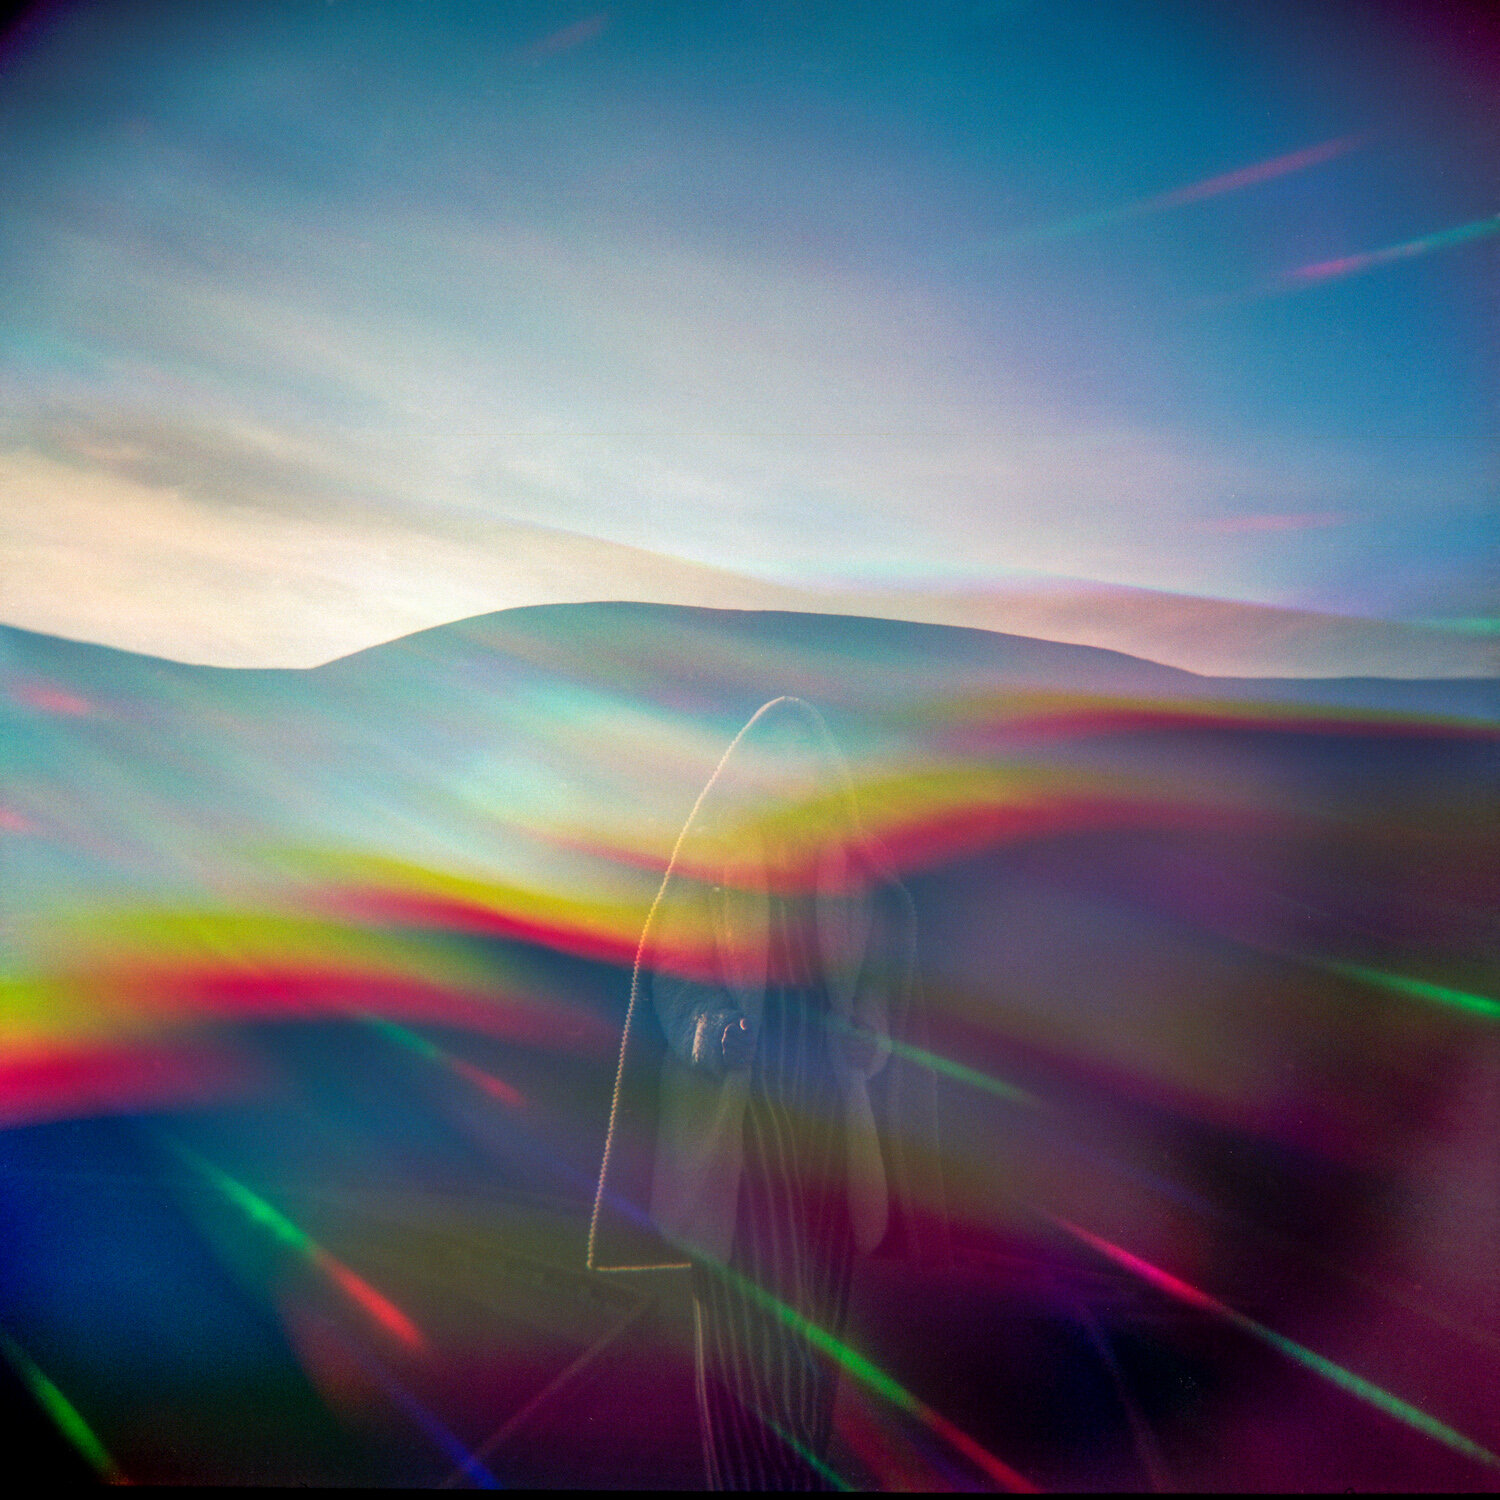
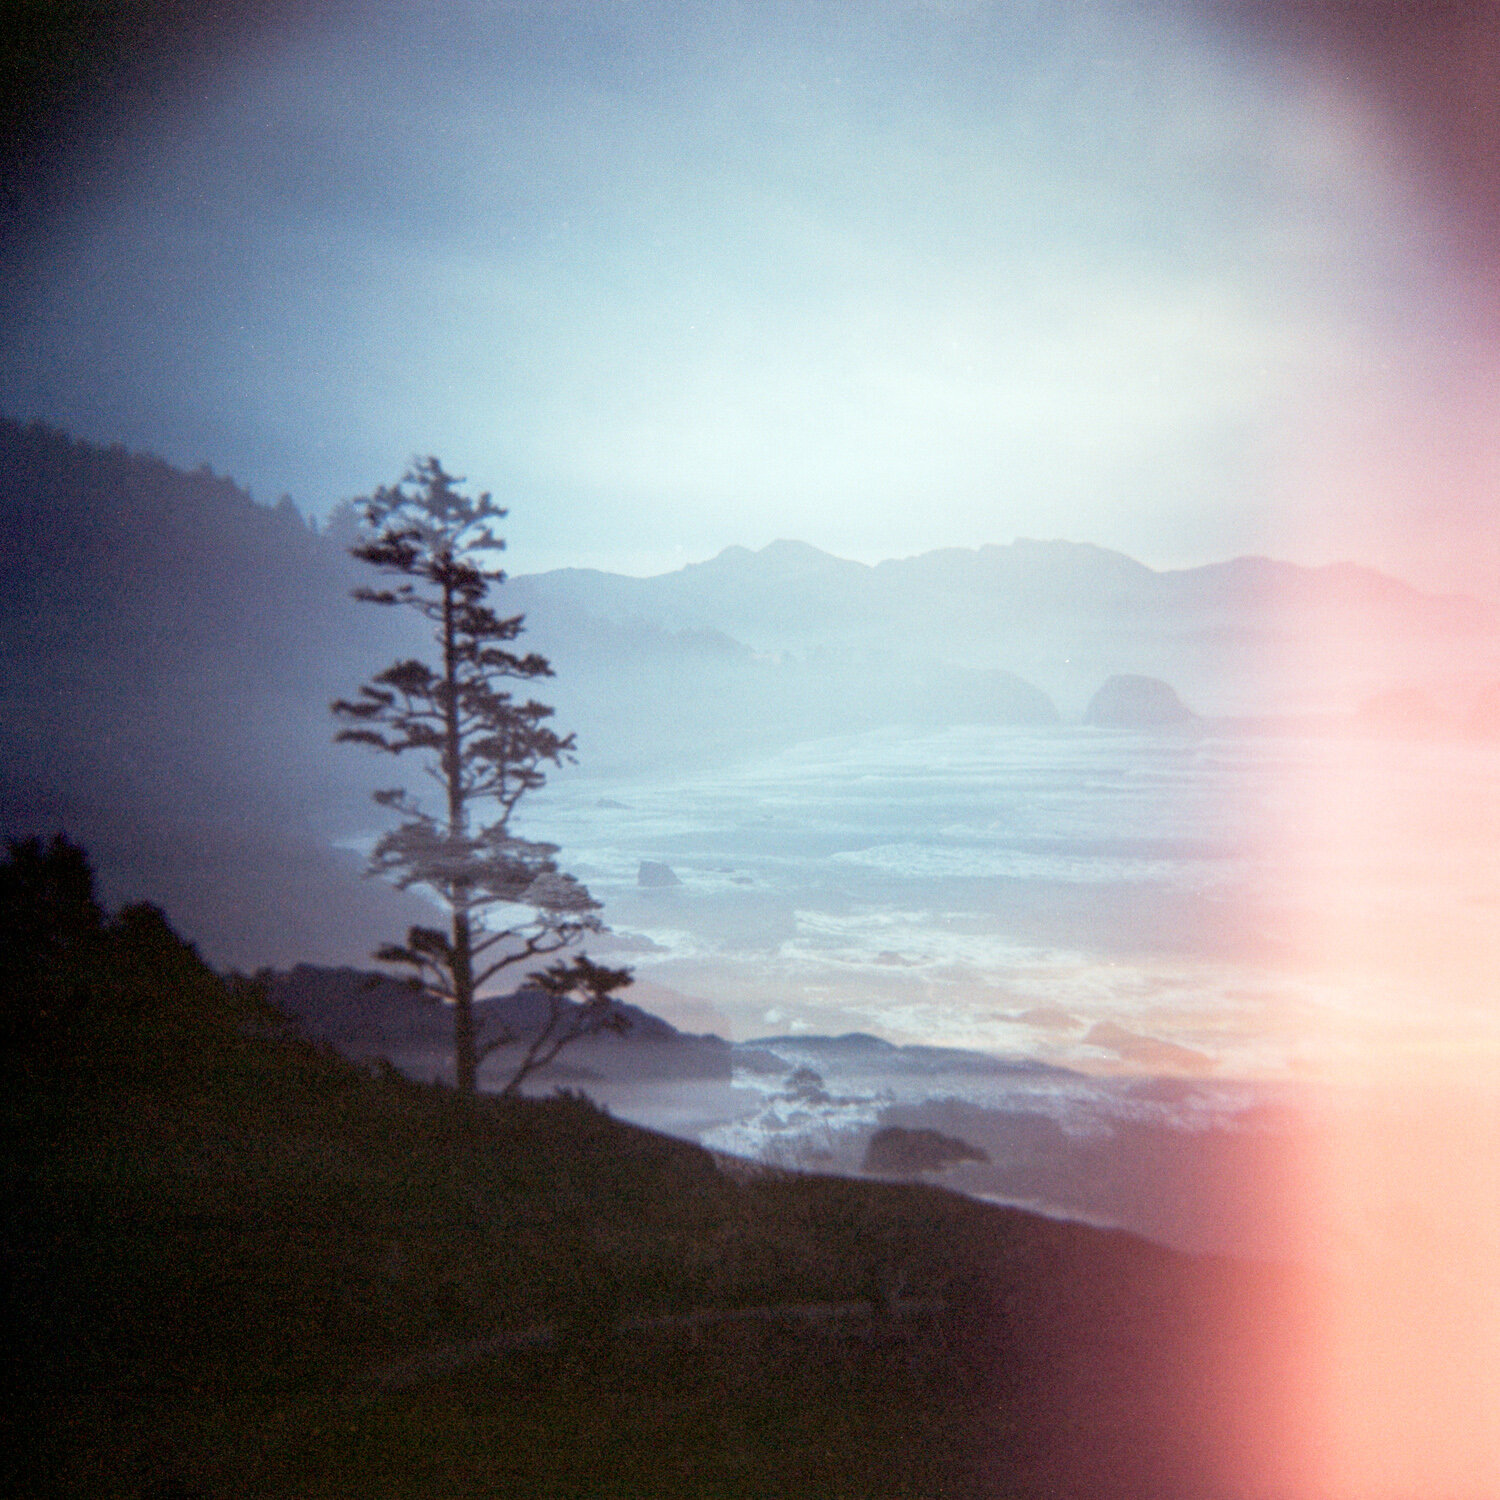
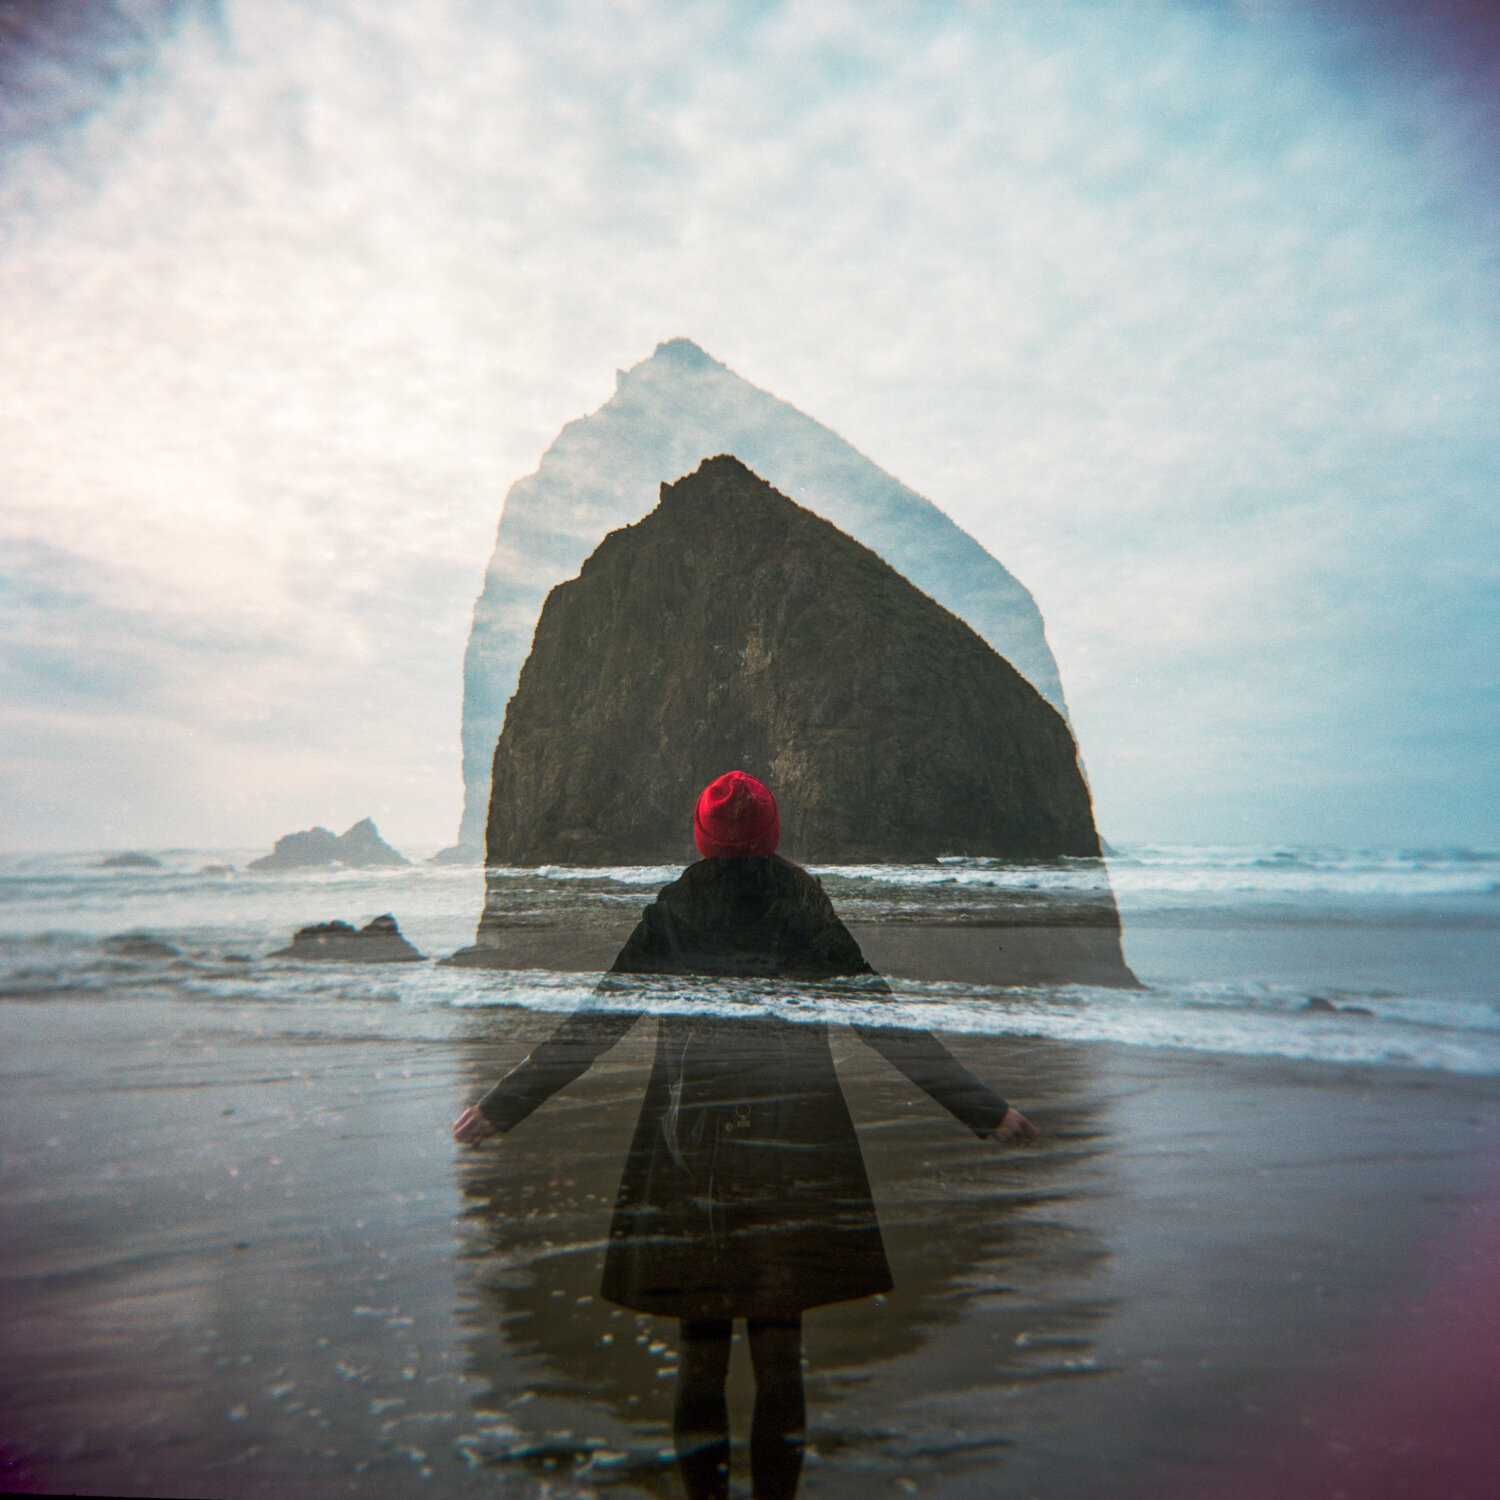
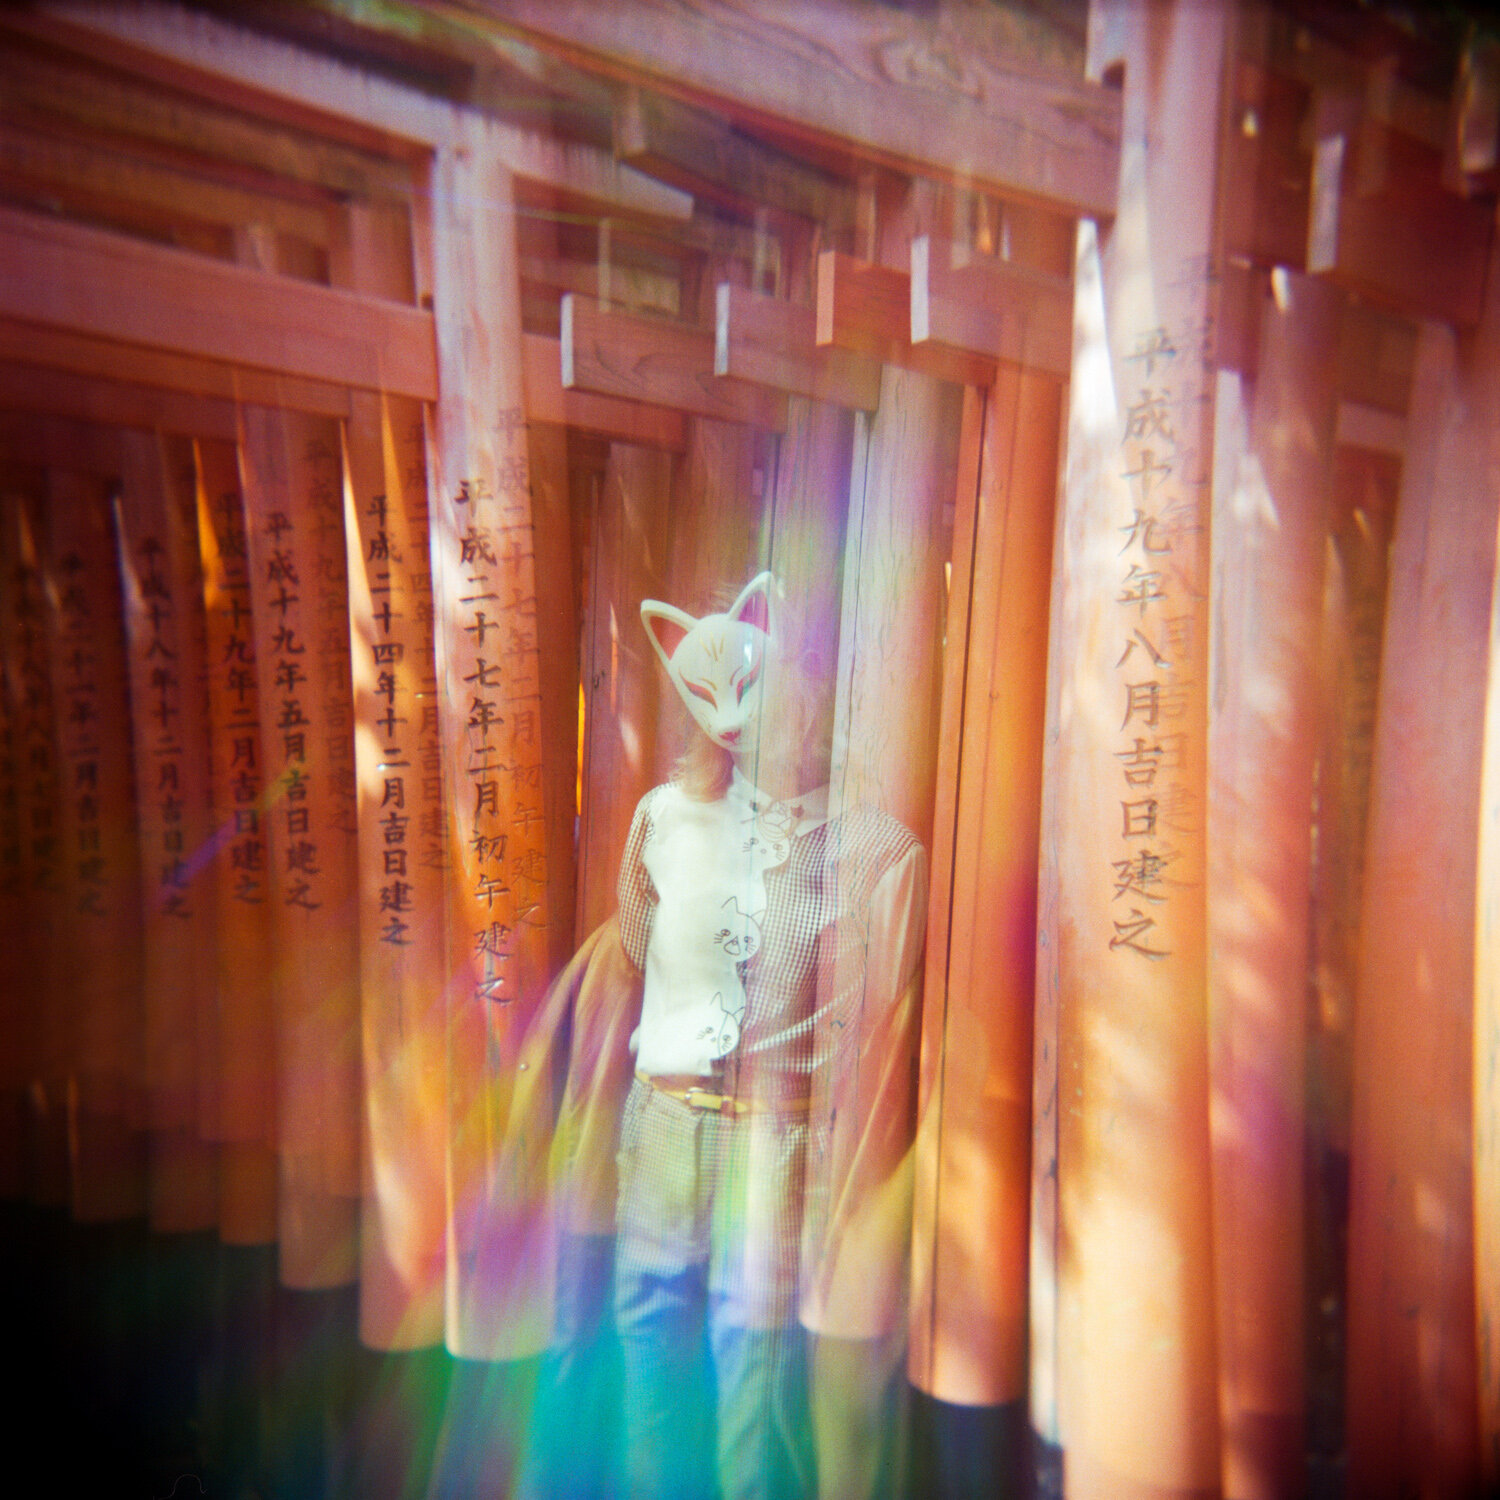
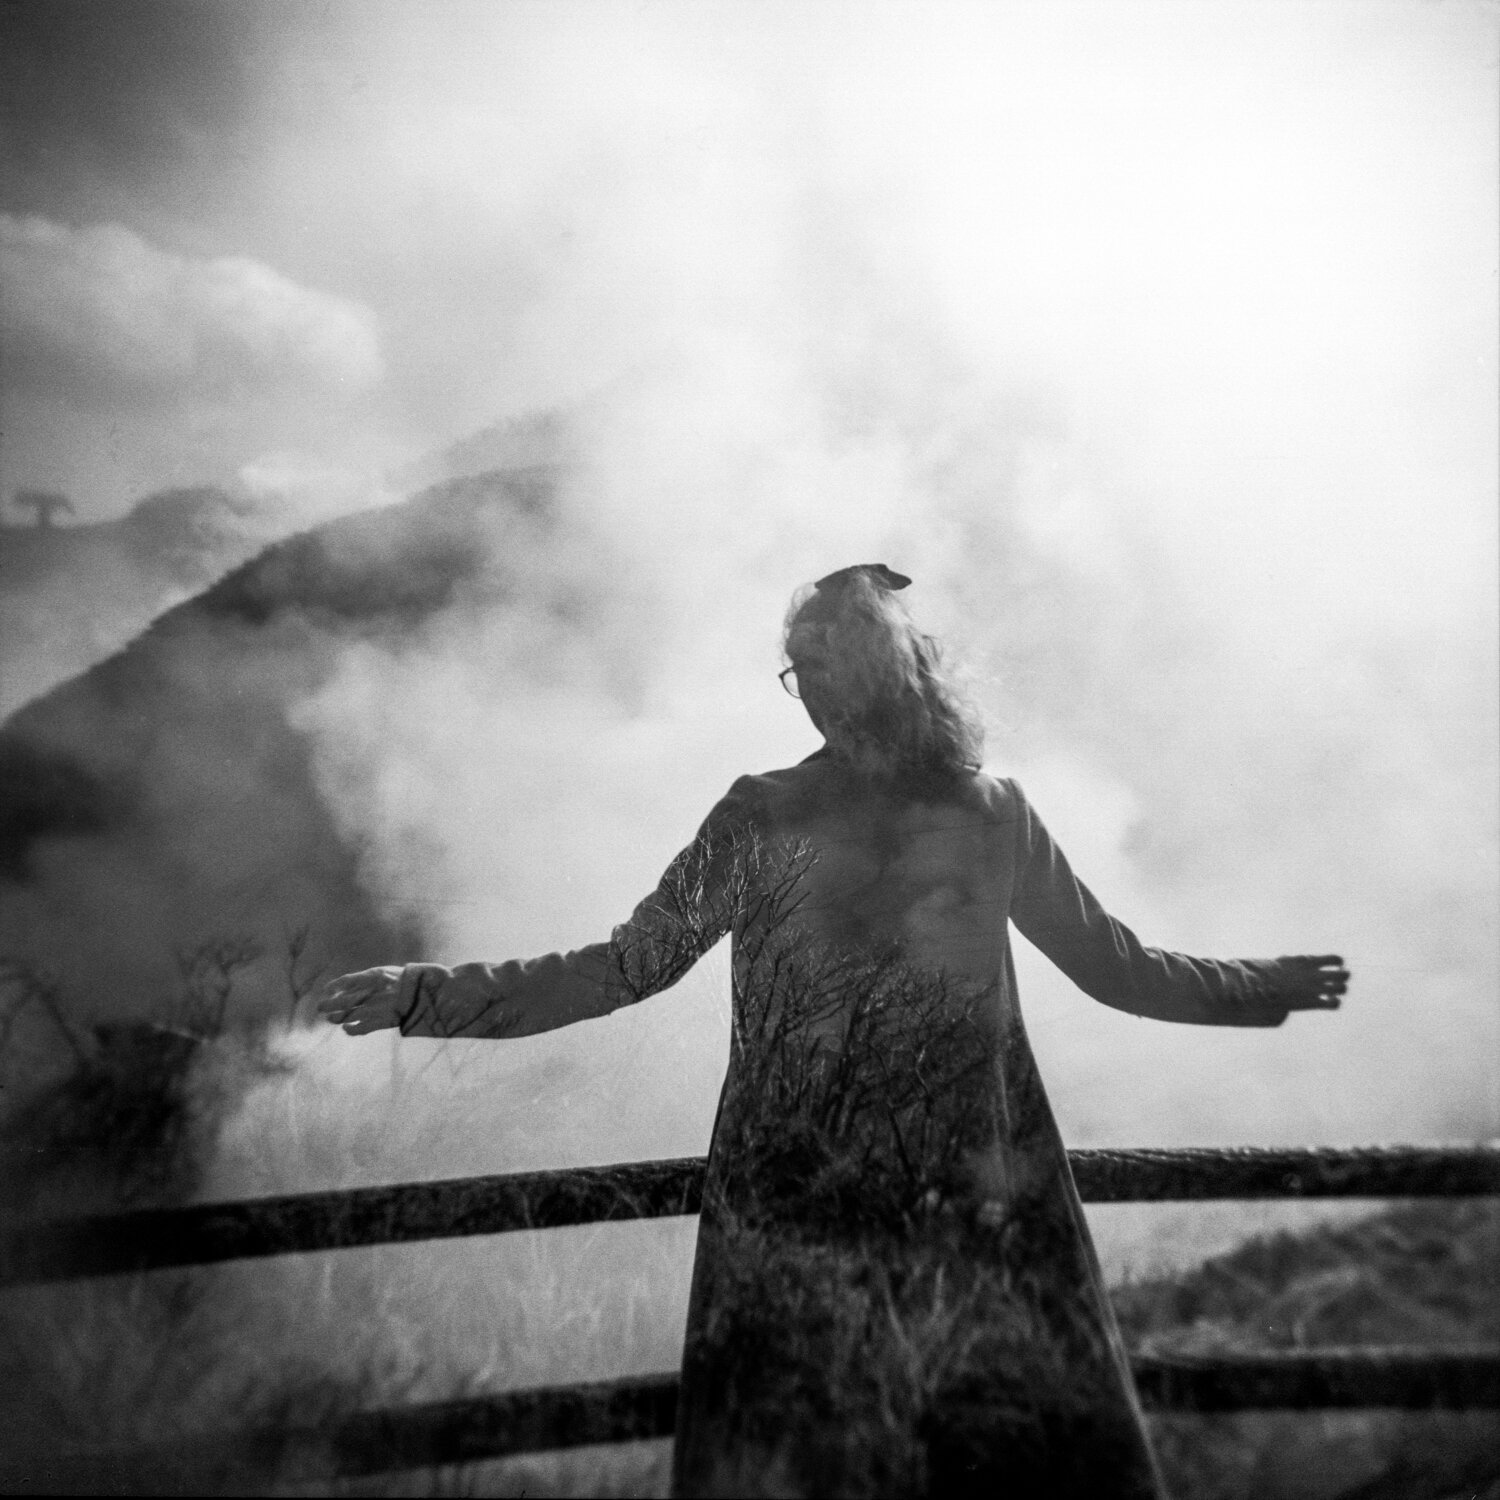
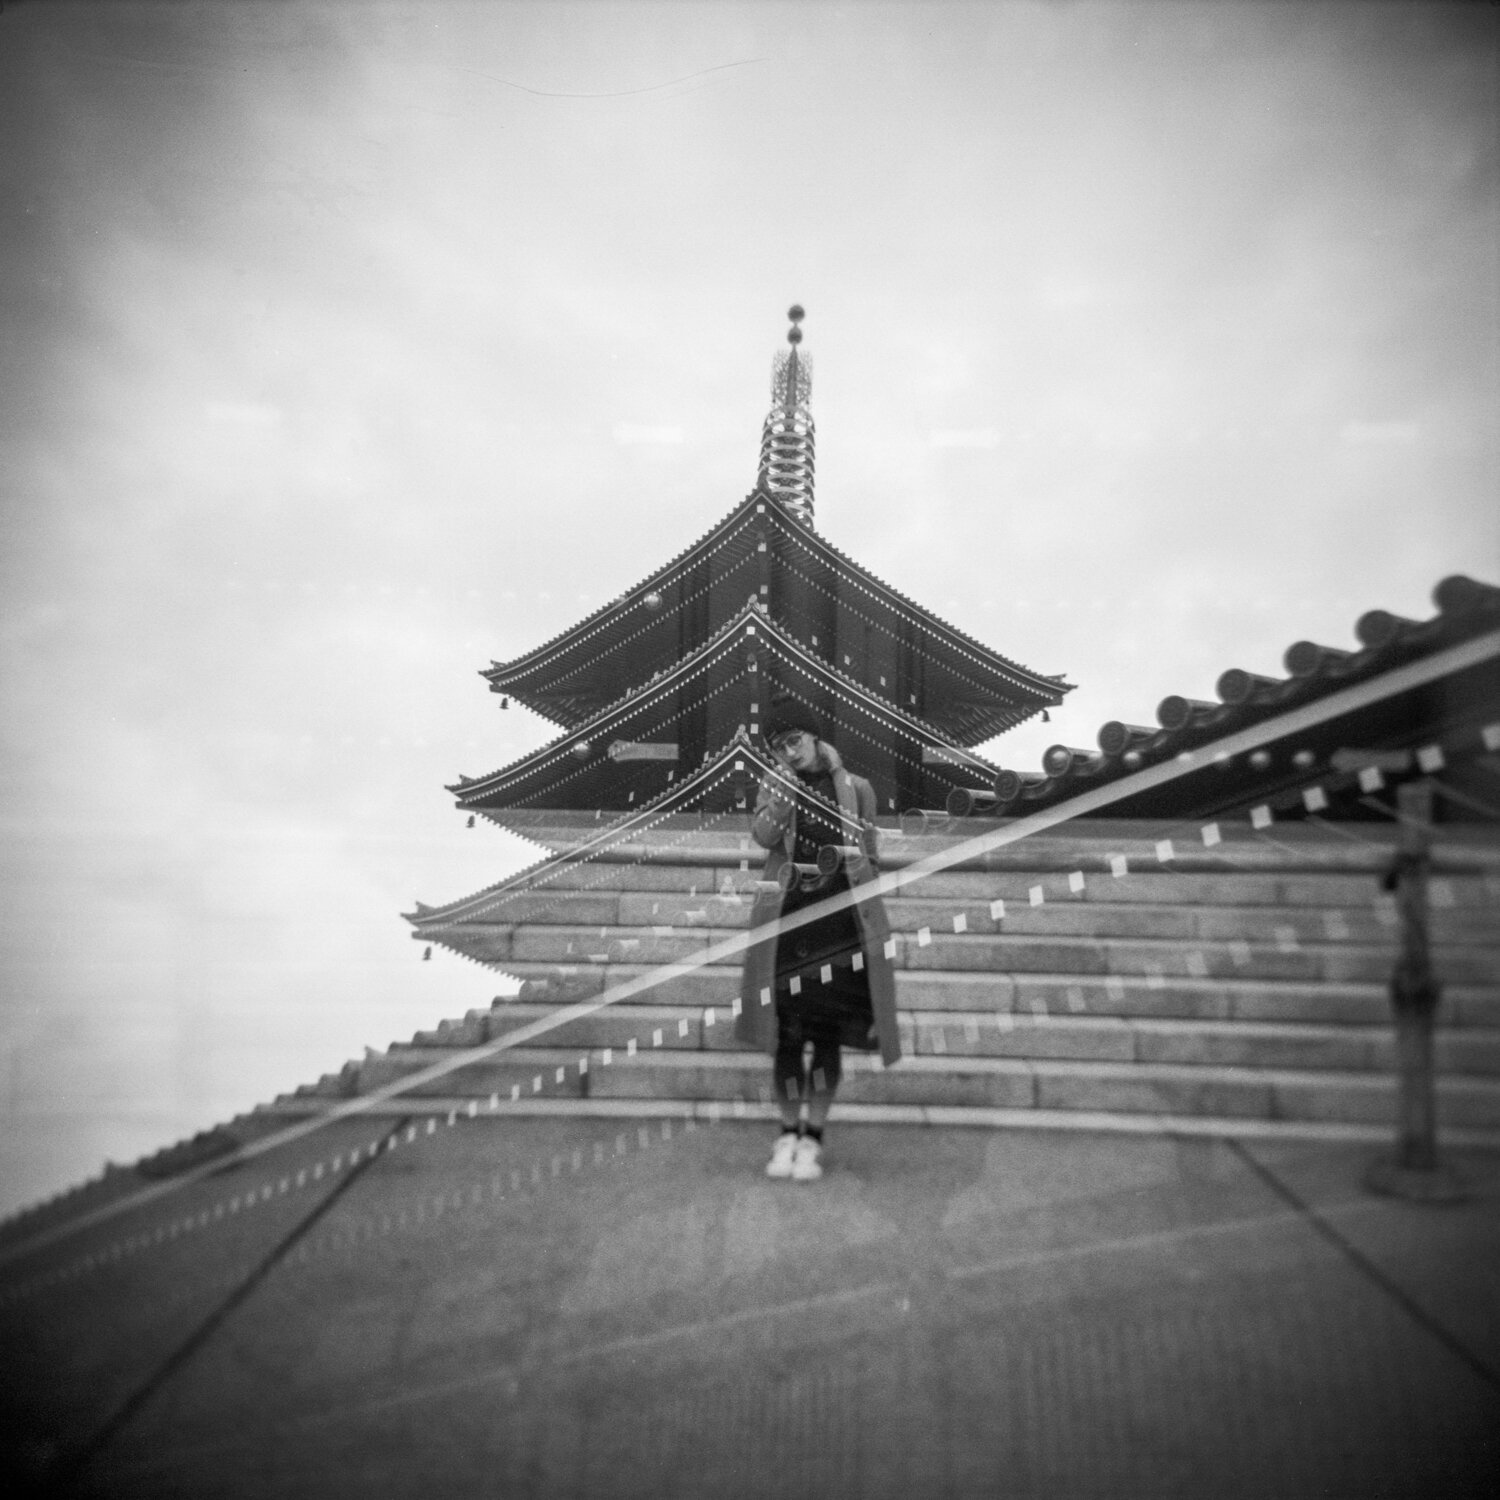
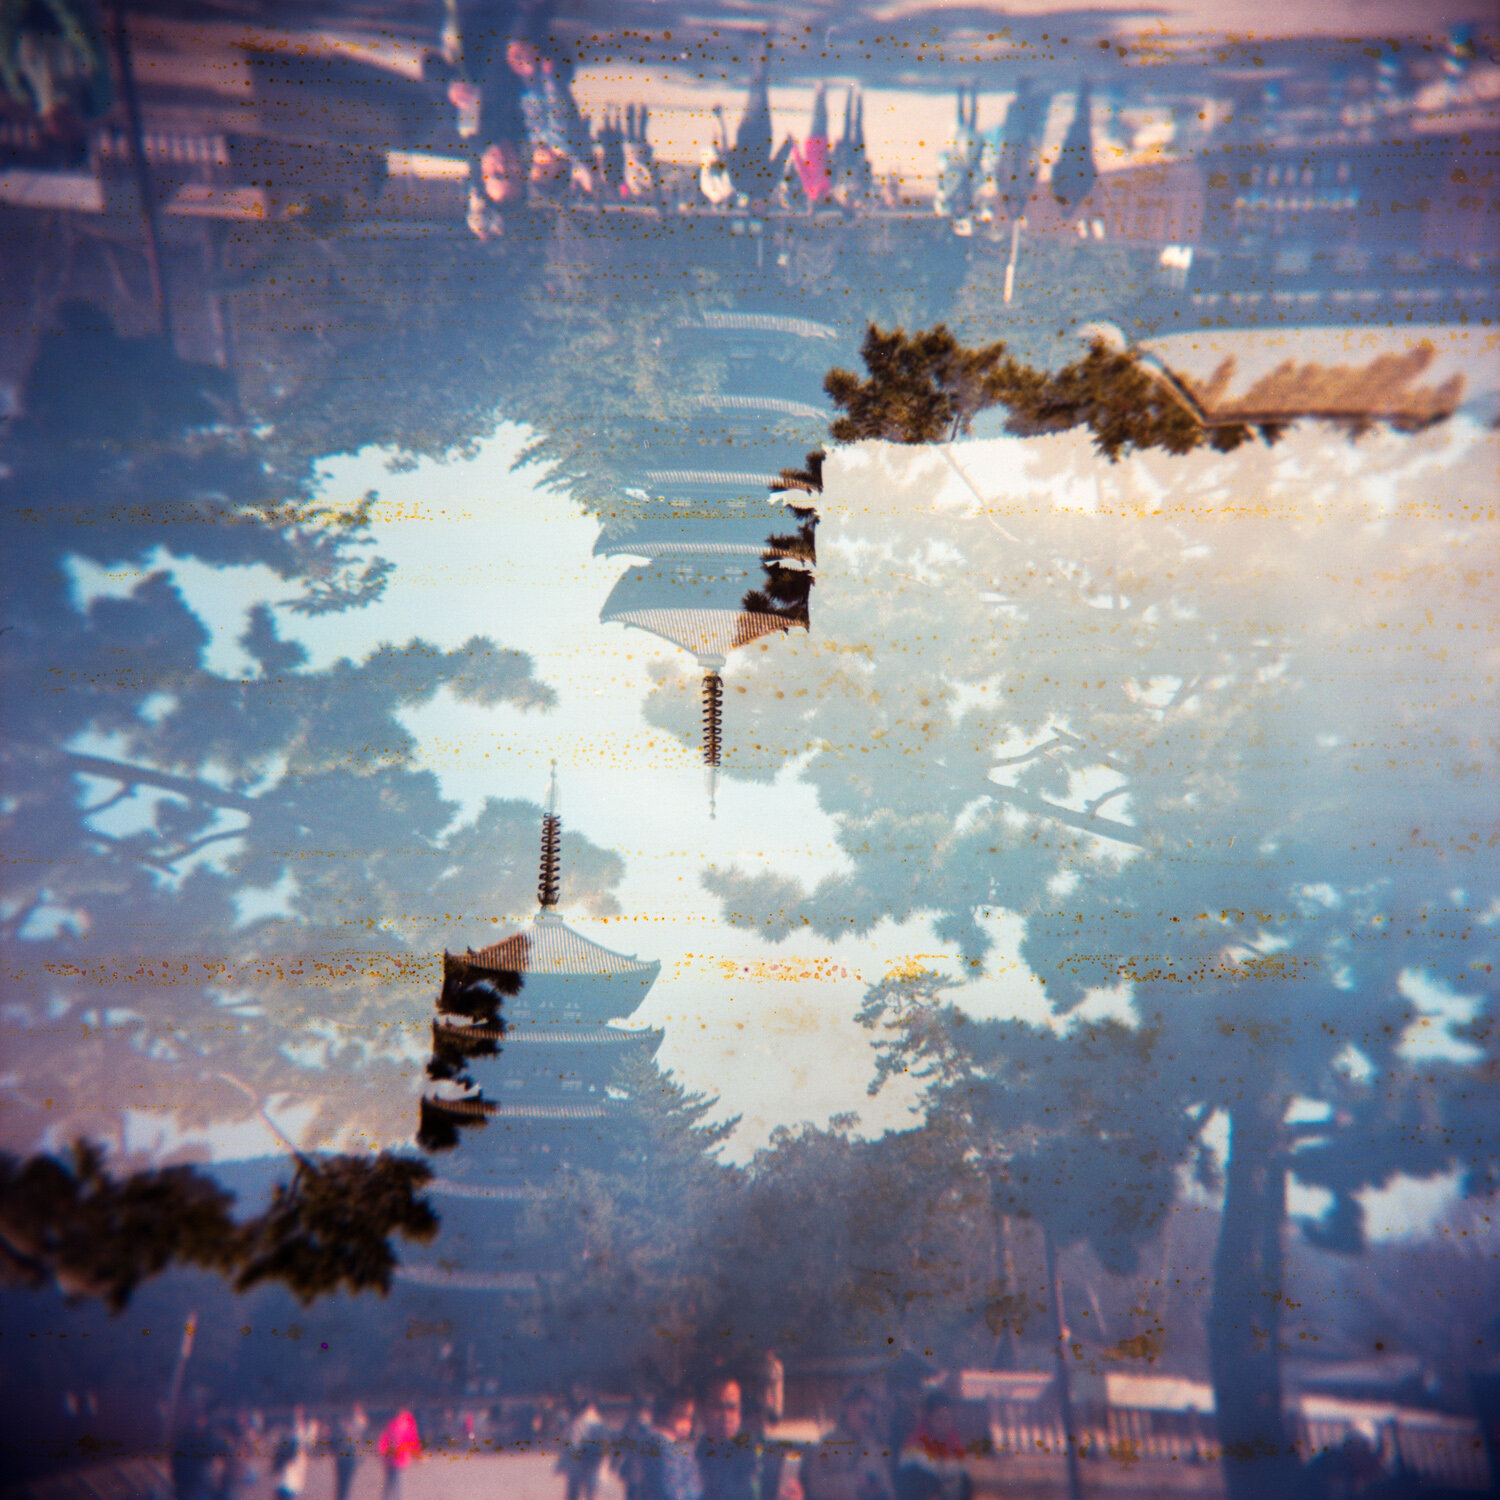
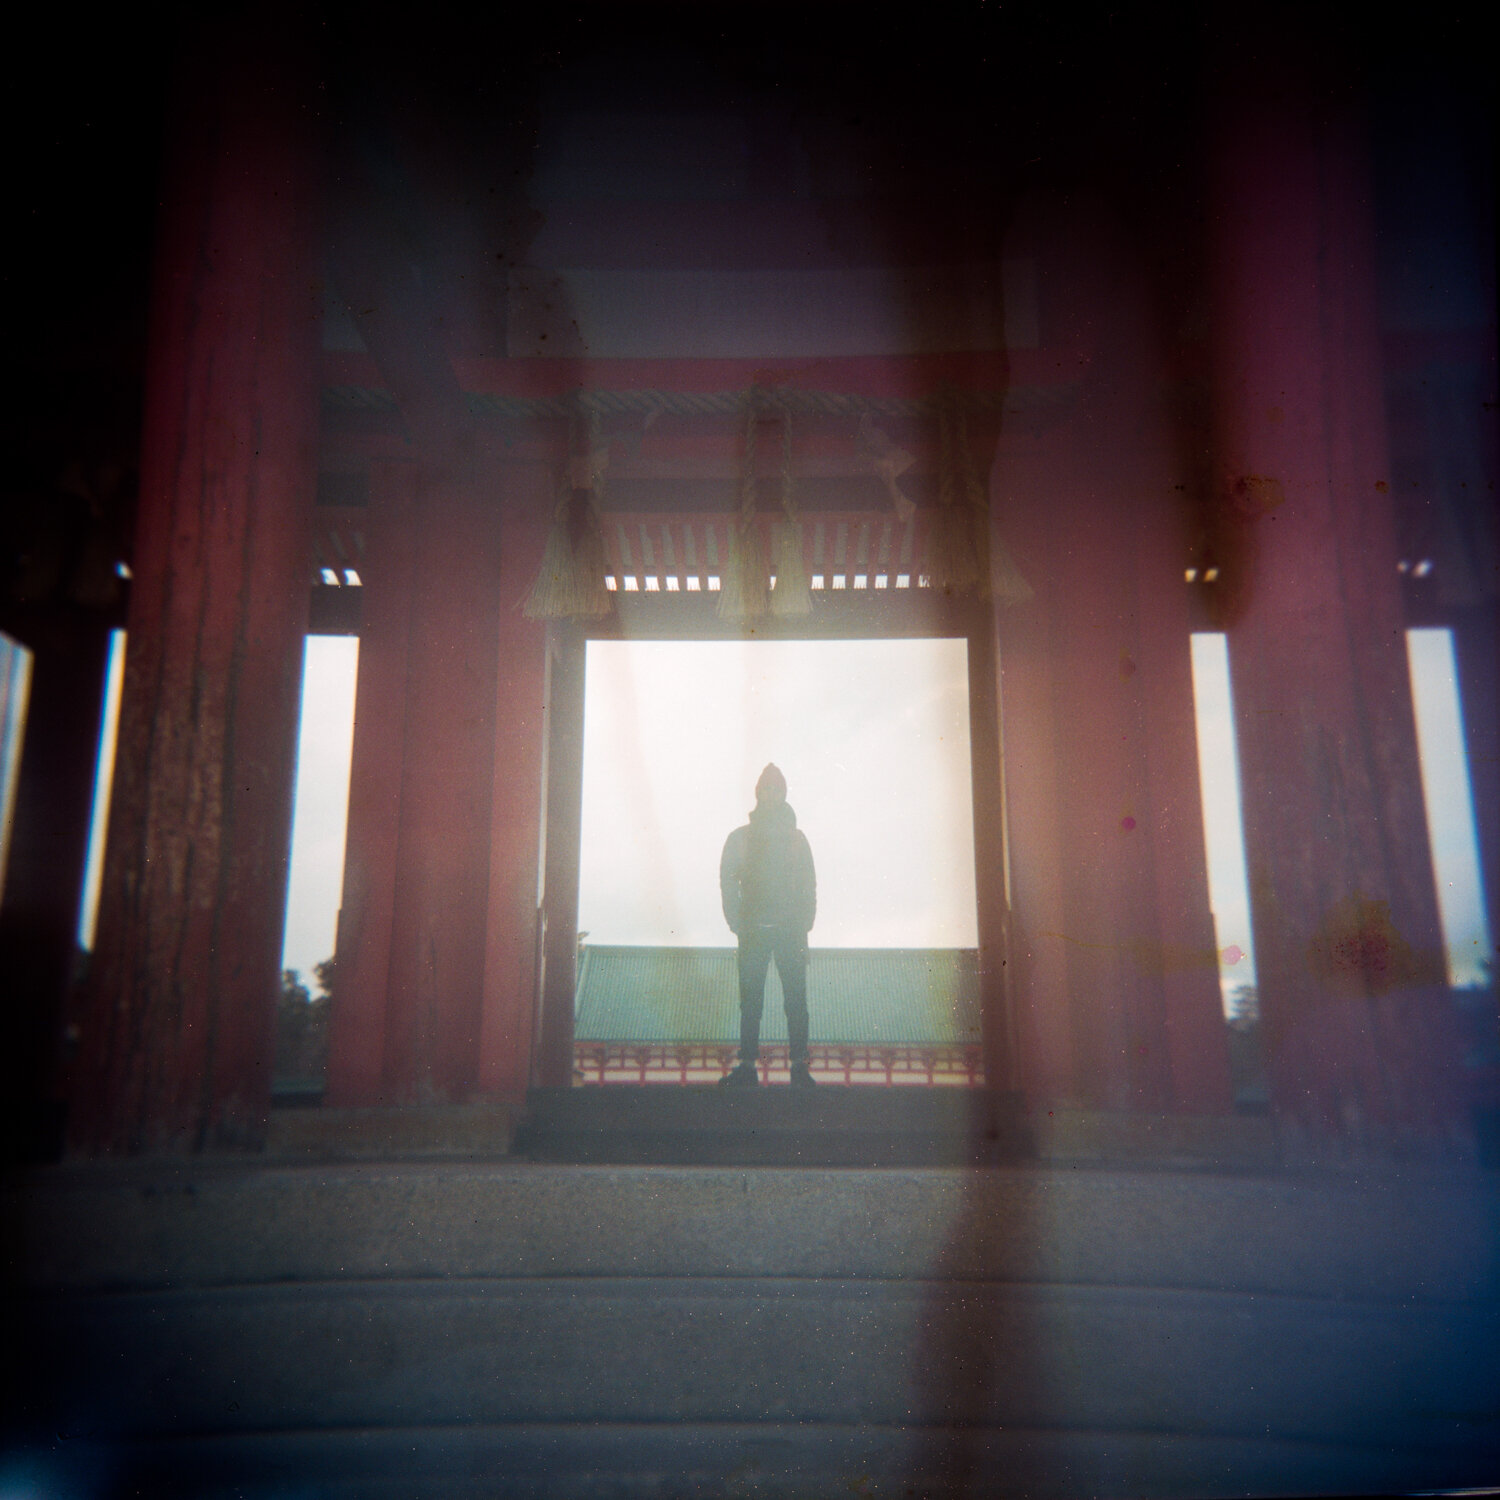
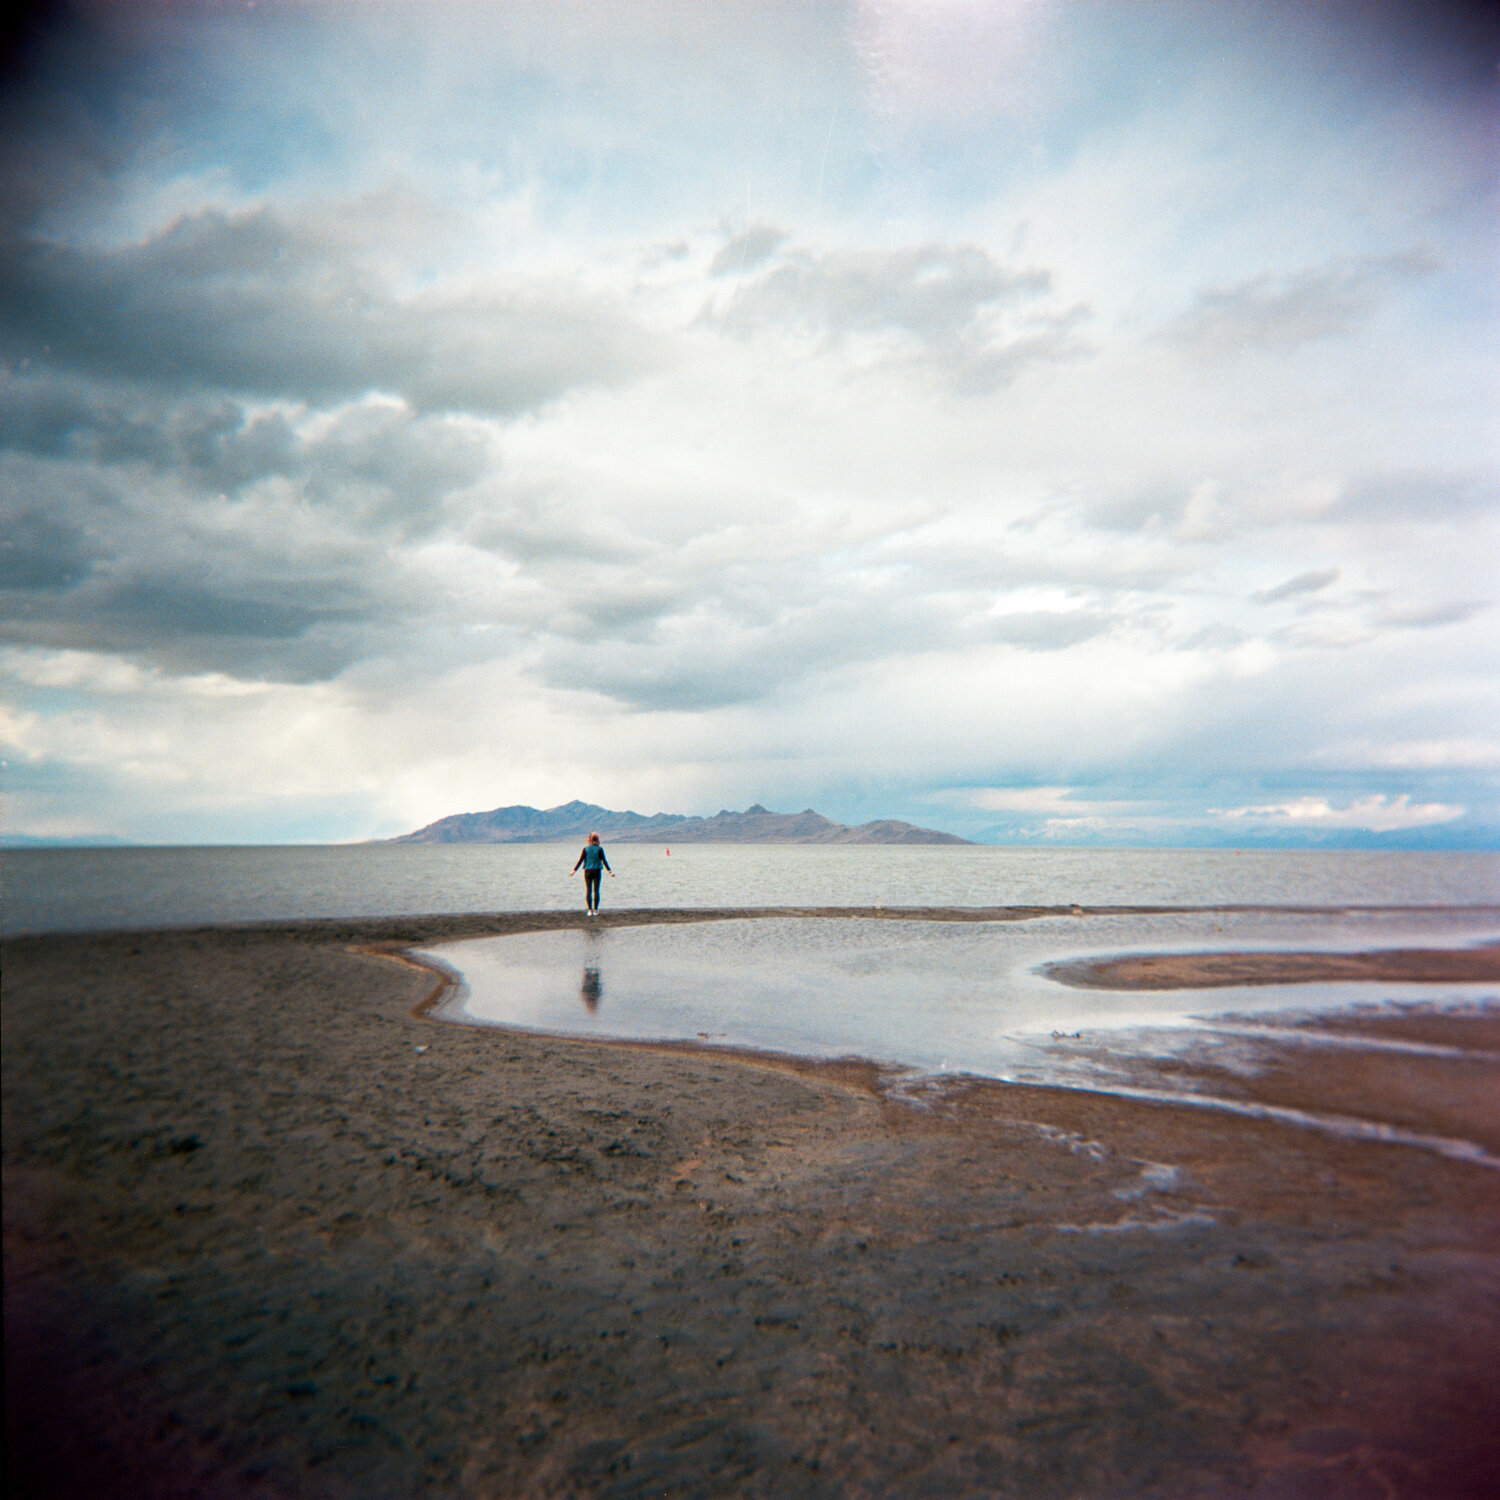
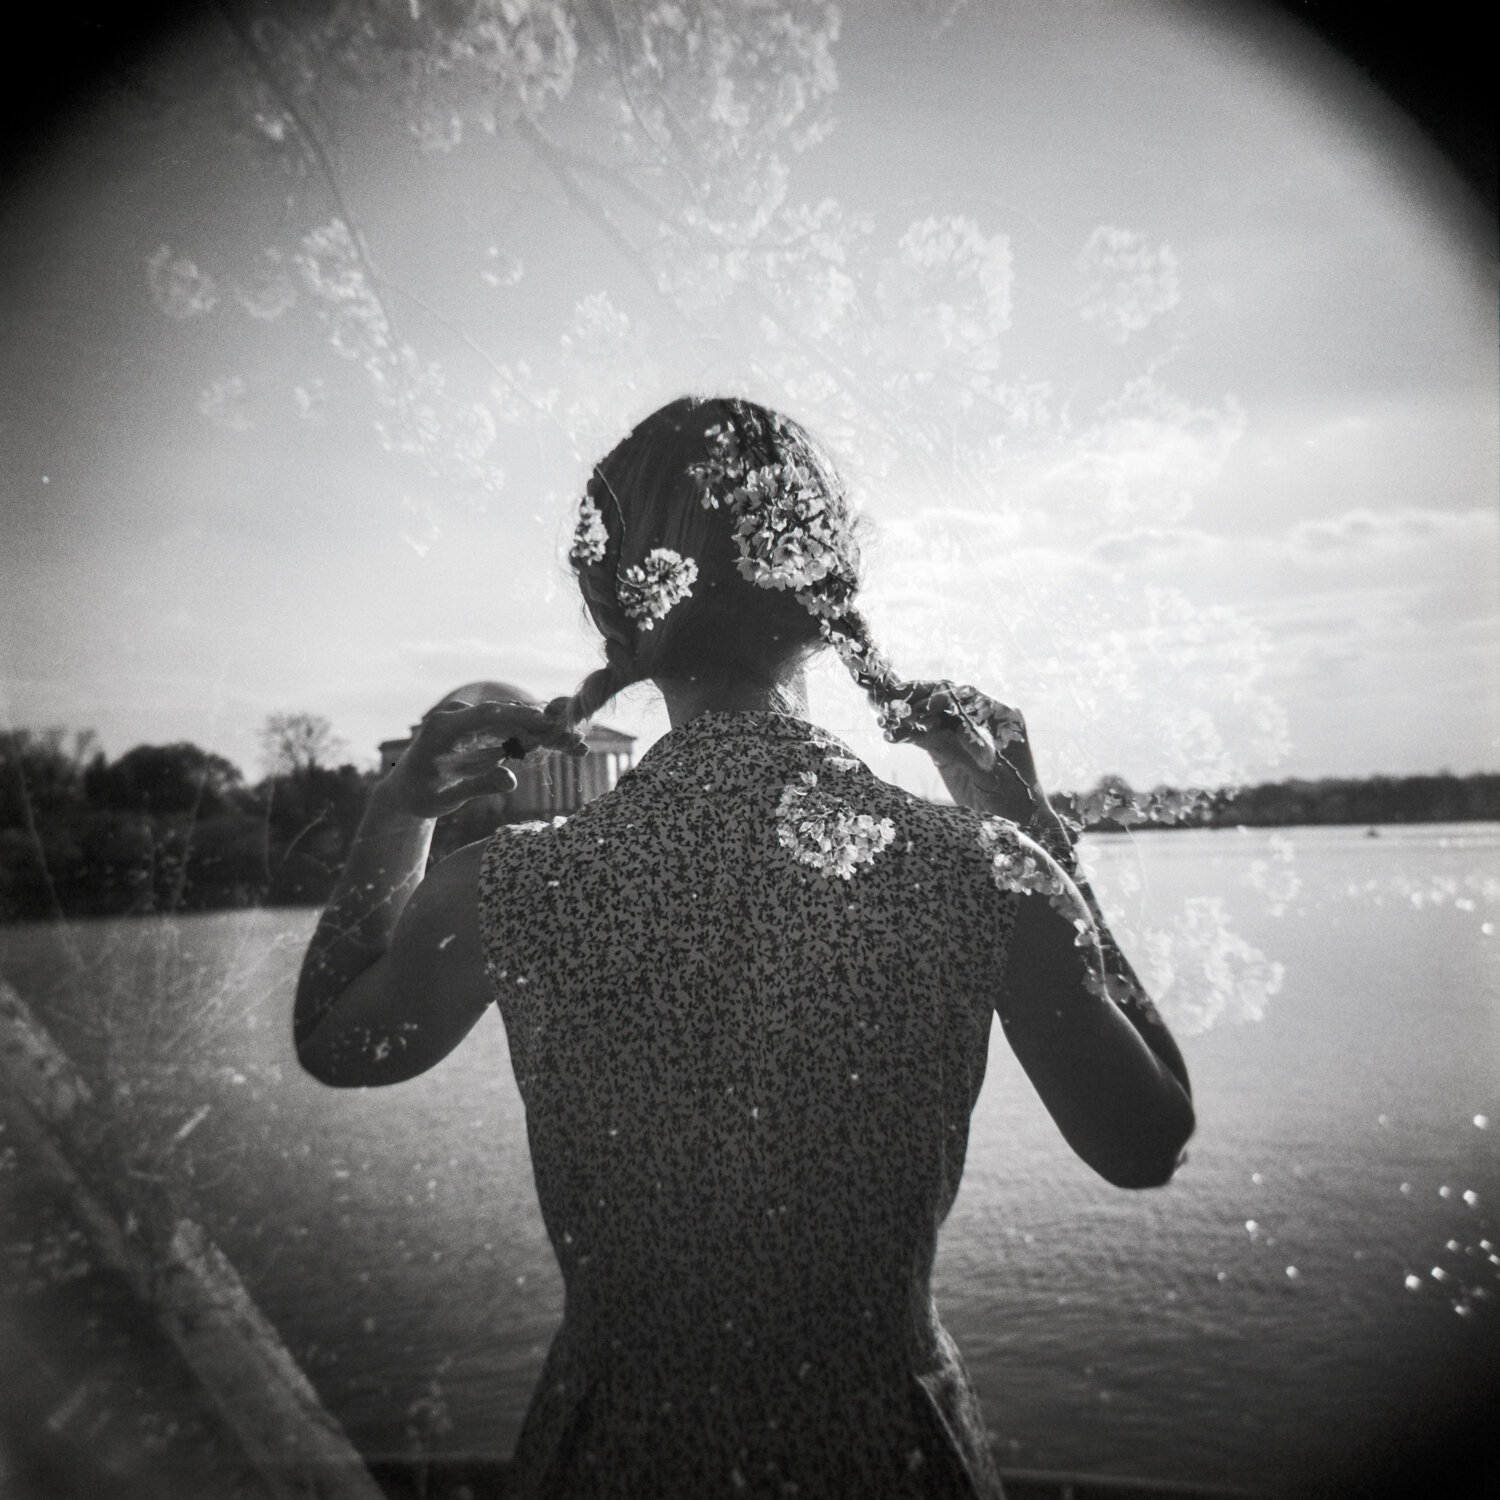
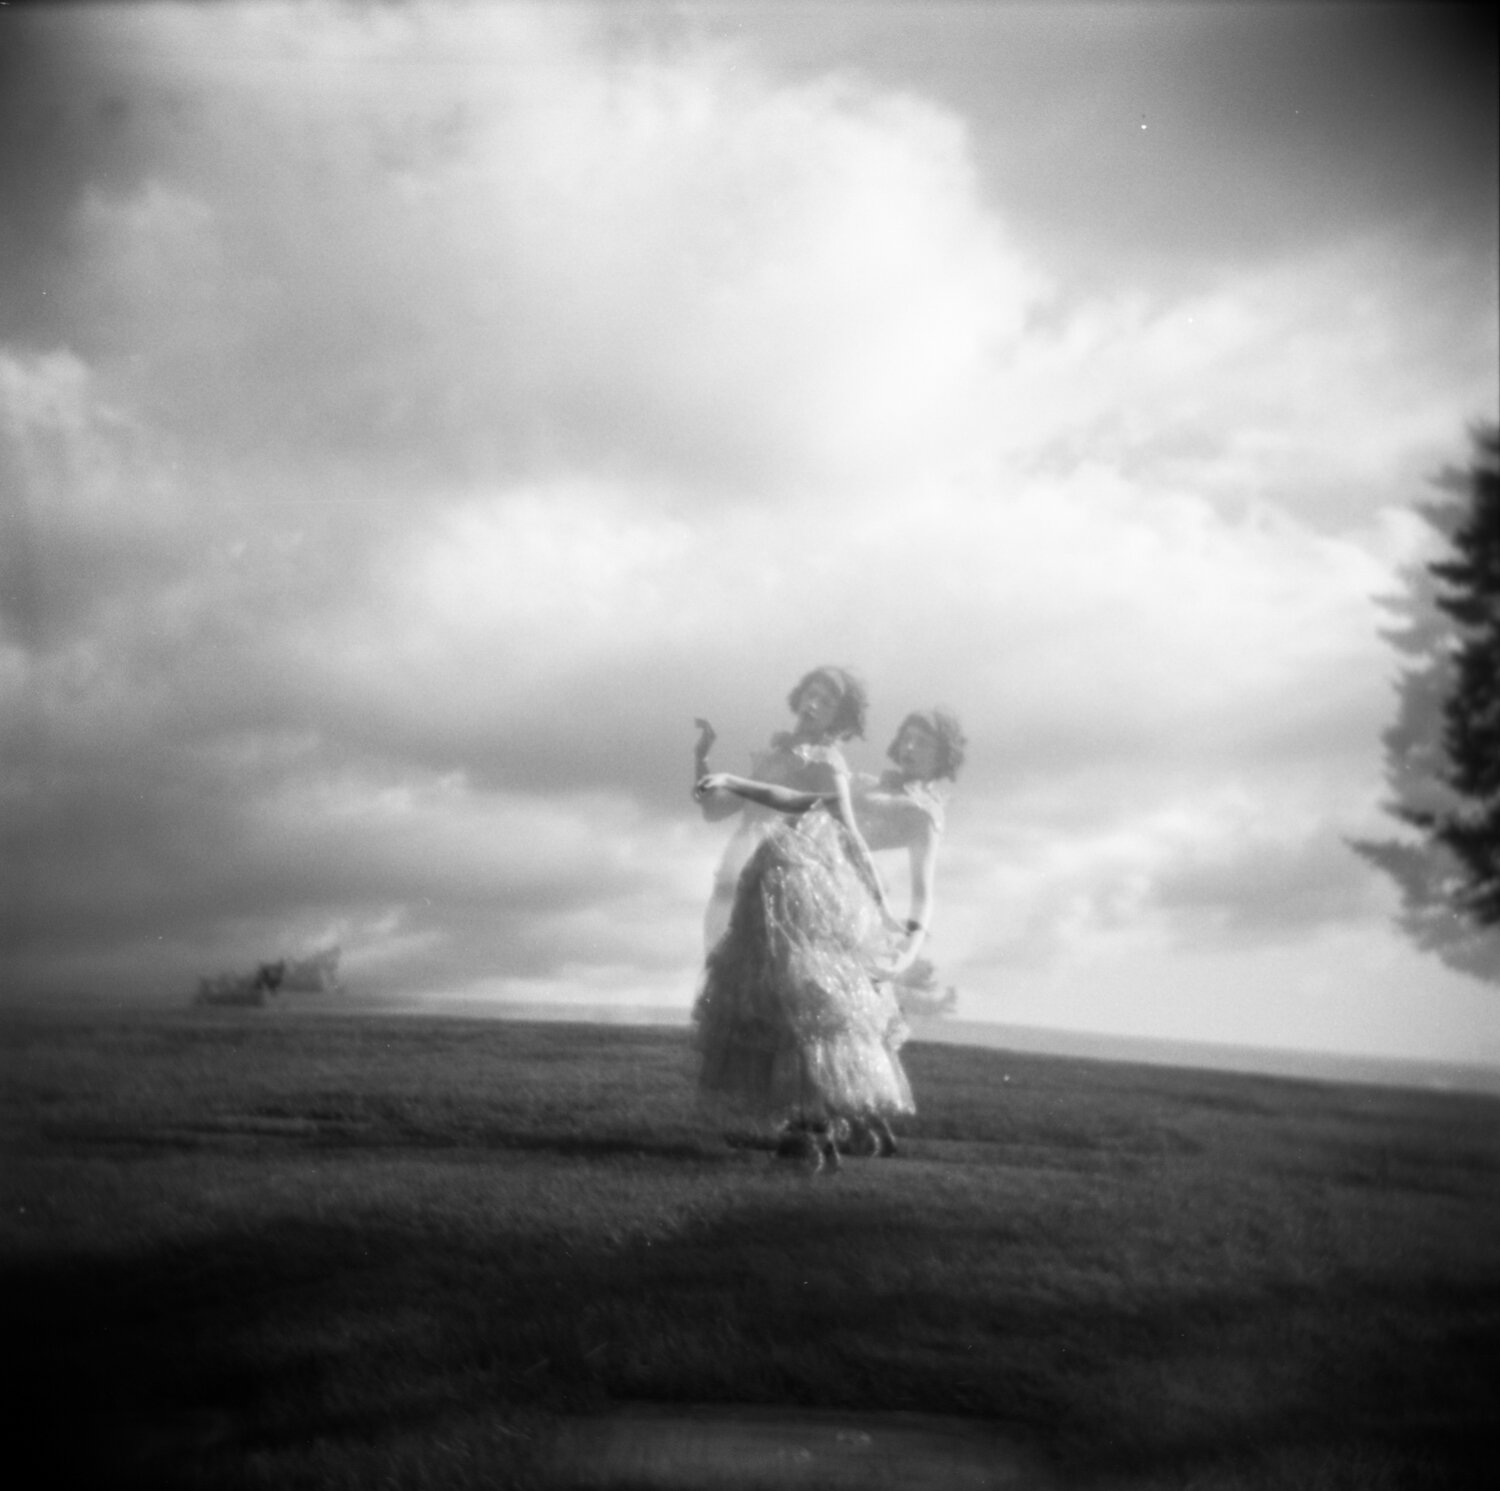
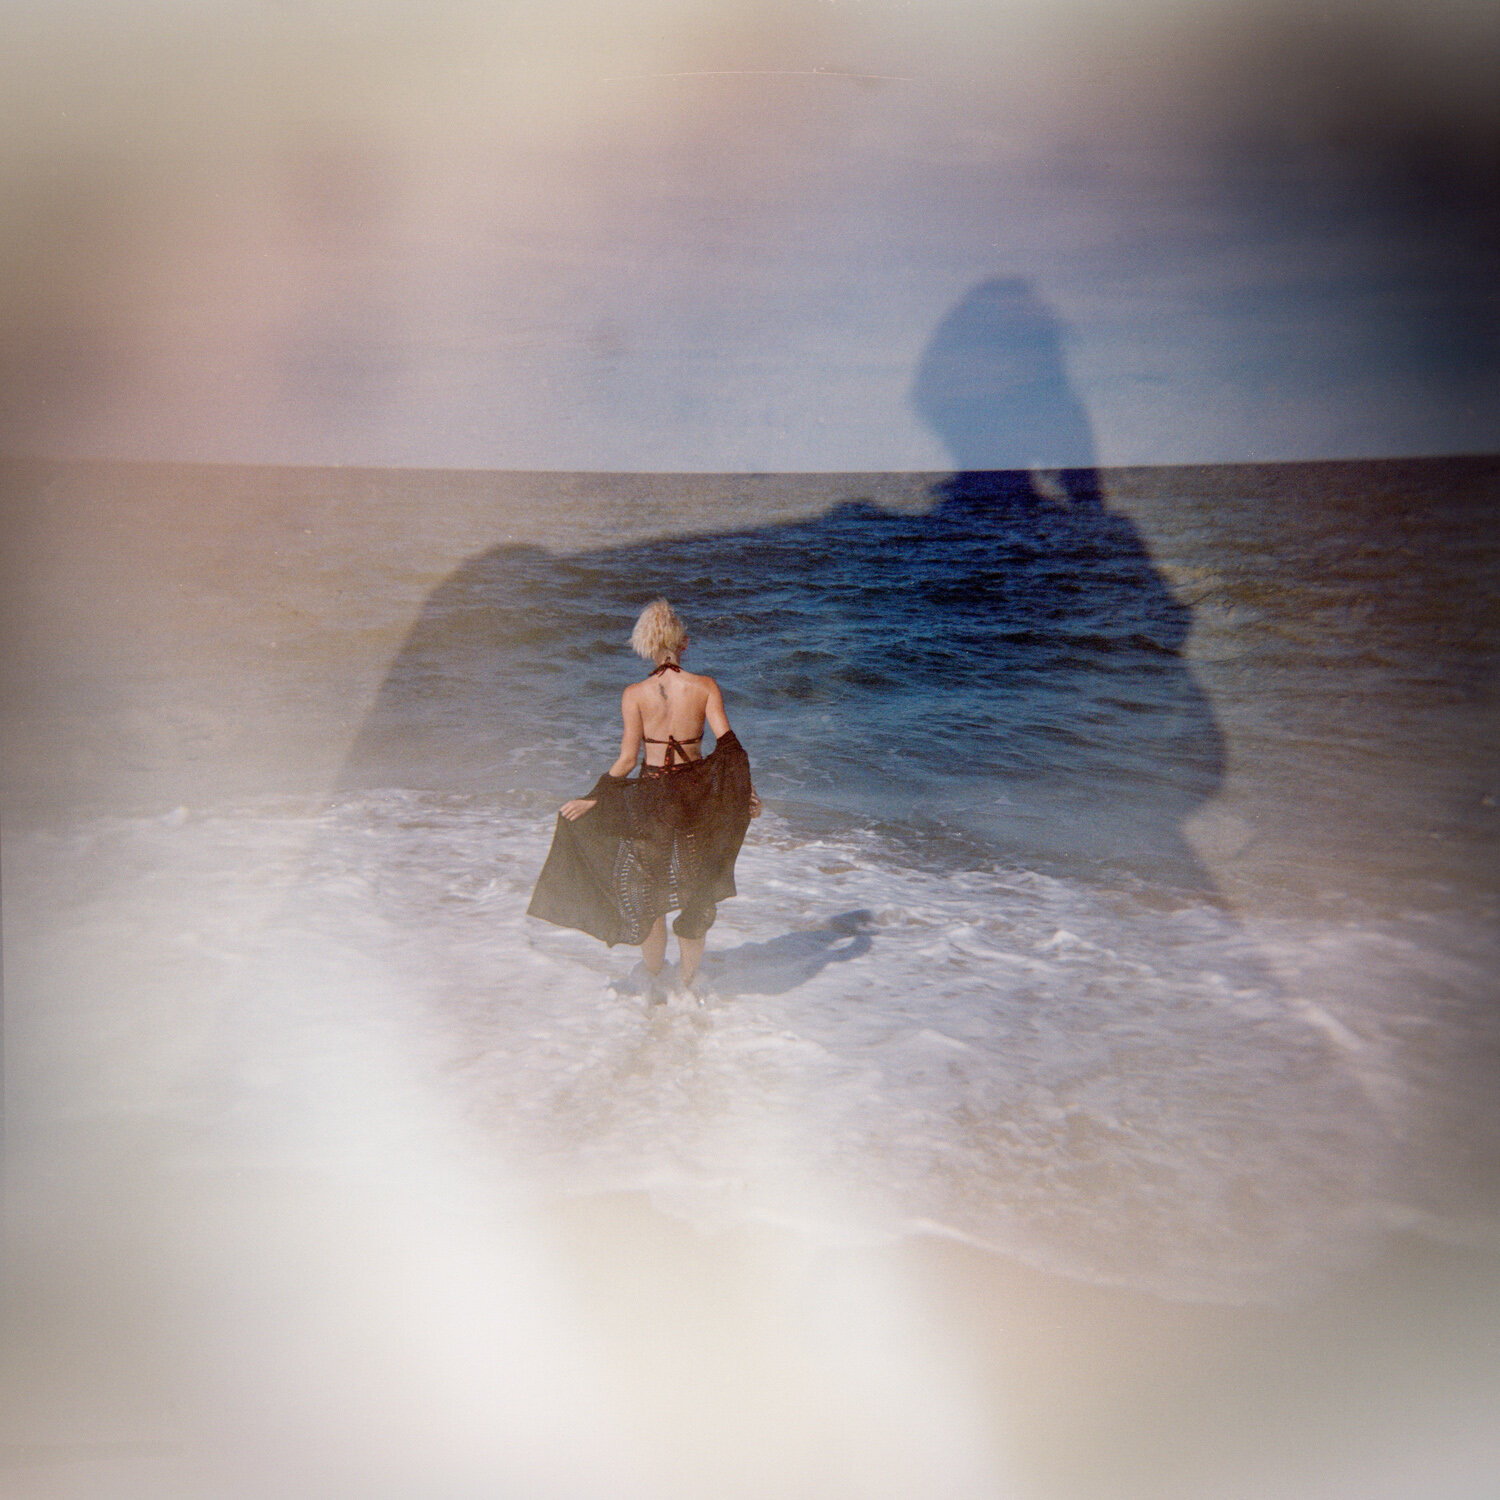
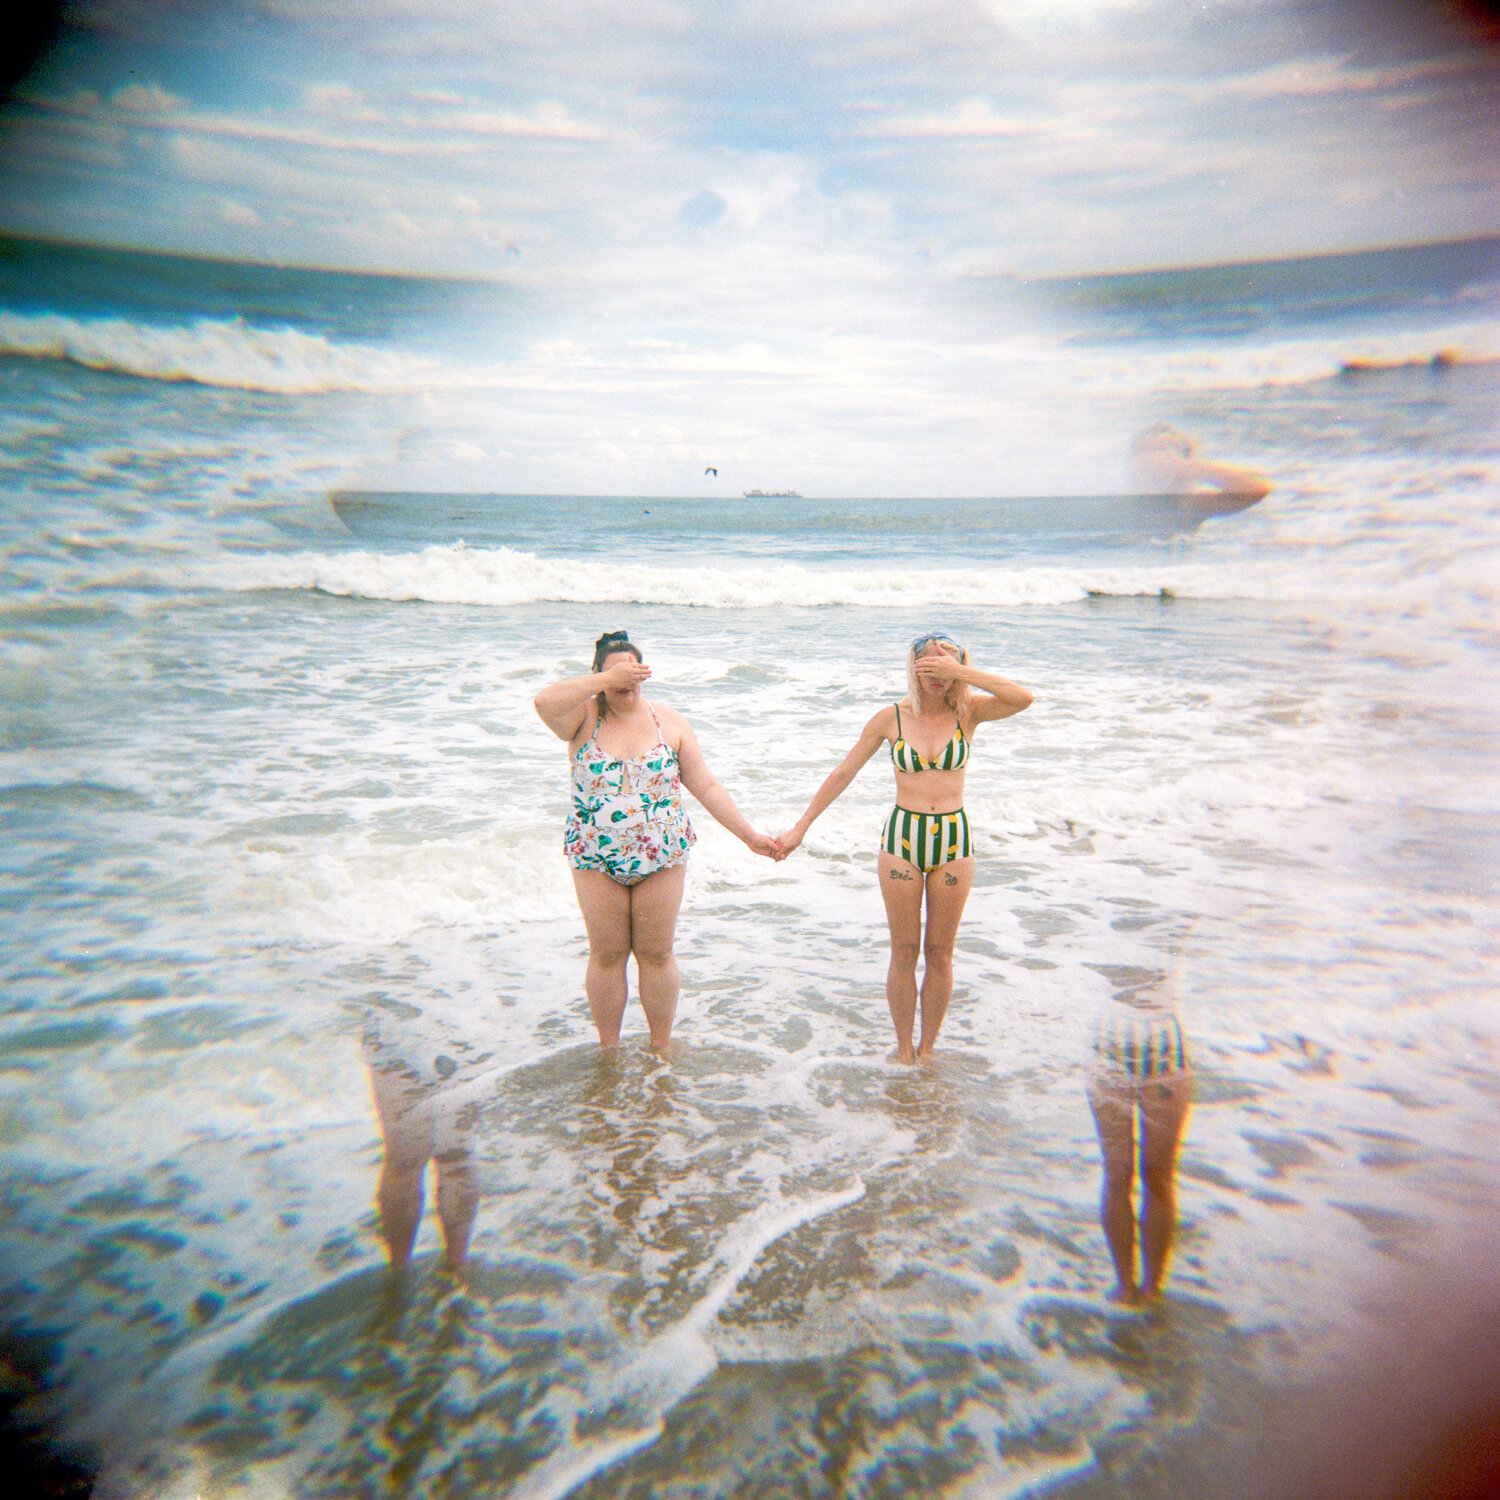
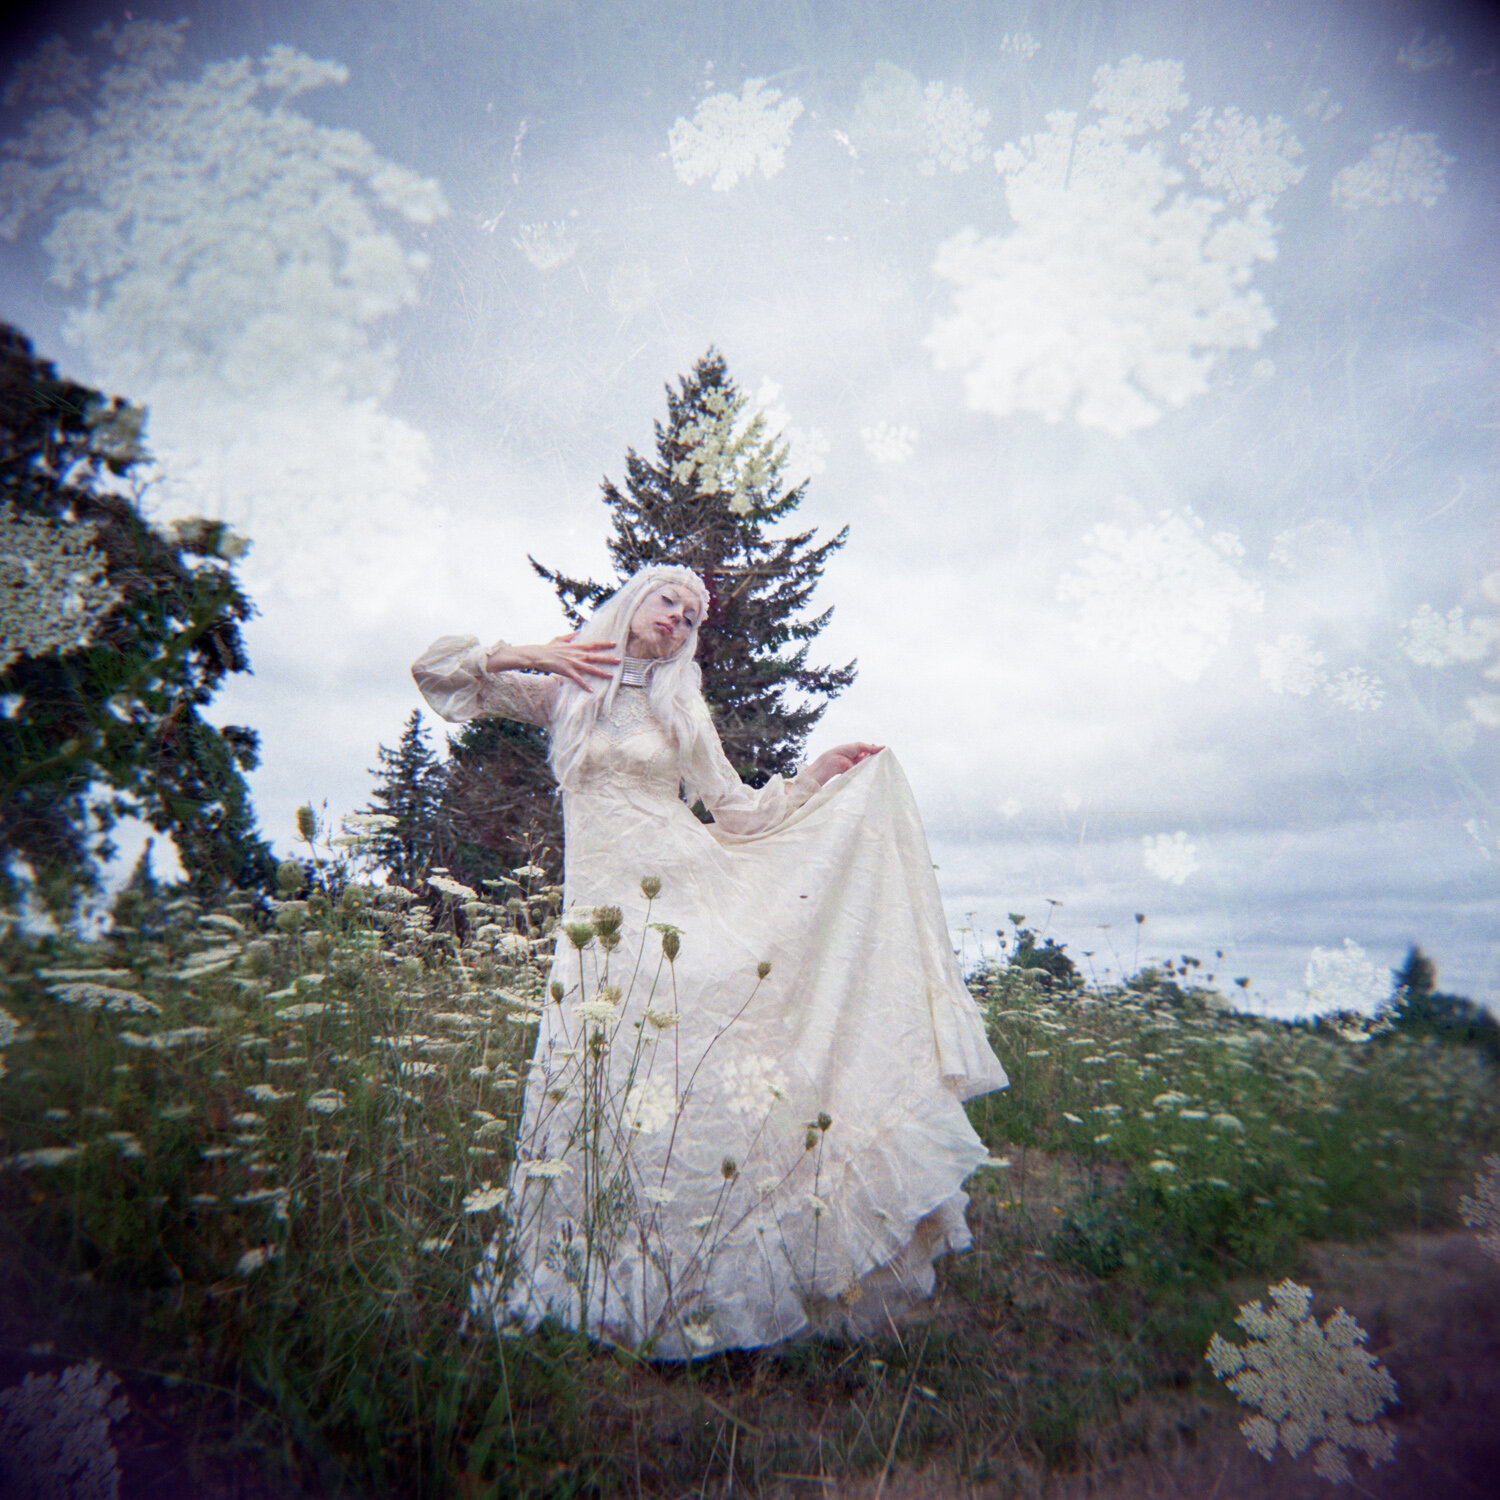
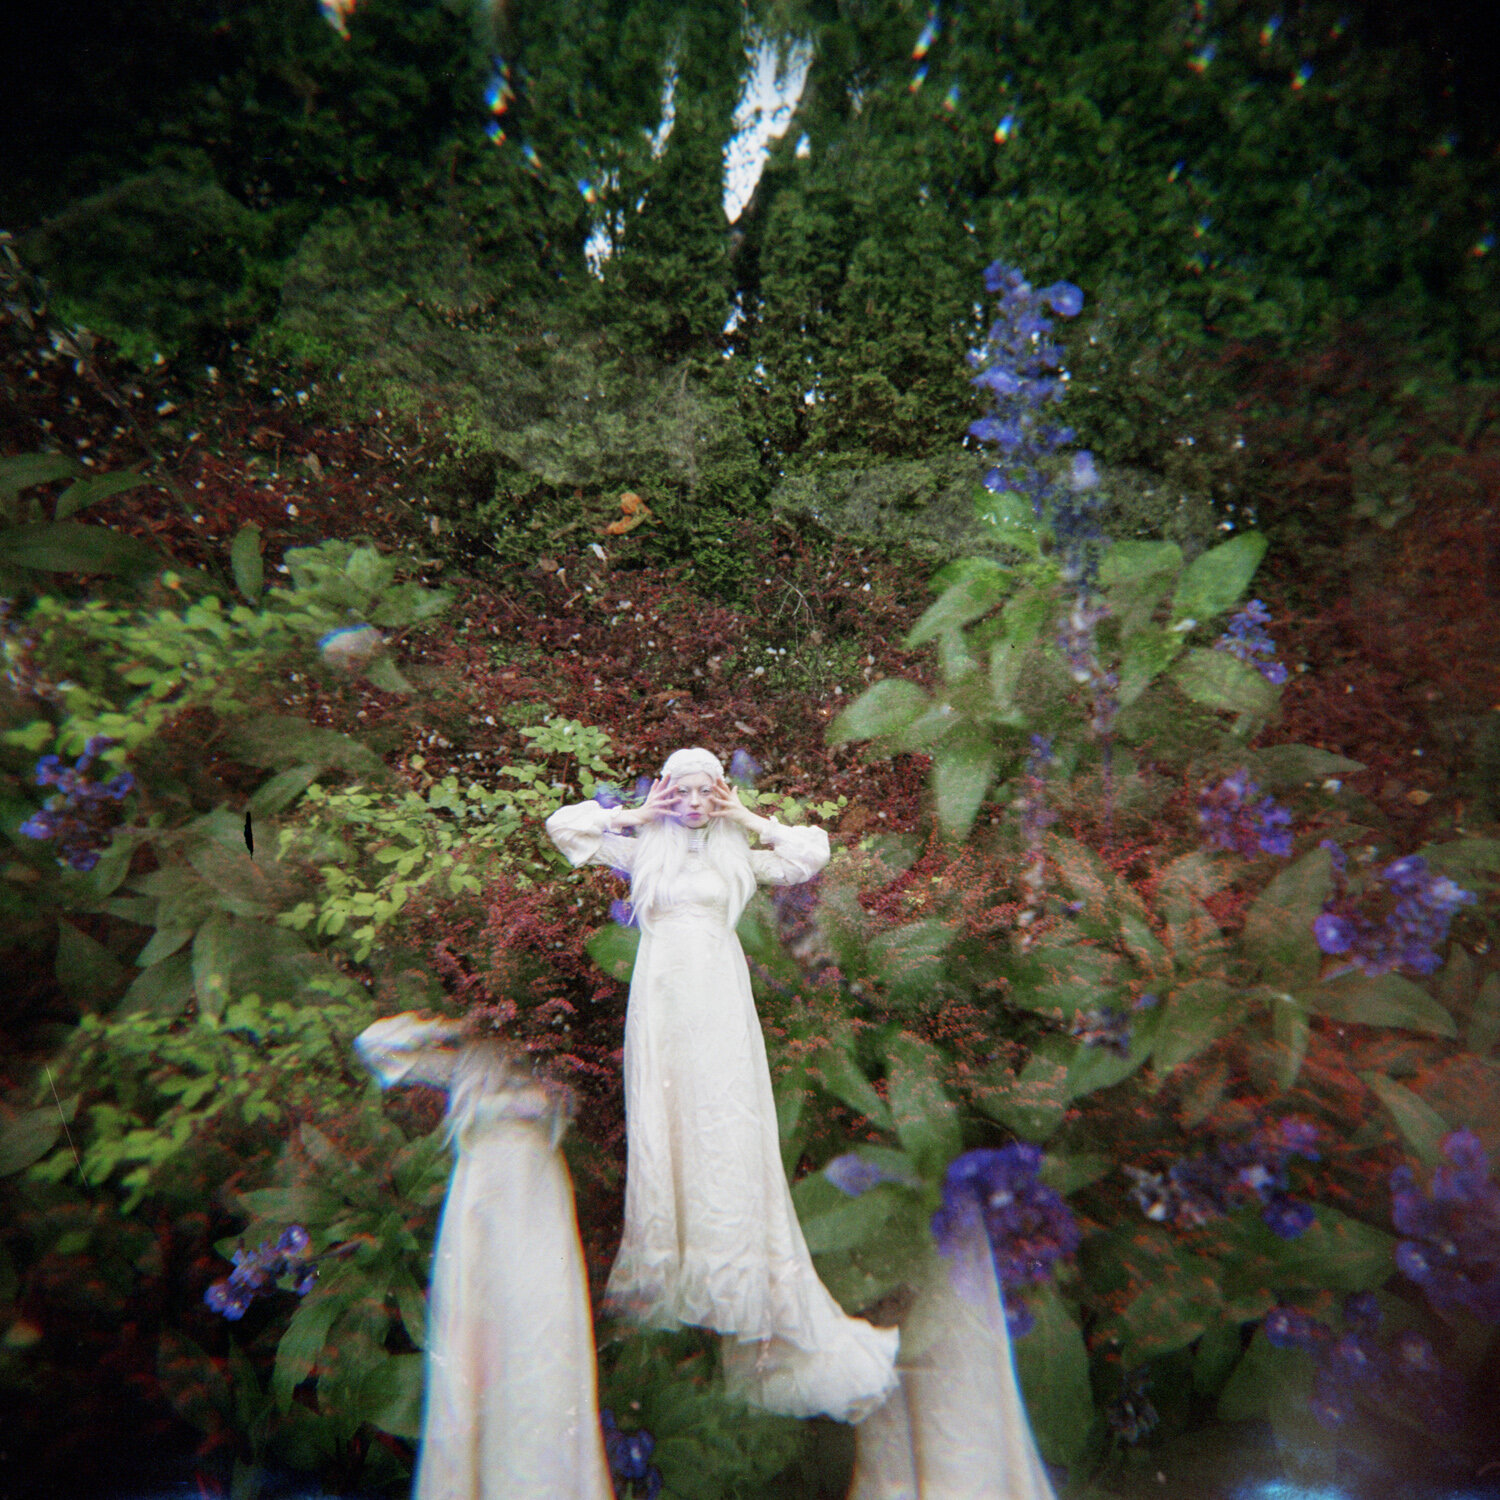
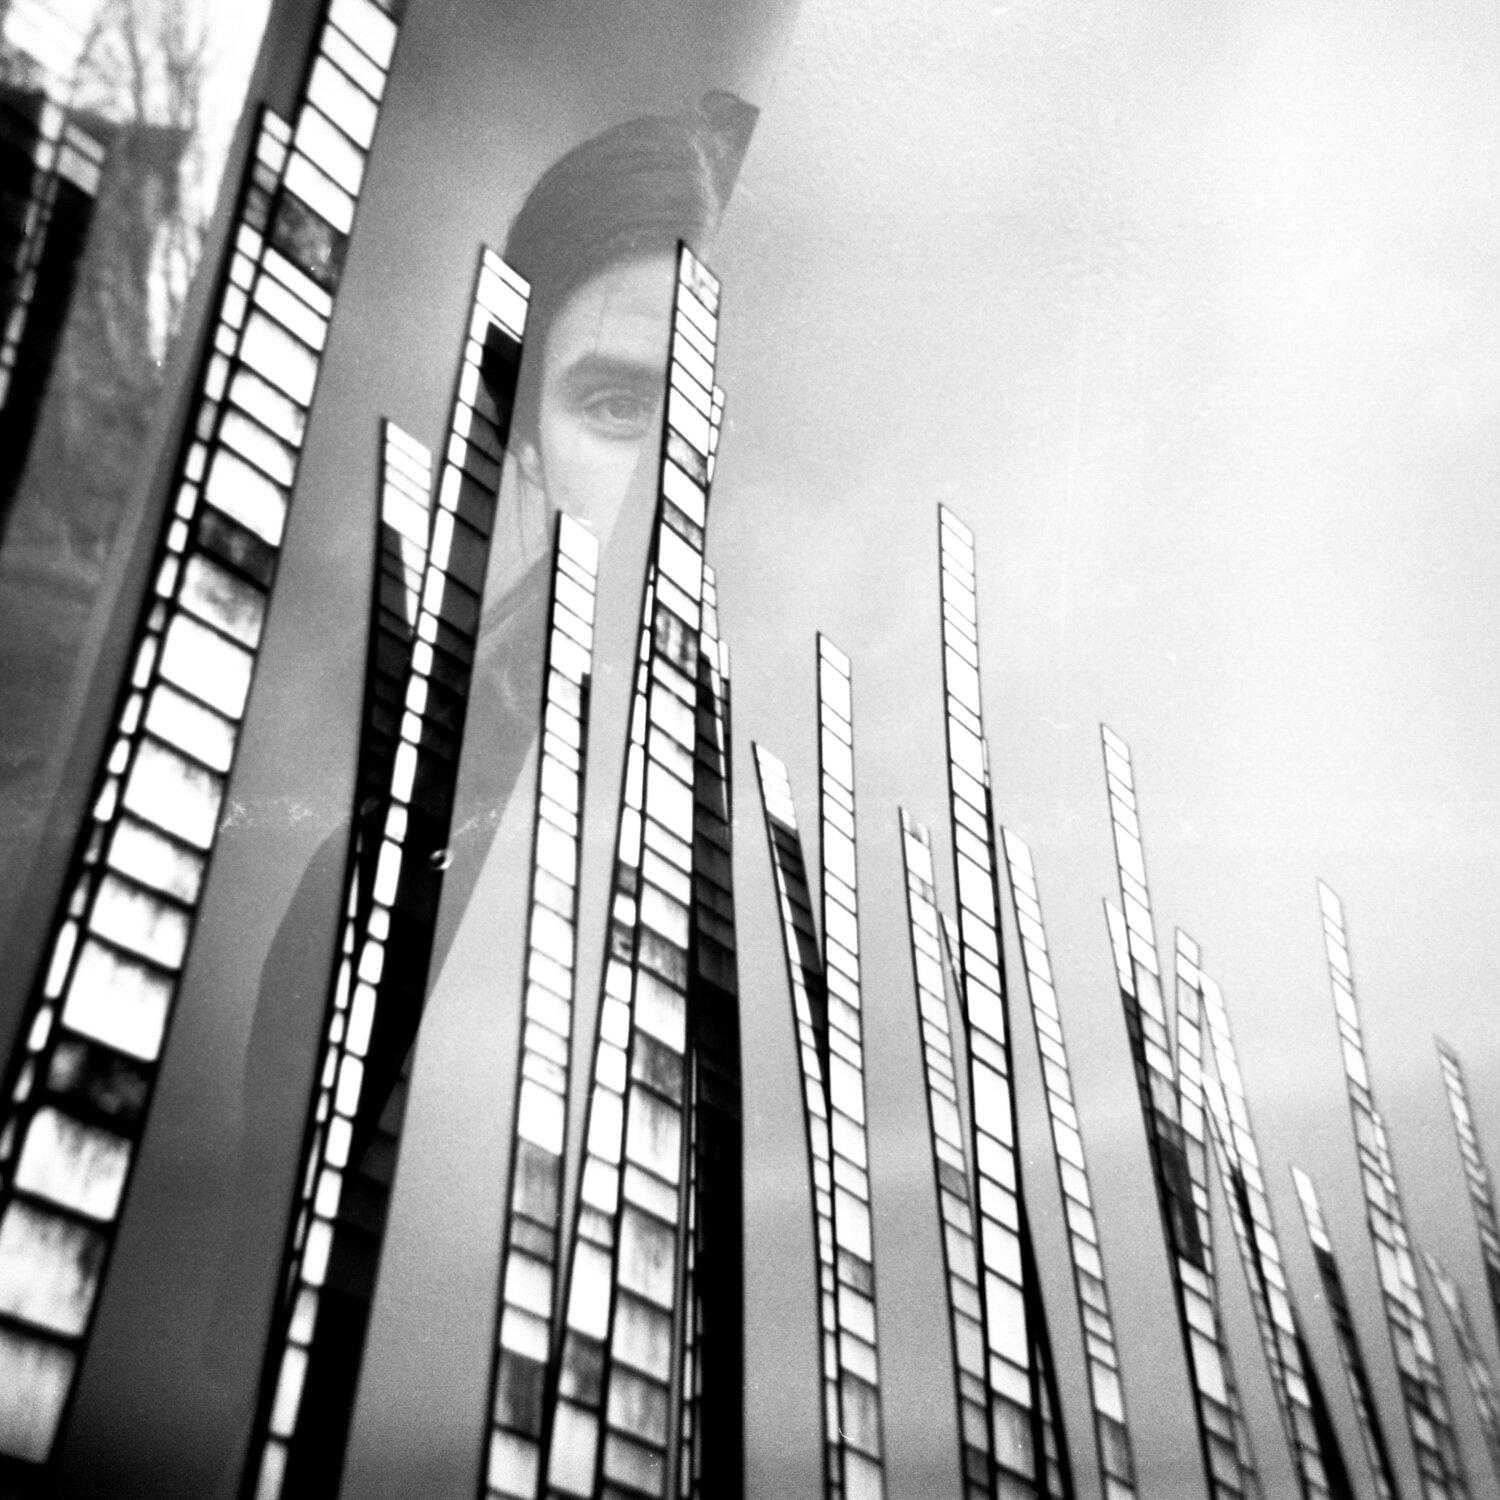
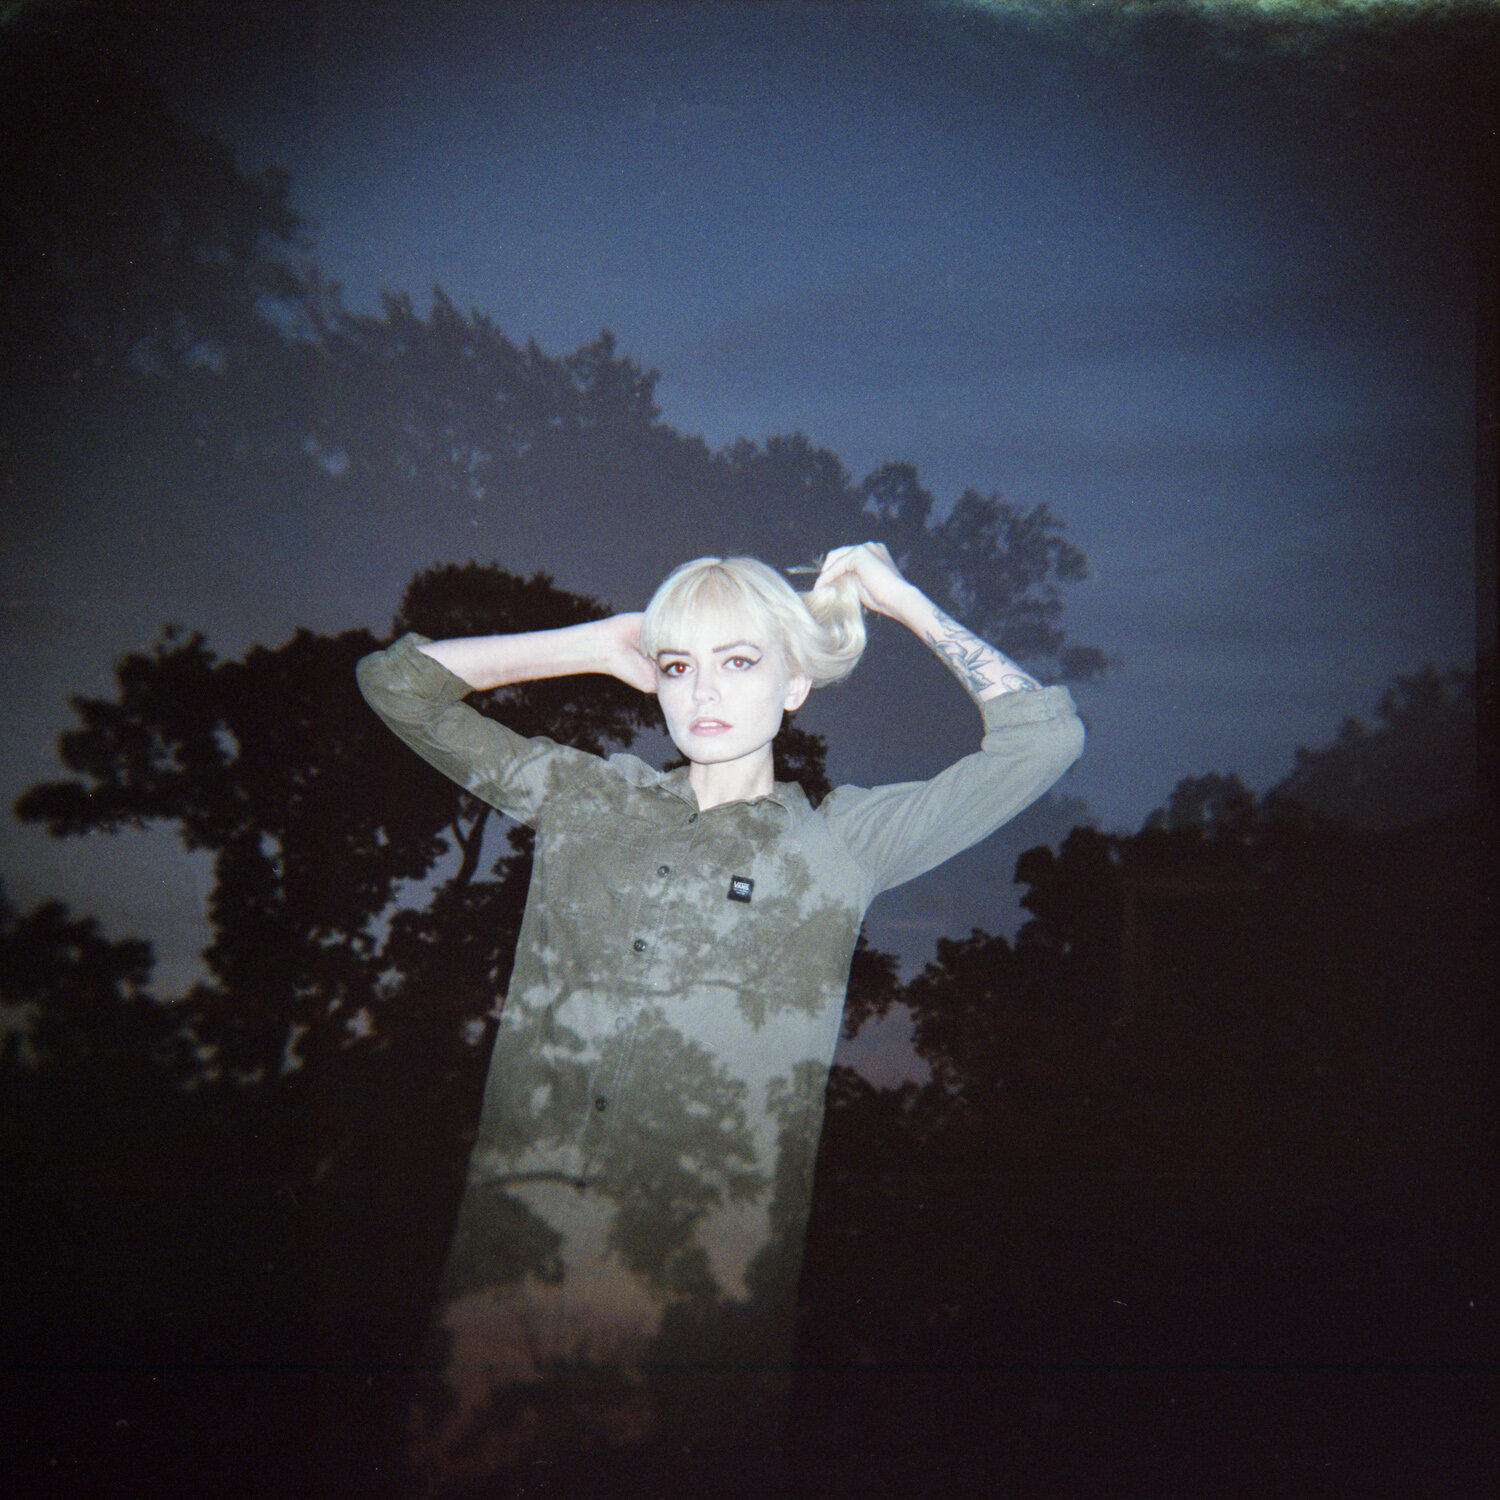
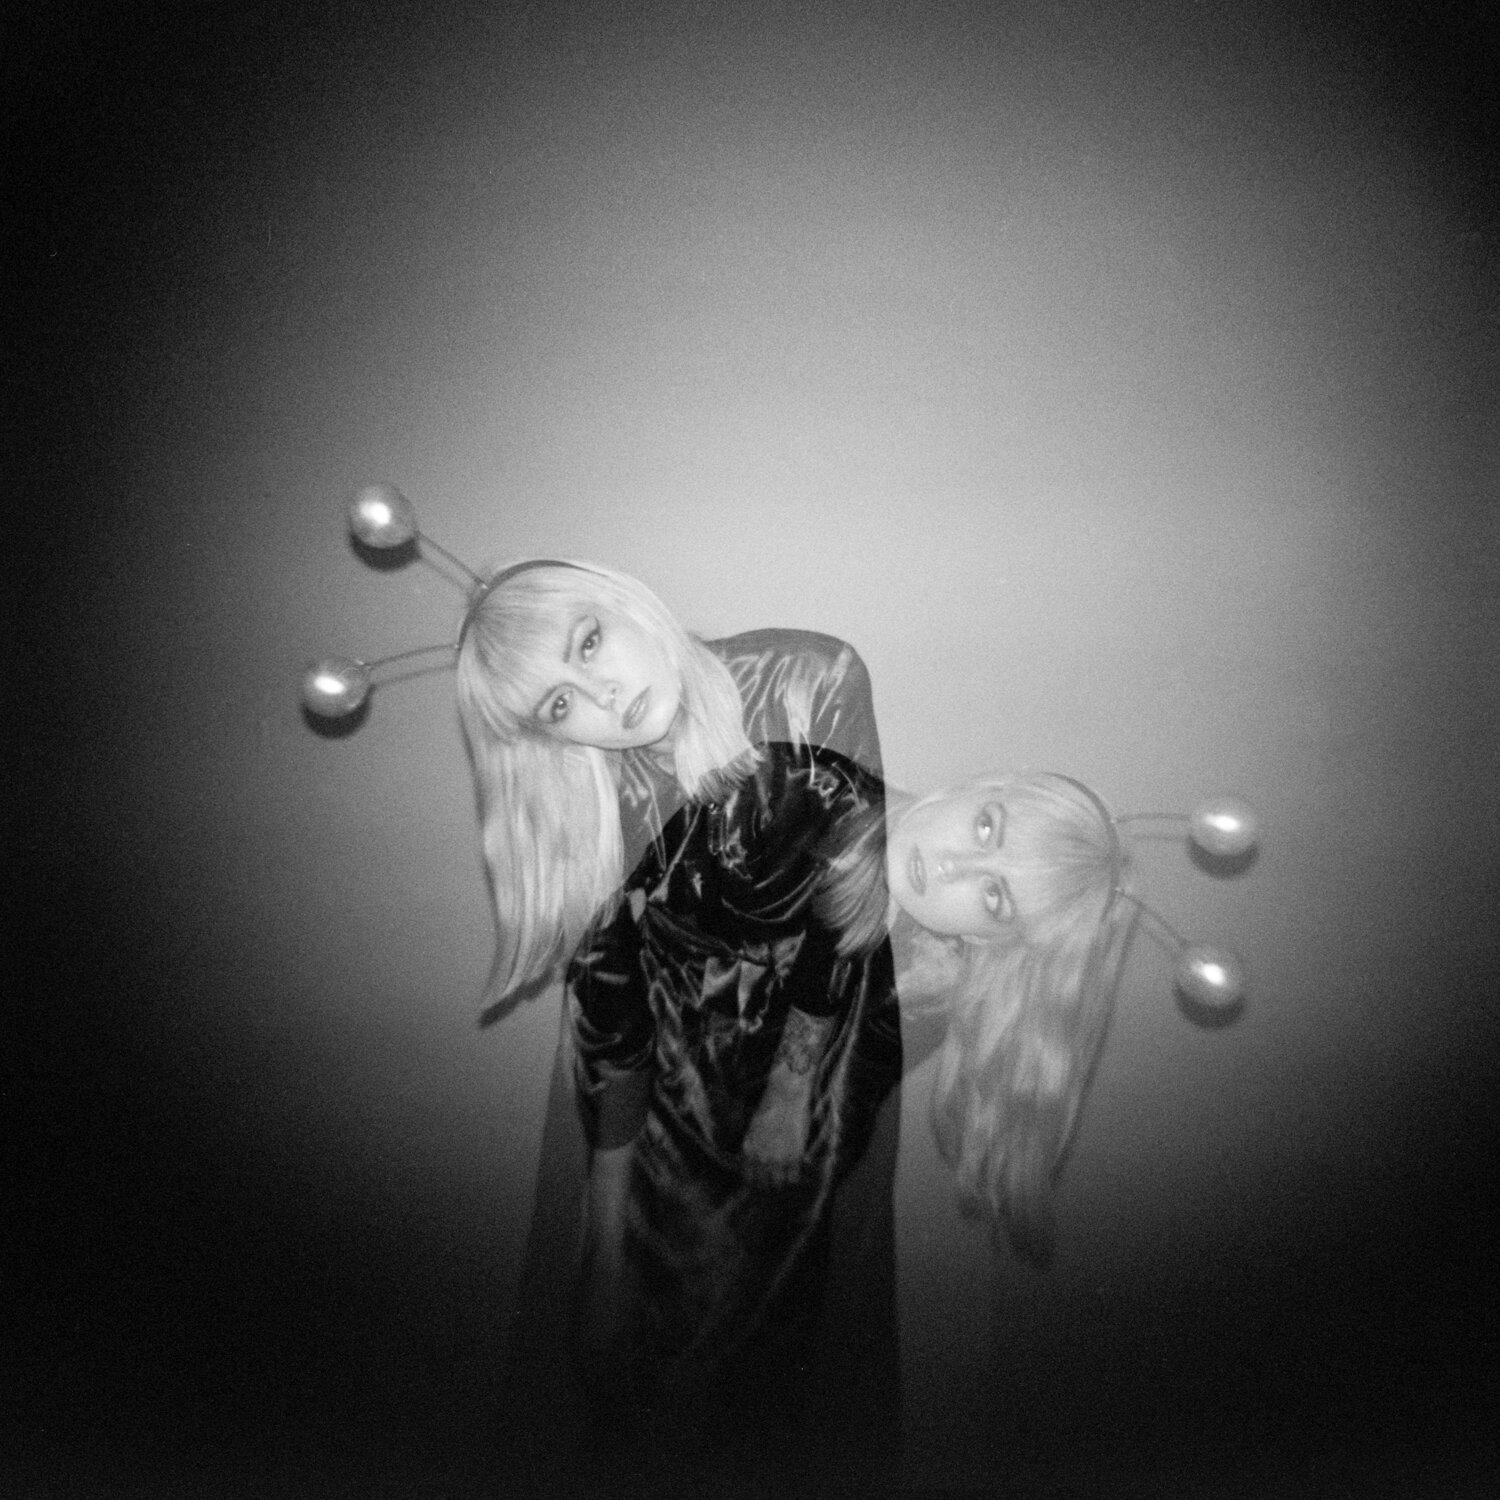
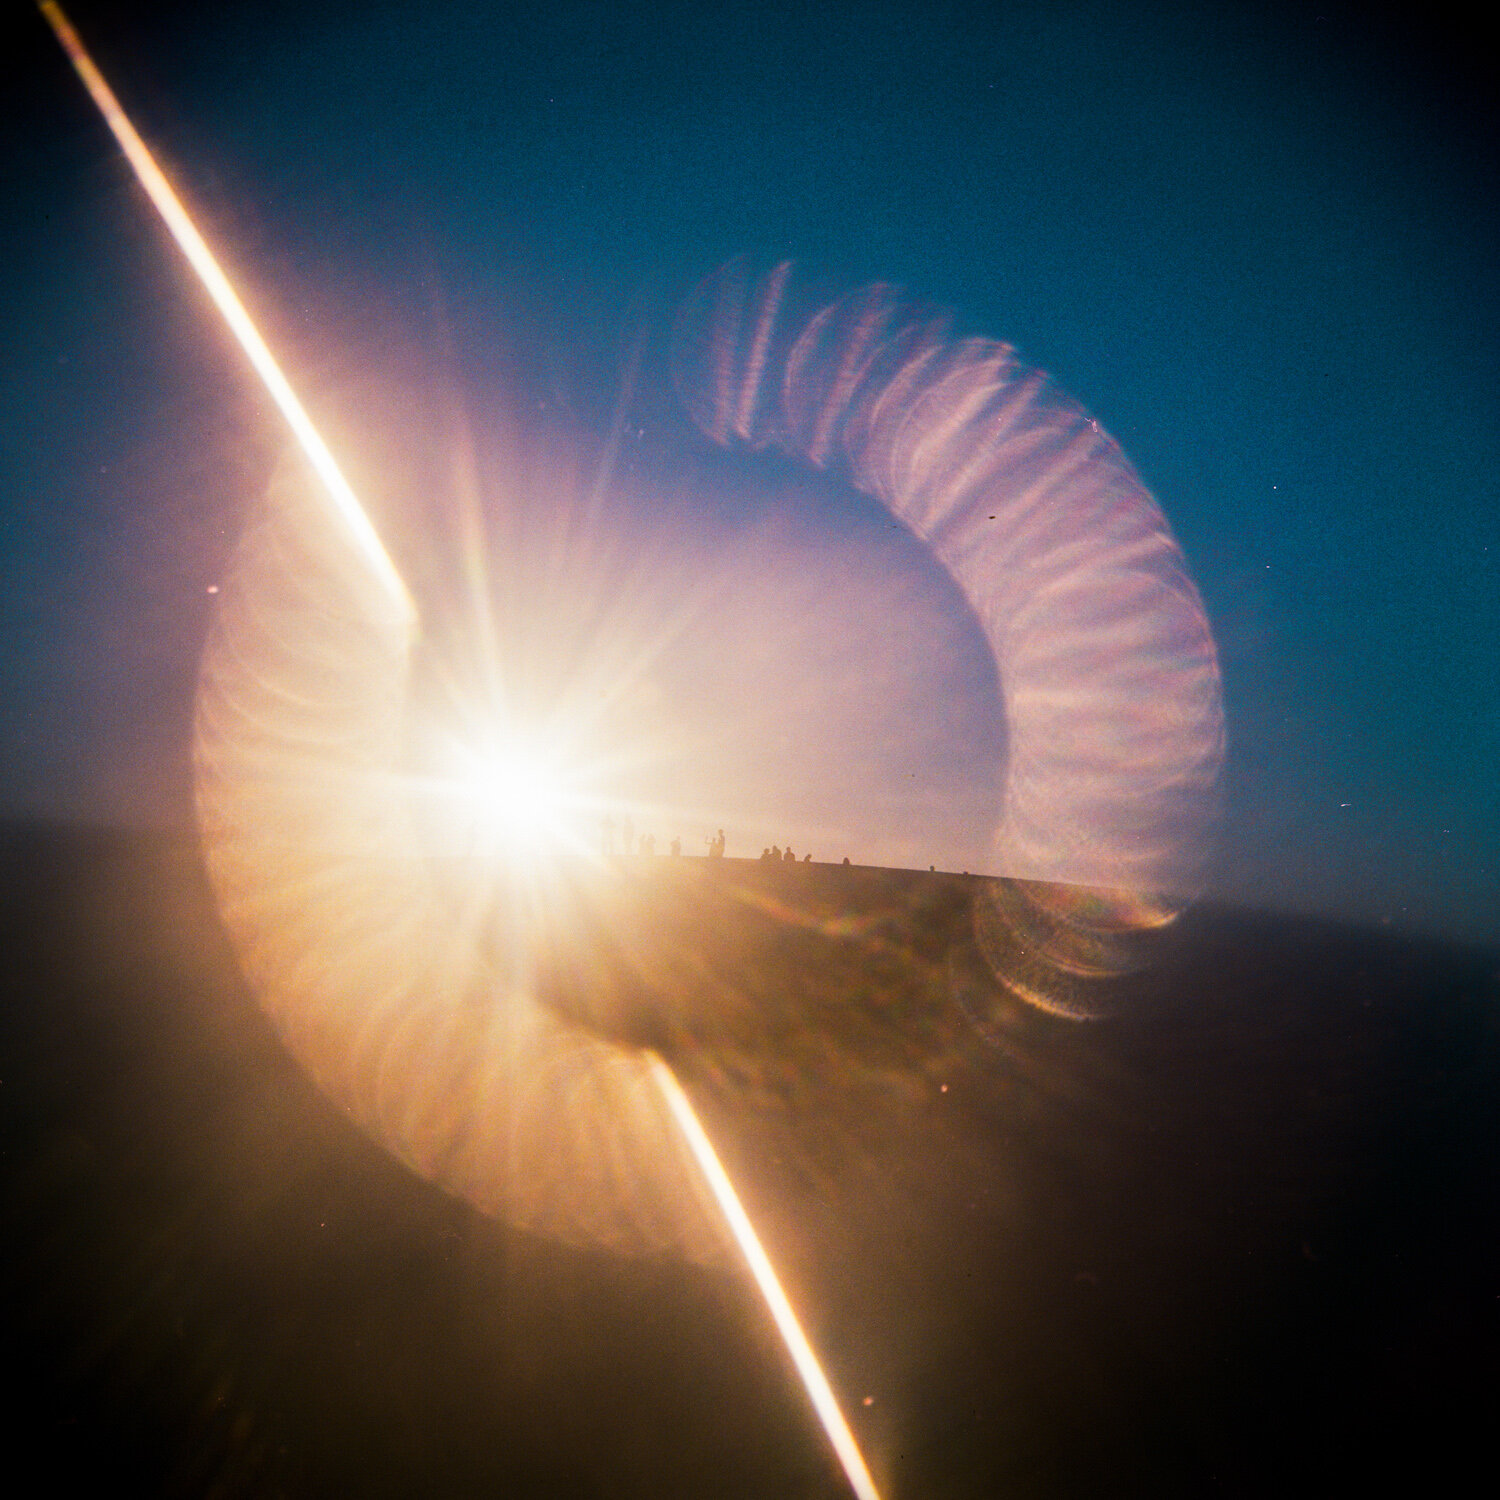
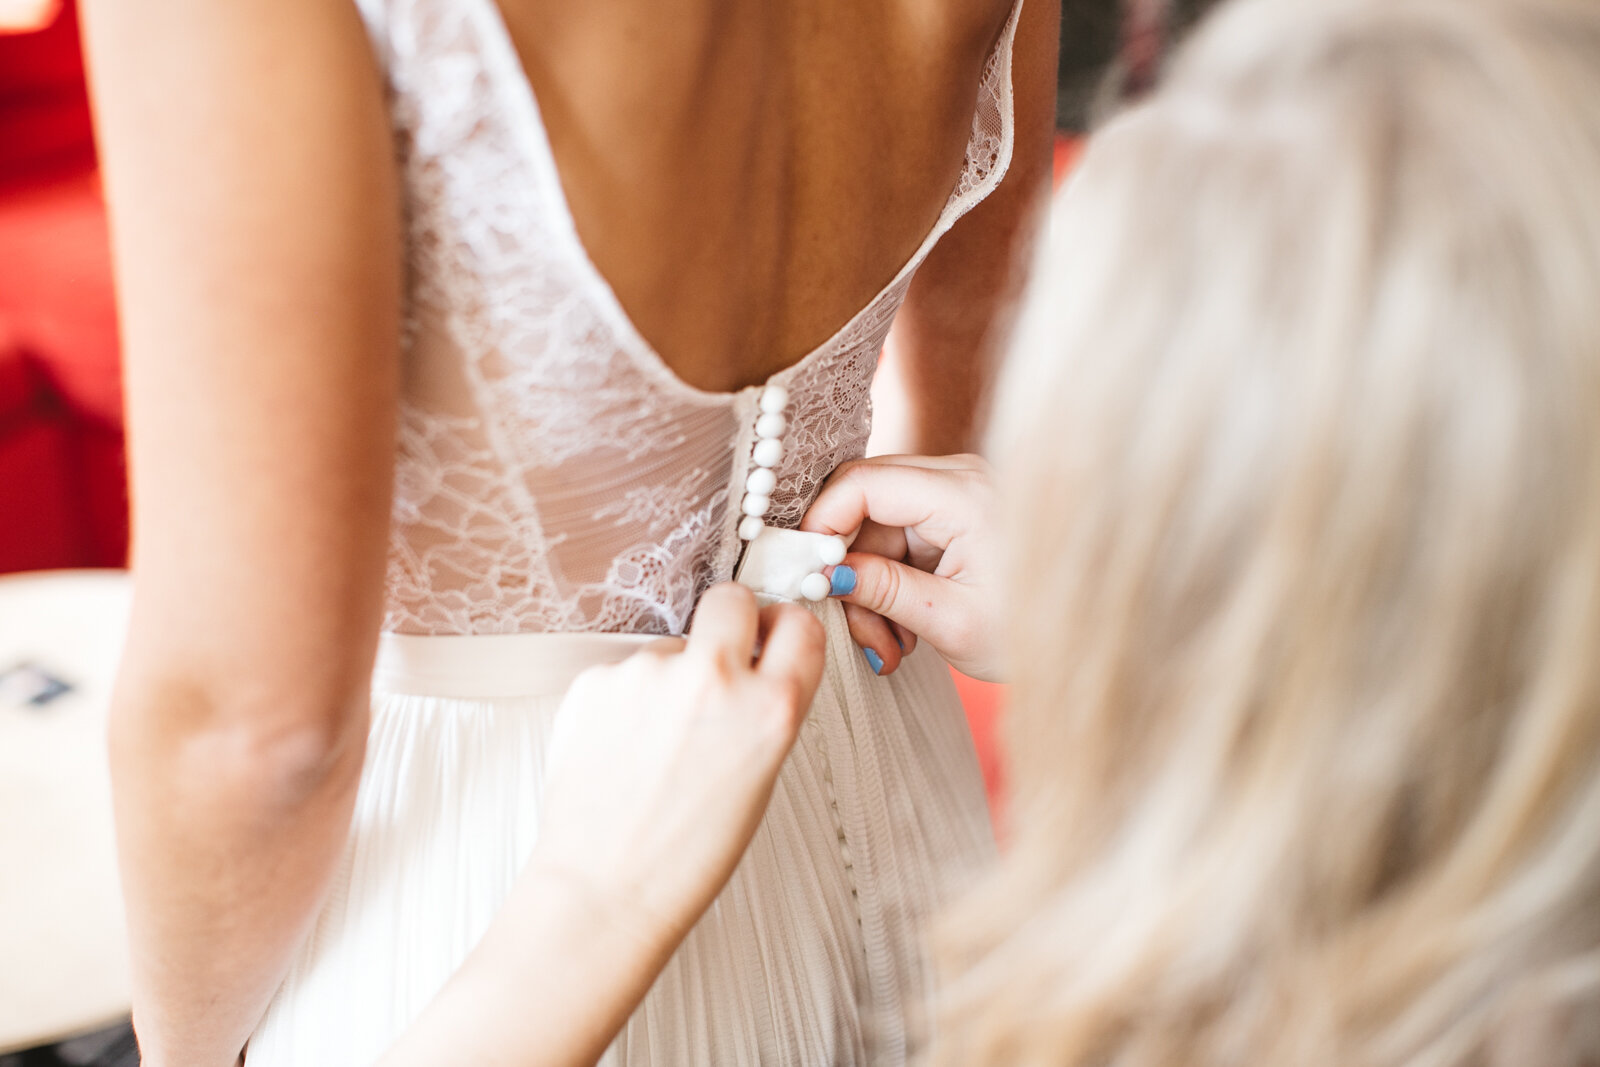
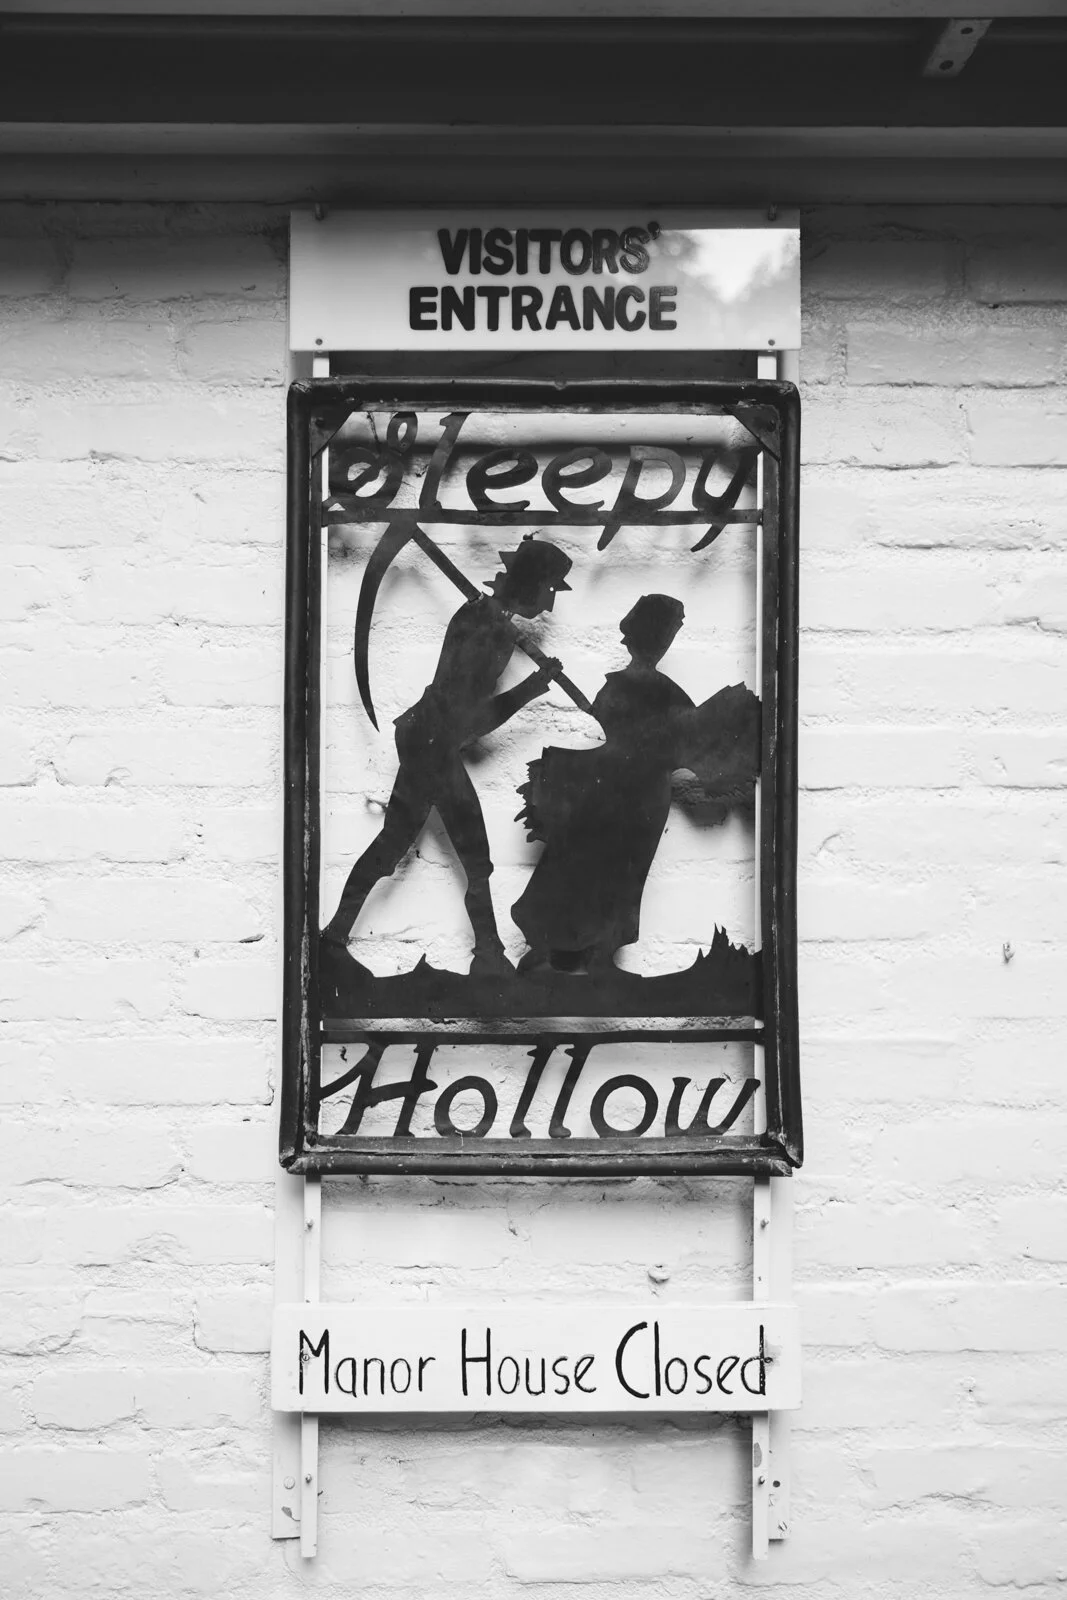
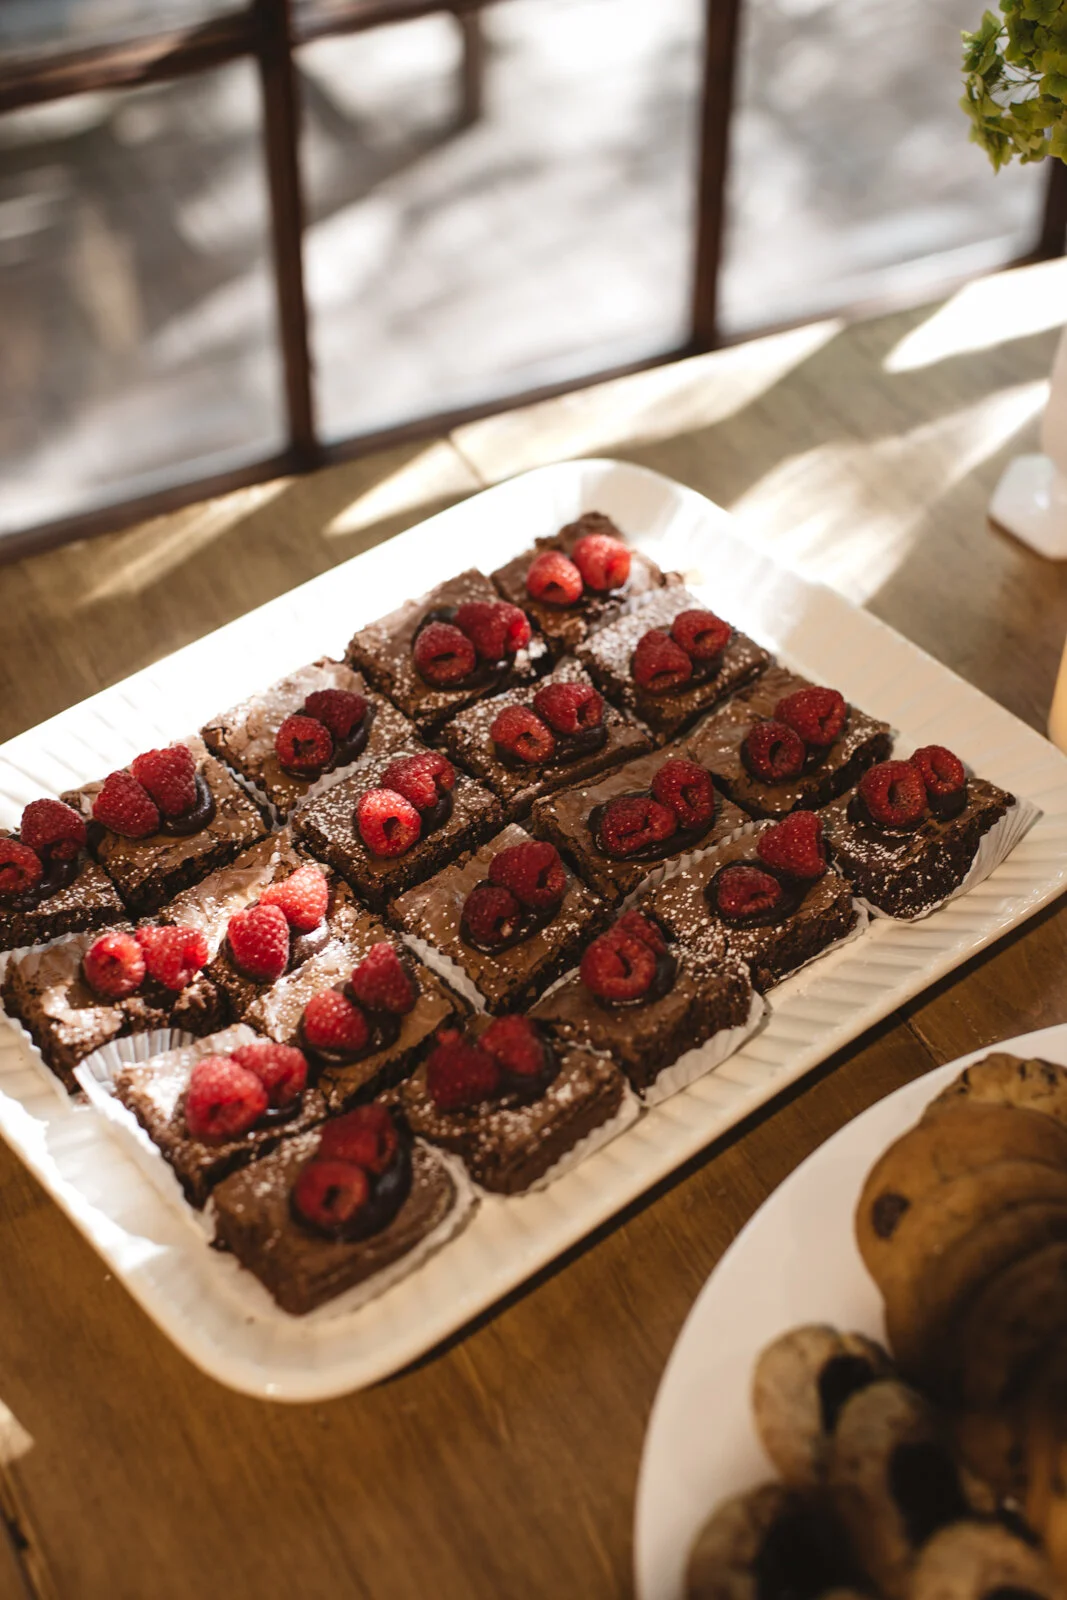
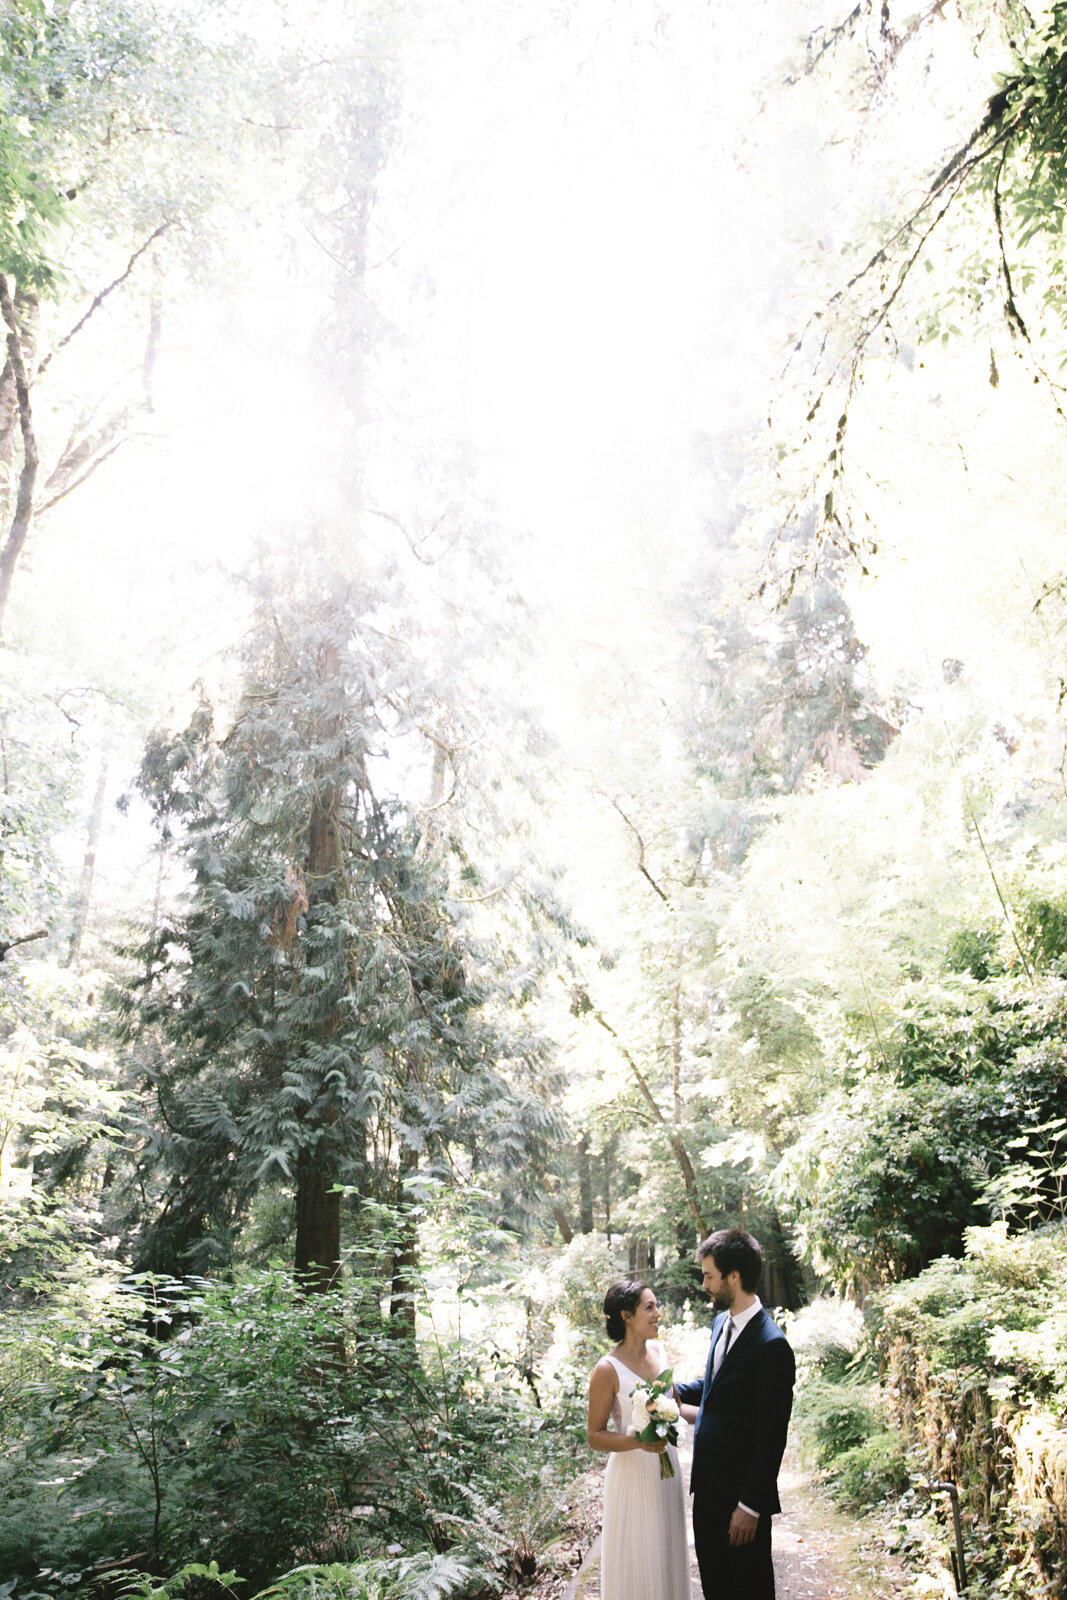
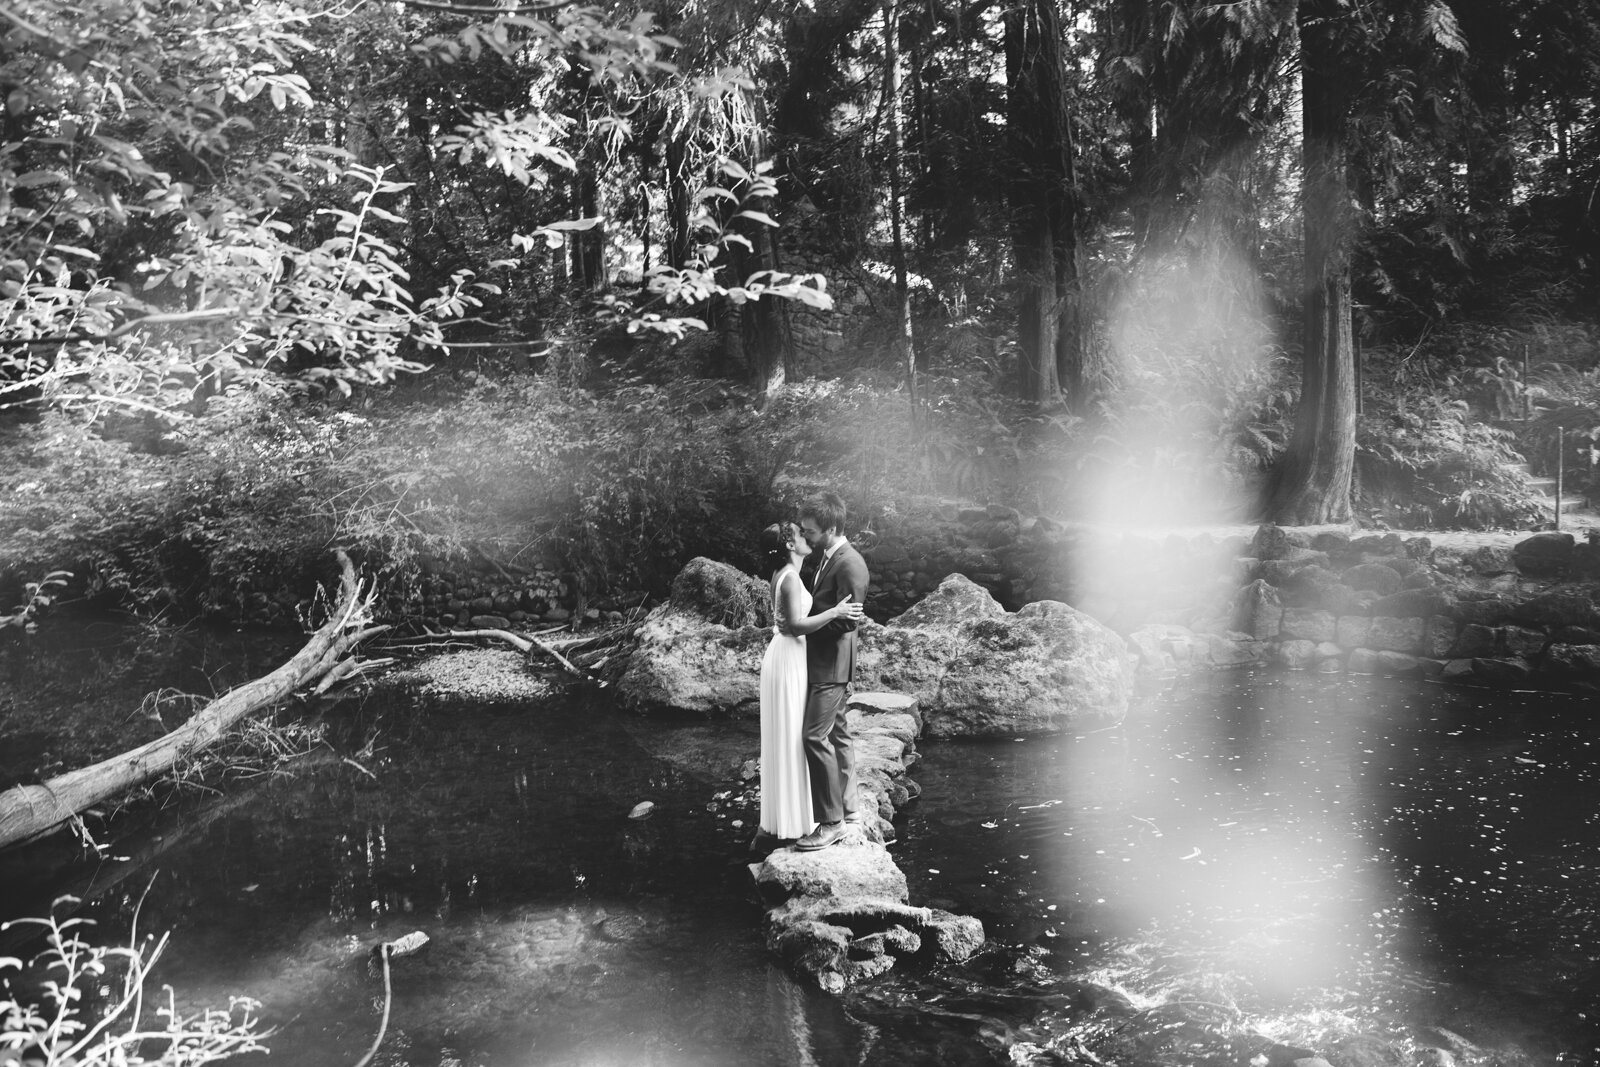
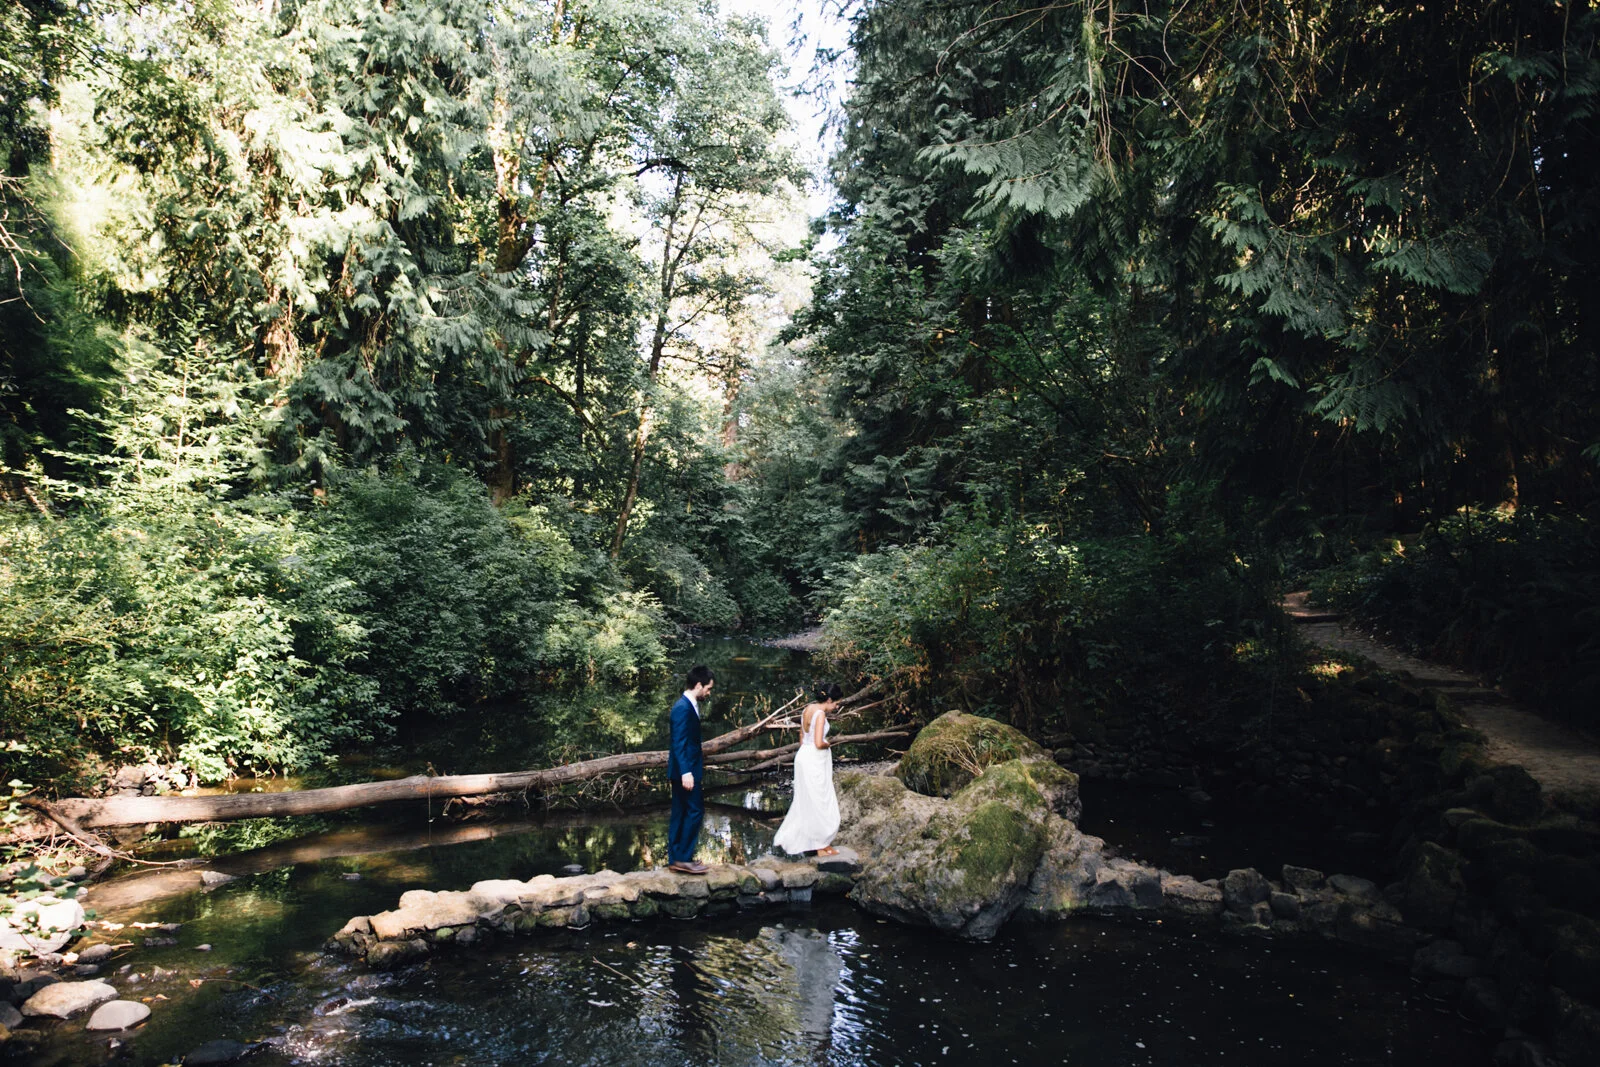
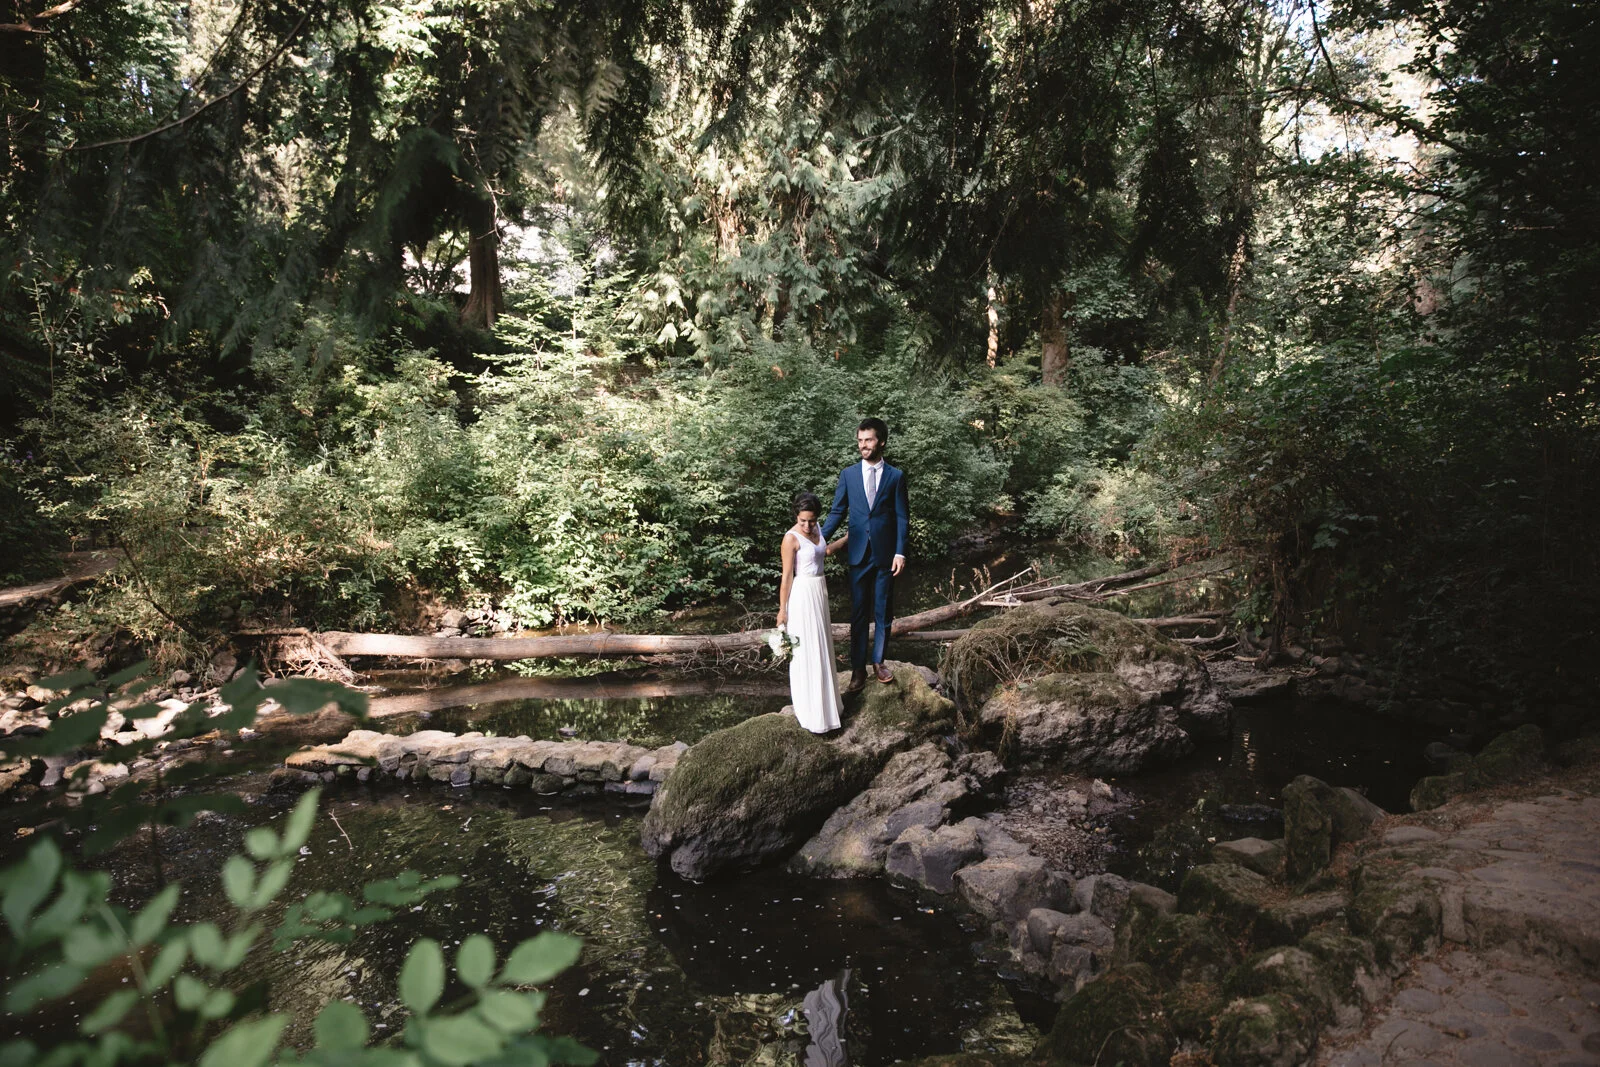
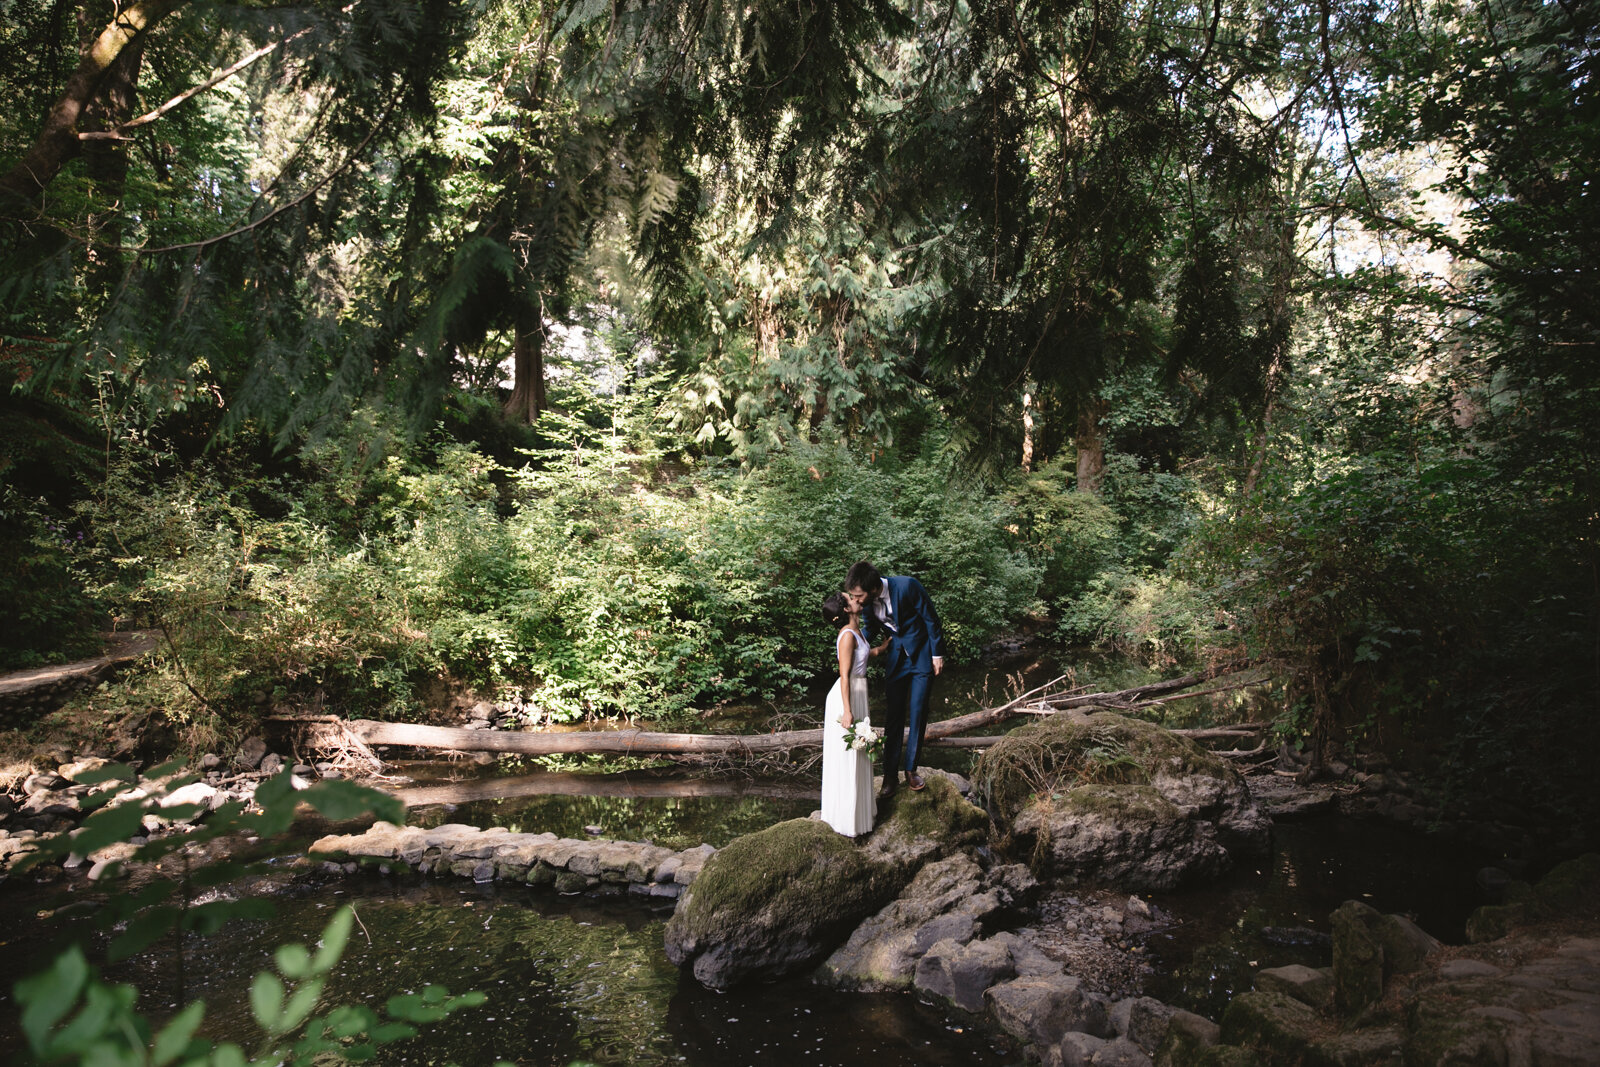
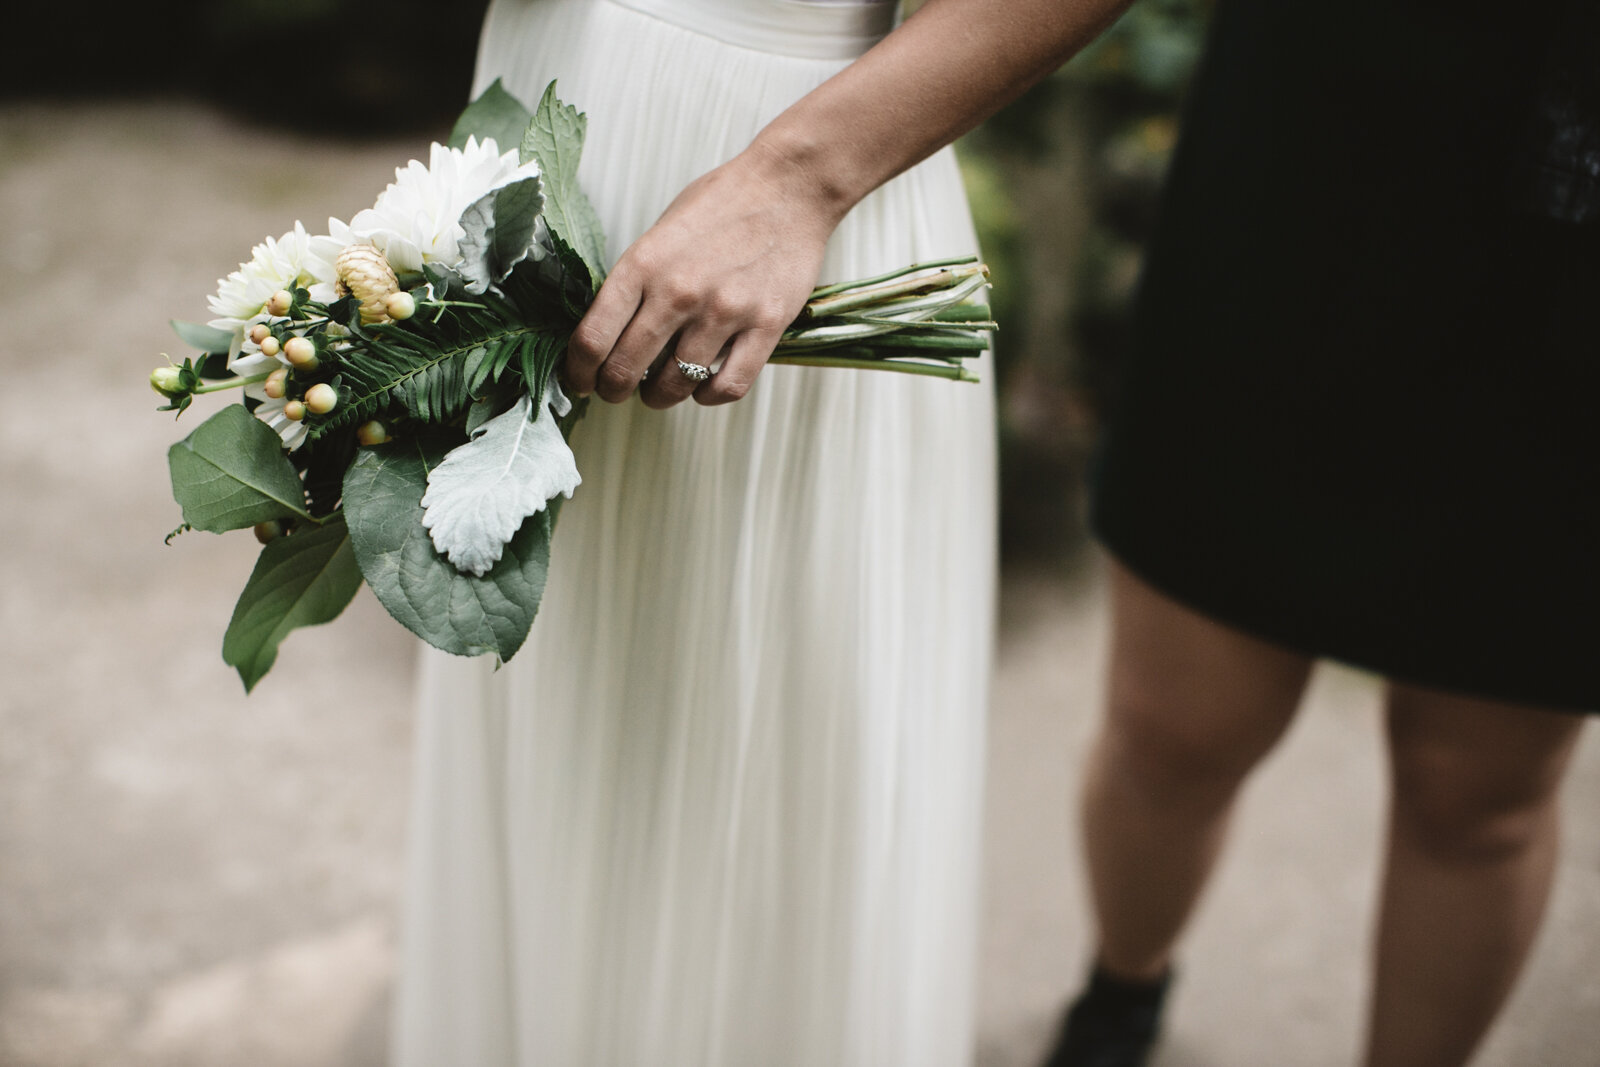
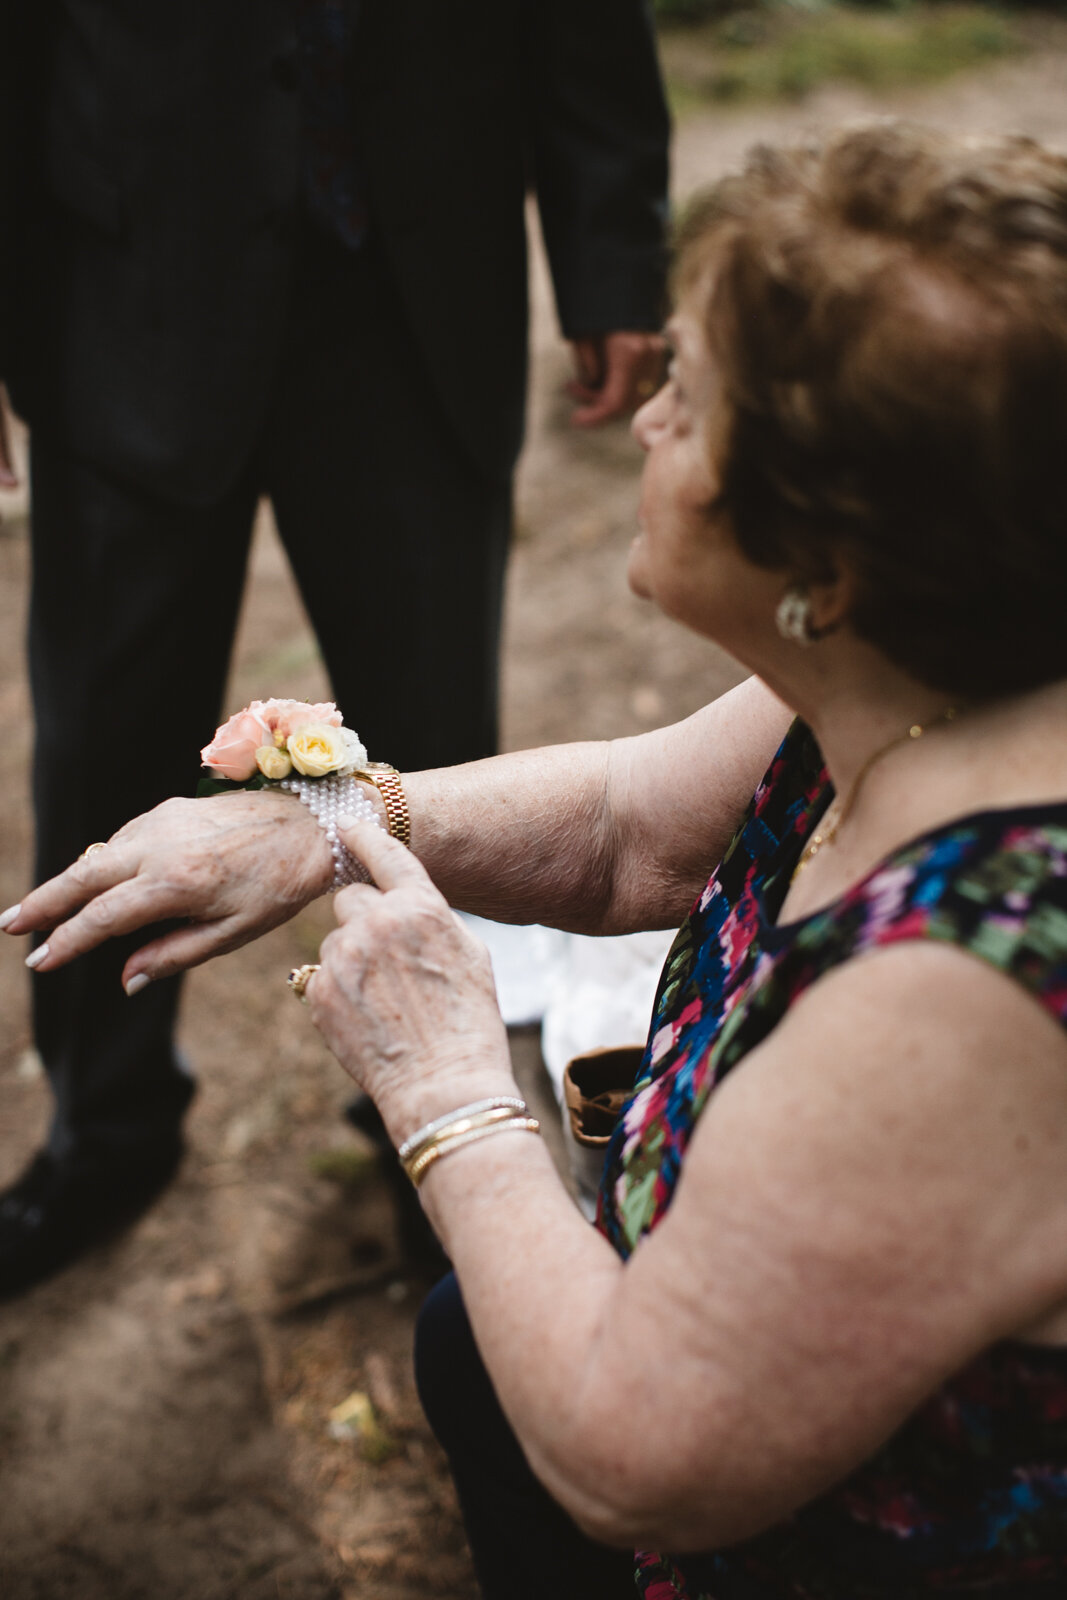
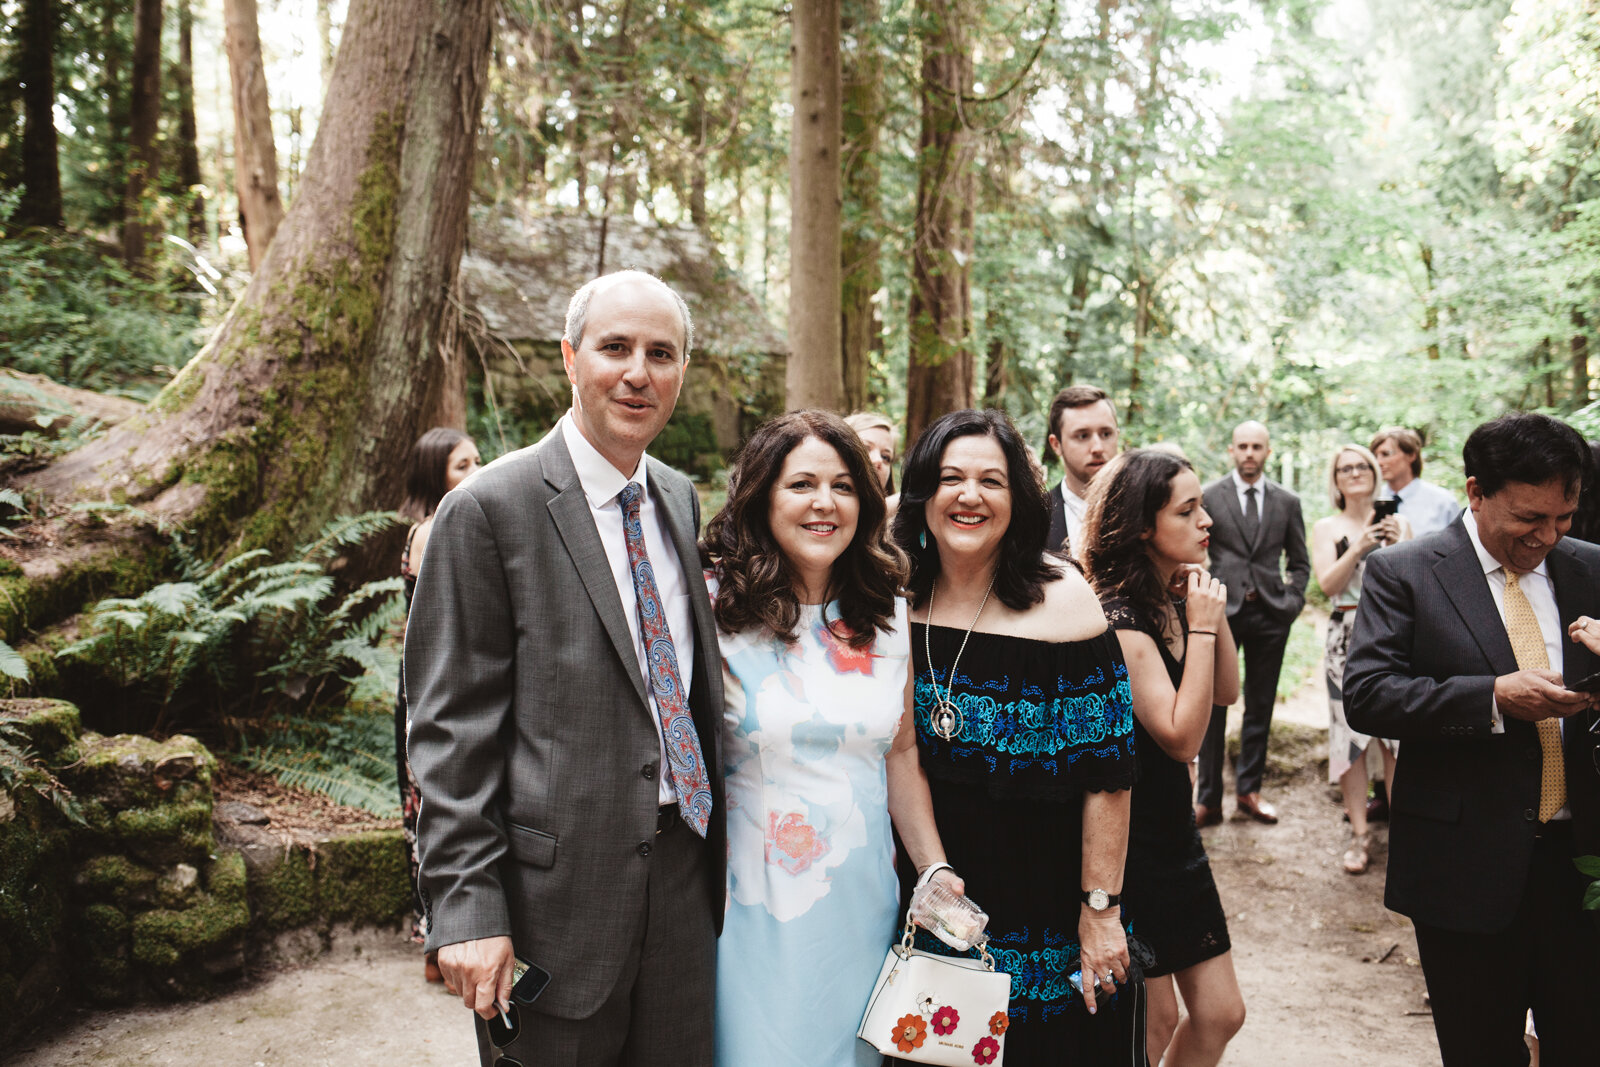
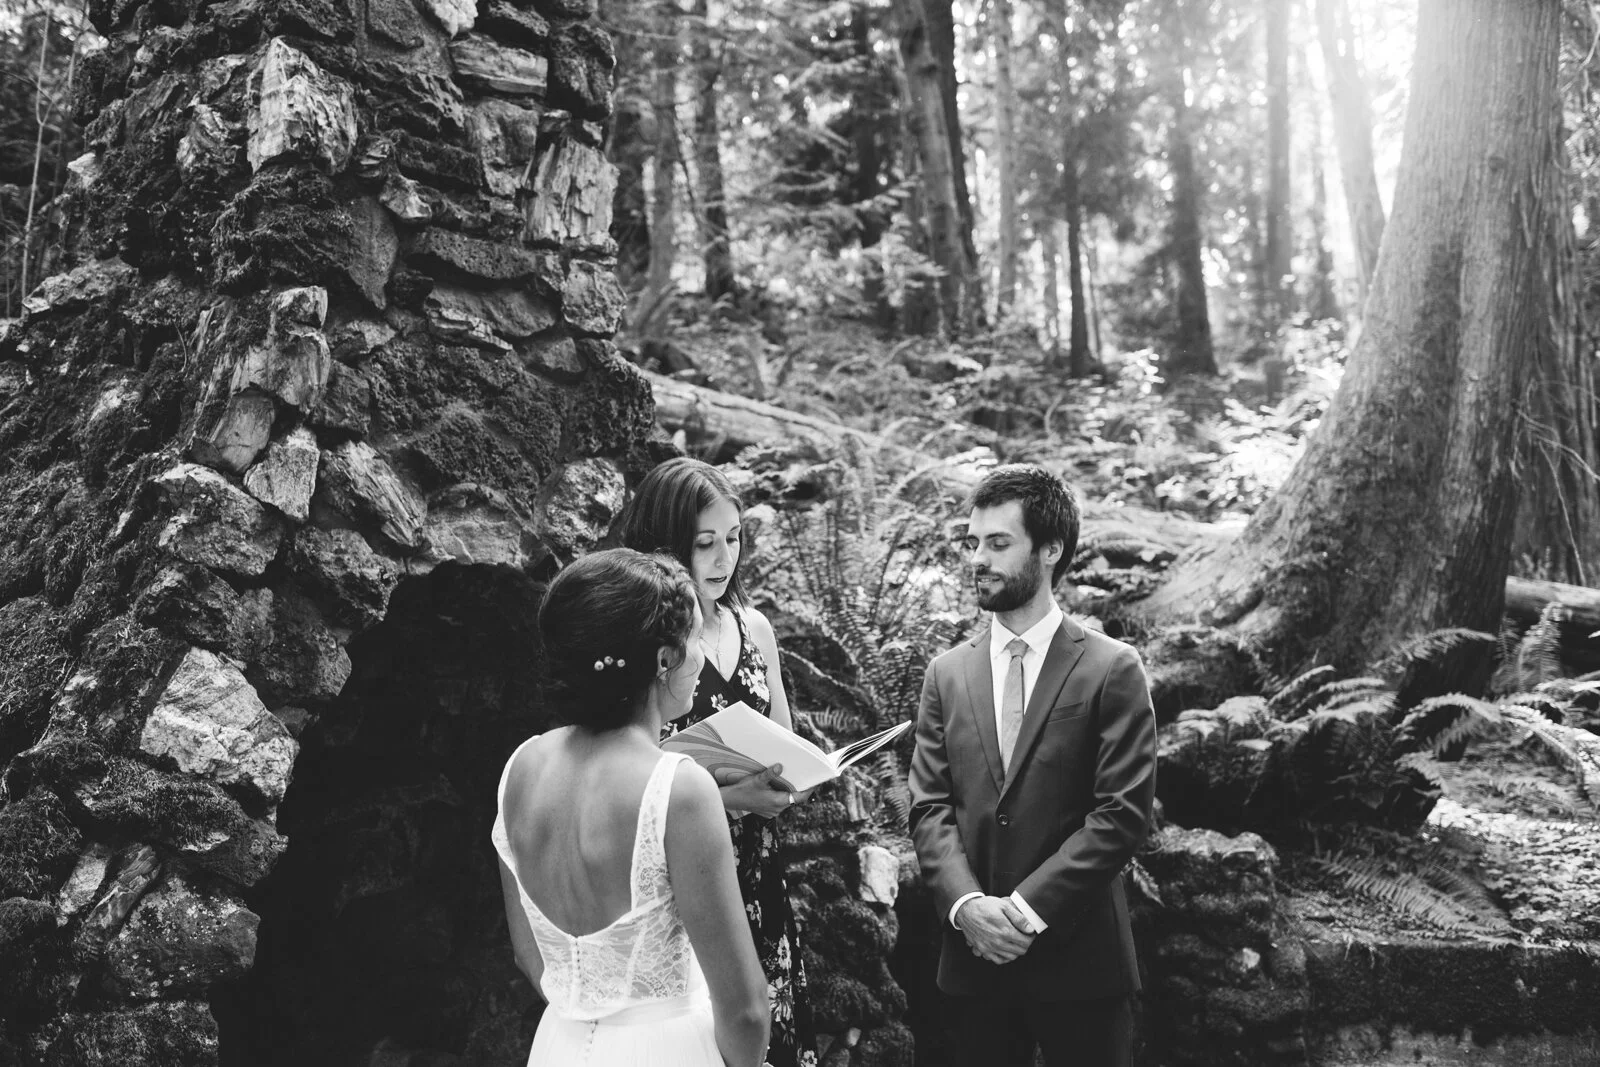
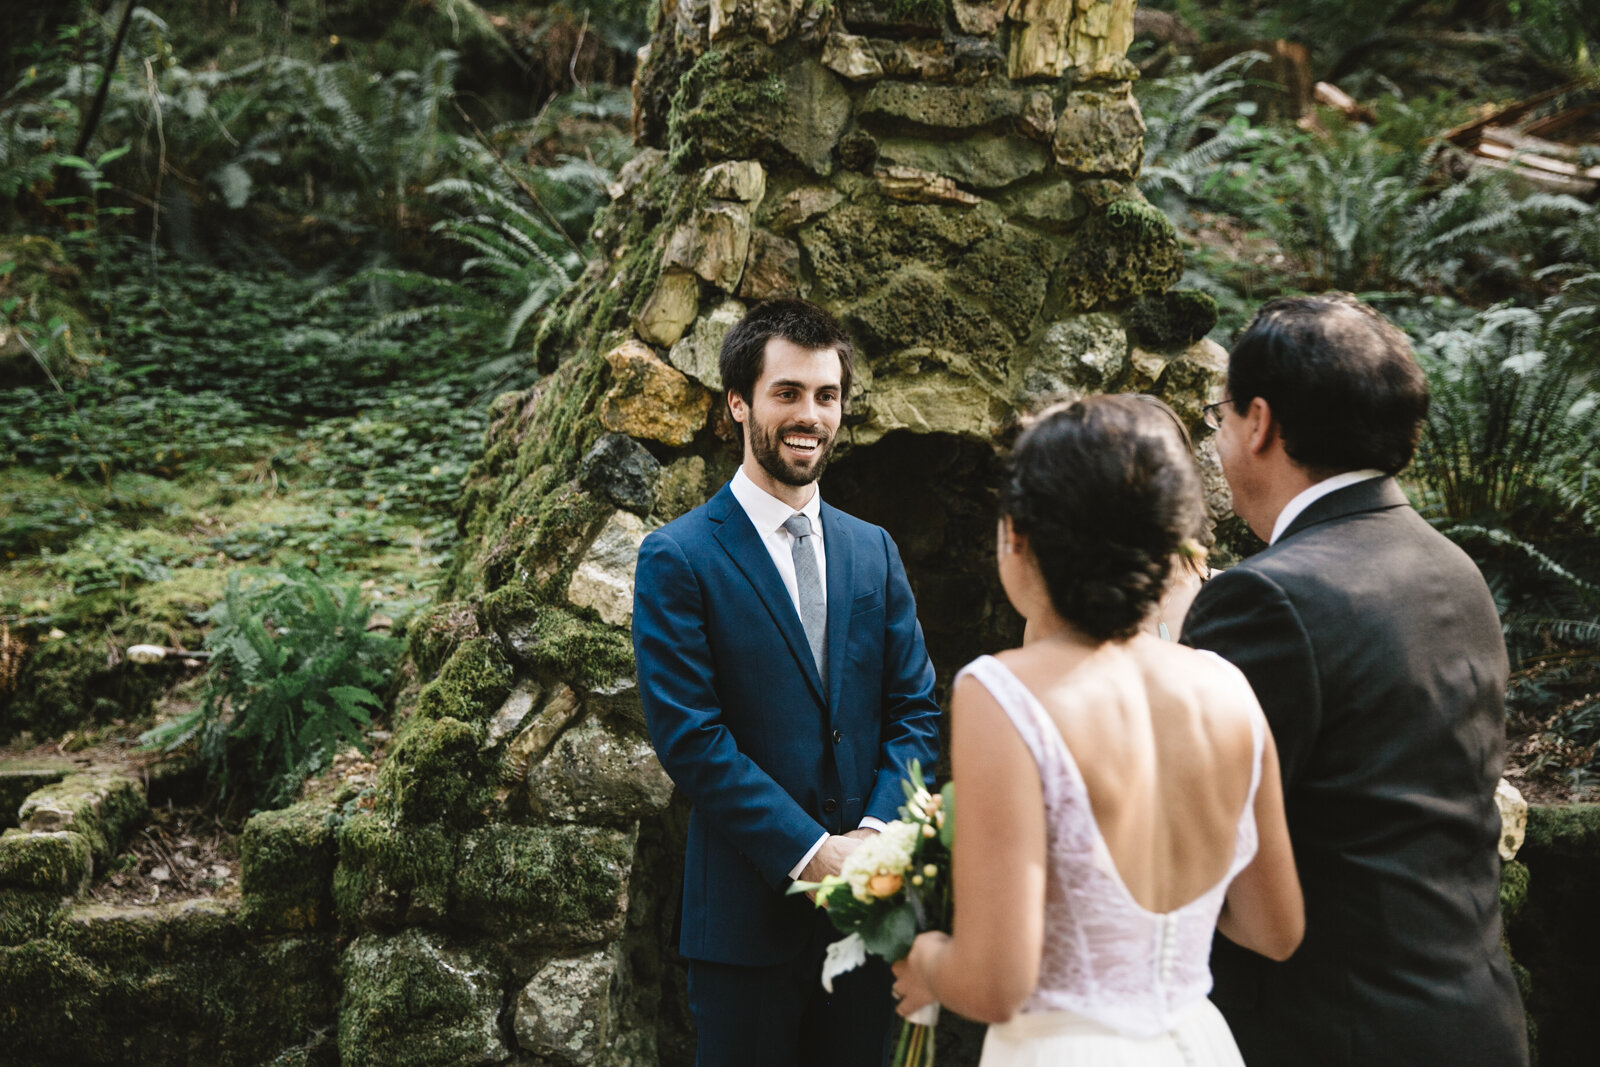
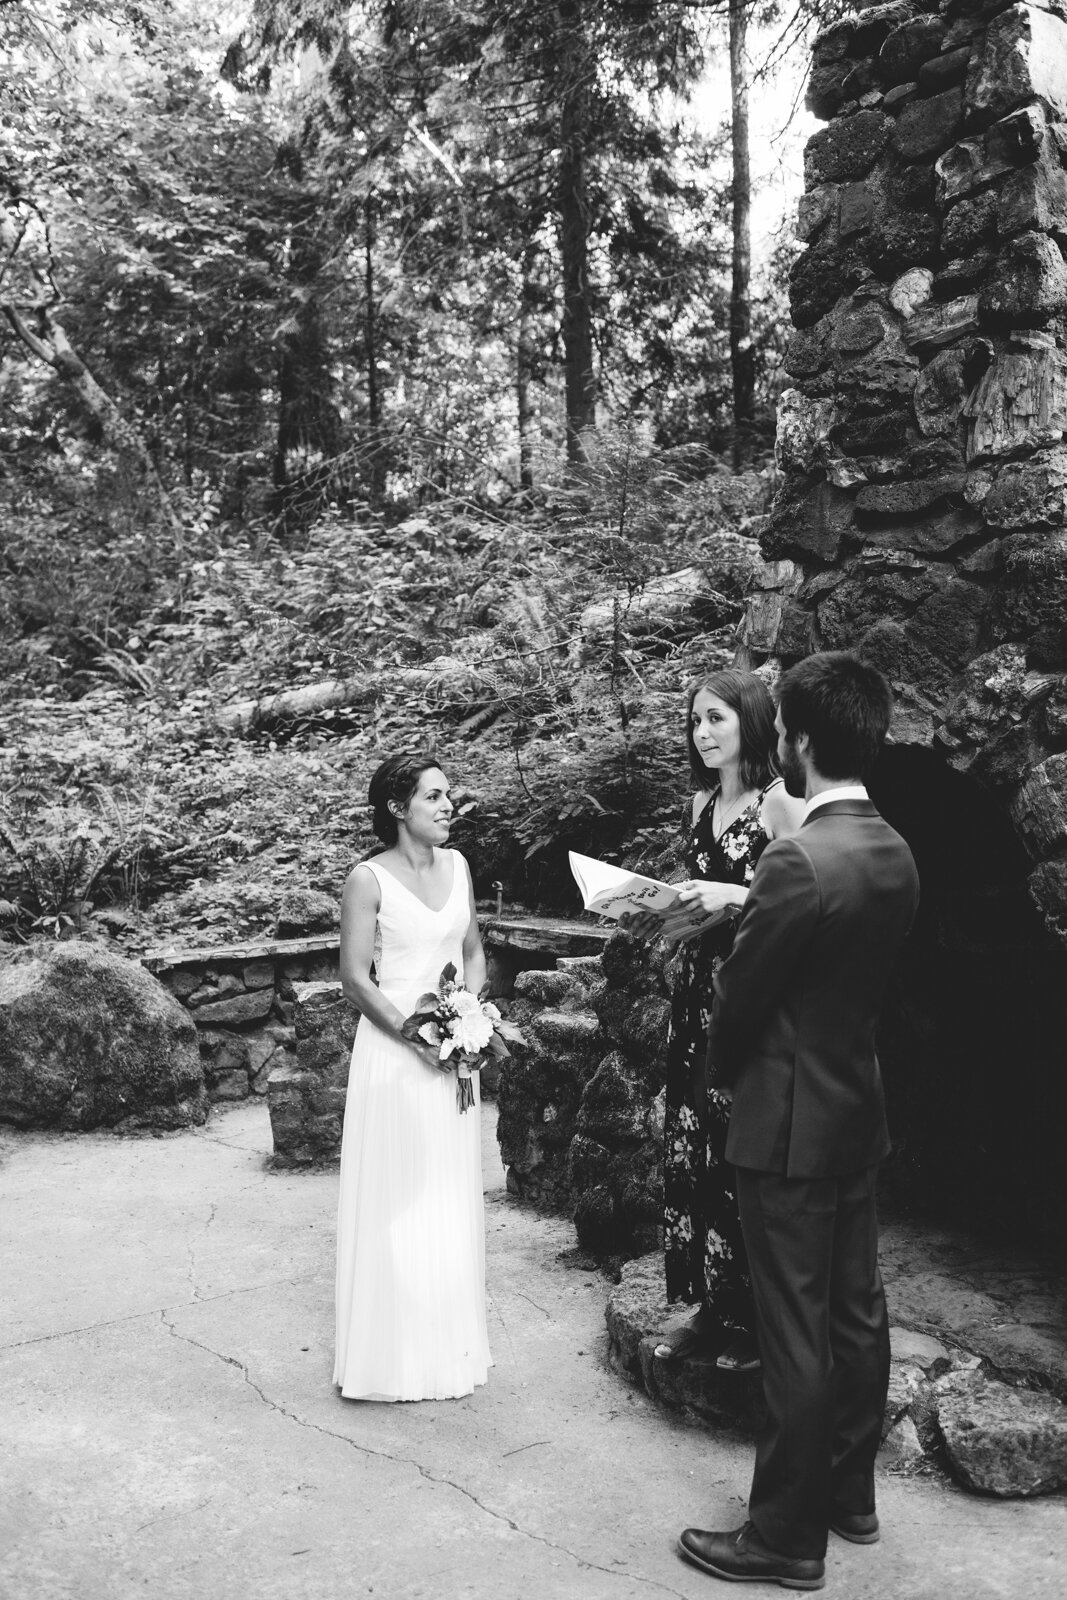
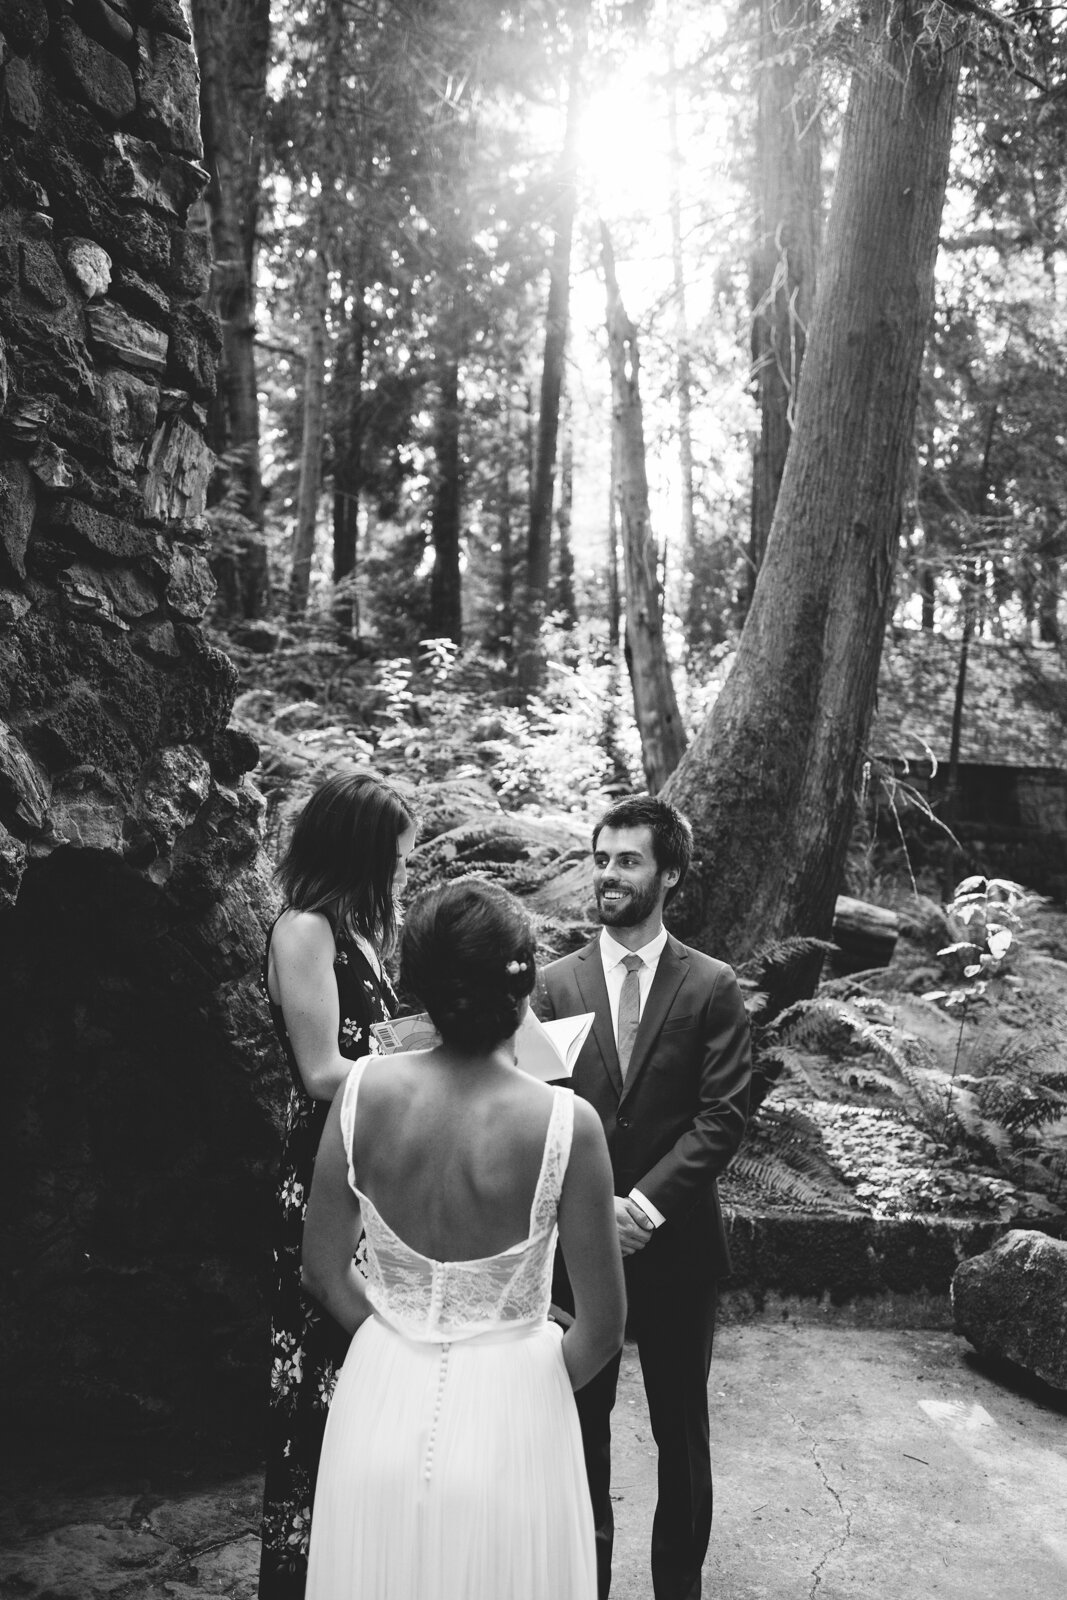
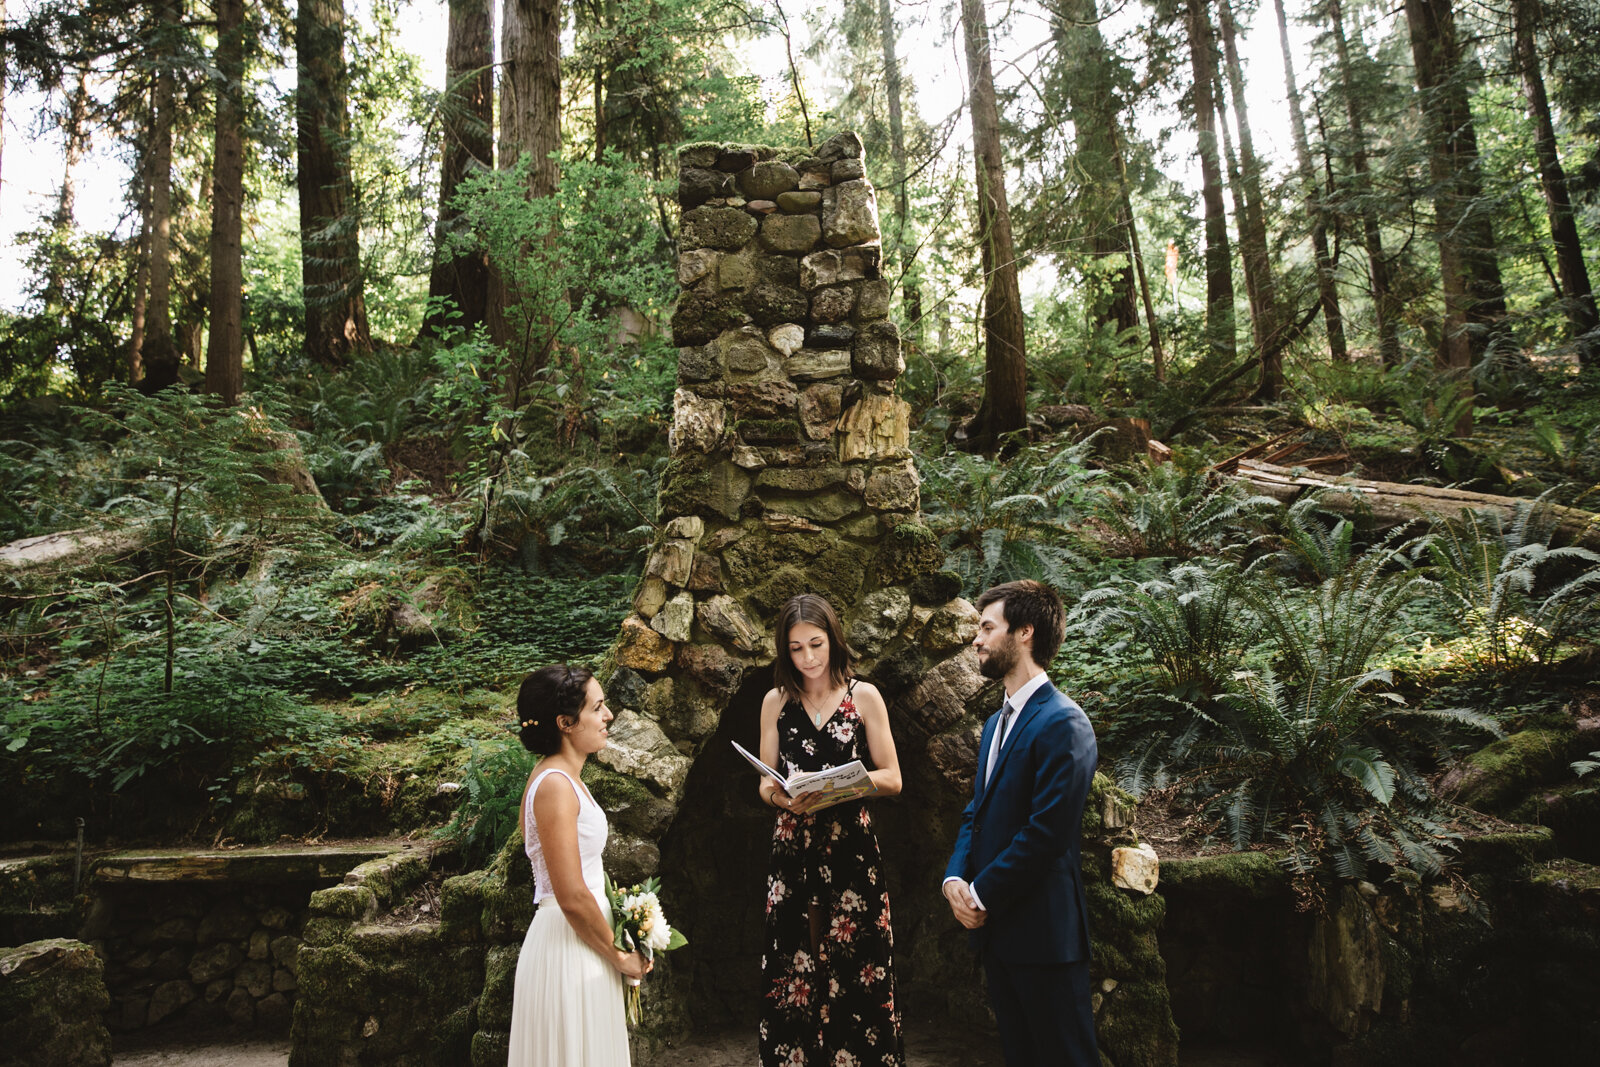
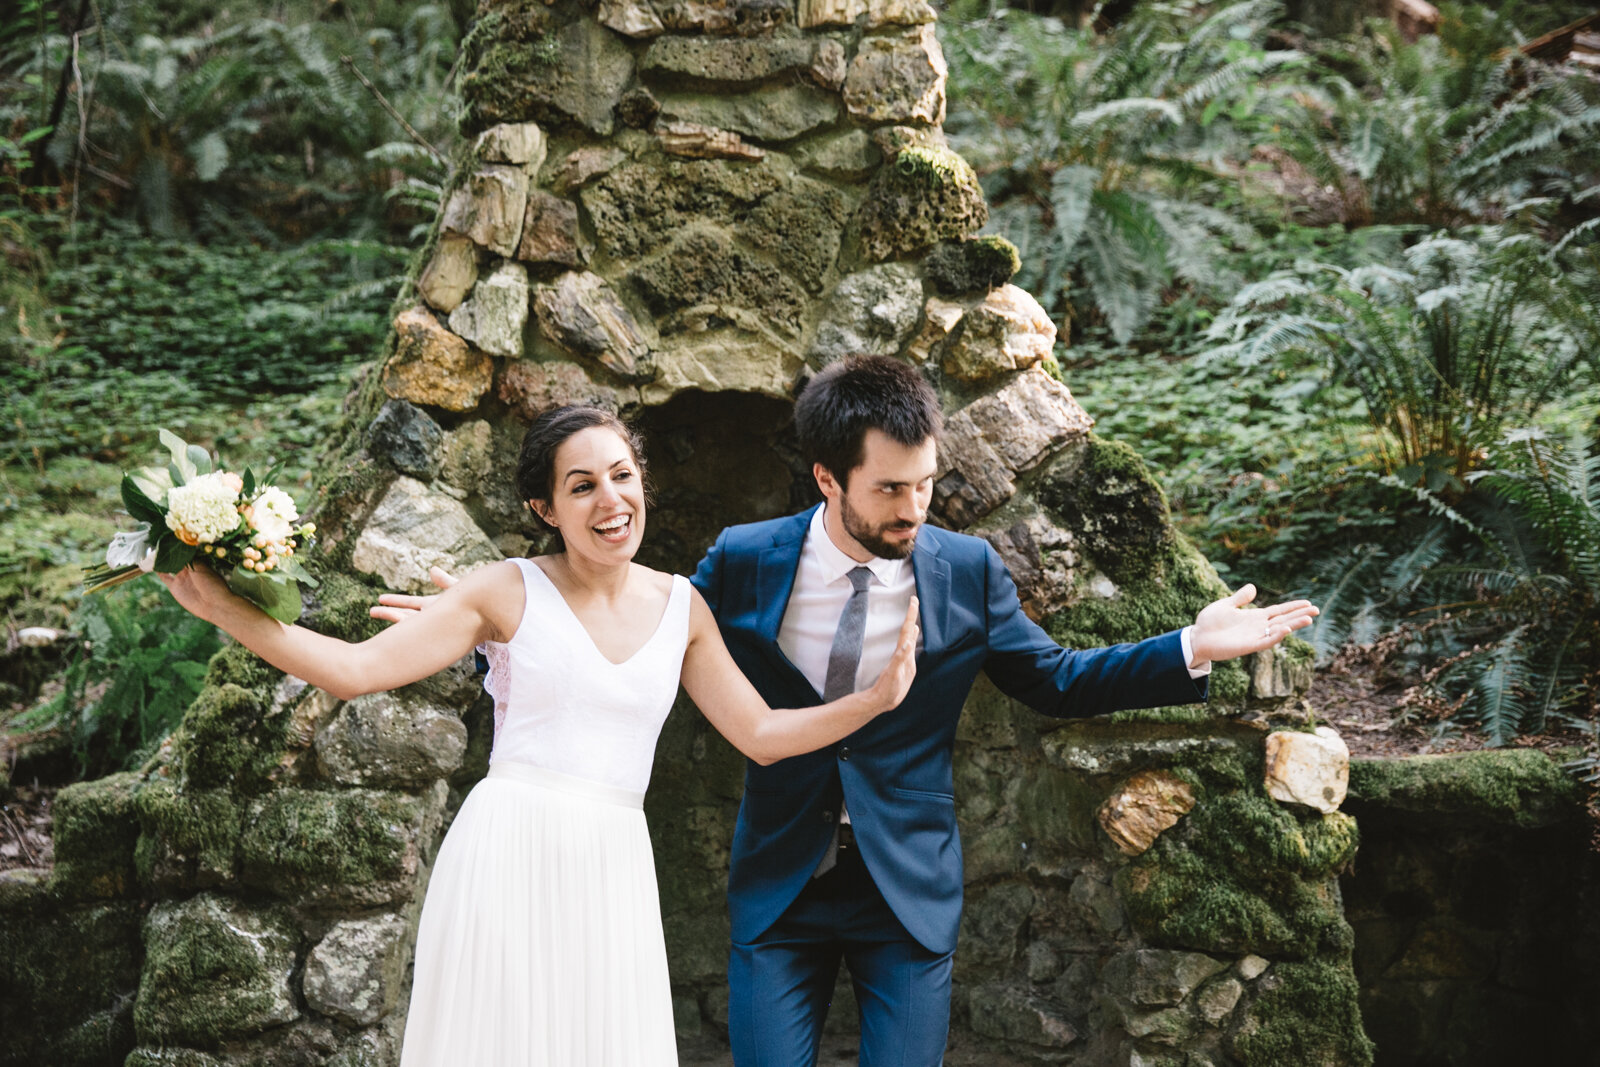
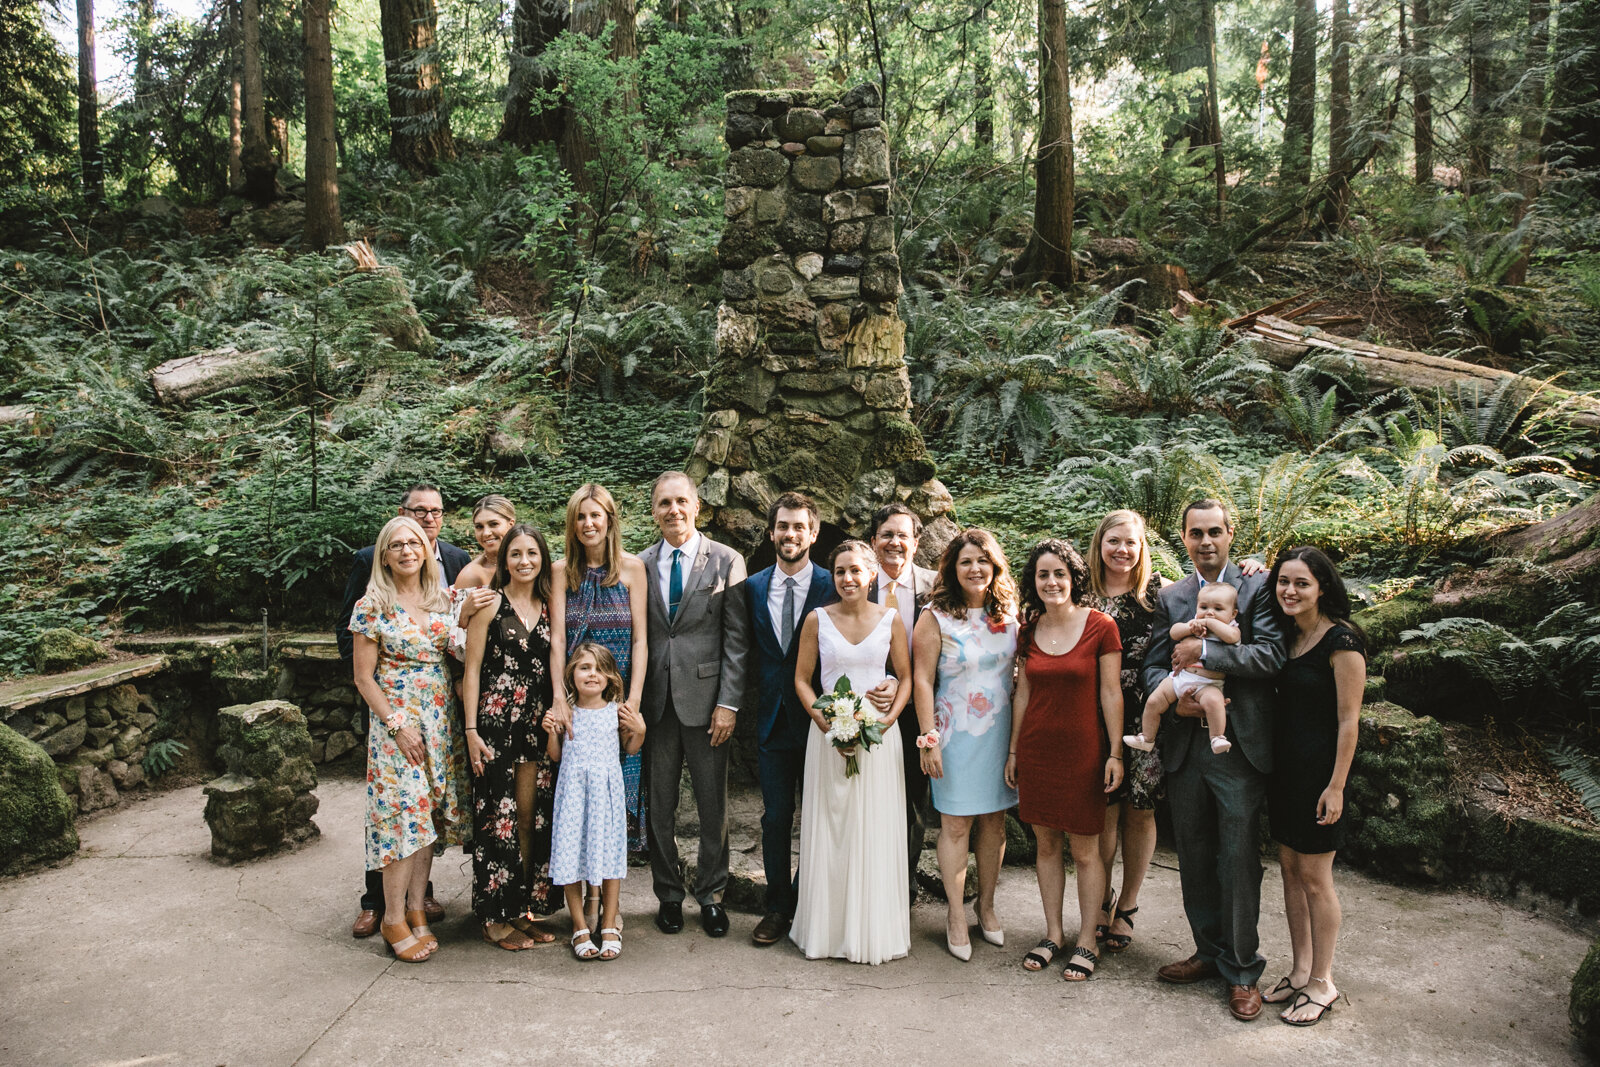
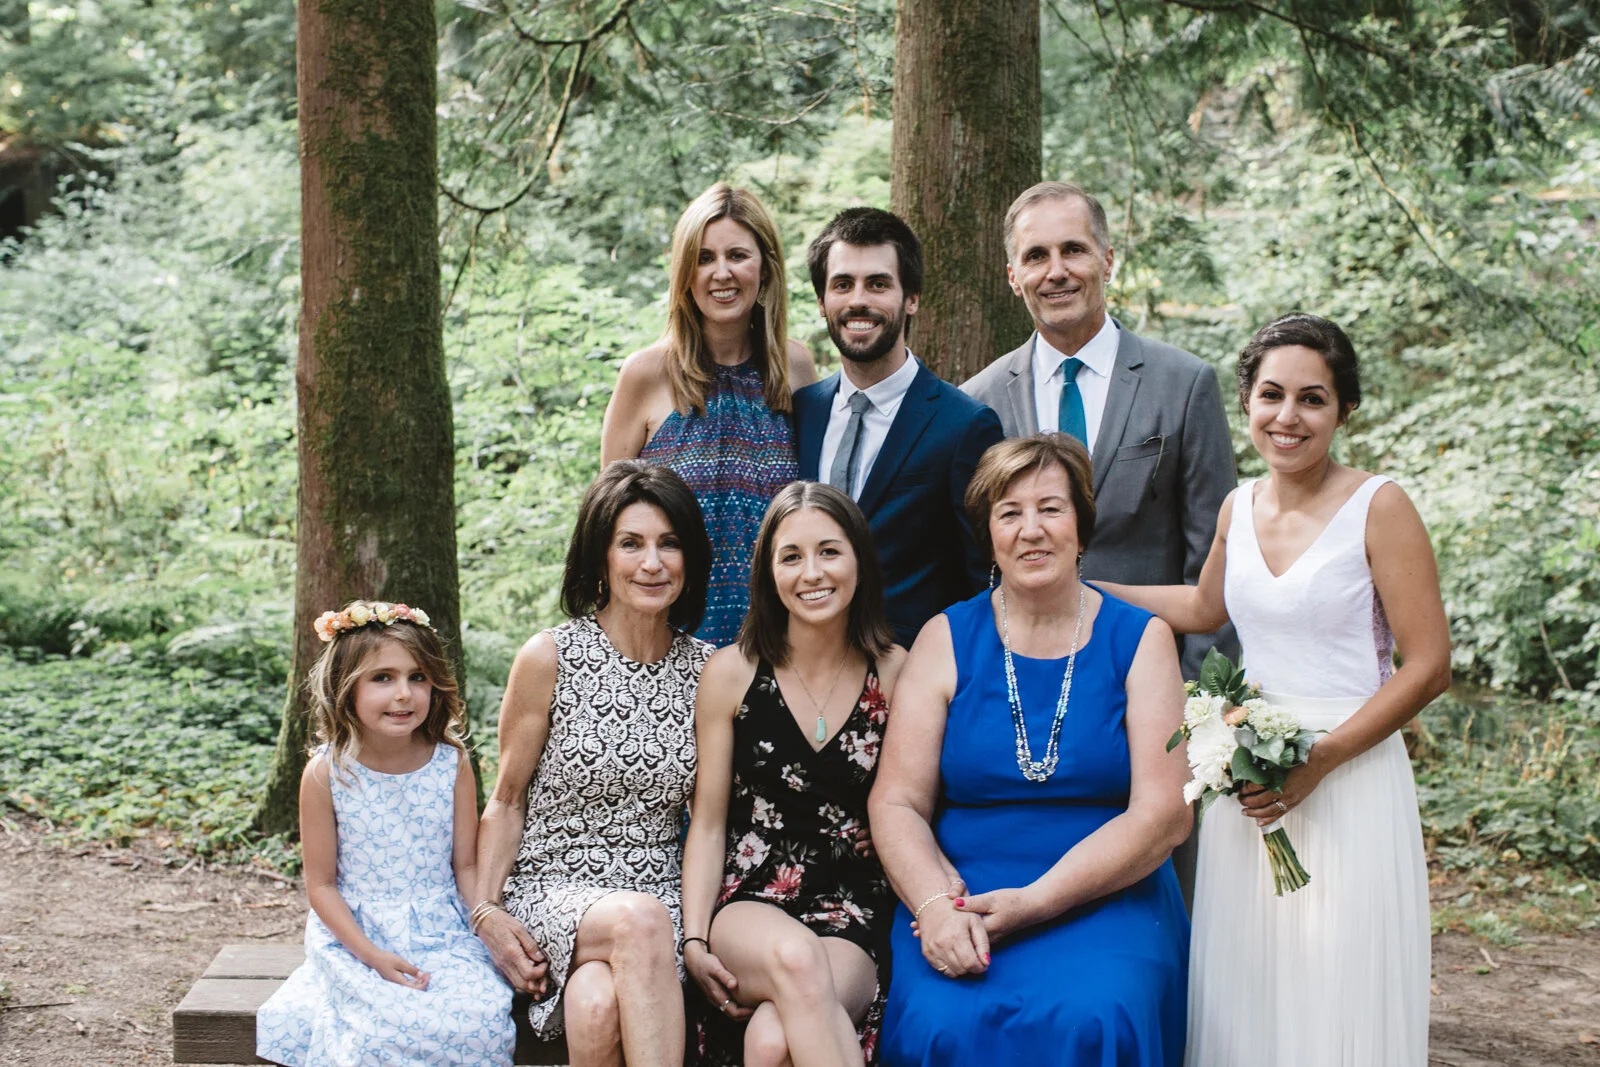
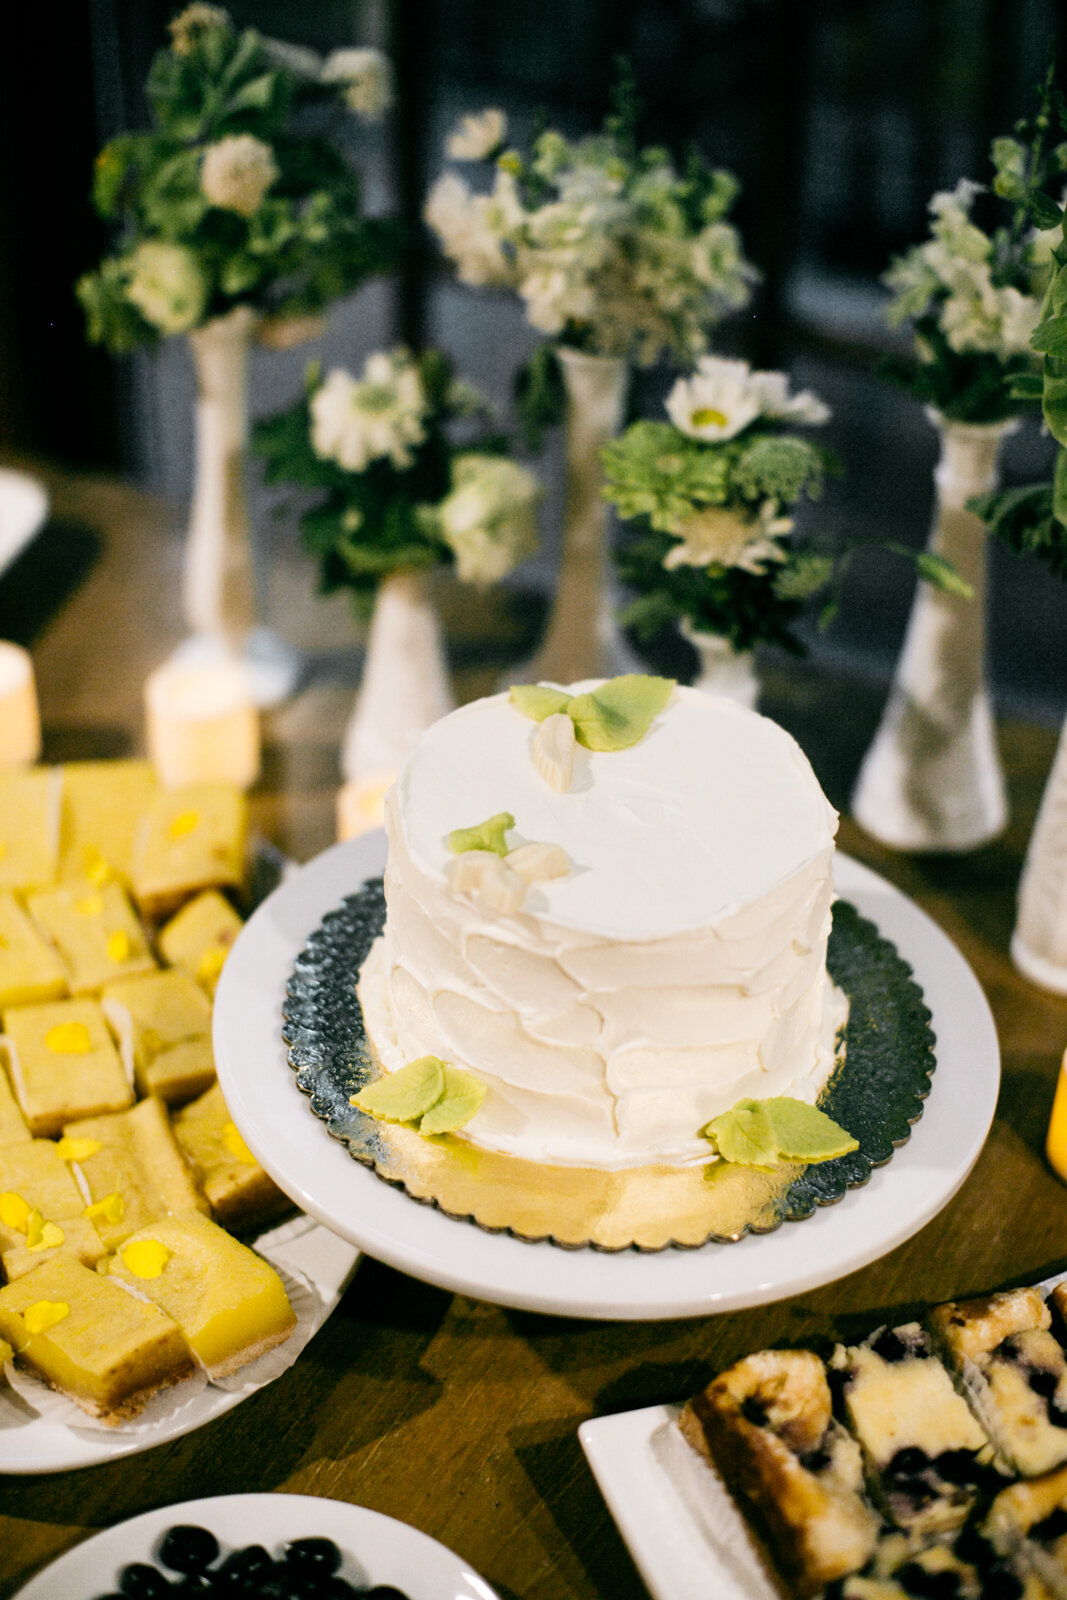
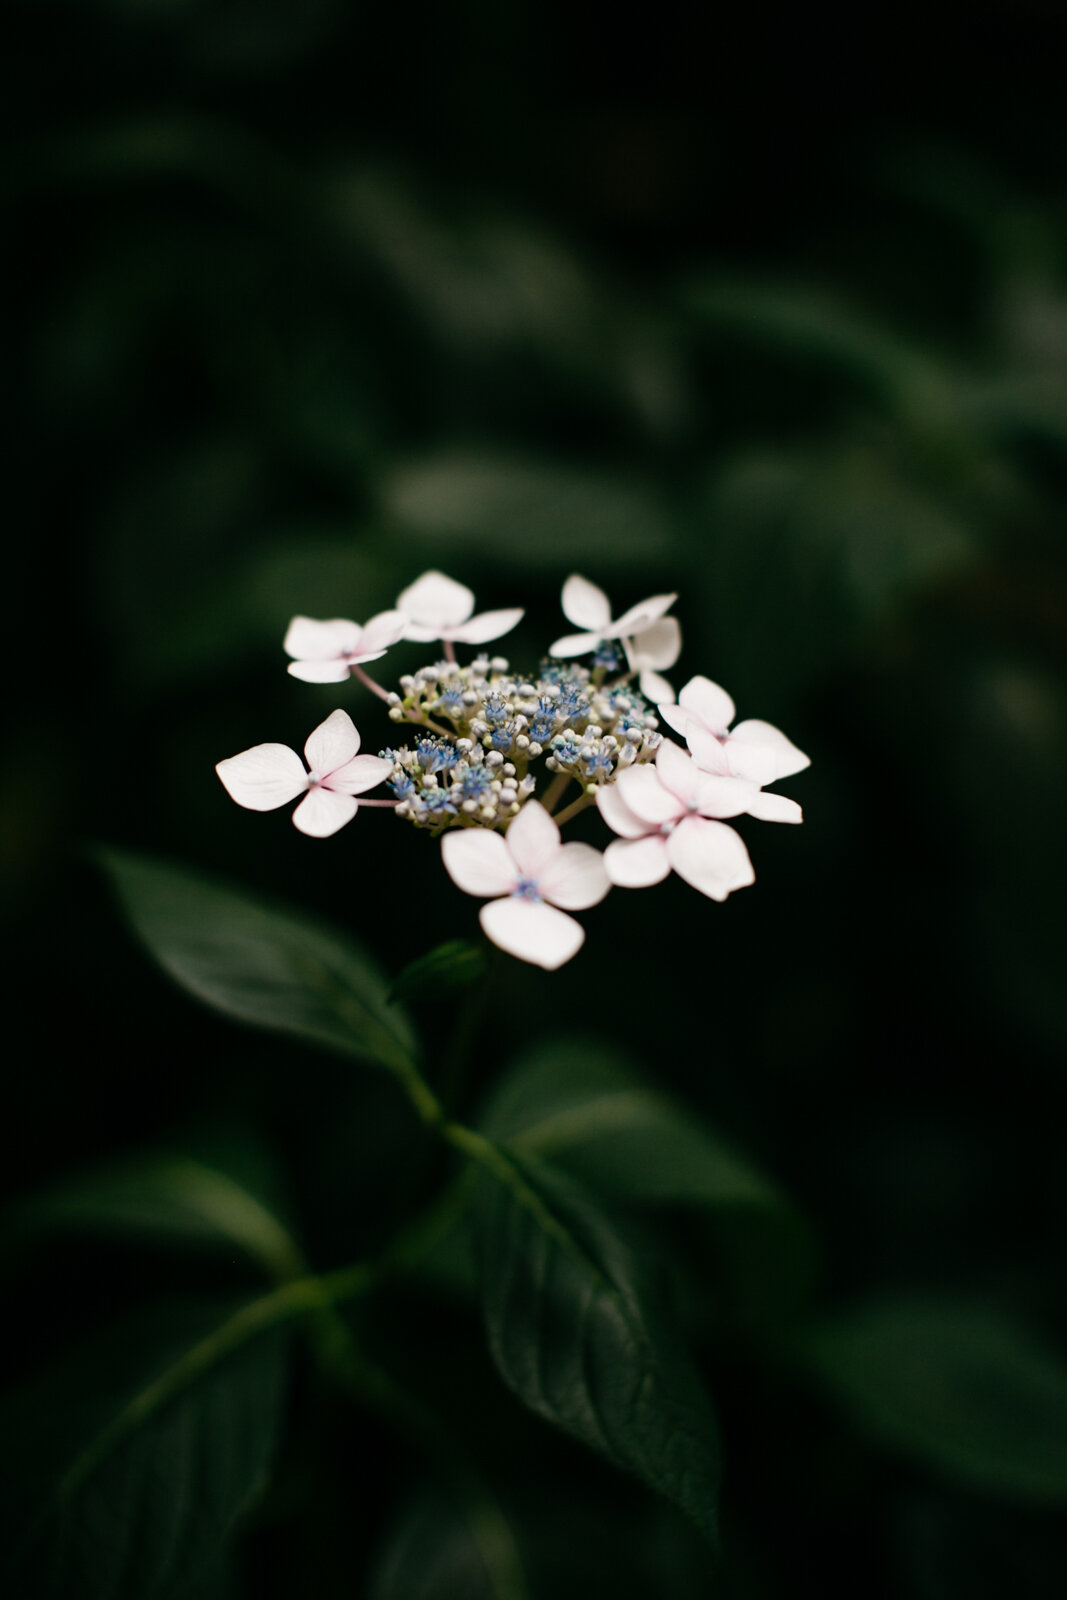
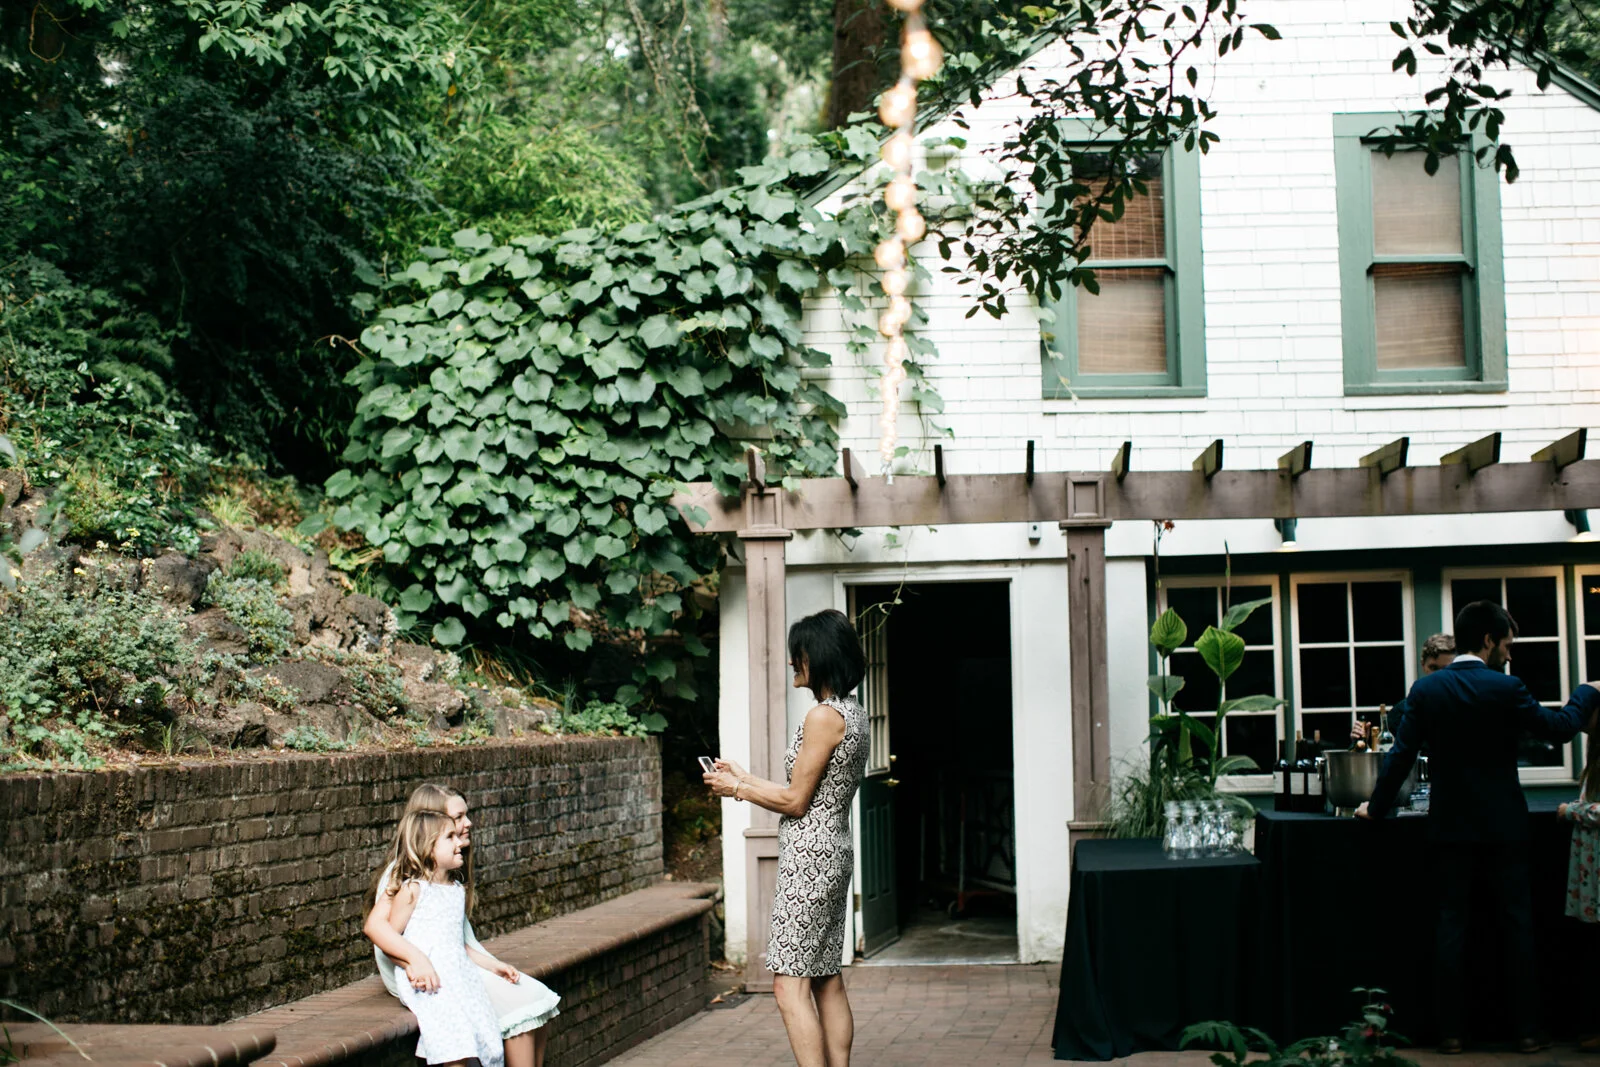
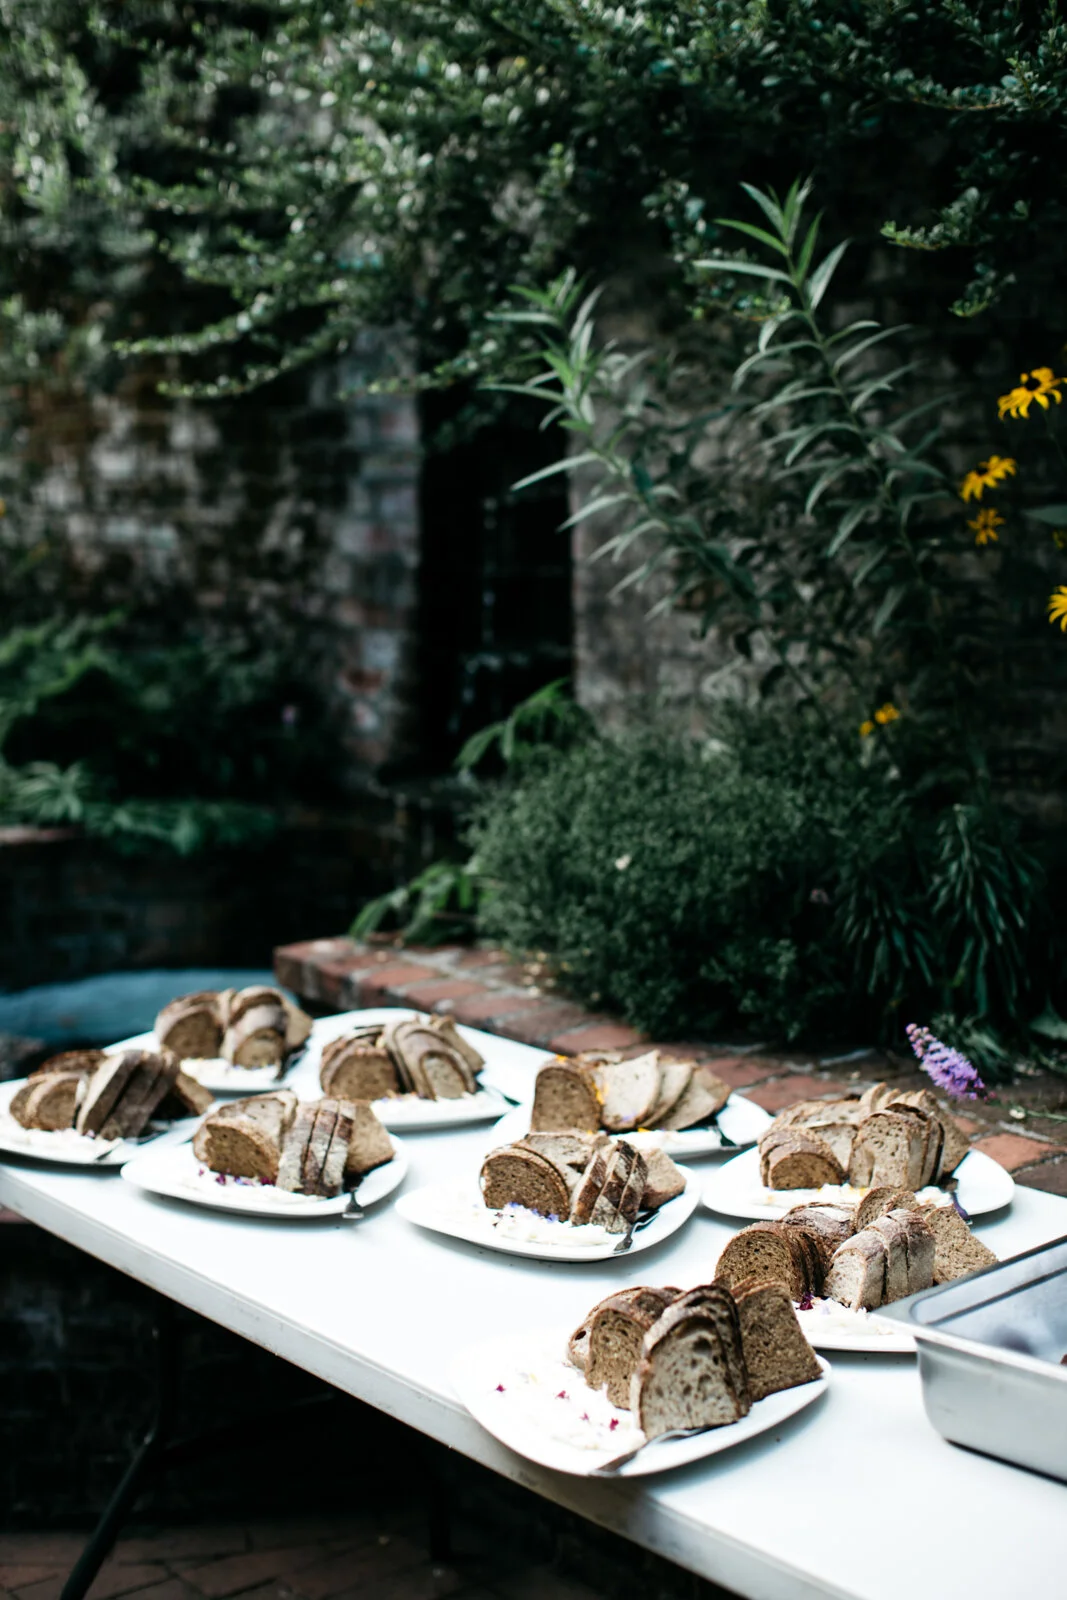
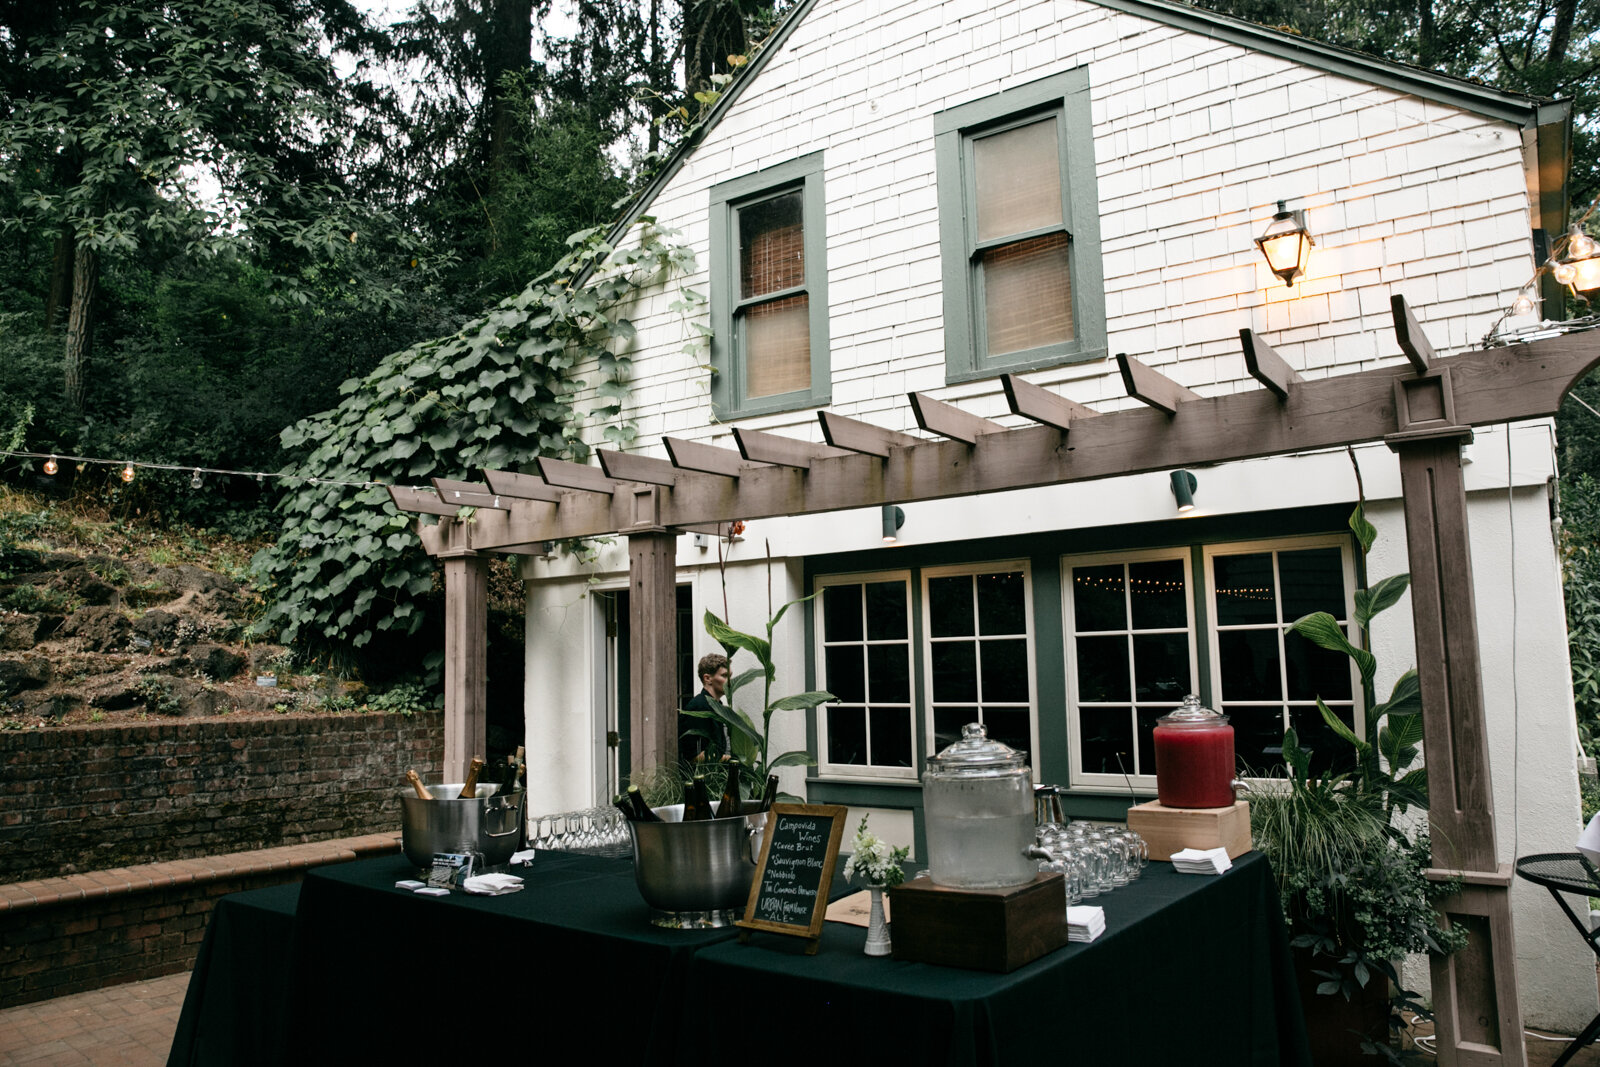
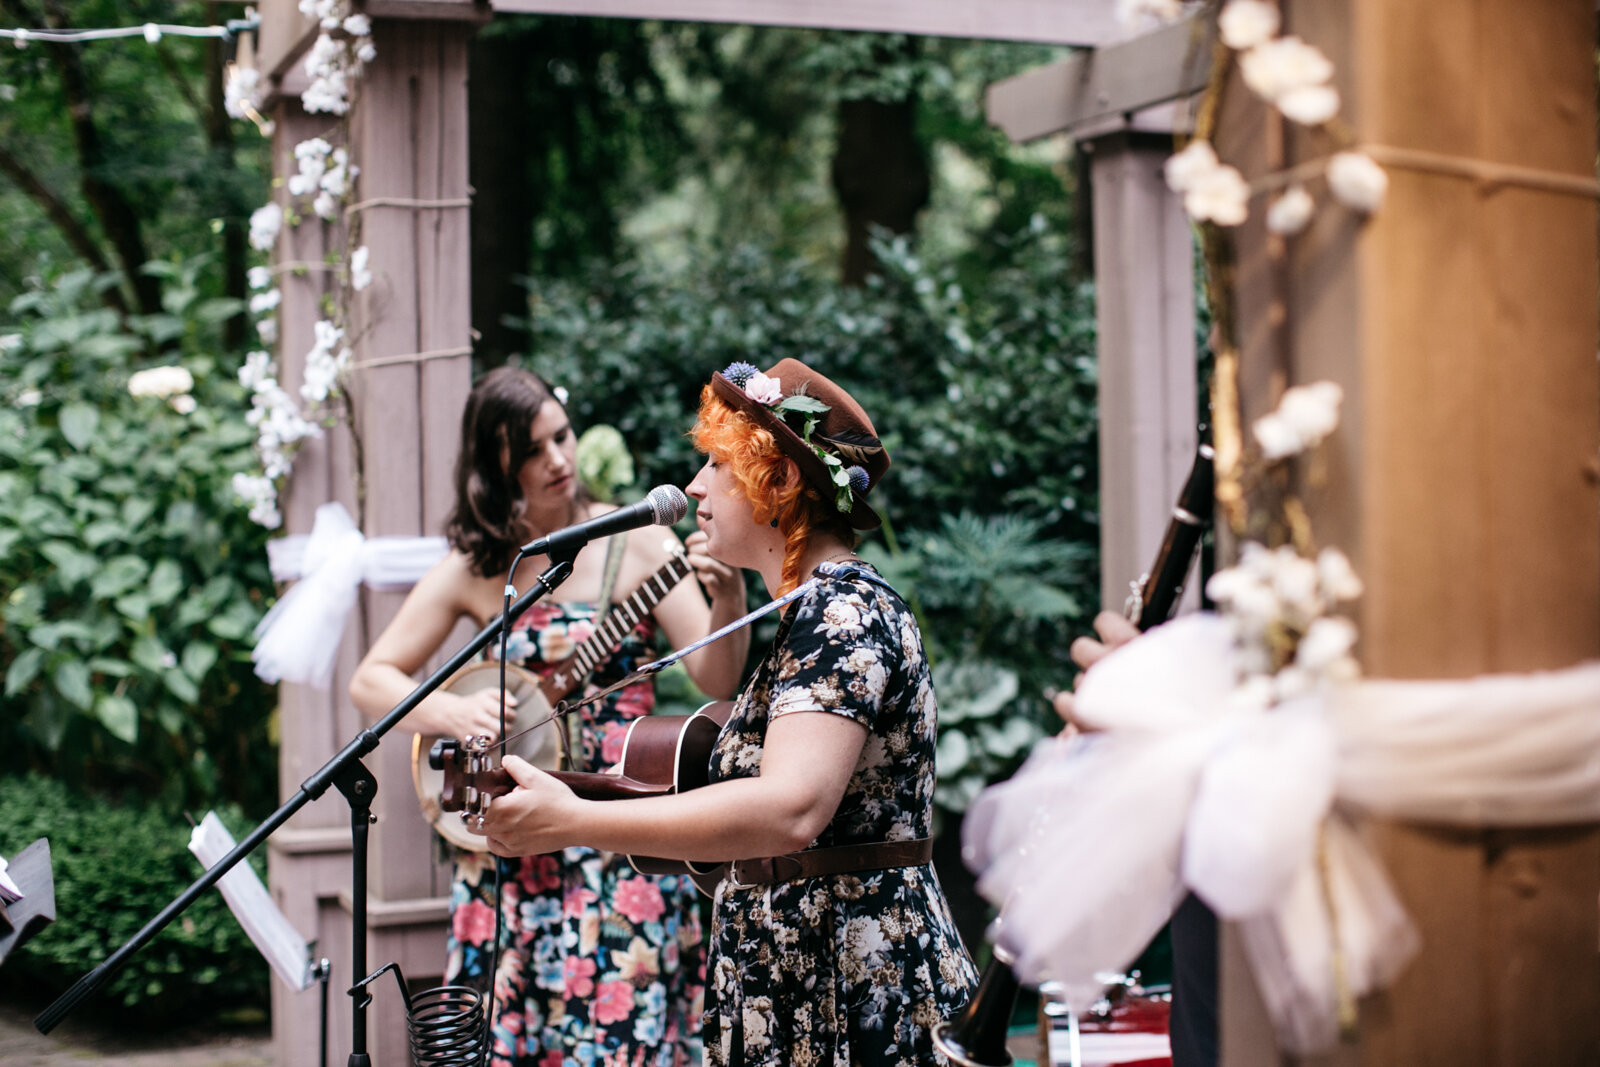
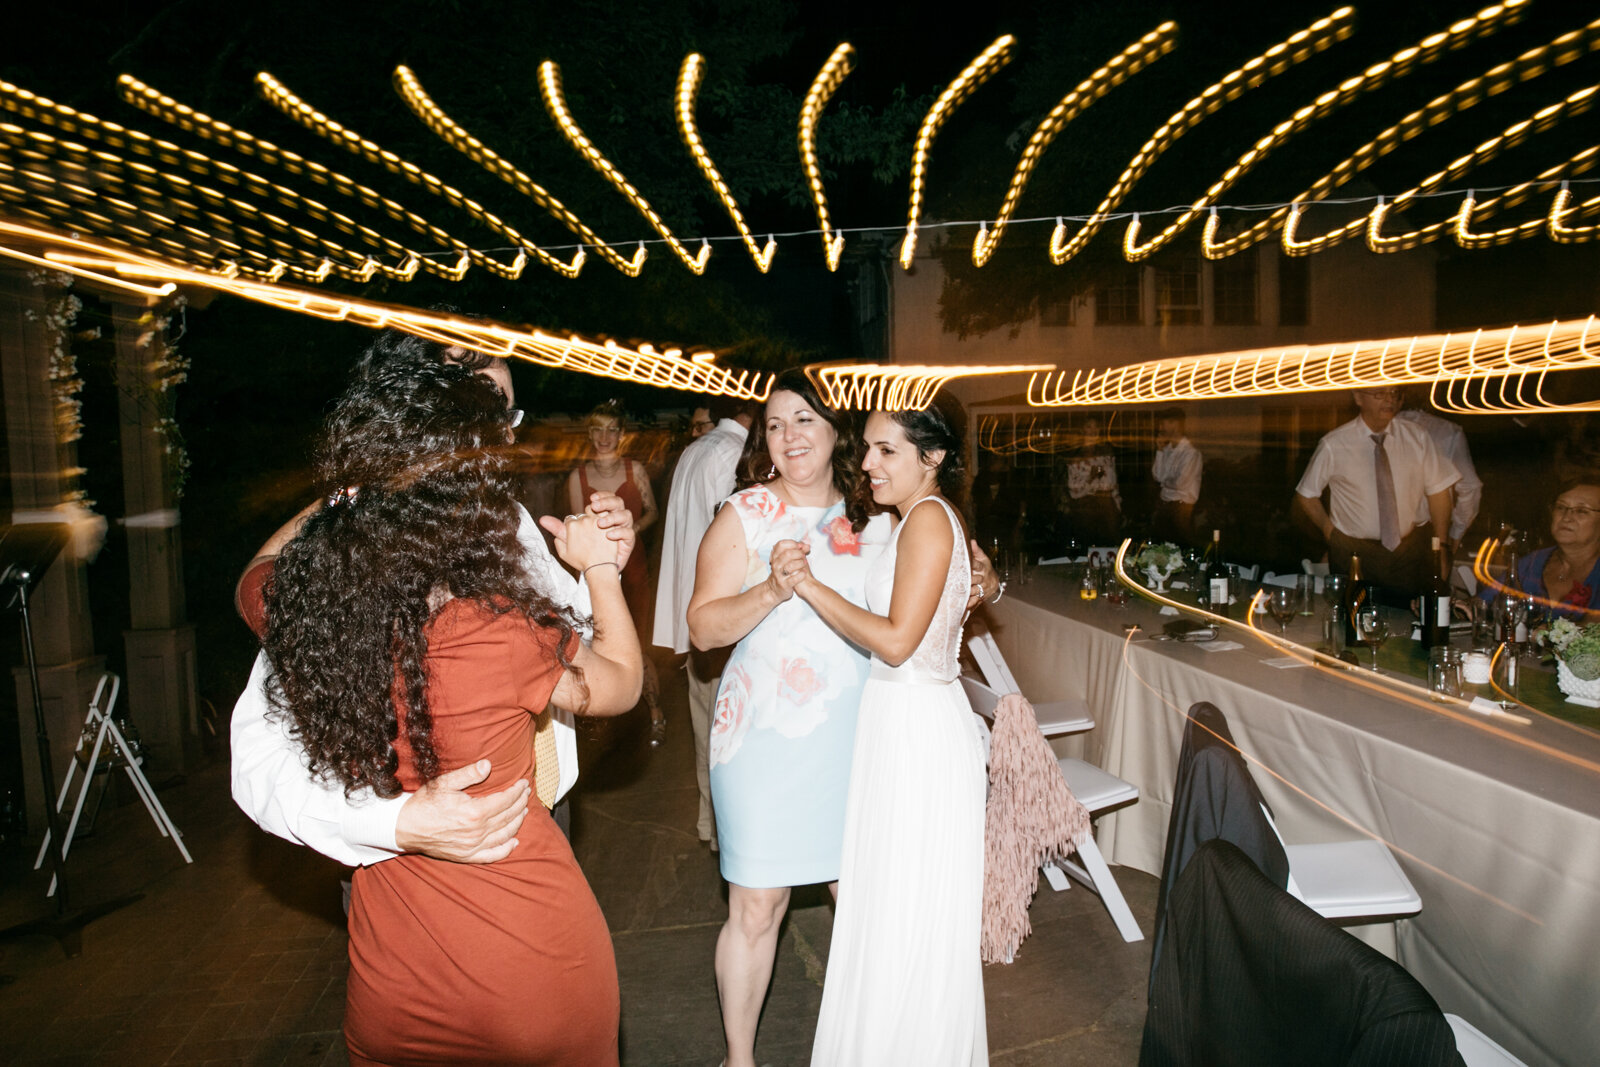
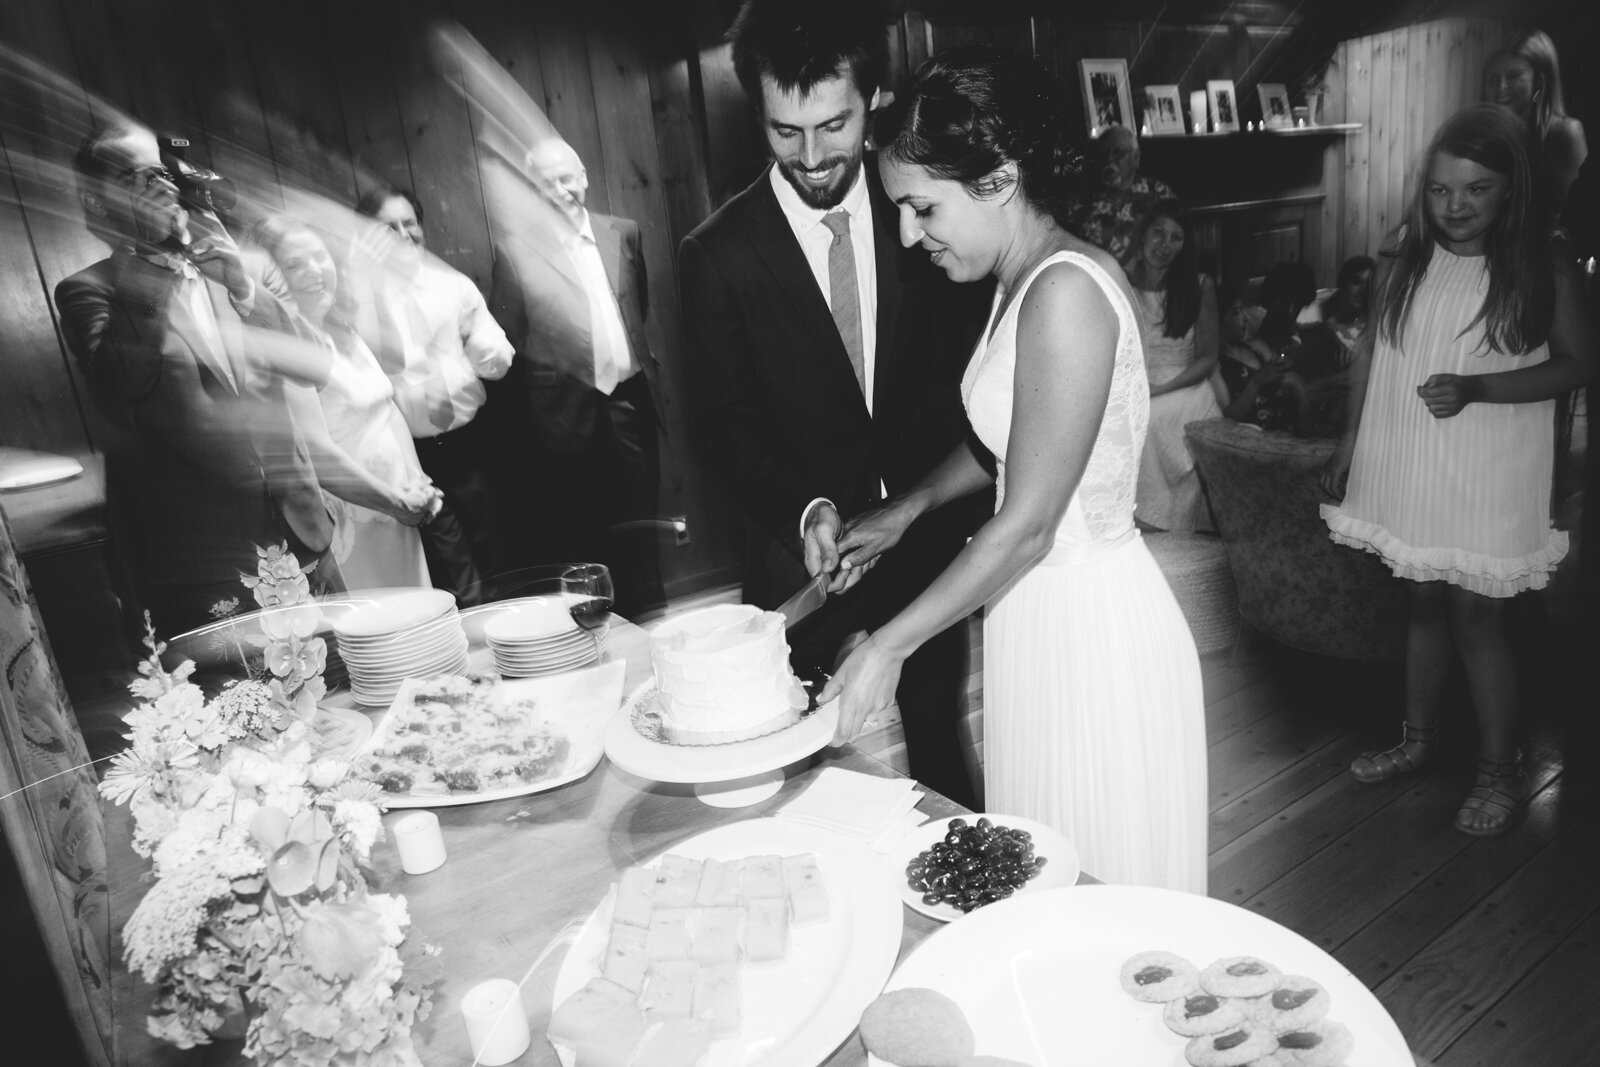
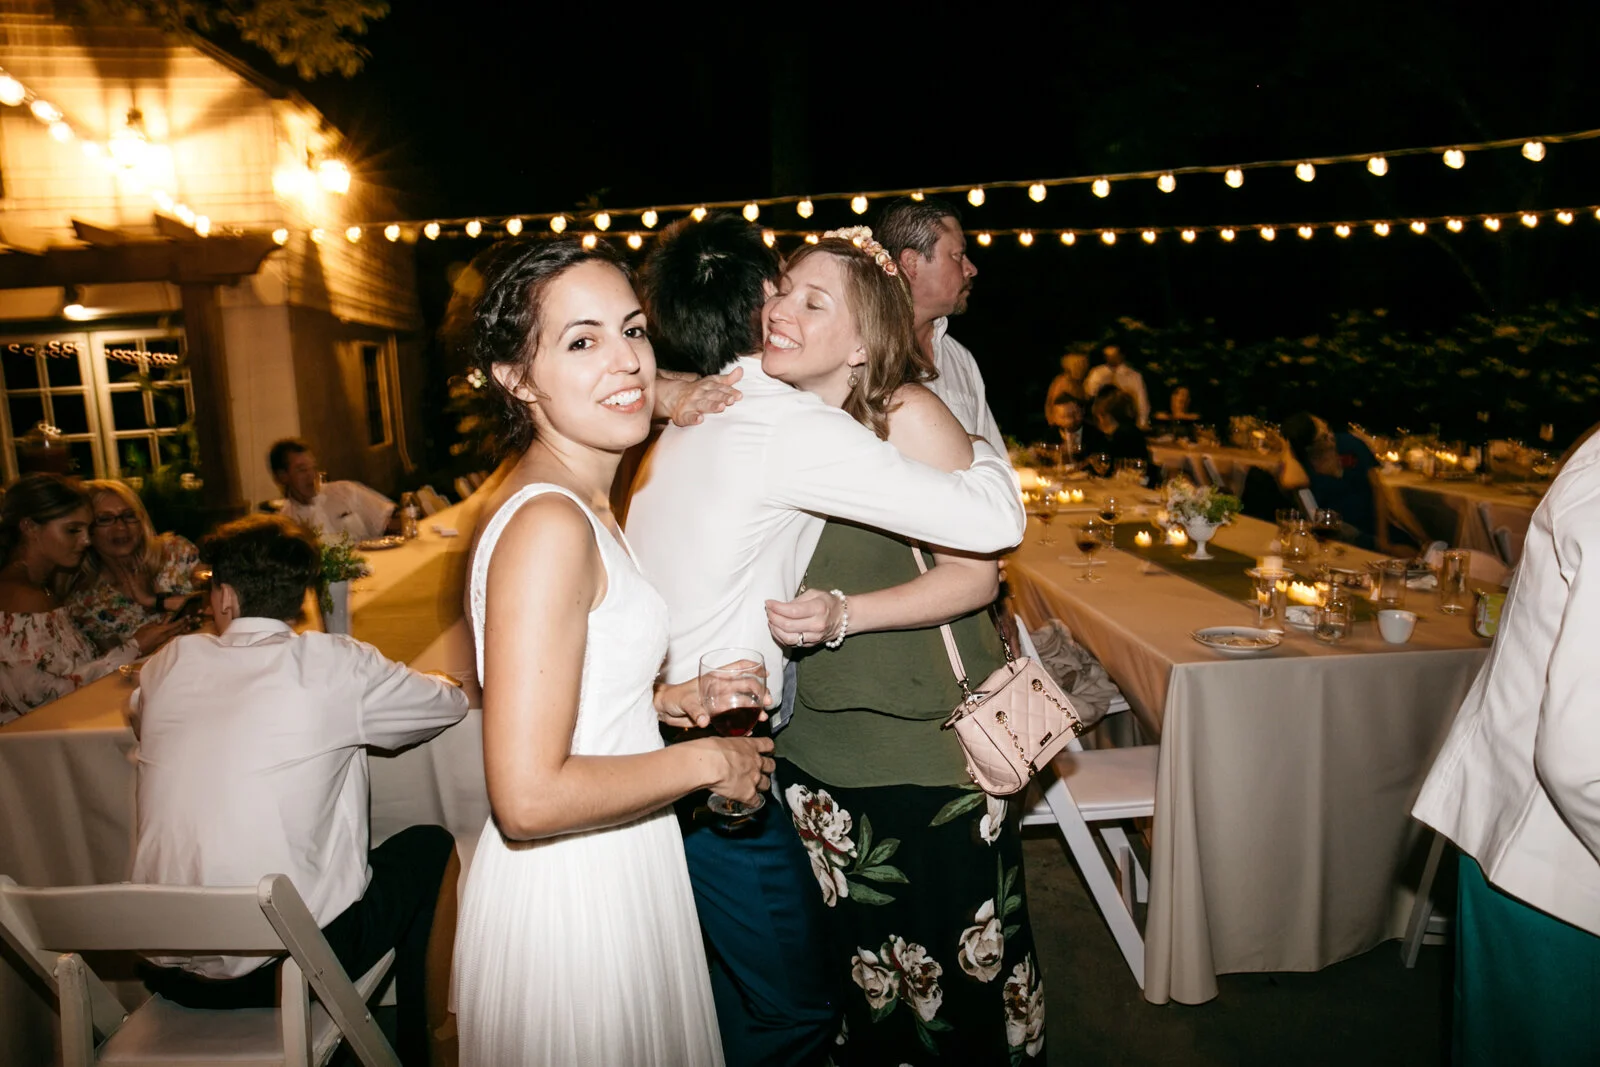
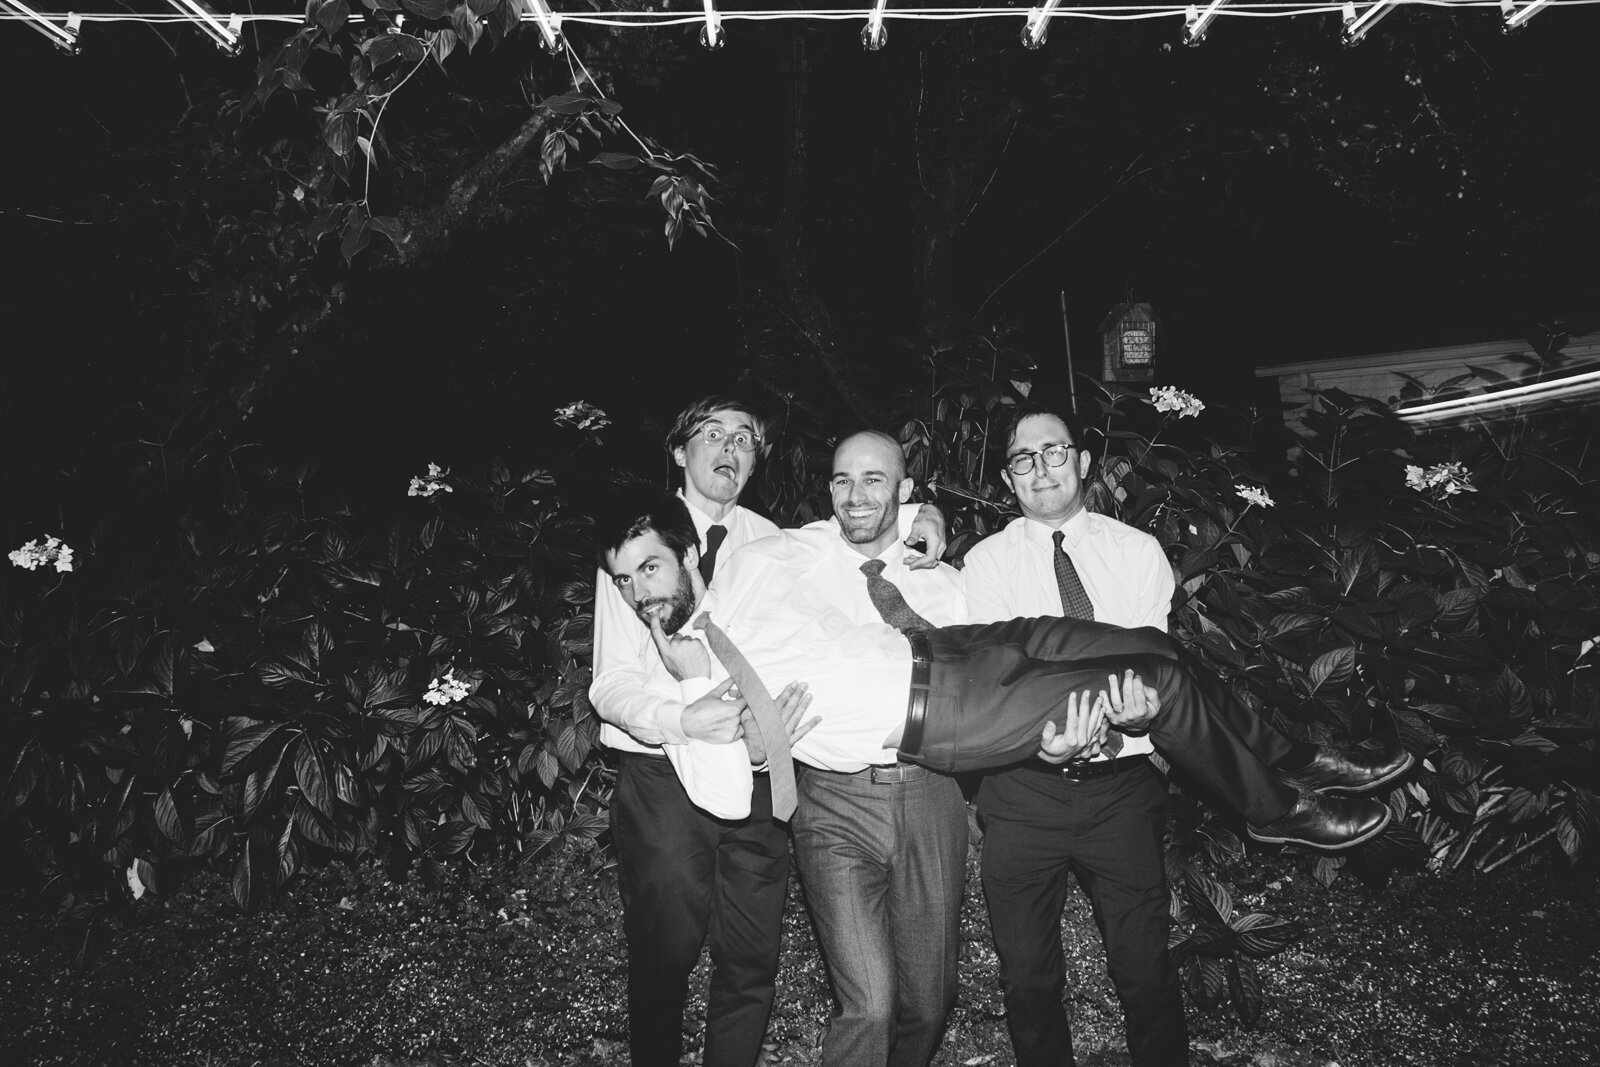
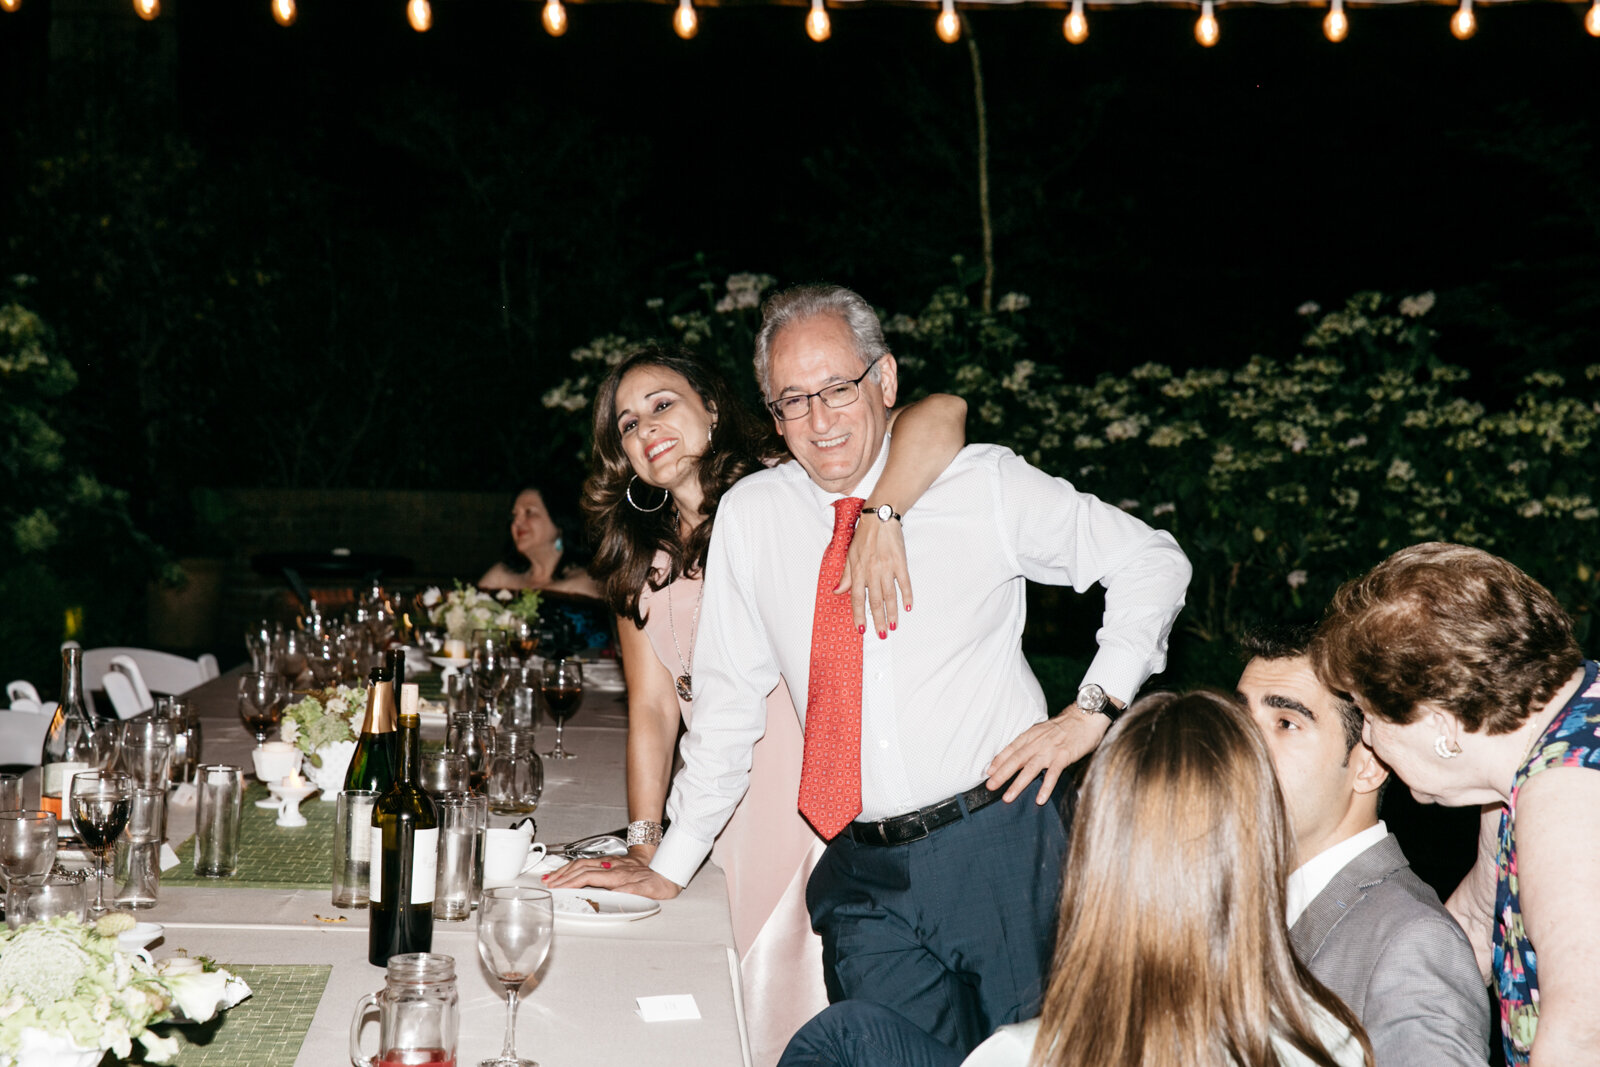
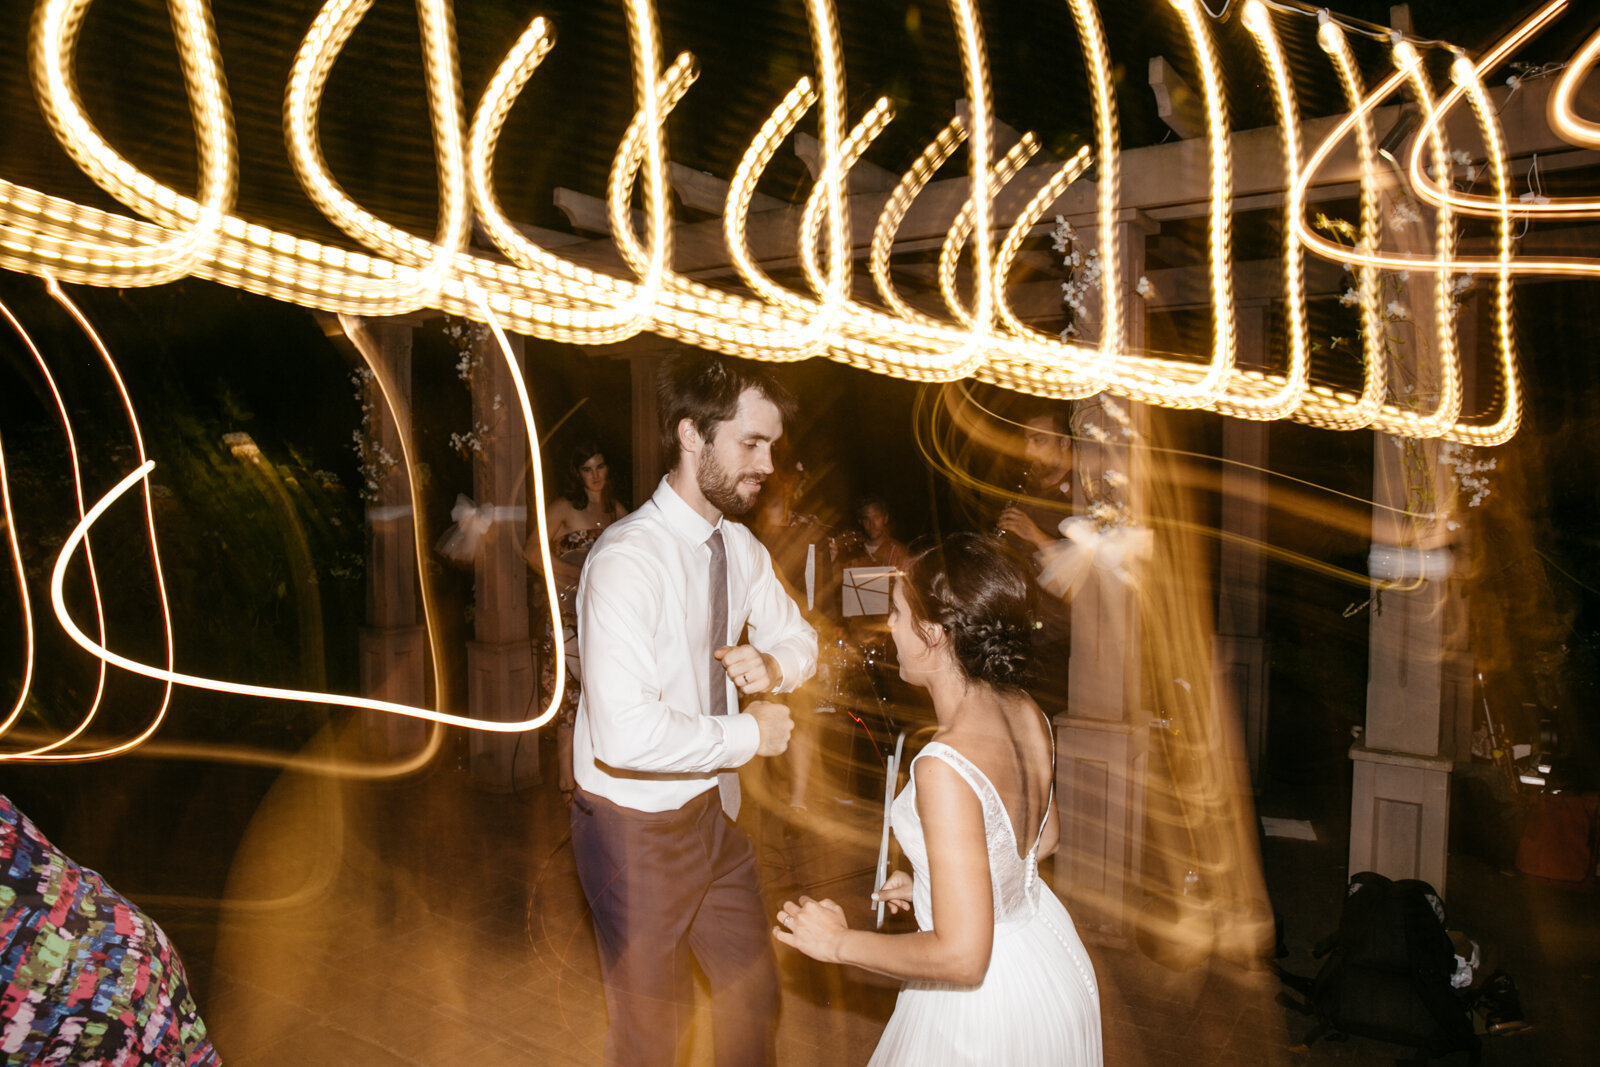
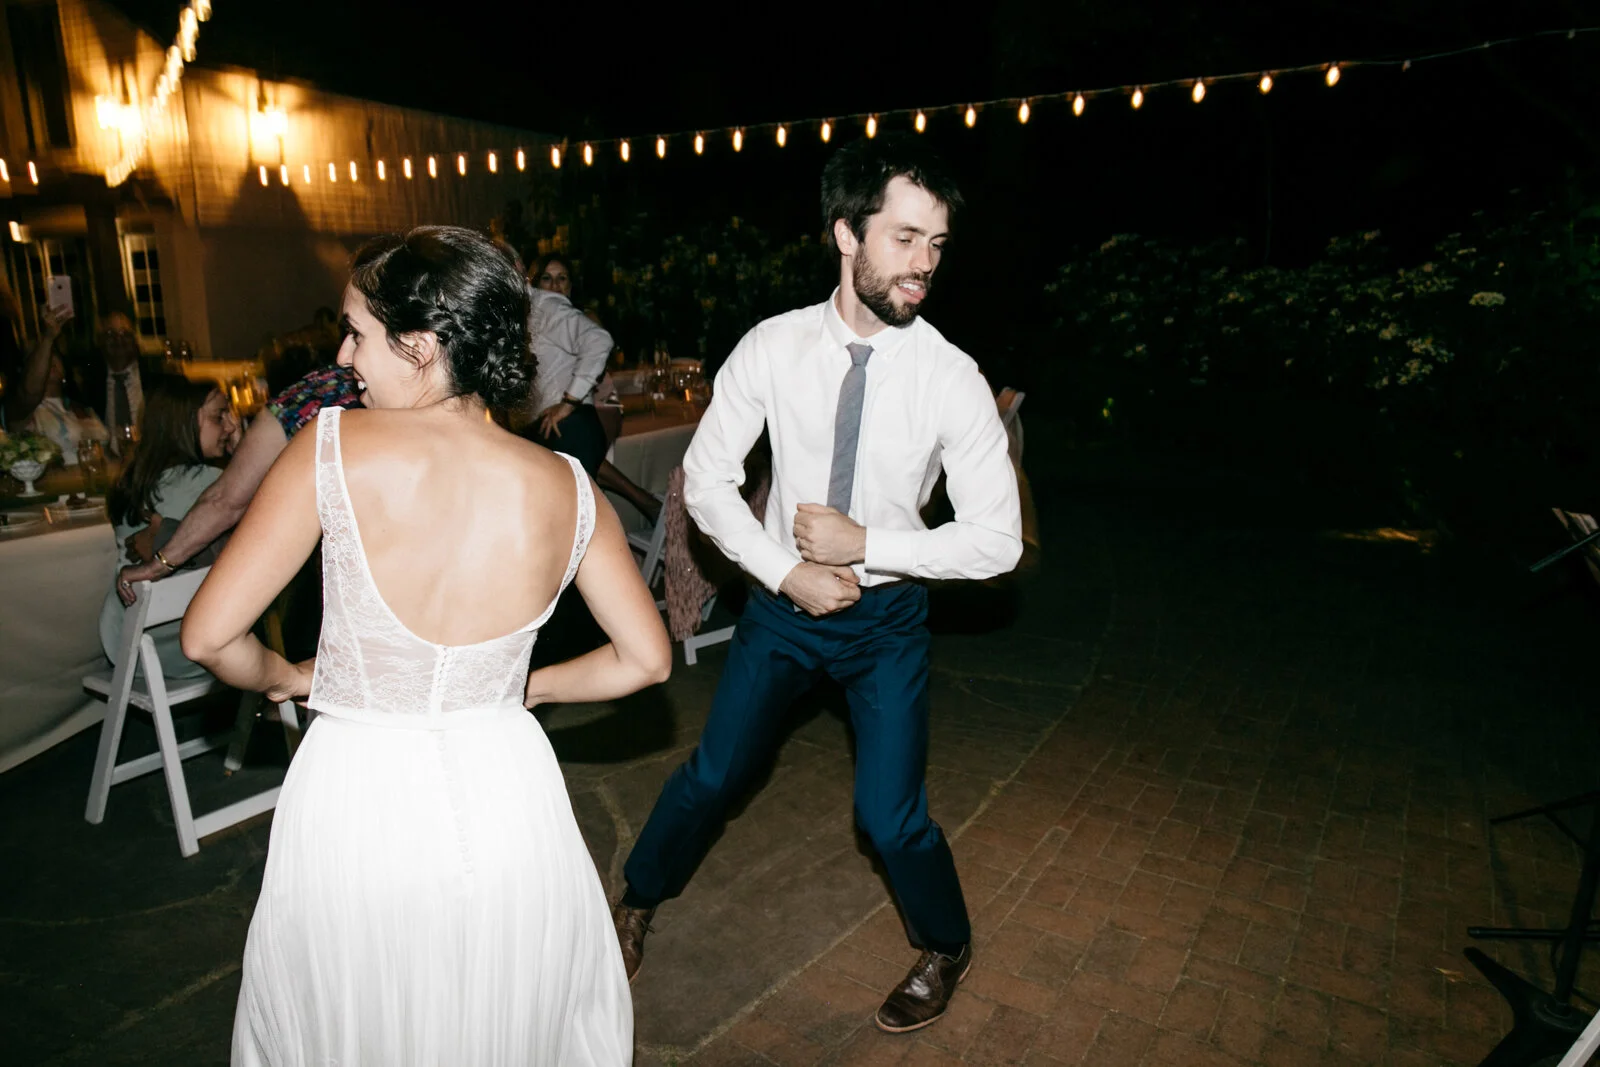
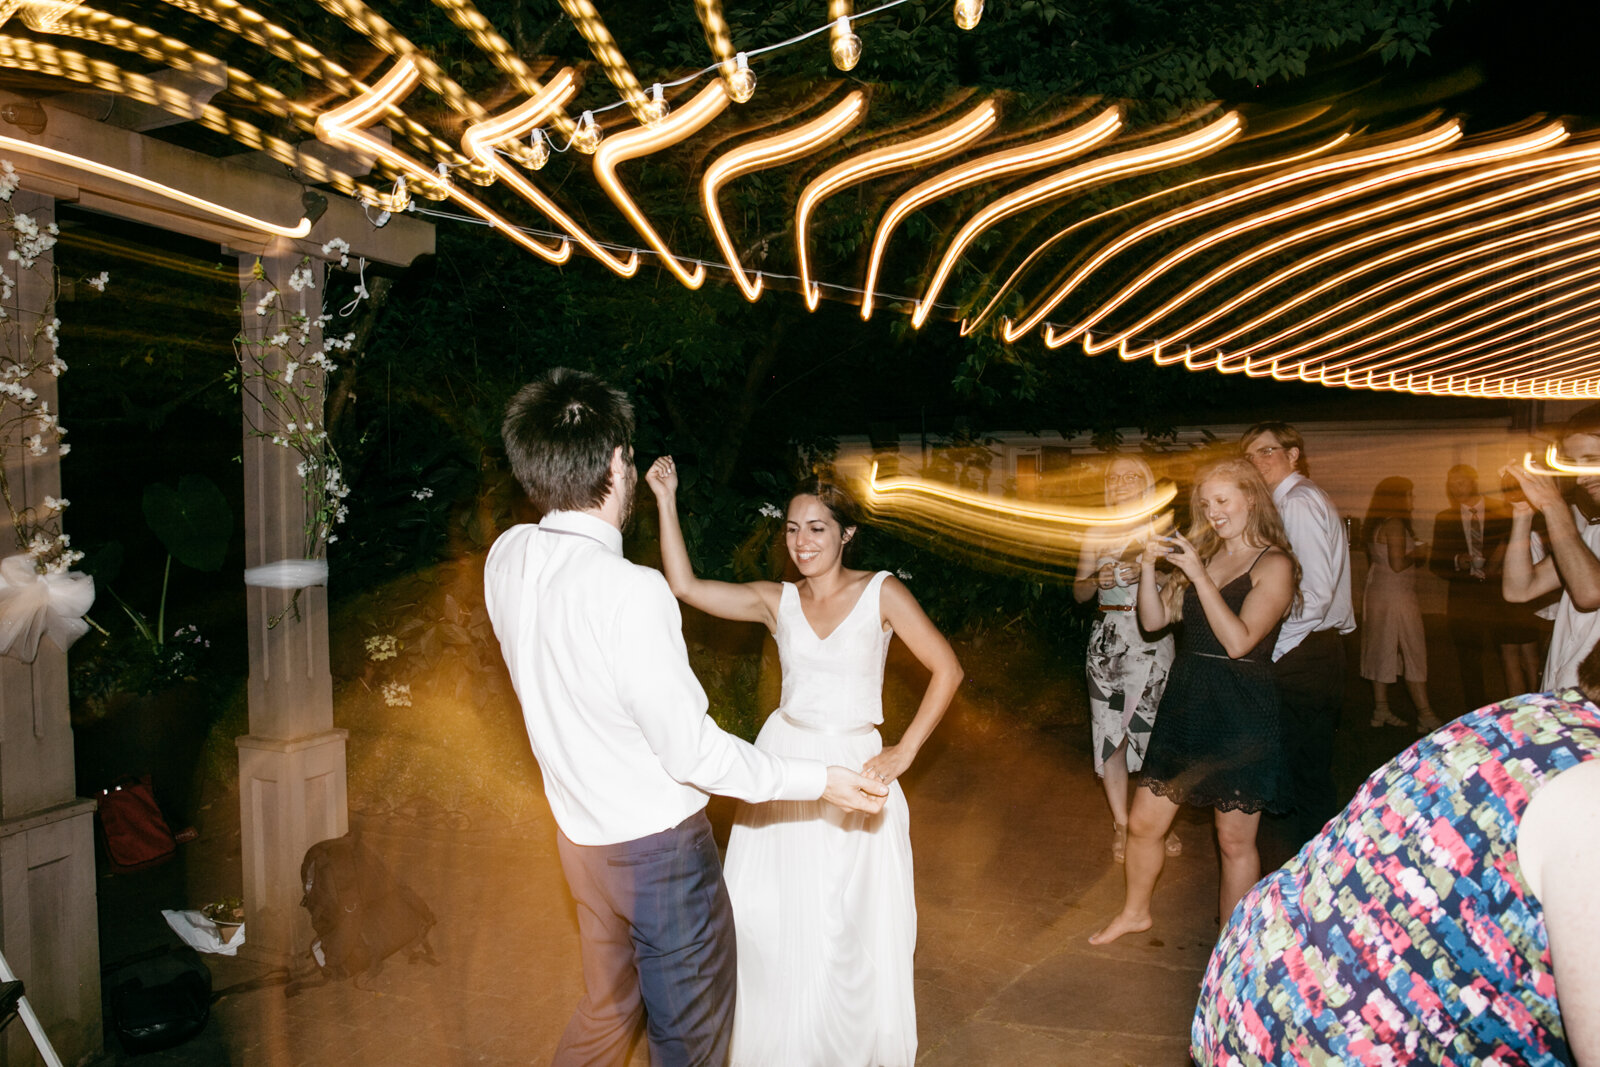
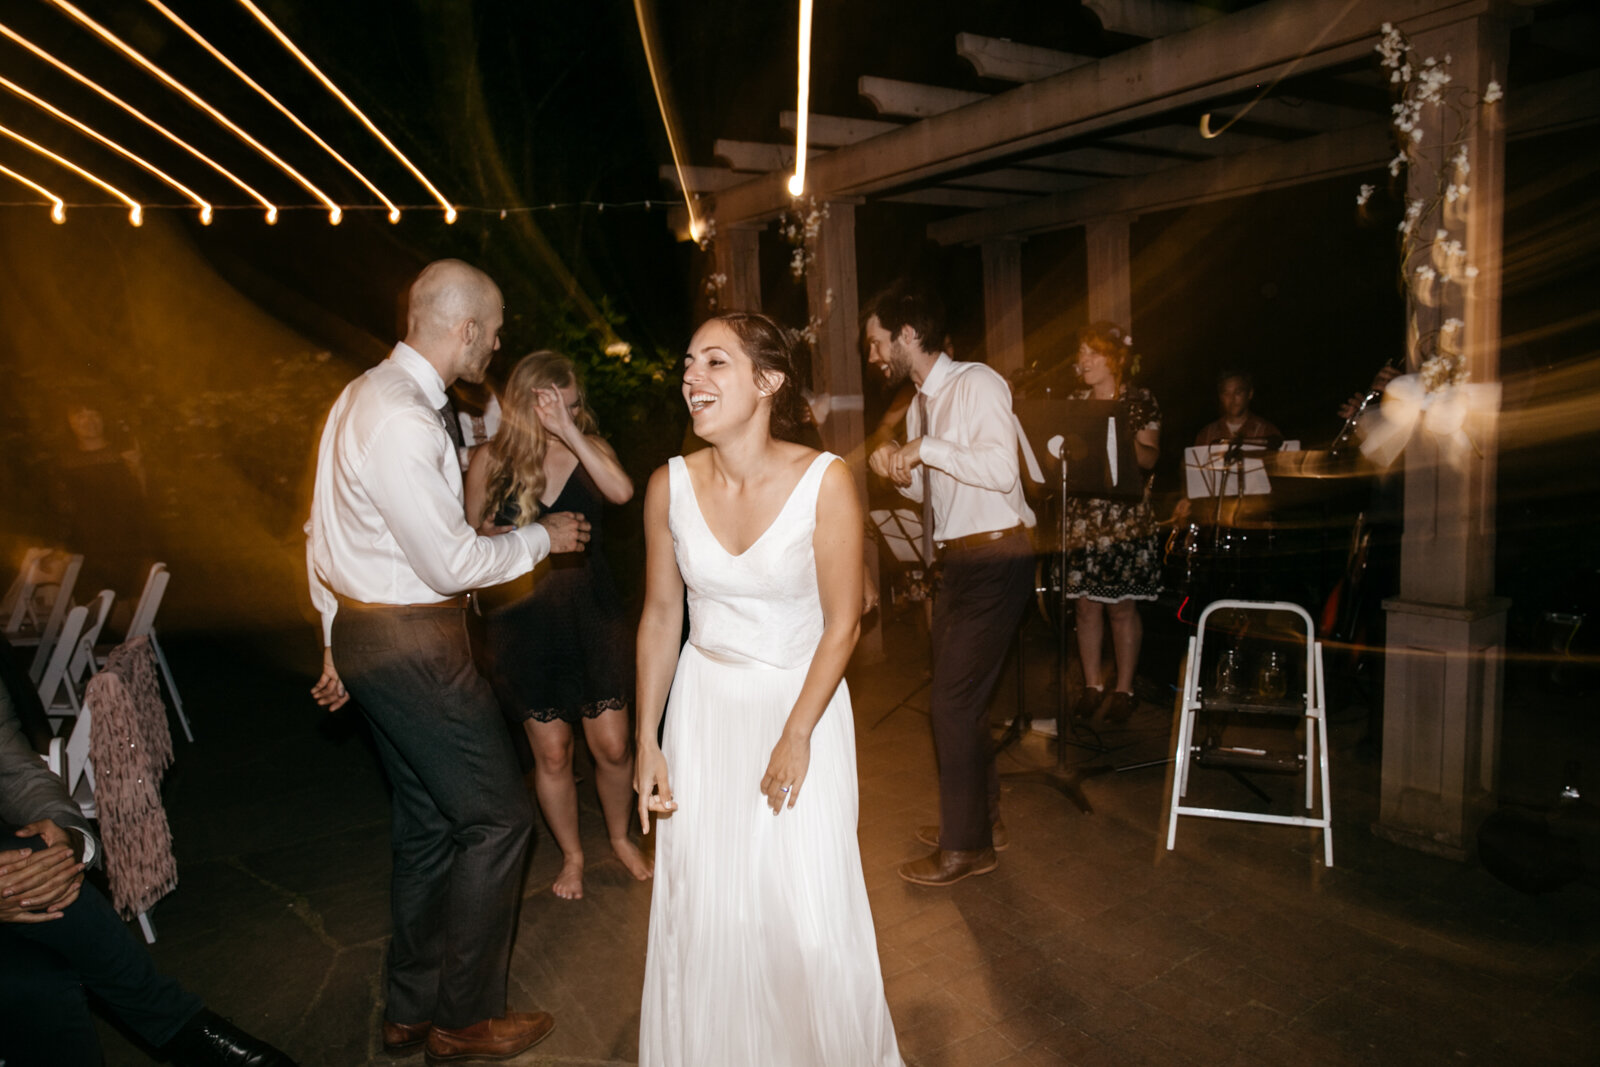
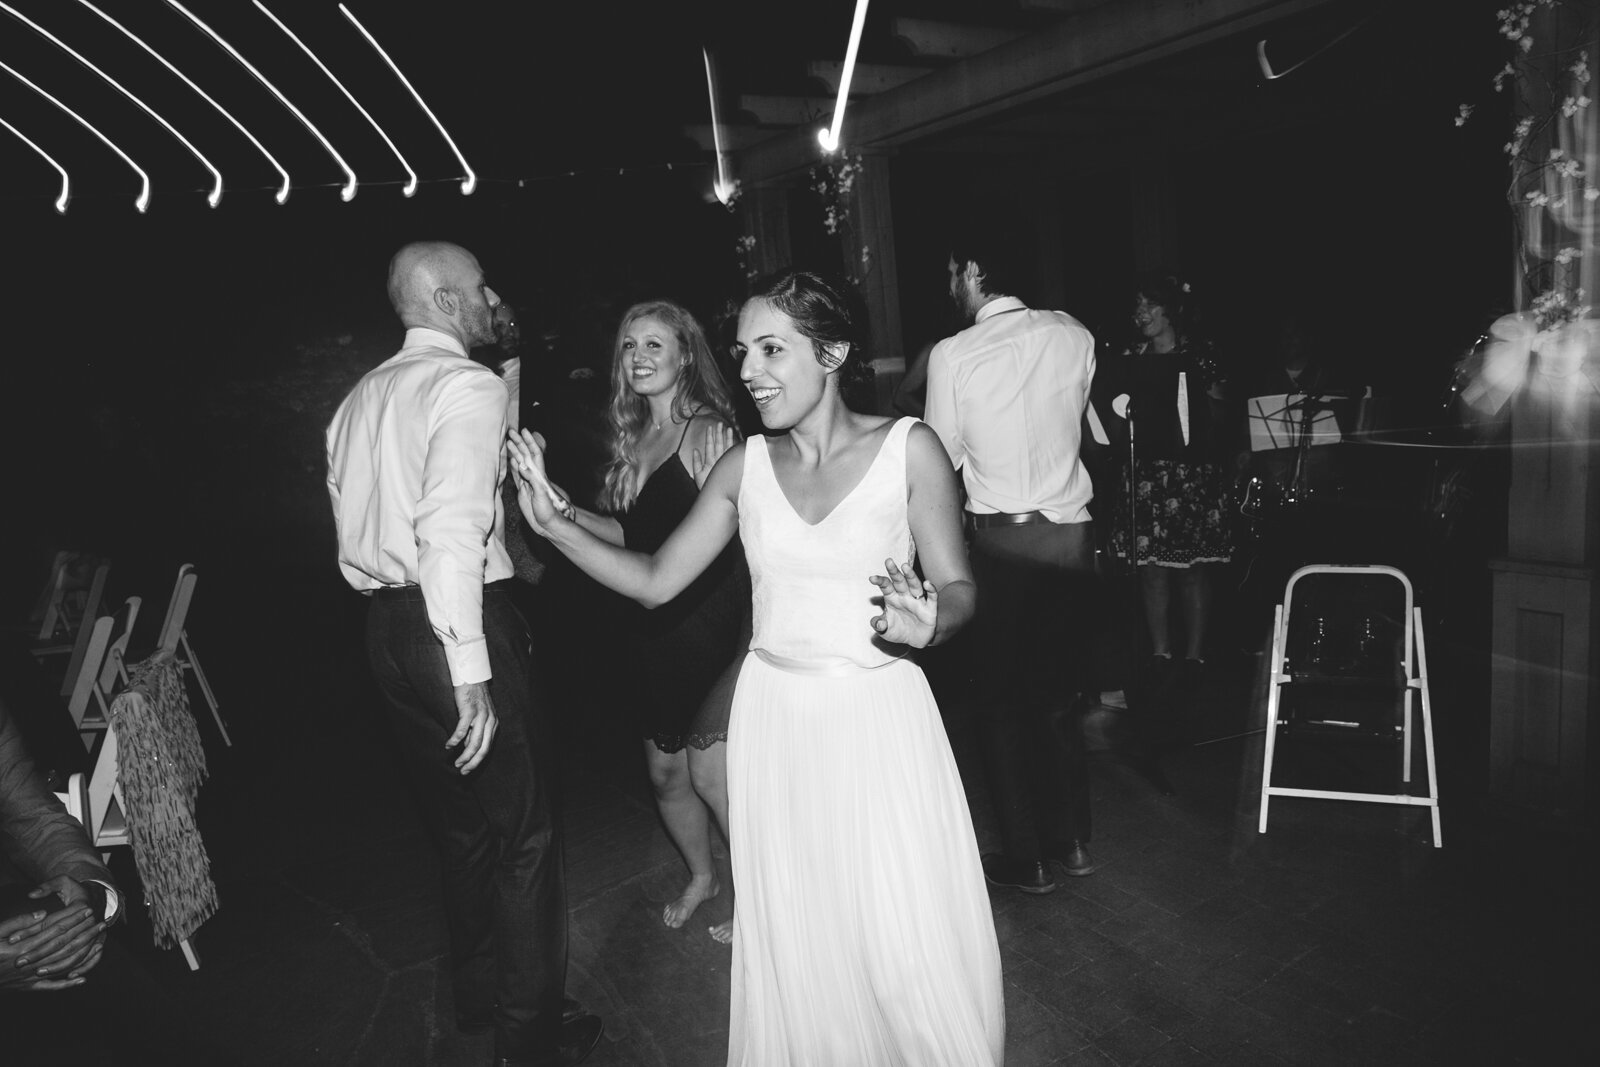
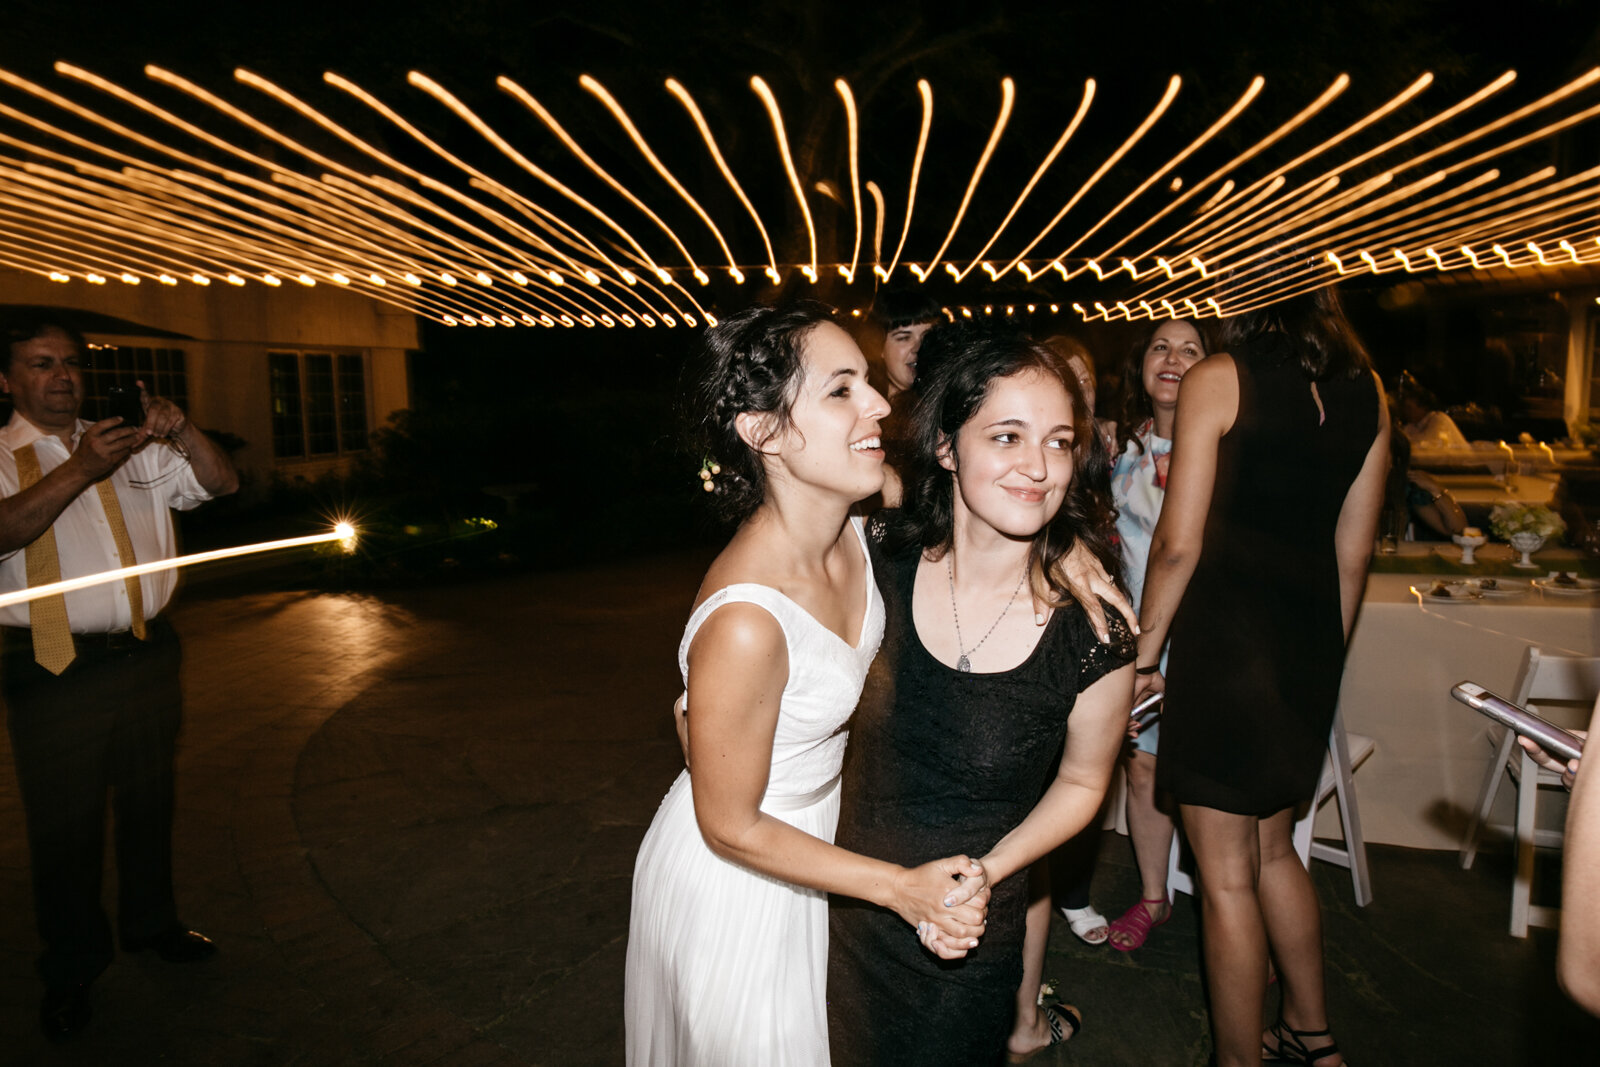
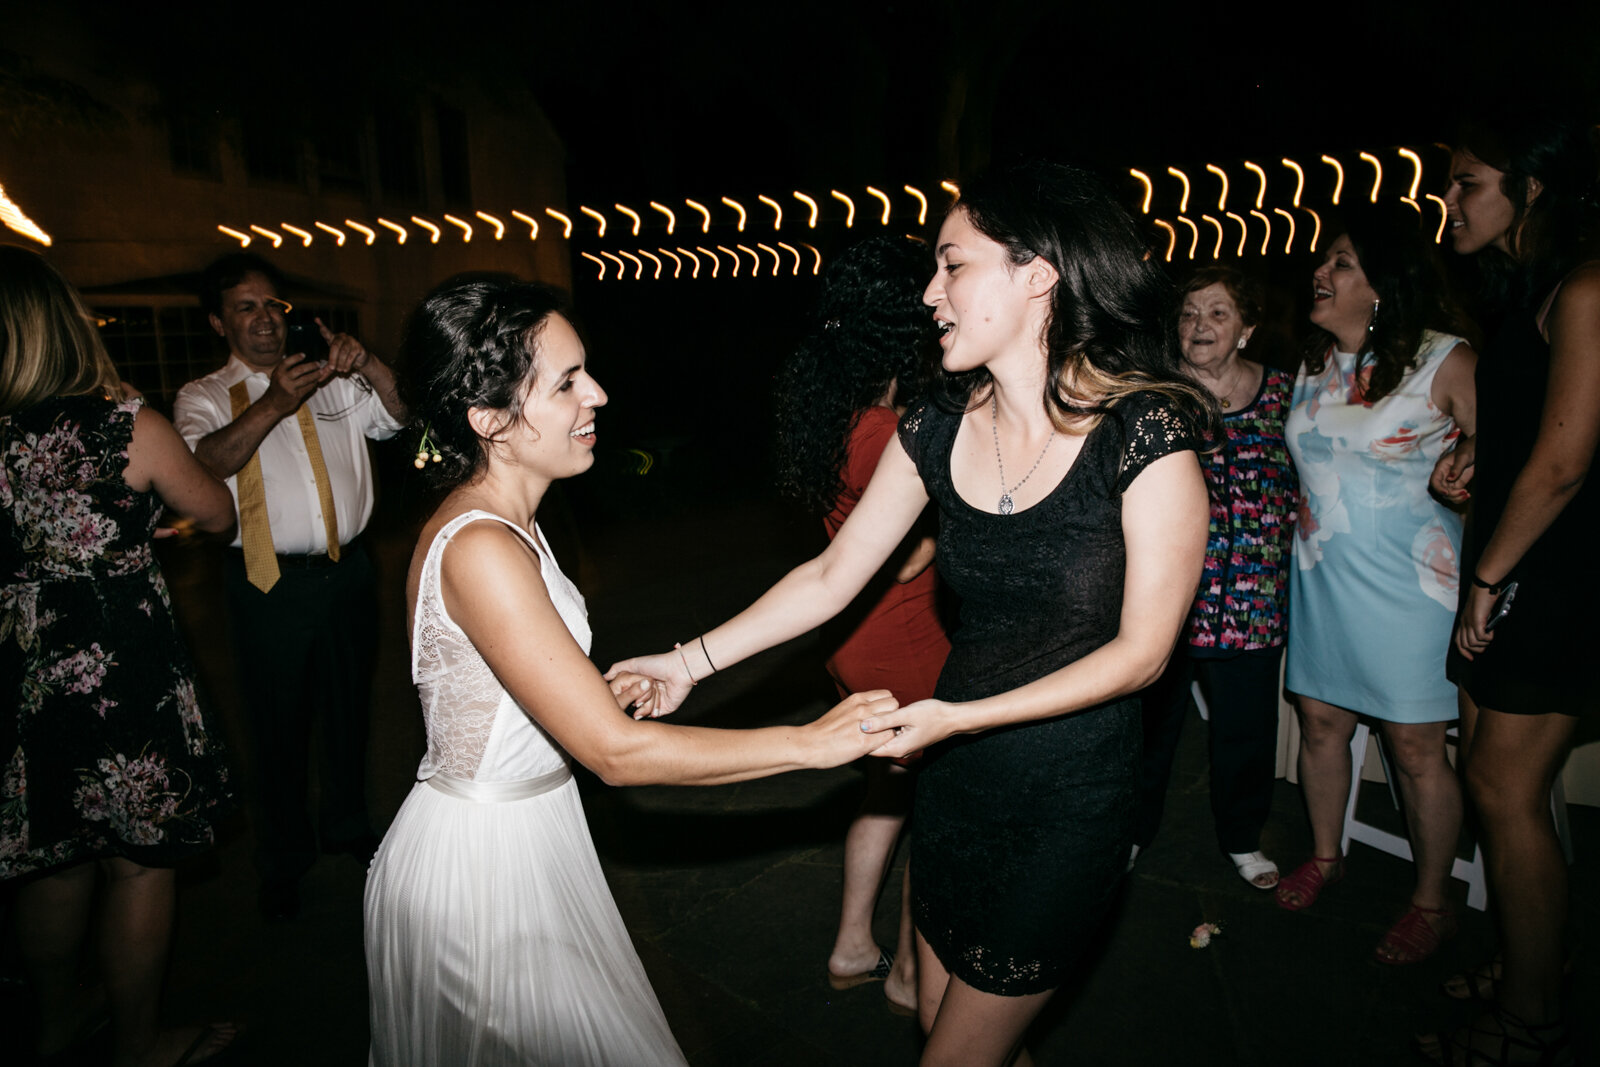
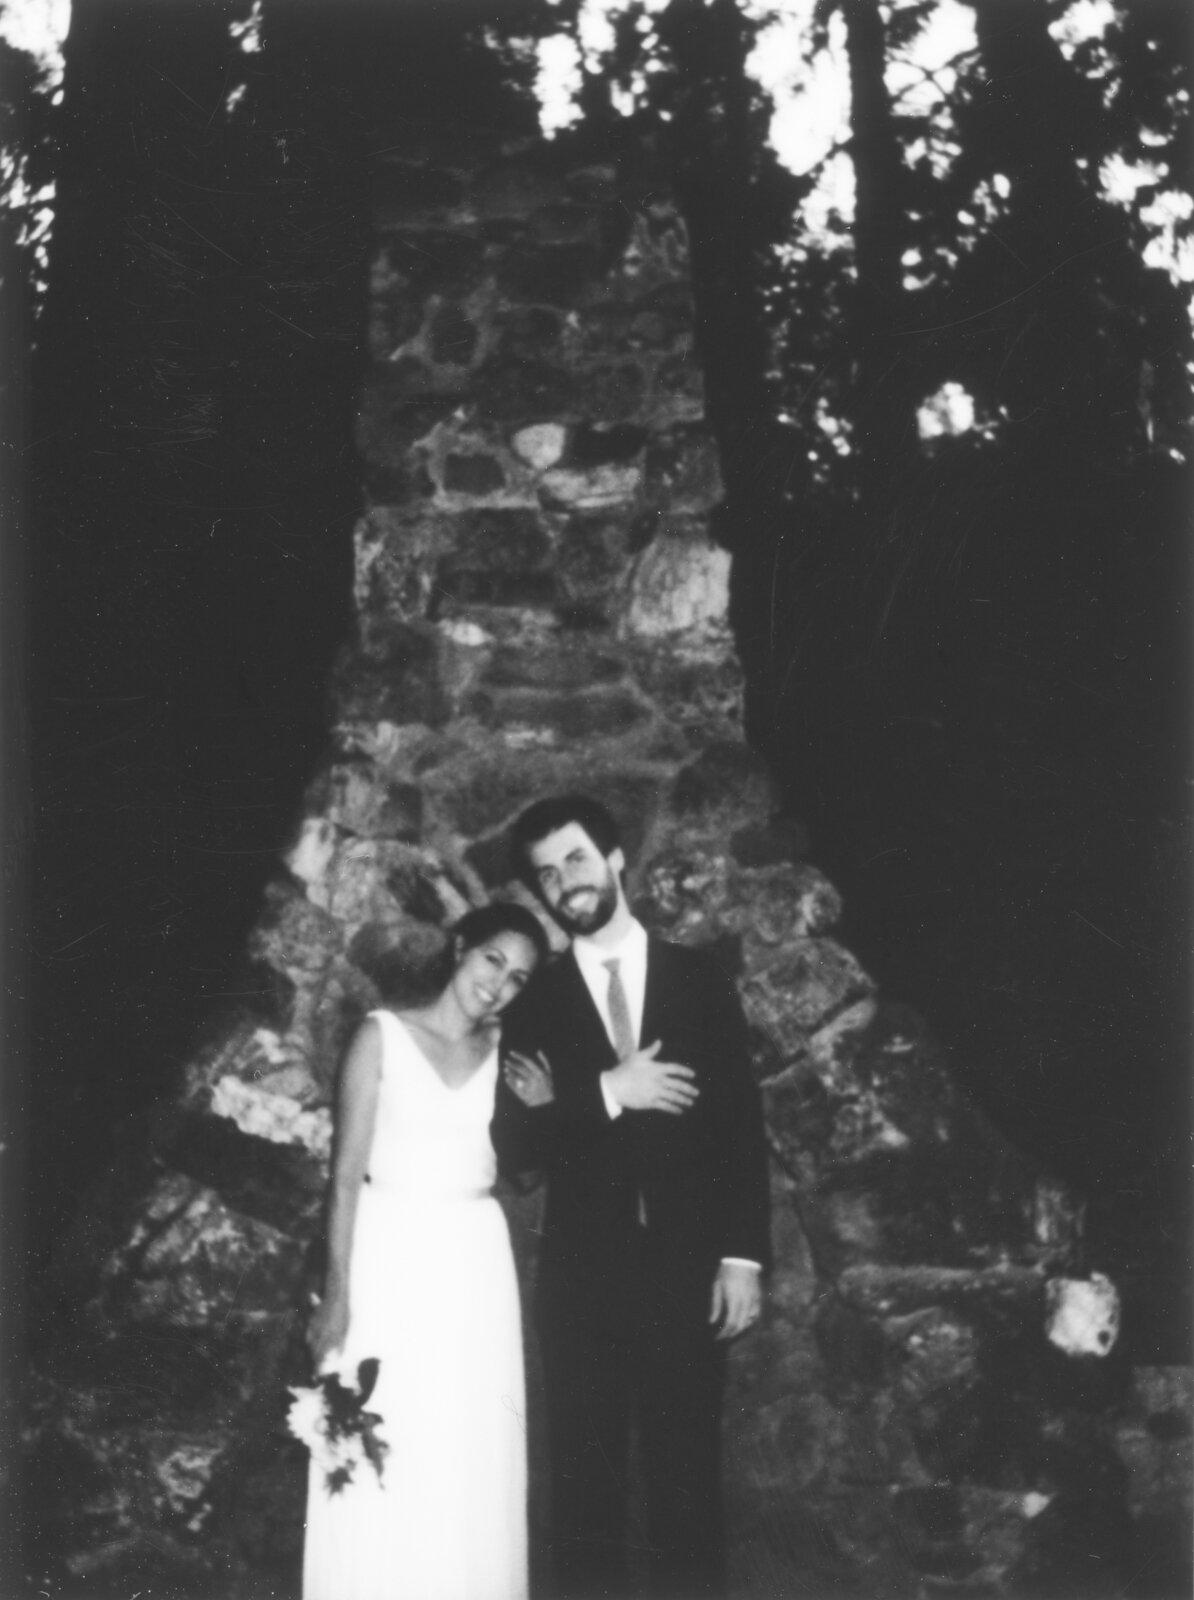
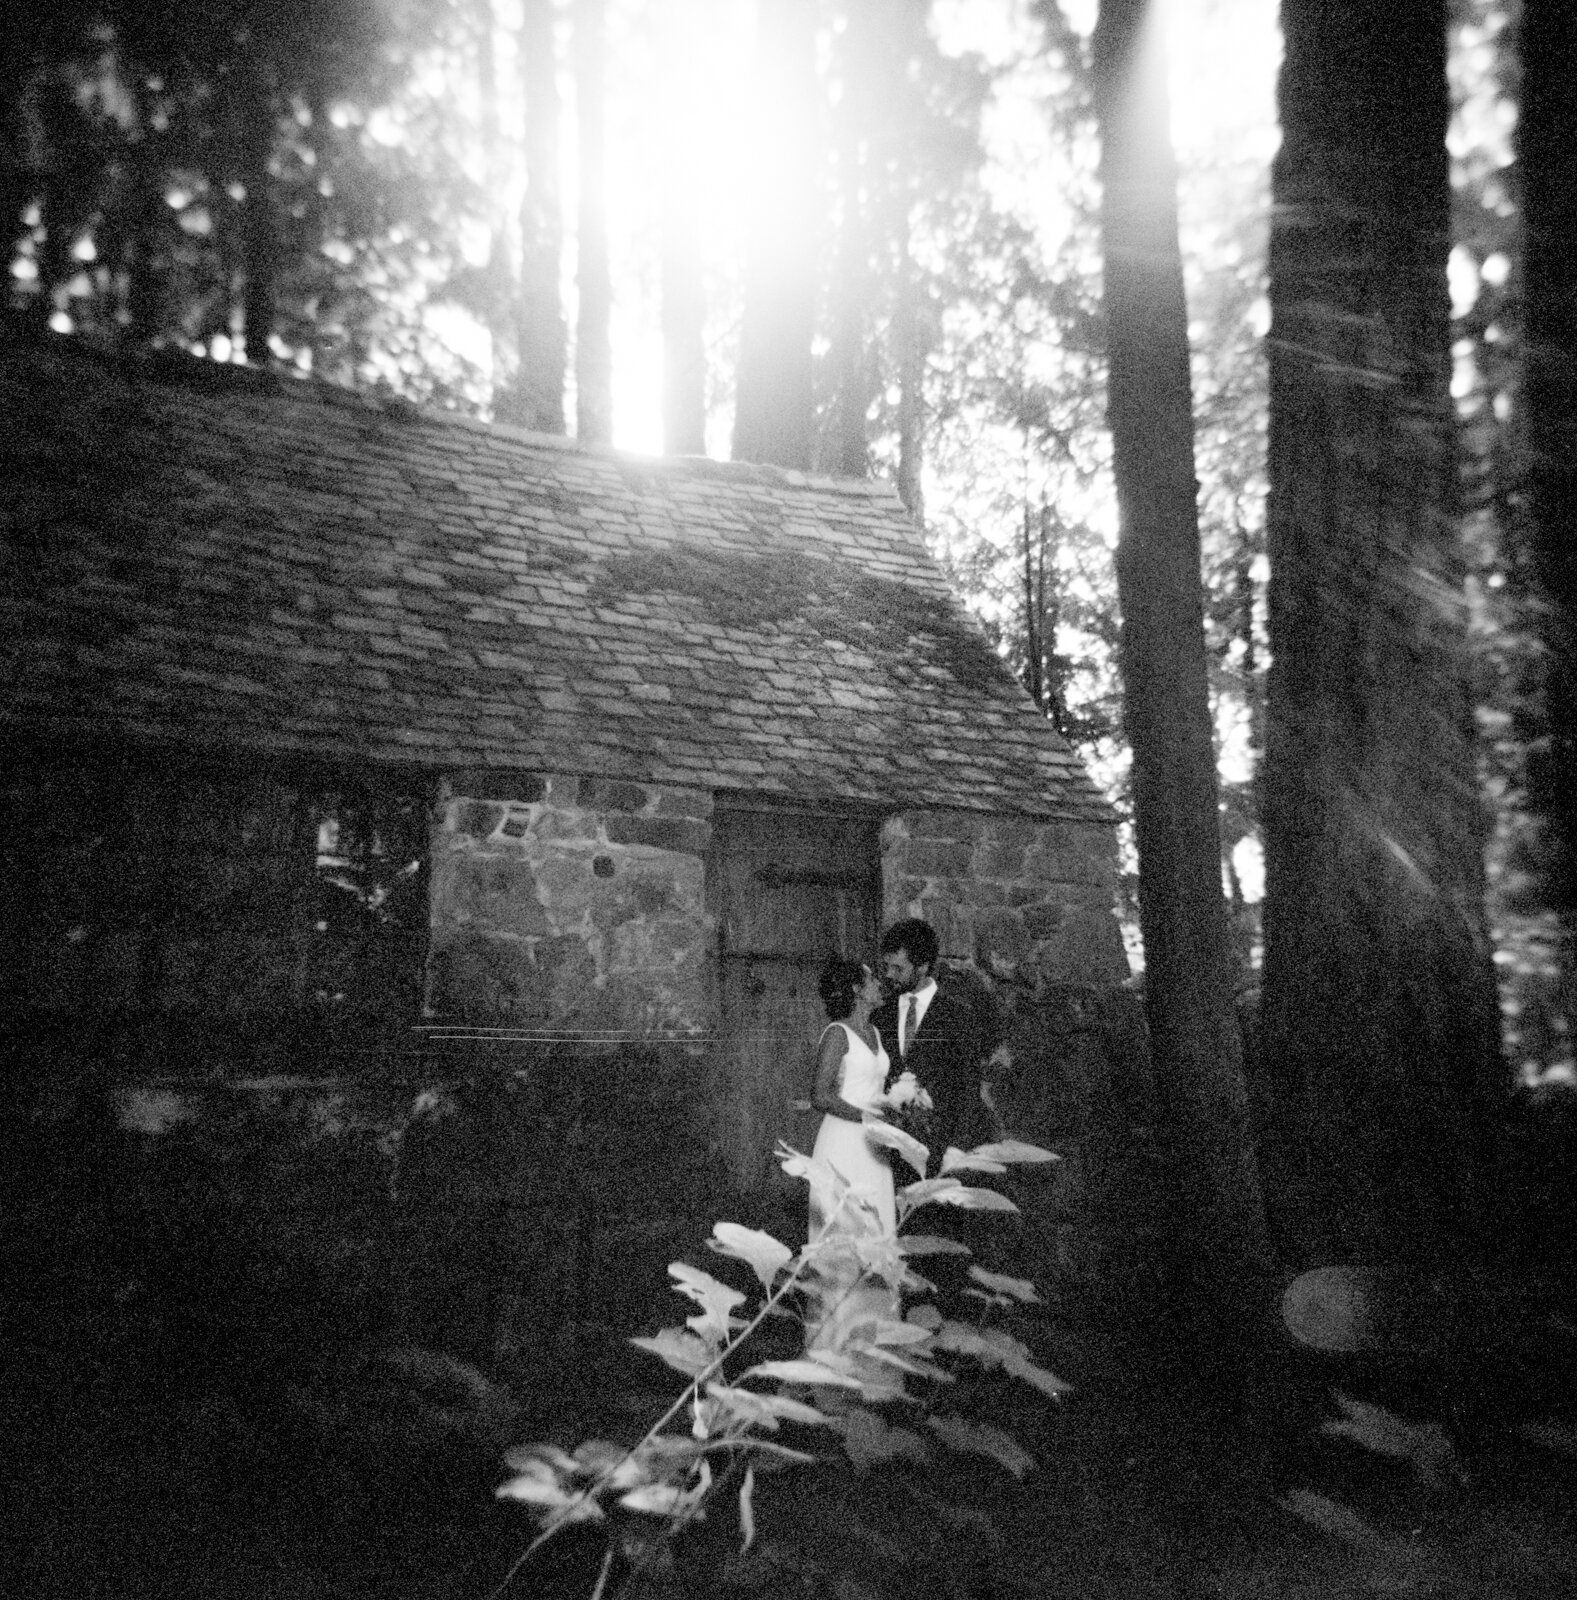
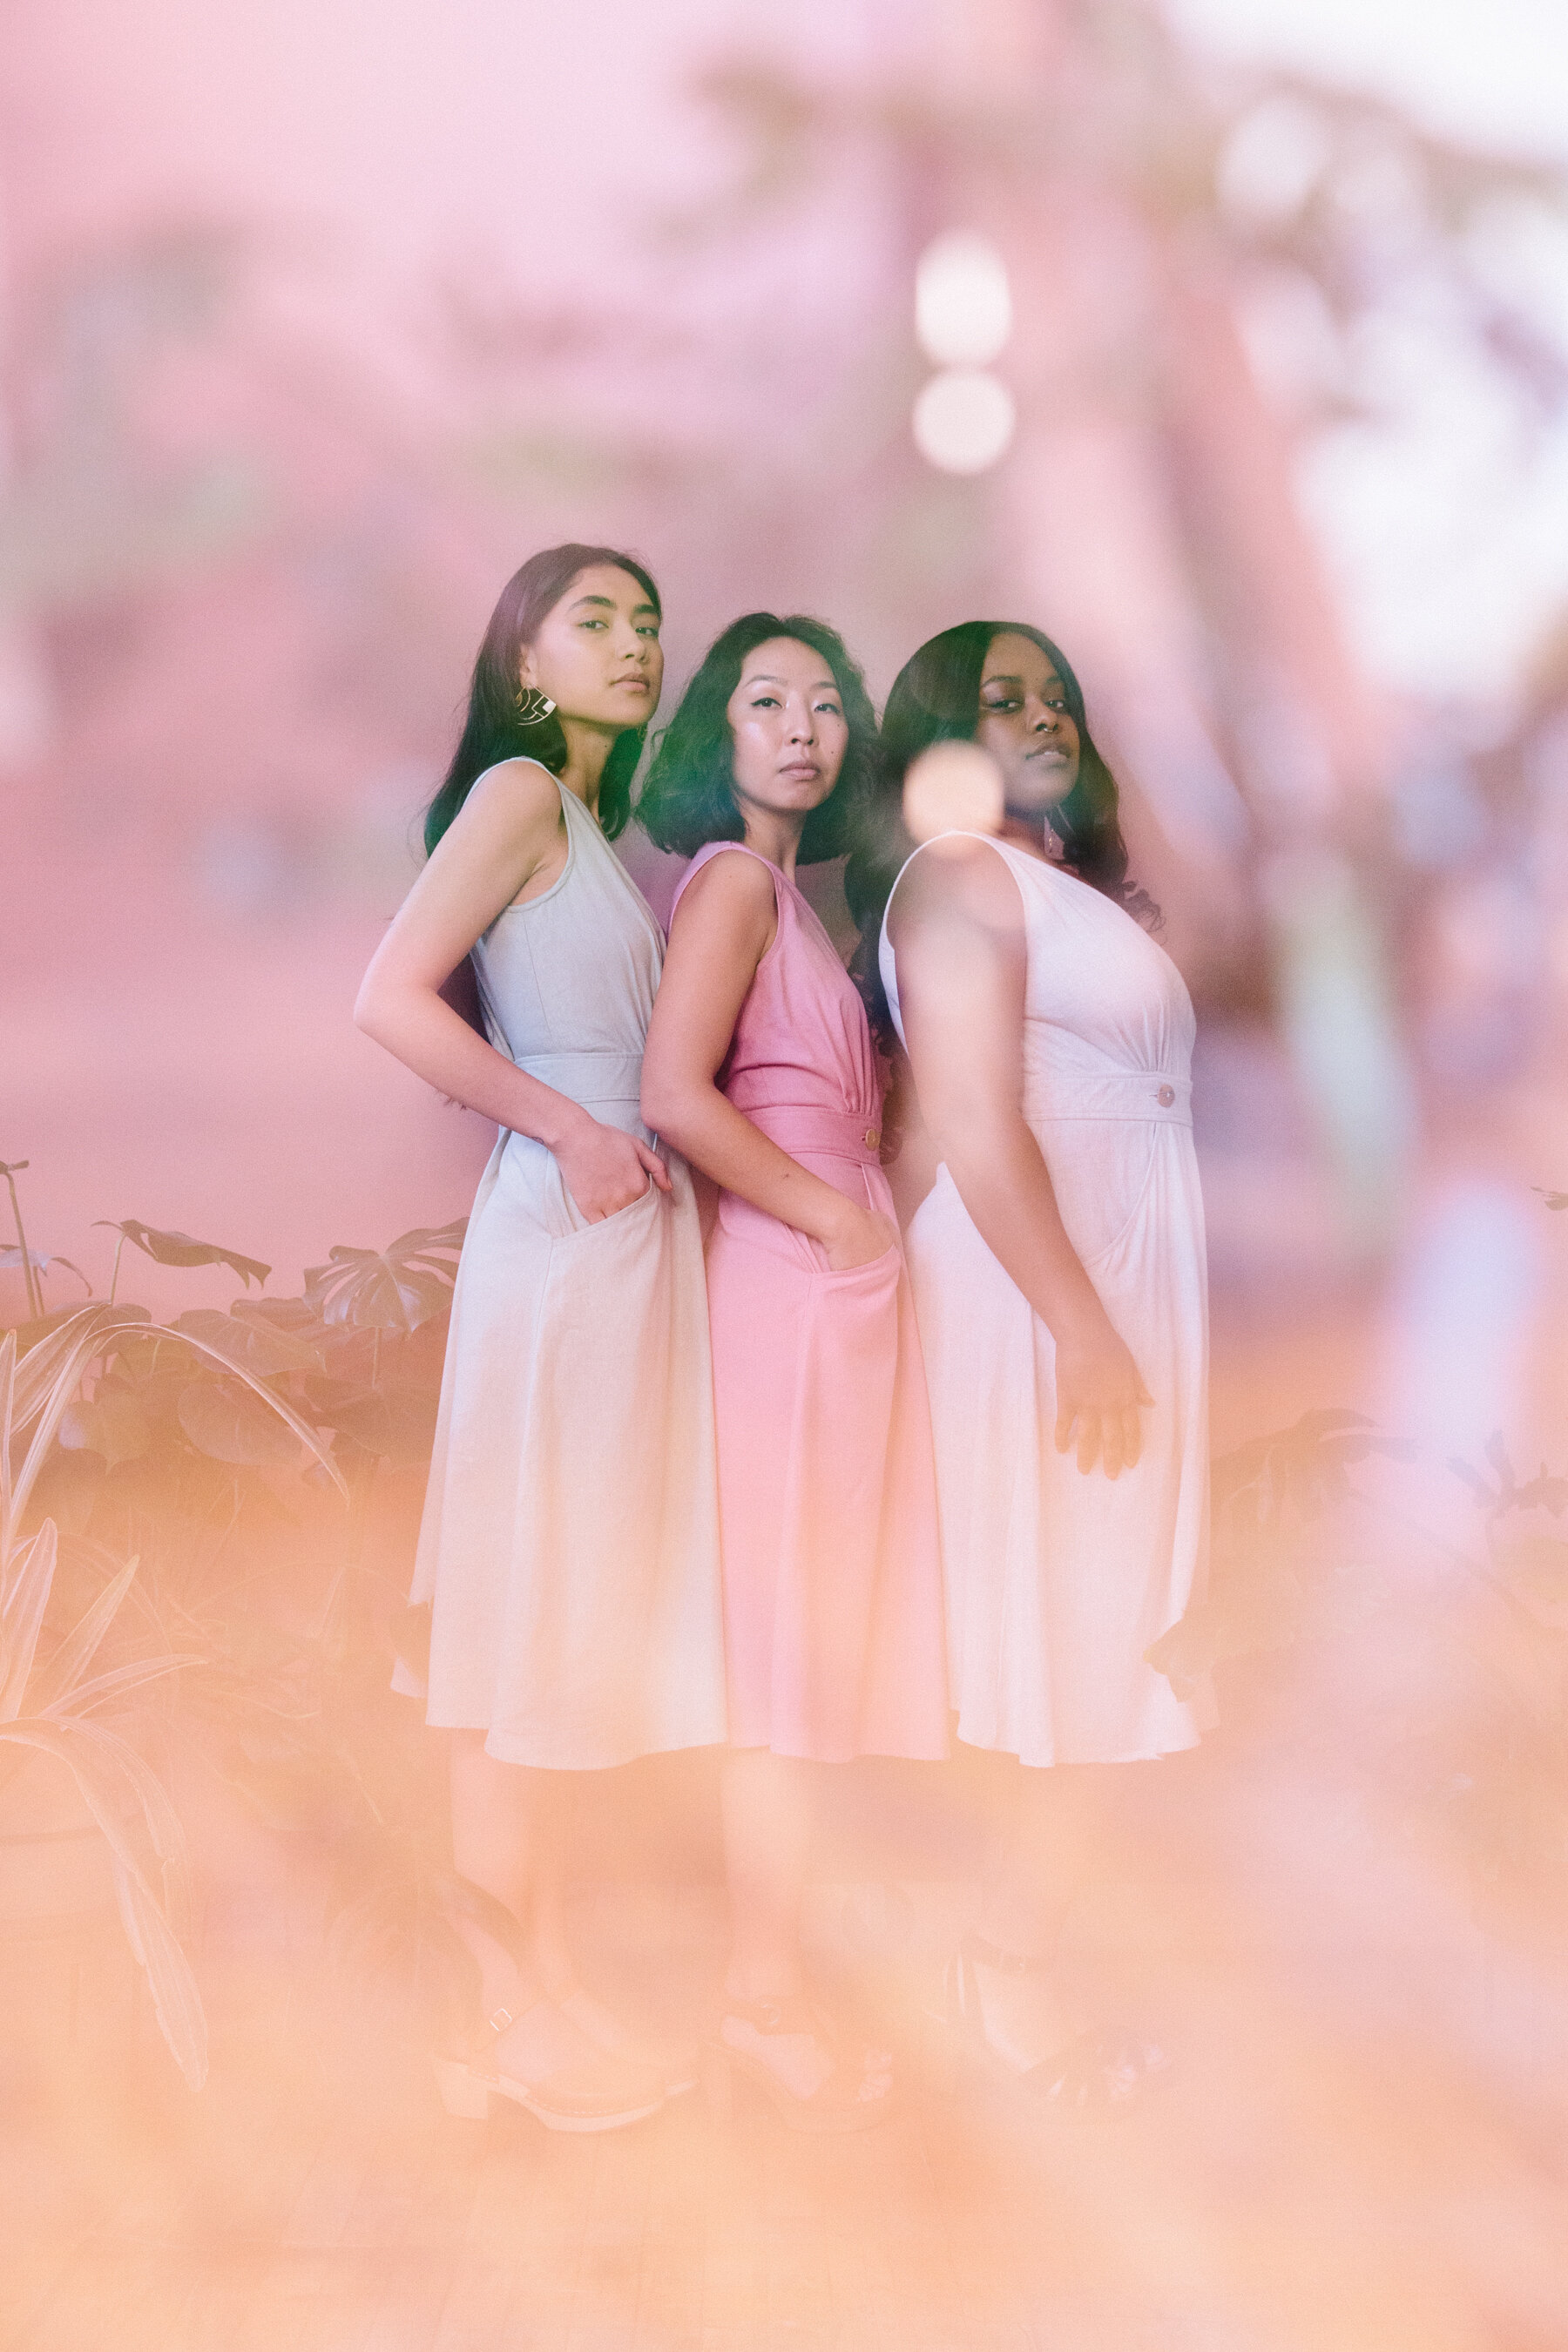
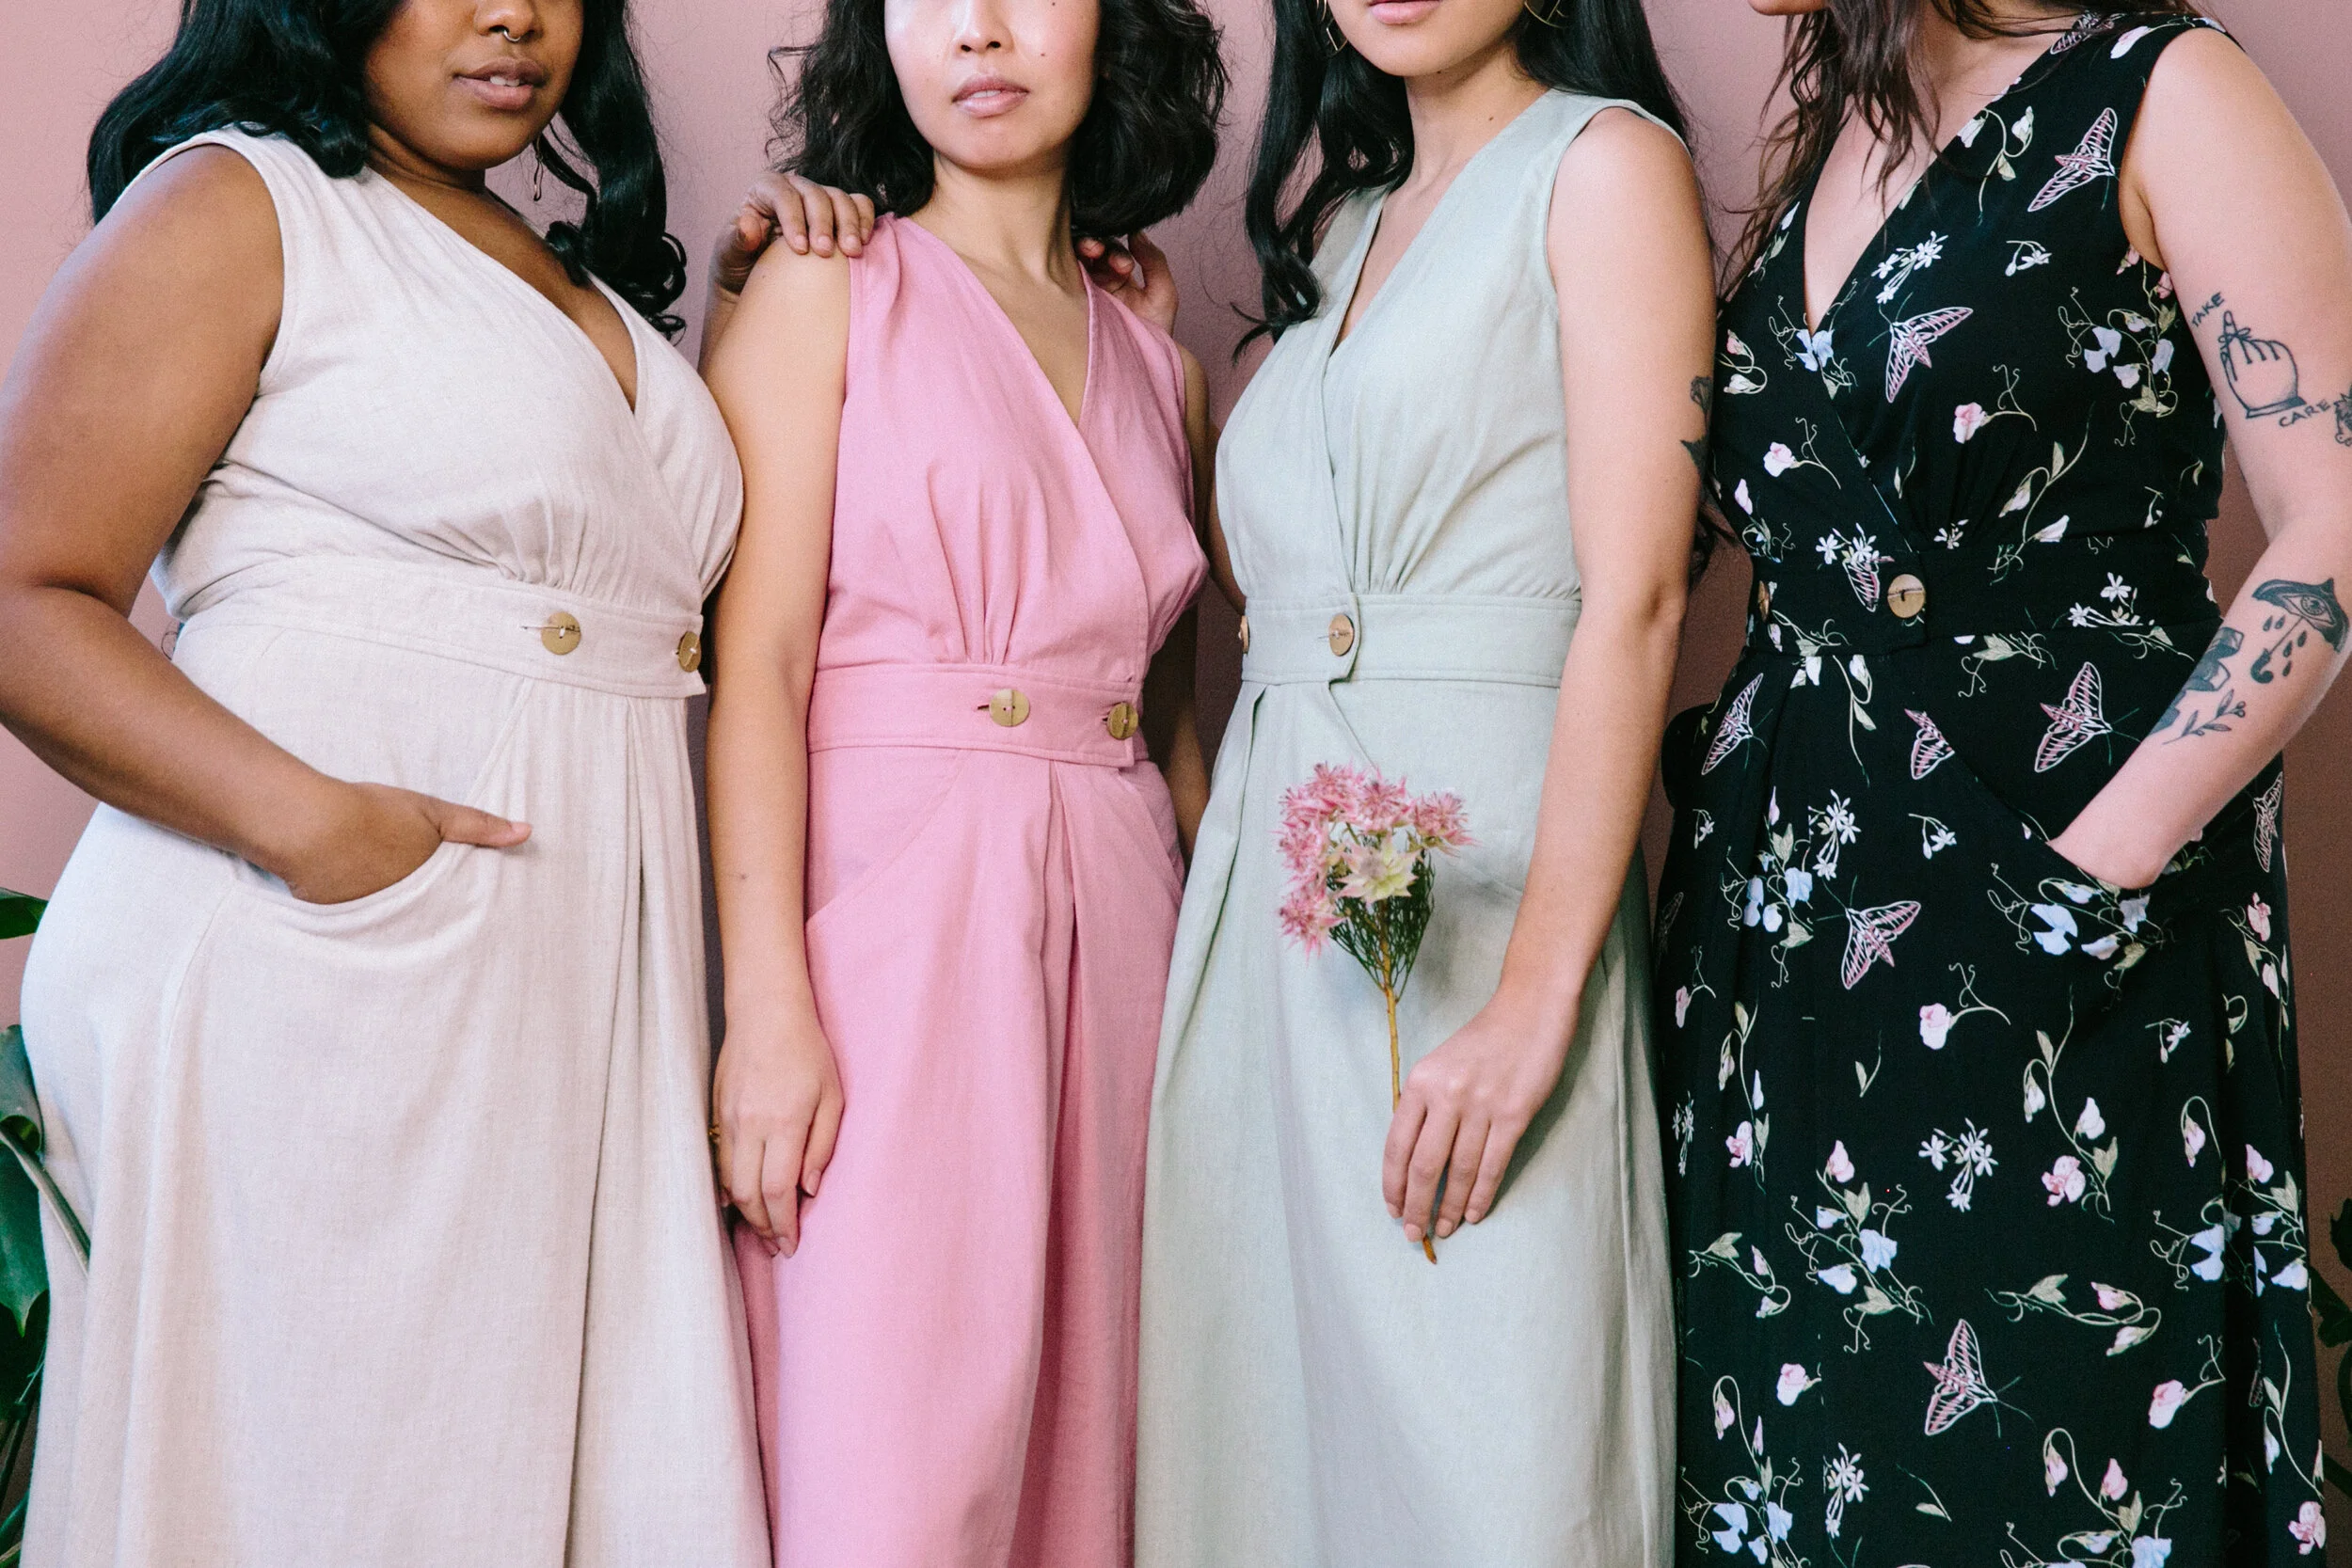
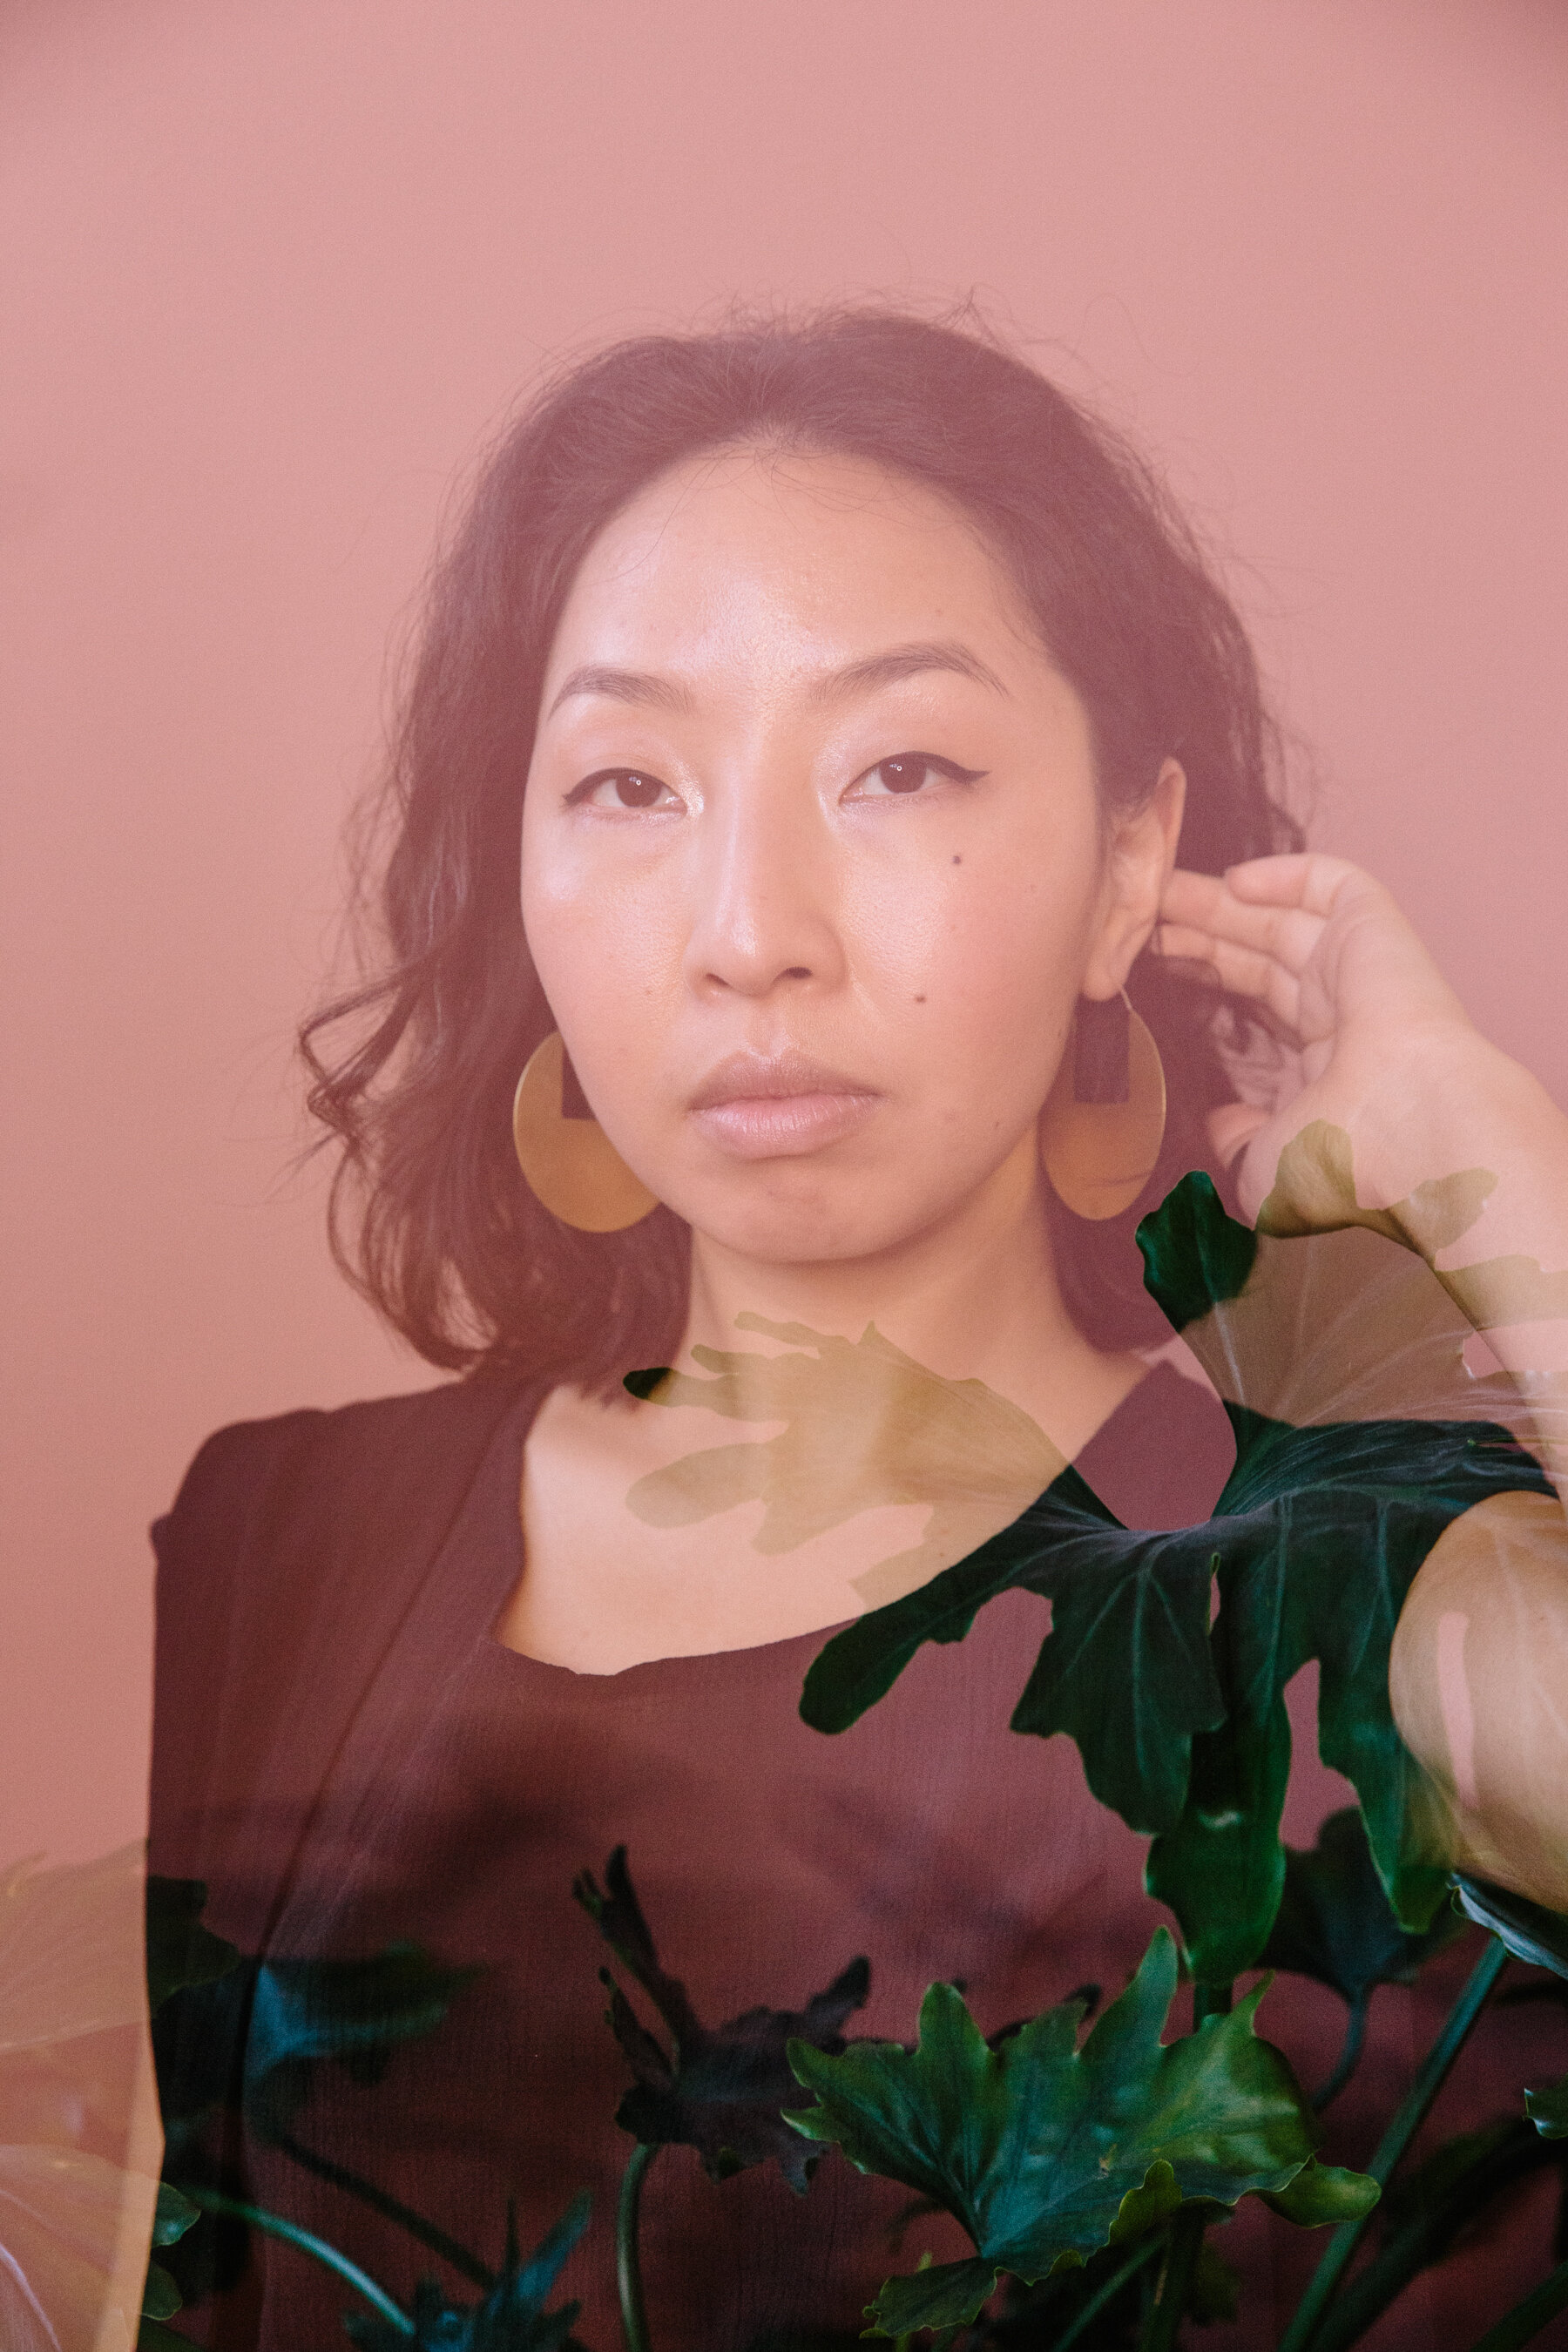
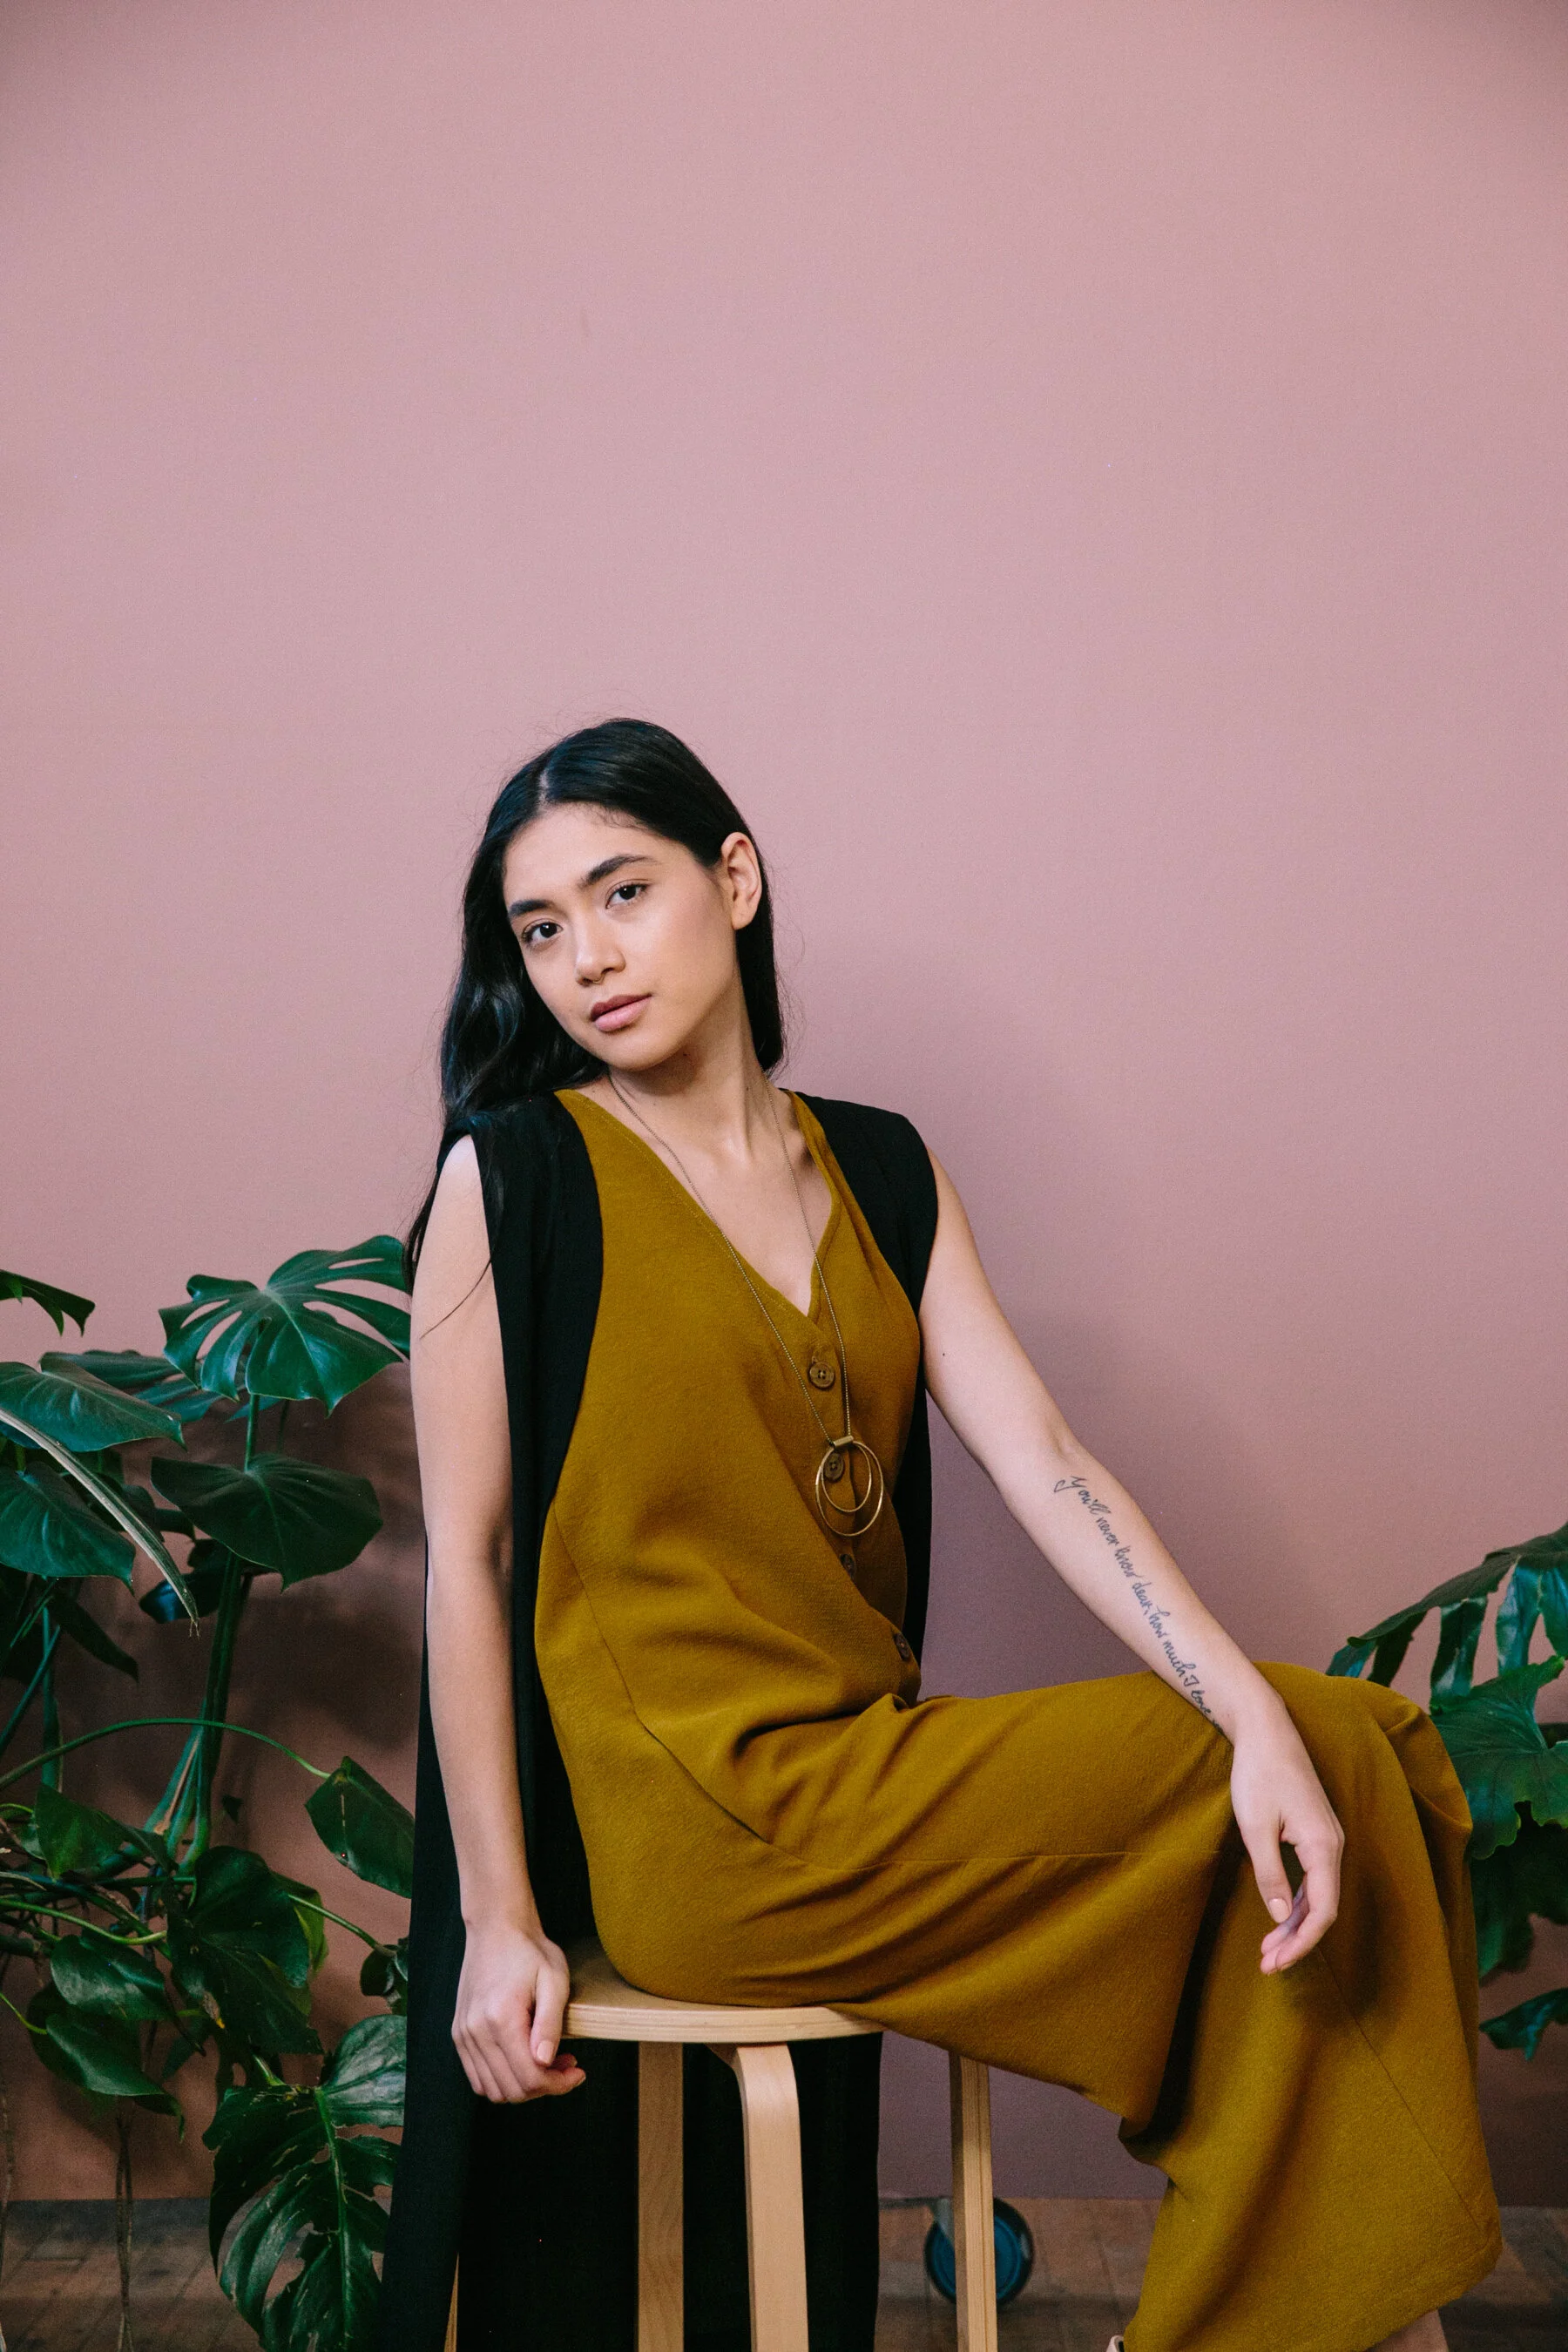
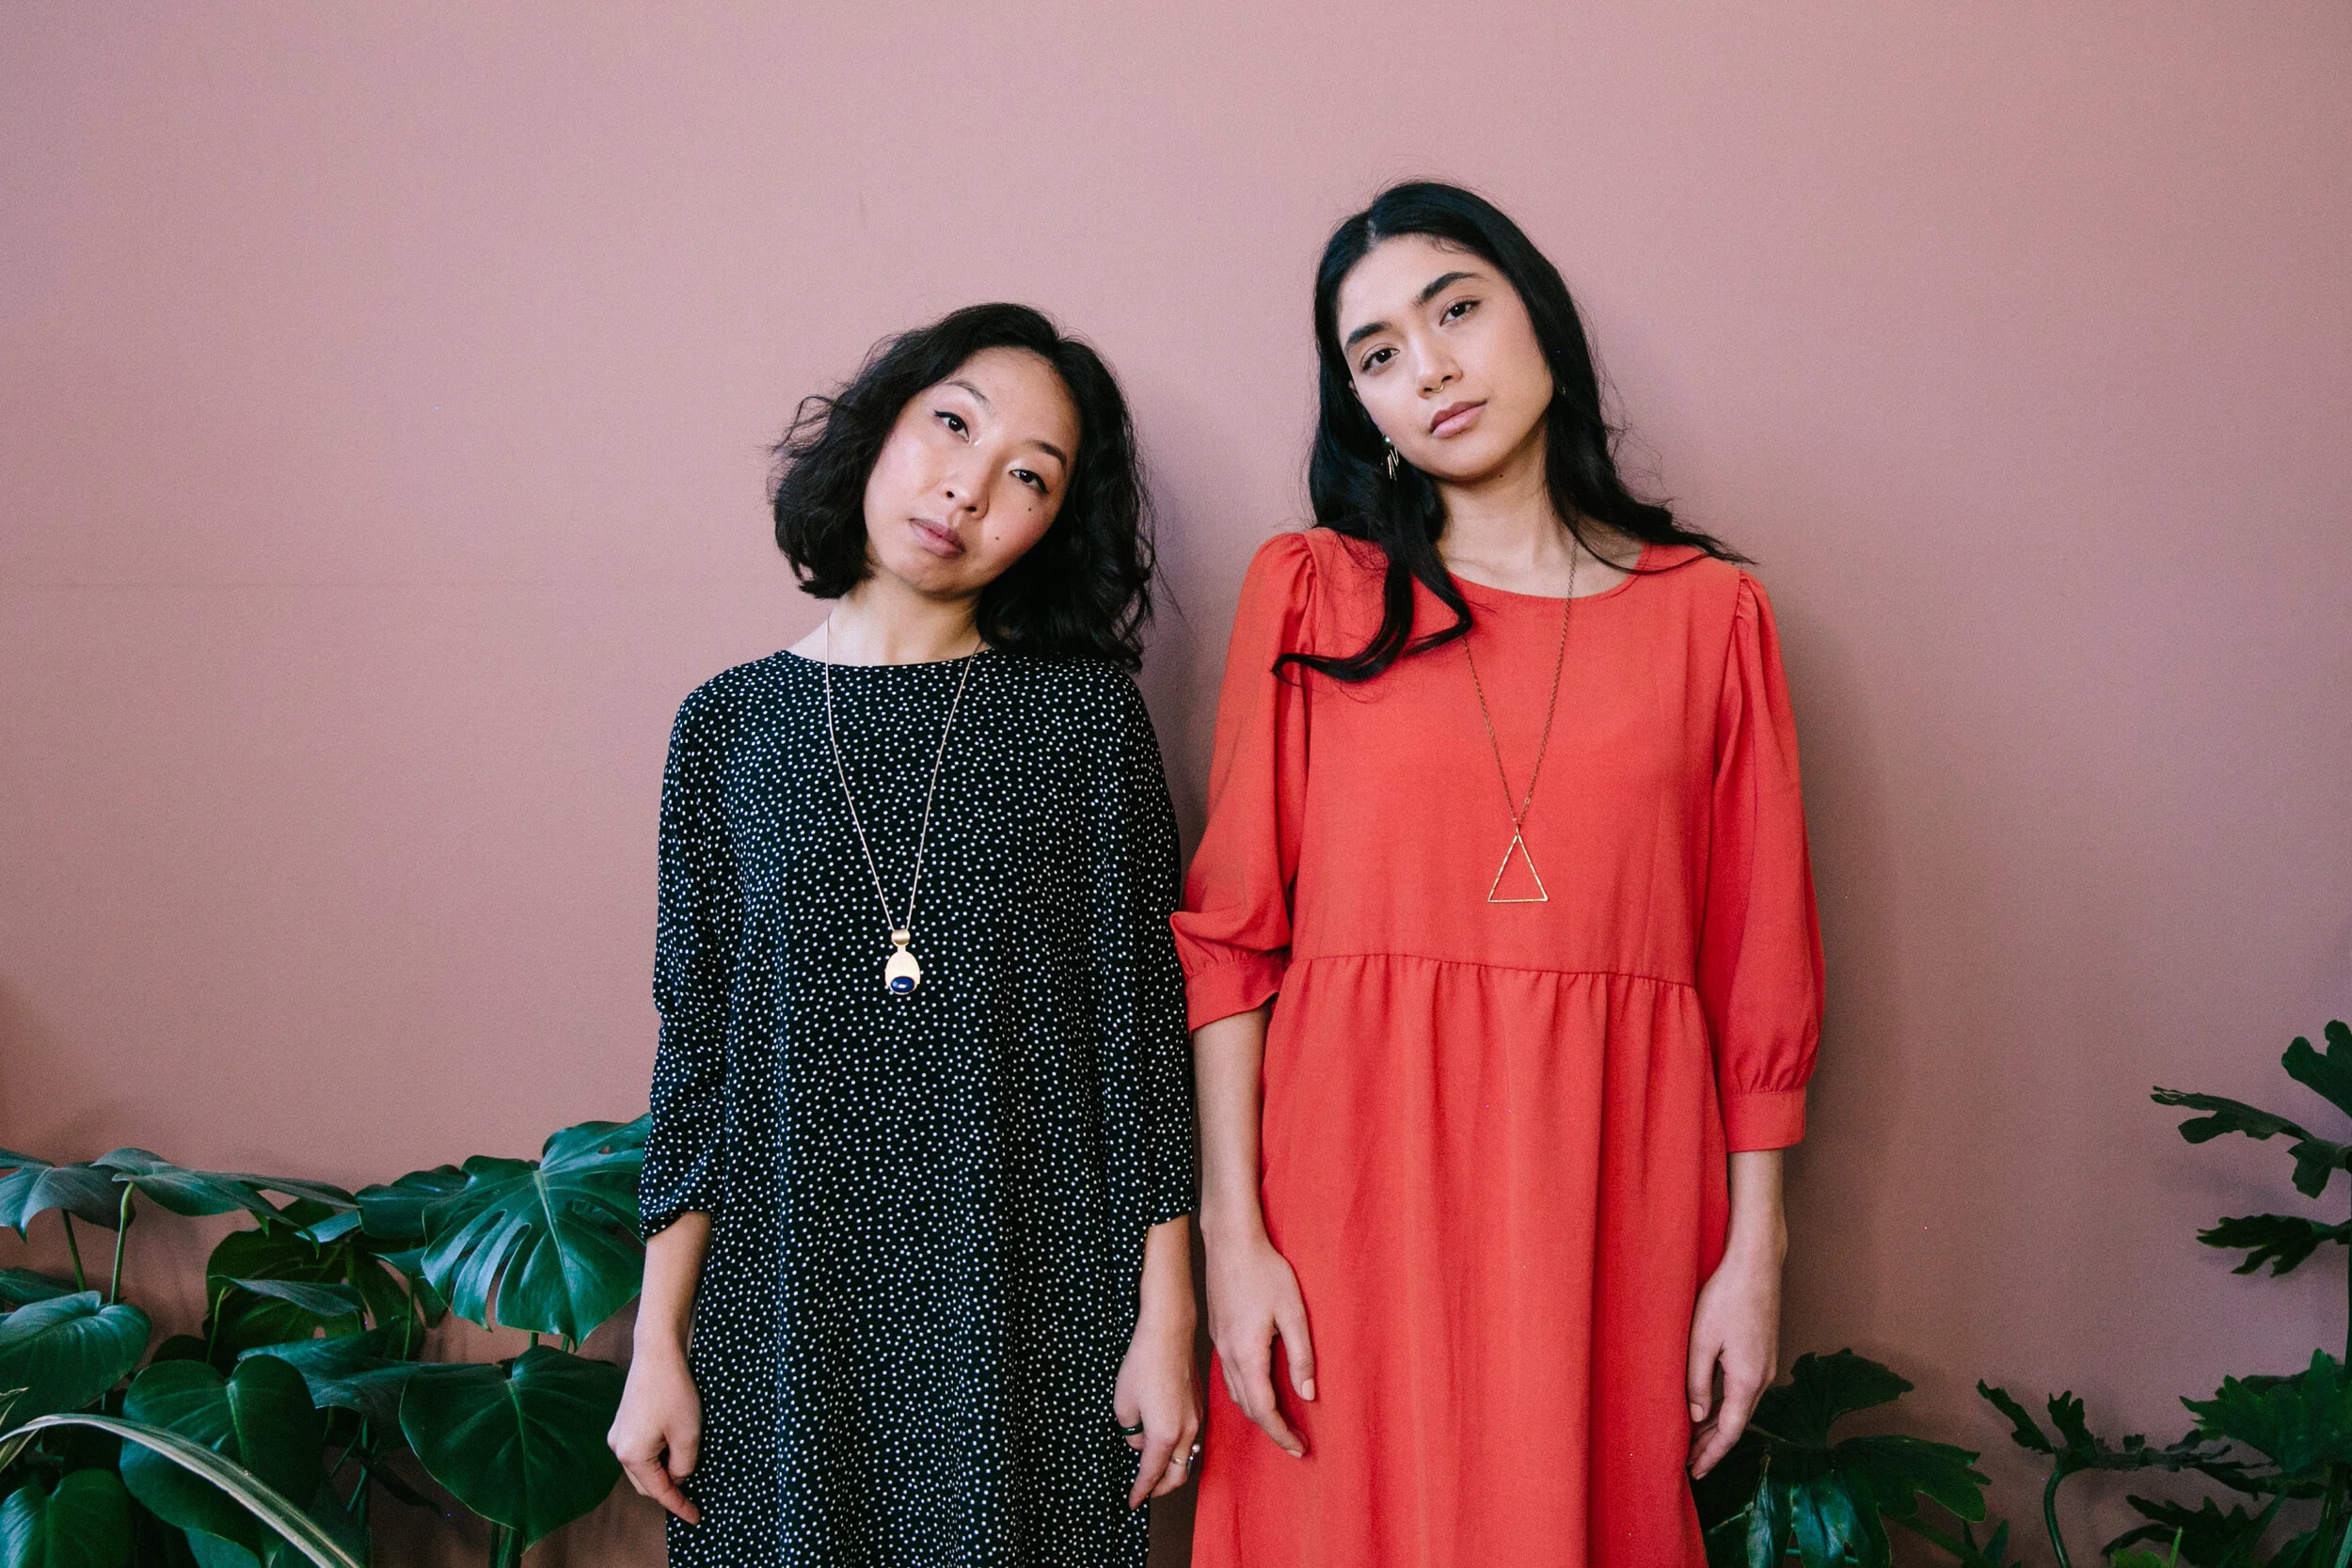
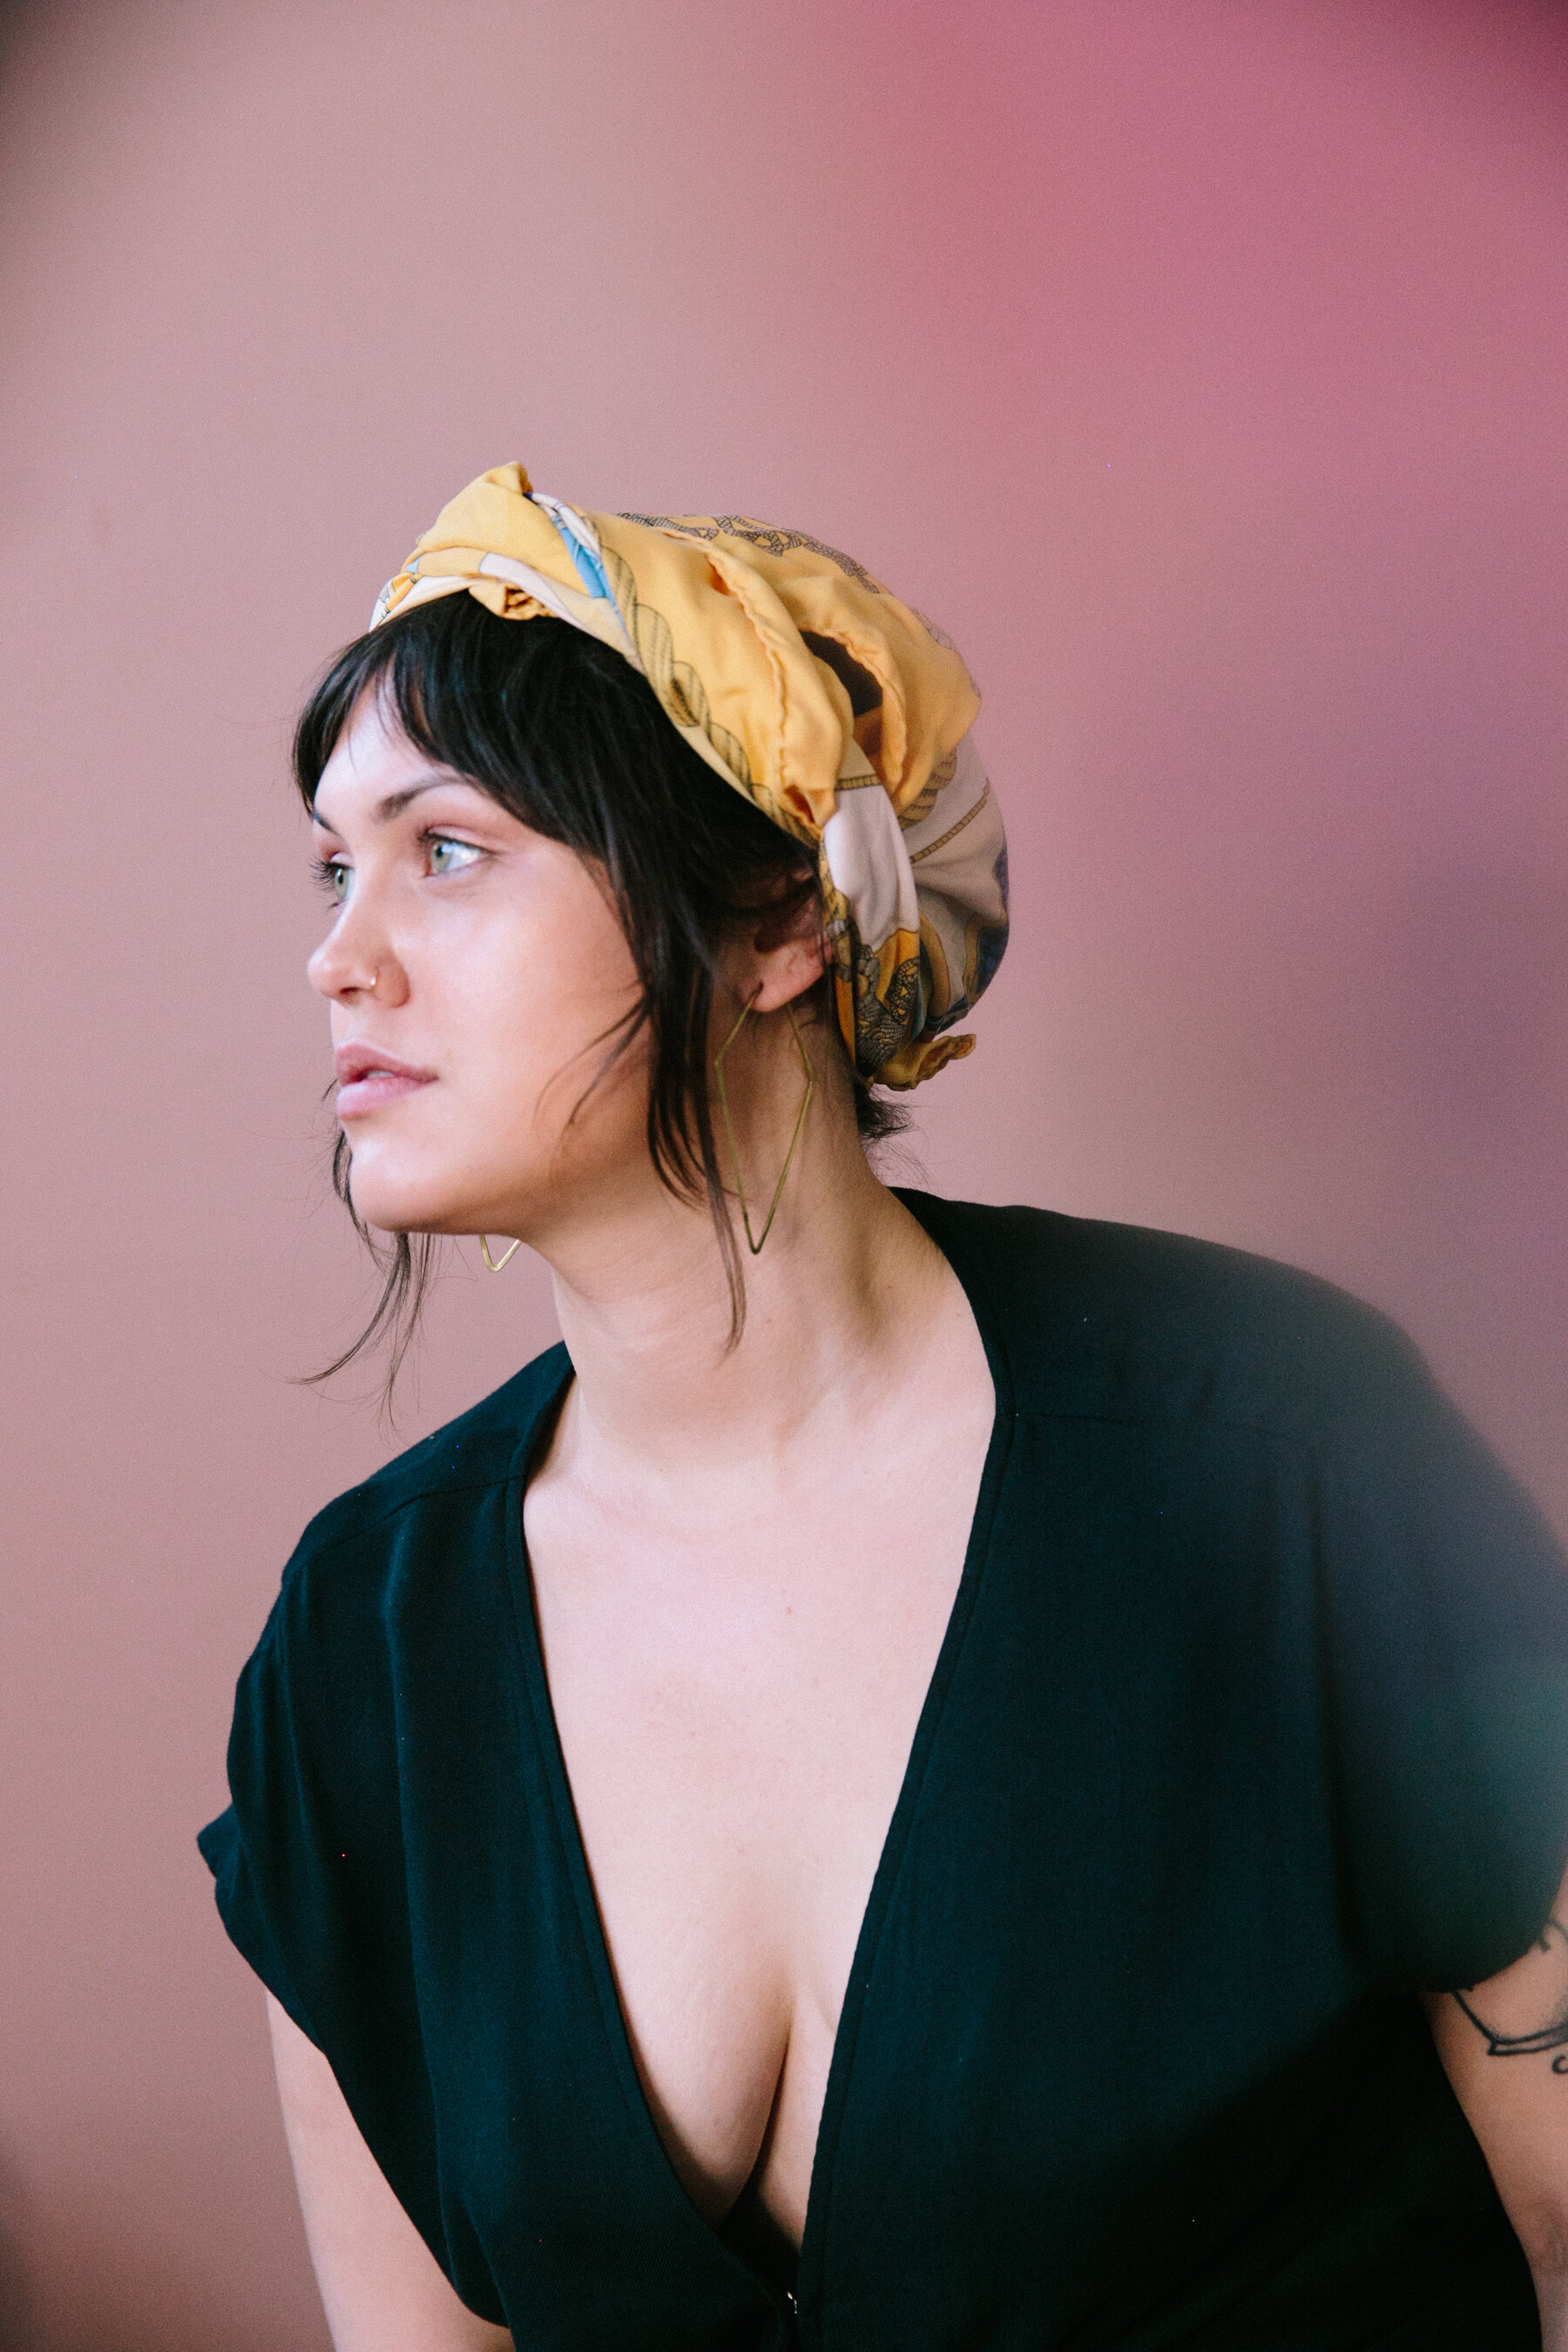
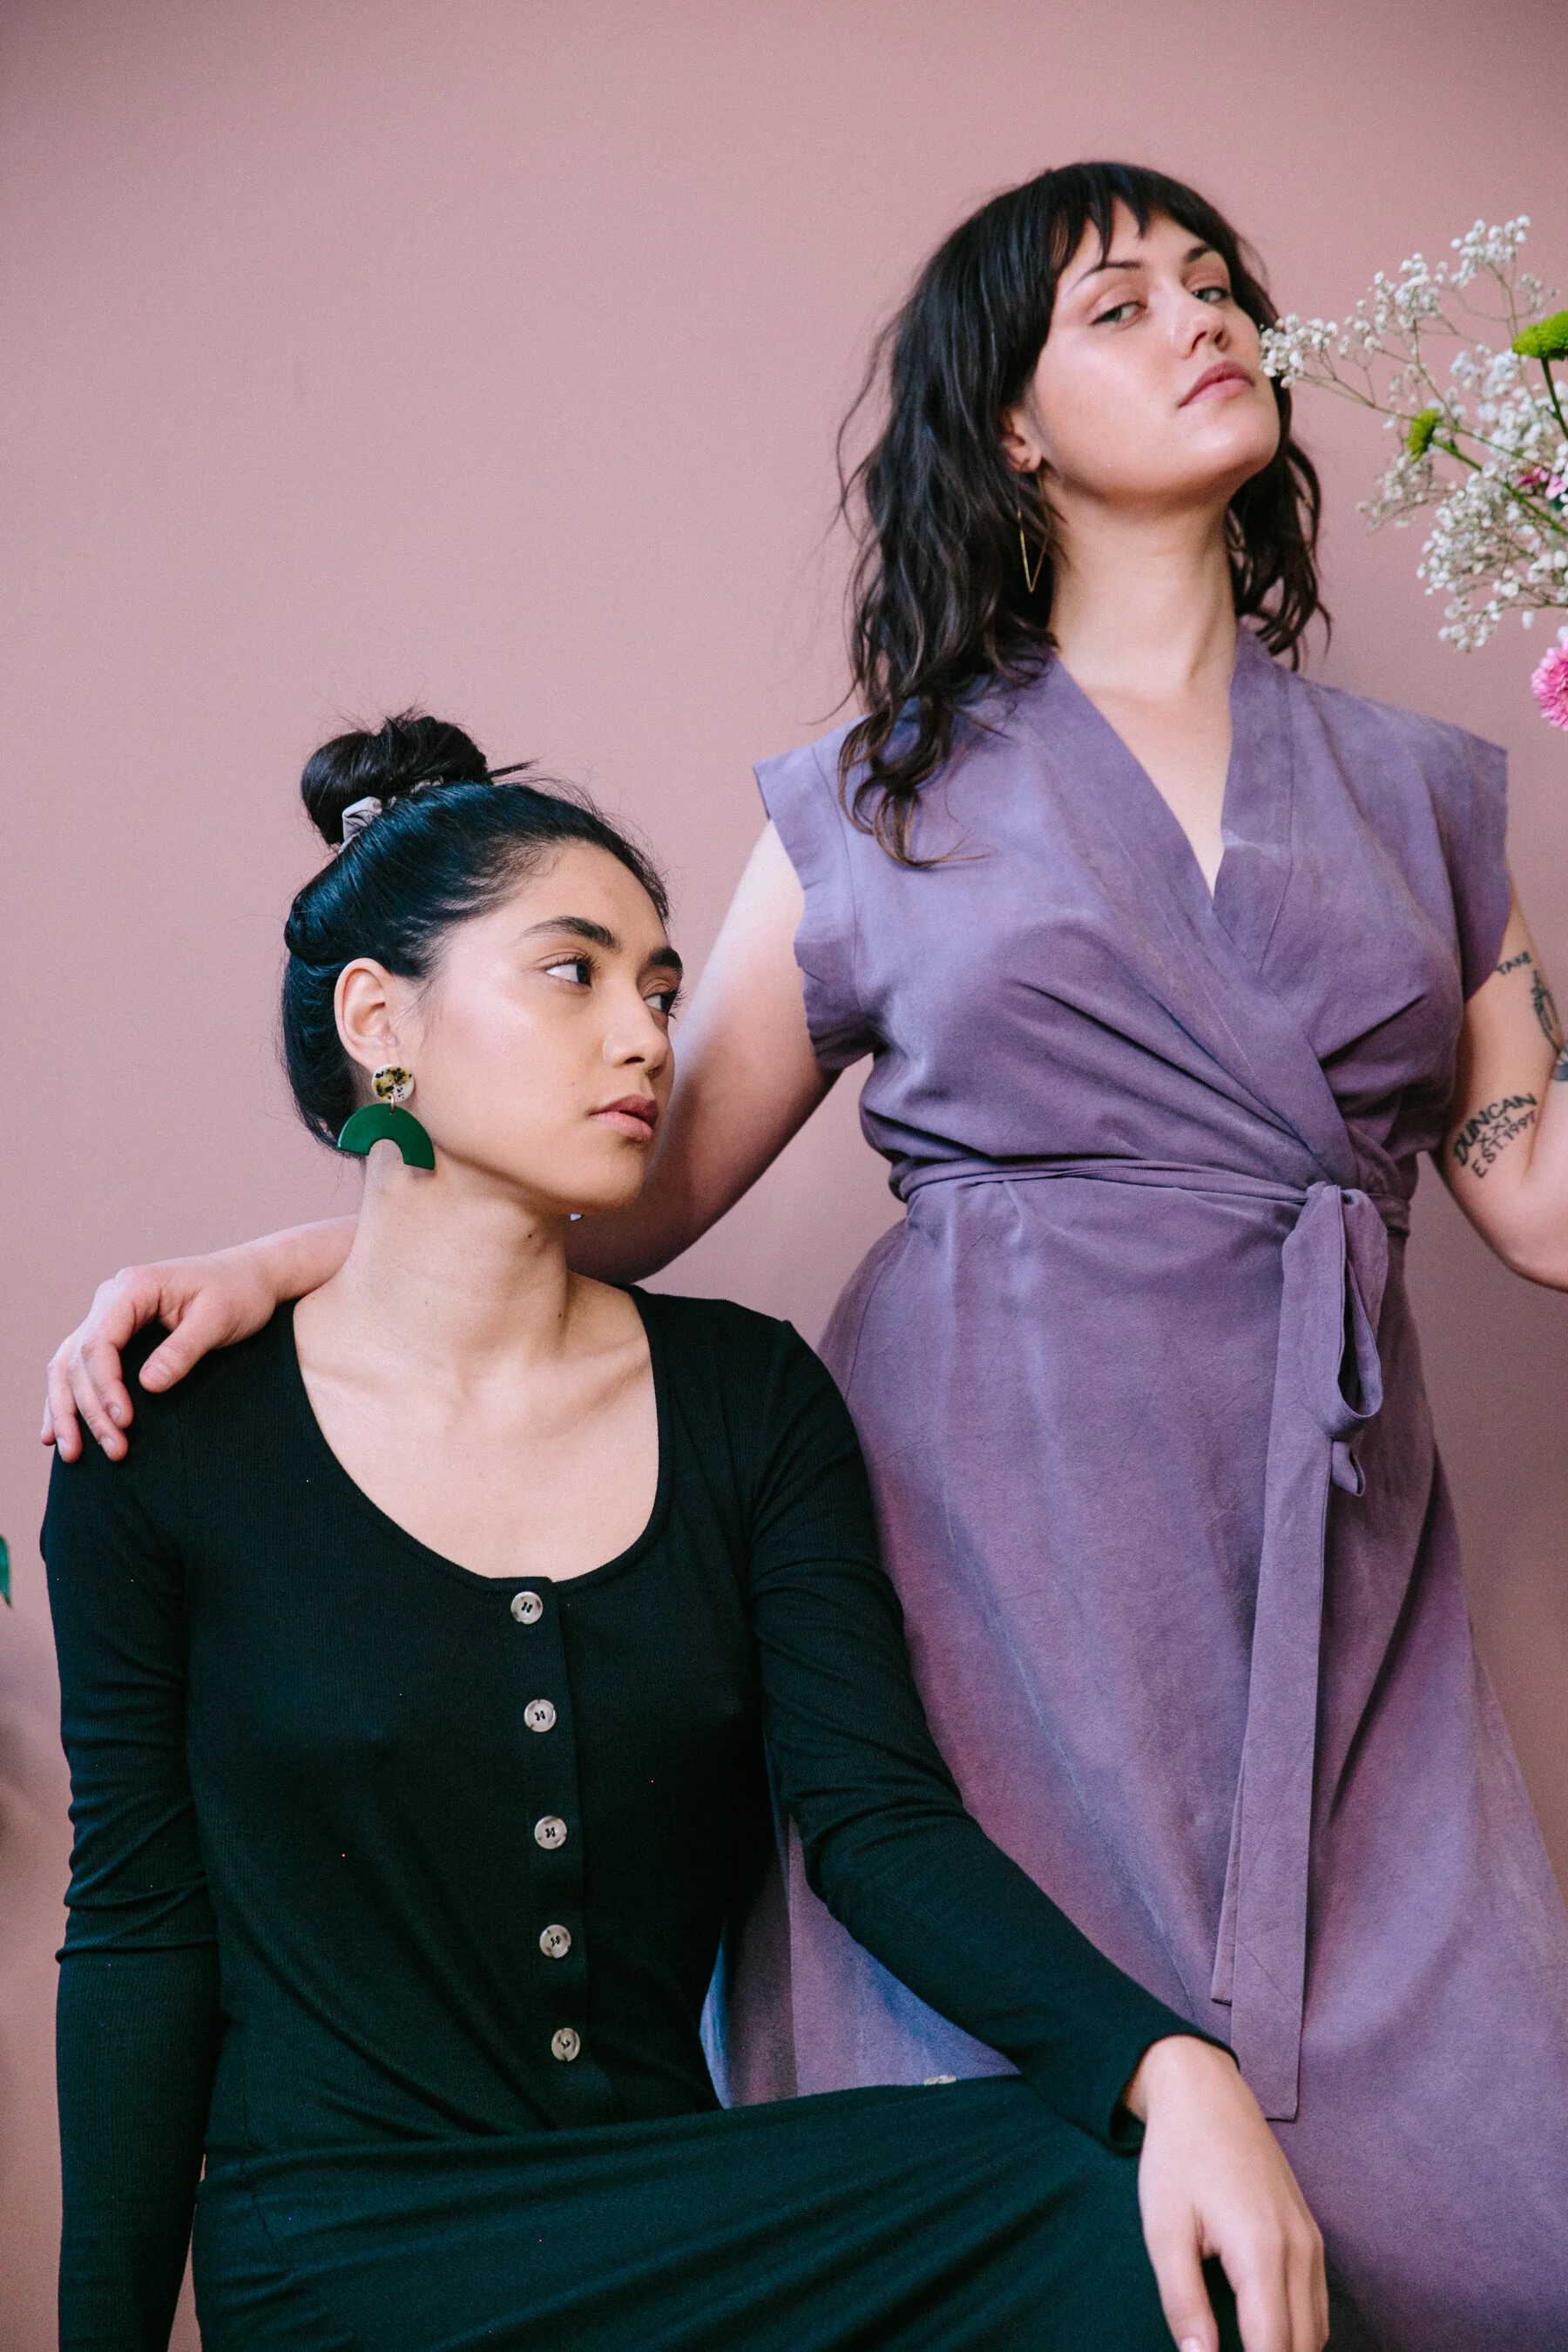
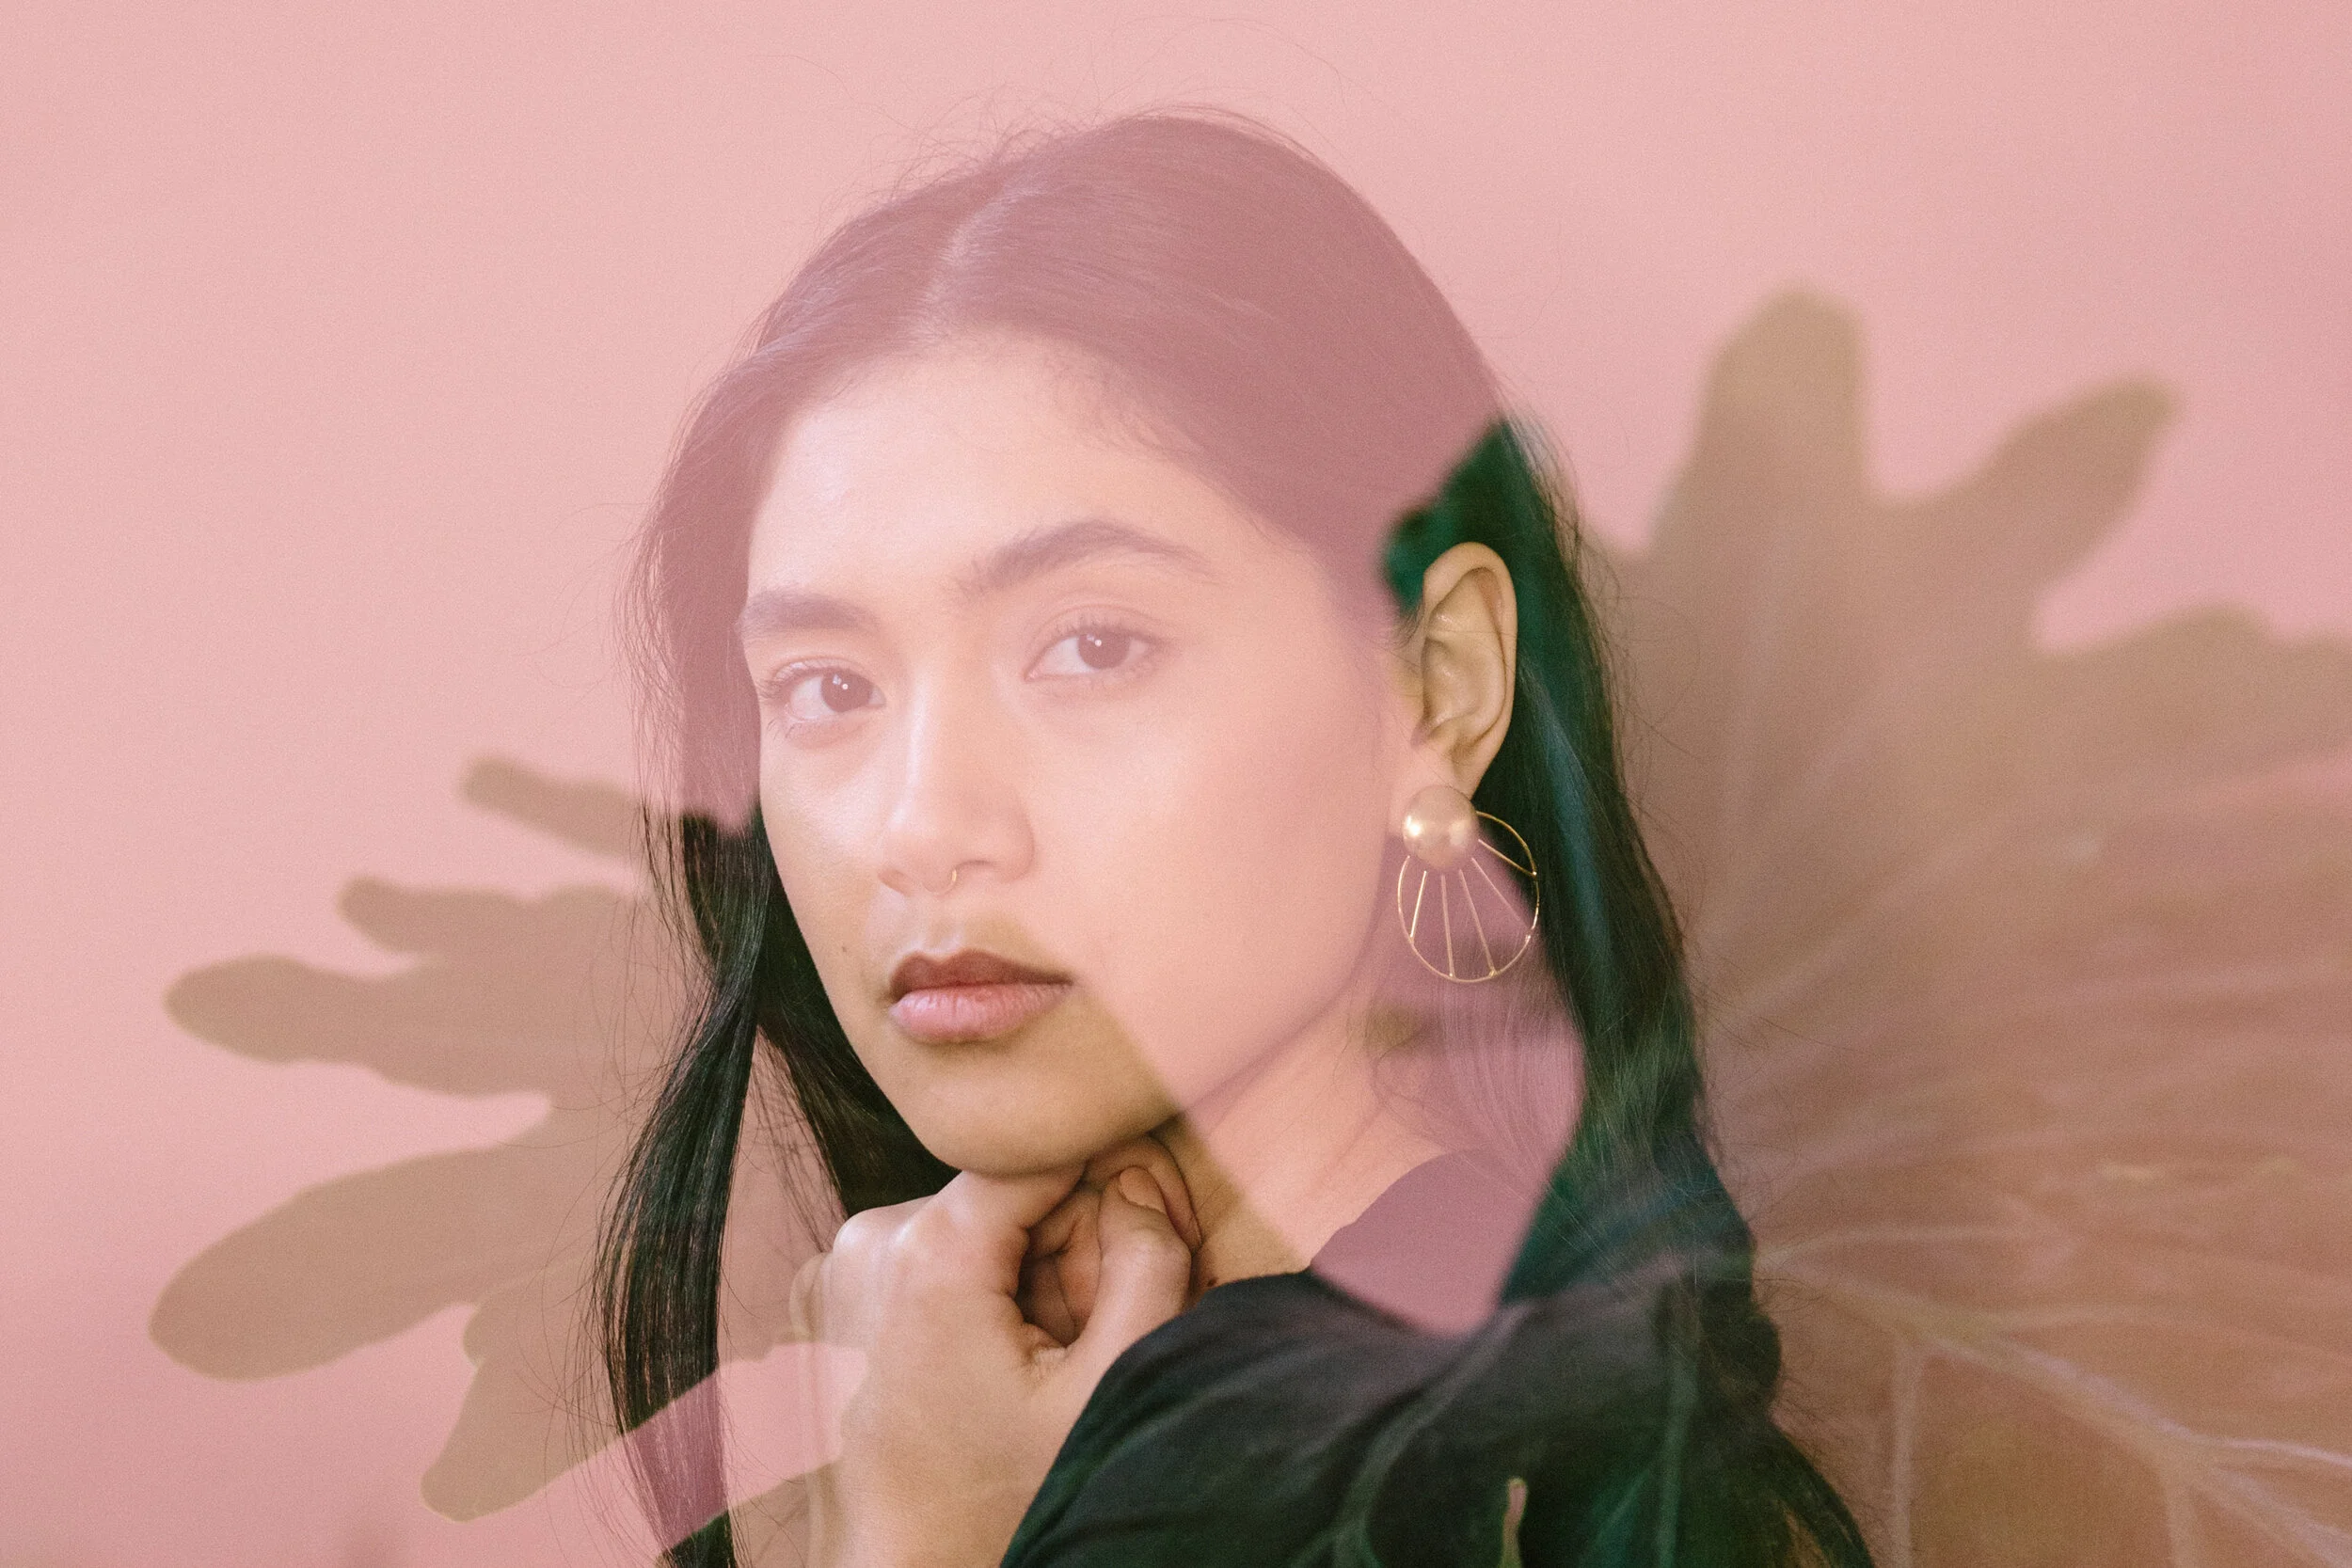
Below, I’ve included all of the images featured in my YouTube video so you can take a closer look at them. These are some of my favorite images I’ve taken over the years. A few of them have actually won awards and have been featured in gallery shows across the US!
If you have any questions, please feel free to ask! You should definitely pick up a Holga (purchase your own on Amazon here) if you get the chance. If you’re looking for one of the fun, funky colorful versions of the camera, like the one in the photo at the top of this post, eBay or Etsy are the best places to find one. I prefer the Holga 120 GCFN model, which features a glass lens and a built-in flash. This helps me get even sharper images than the traditional plastic lens Holga and allows me to photograph in lower light situations.
WHERE TO BUY THE HOLGA 120 GCFN:
SHOP Amazon
SHOP B&H Photo
SHOP eBay (you can find more fun color options here)
SHOP Etsy
FILM RECOMMENDATIONS:
Kodak Ektar 100 120 film (for shooting in bright daylight)
Kodak Portra 160 120 film
Kodak Portra 400 120 film
Lomography 400 120 film
Kodak Gold 200 120 film
#CommissionsEarned
If you found this post helpful or inspiring, I’d love it if you considered signing up for my Patreon! For as little as $1 a month, you’ll get early access to all of my YouTube videos, plus tons of photos that I don’t post anywhere else. Depending on which tier you choose, you could also receive seasonal prints and/or discounts! I always use all of the proceeds towards cameras, film & processing.
If you have any questions, I’m always happy to help! You can contact me here, or leave a comment below! Thanks so much for stopping by! You can also check out my B&H Photo storefront & Amazon Storefront for more camera/film recommendations. :) Have a magical day!
<3 Myles Katherine
(click to enlarge images)